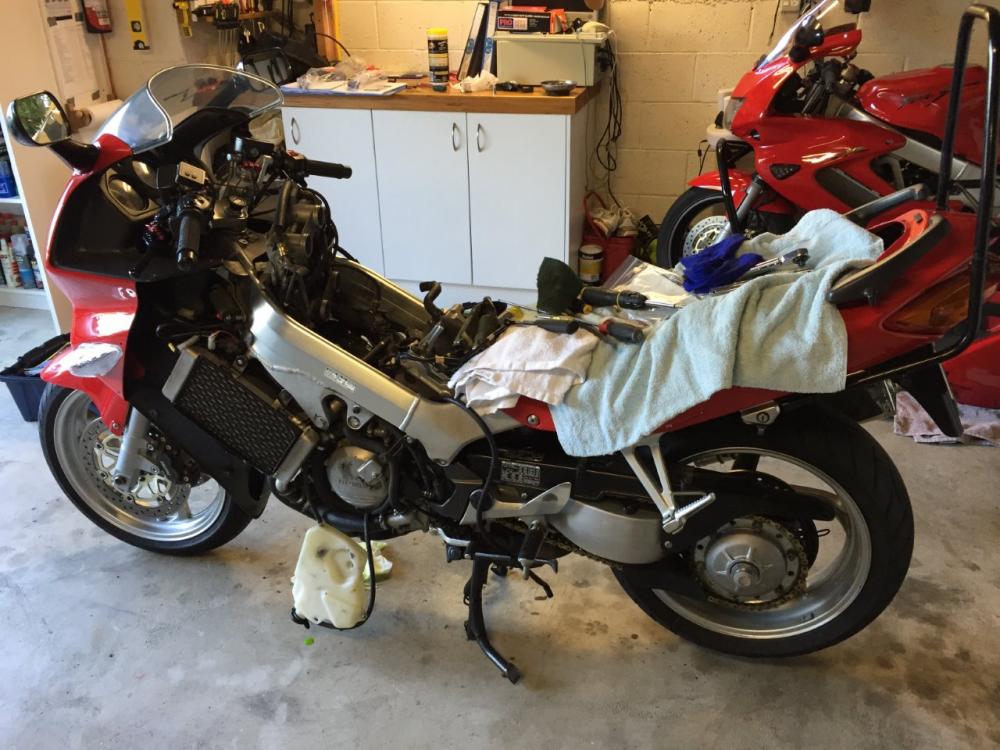
I am looking to replace all the coolant hoses due to an increasing leak. Along with the thermostat o-ring as long as I'm in there.
Looks like I need to remove the throttle body to get to the thermostat and at least one of the hoses. The service manual says to disconnect the fuel lines from the tank, something I'd rather not do that, and it looks like I can just pivot it out of the way, and rest it on a bench or something I bring up right next to the bike while swapping hoses.
My final concern is likely unfounded, as the manual doesn't mention it, but there isn't any need to re-synch anything as long as I don't mess with the painted bolts, is there?
No, you do not need to do that. I had mine off and on about 6 times, and all I did was remove as few of the hoses as possible, and electrical connections, but no fuel lines, pop the rack up off the boots, and tilt the throttle body over to the left side of the bike, standing it up on edge, out of the way. Then you can access the thermostat housing just fine.
And you so not need to synchronize afterwards, as long as you haven't disturbed the rack that holds the throttle bodies together, or the synch screws.
Good timing, Just finished my gen 5 today for the same procedure. I also replaced the two orings between the heads and the cast elbow front and rear, so total of three orings, one t-stat, and three hoses. The frontmost hose ( about 2" long was the one leaking). I also changed the plugs.
I agree with the first reply. Except I found more room to work on the hoses with the tank and TB's on the left but when working on installing the throttle bodies/air box I had the tank on the right. Supported the tank on two milk crates and 2x2's and a packing blanket.
Just so you are ready--------the air box is a real pain, and I have been wrenching on bikes for over three decades for me, friends , and a few customers.
Take many notes. :fing02:
Have fun. Taking my time, ( first time below the air box ) took me over ten hours with no beers. :beer:
Oh yea, you need a LONG phillips number two, 16/18 inches would work fine.
And I needed gasket remover, the Japs put on some serious sealer on the cooling elbow orings that go to the heads if you elect to change those too.
You didn't ask, but if you have trouble removing the throttle body, pry it out with a piece of hardwood. Lever against the frame. While you're in there, you might want to replace the throttle body boots. Getting the bodies back in is a beeotch with old, stiff rubber. Also, if you have a stock of vacuum hose, check for split or aging hoses, and replace as necessary.
For your amusement, here's a pic of my installation jig. It's a reversed woodworking parallel clamp, pushing against a ceiling beam. Feel free to laugh at me -- but it worked.
Ditto a comment made above: get yourself a really, really long Phillips head screwdriver.
I've been known to boil old carb boots in water to get them soft enough to put back on. However, it may be worth it to just replace them.
I got a 16 inch #2 phillips yesterday. Also, I saw the wood board trick on youtube, and I have to say, I was rather surprised.
Not sure when I'll get around to it, but this will have to be a weekend thing. (Un)fortunately next weekend will probably be filled with drinking much mead at a renaissance festival, so that will be a no-go.
As far as the spreader goes, I have a rather hefty one now, and would make do with the header for my garage, and some scrap bits of wood. Lord knows I used enough scrap bits today on my little tire mounting exercise.
I had a beeech gettiing the throttle boddies off, actually first tried with a nylon web rachet strap to the carrying beam above my lift, it was picking the rear wheel off the lift !
I didn't really want to pry--but that's what I ended up doing, like said above against the frame under the fuel rail with a piece of yellow pine.
I lubed the stock rubber intakes with engine oil and the TB's just snapped right in one at a time with hand pushing only.
I have been surprised at the various uses I've found for the tub of bearing grease I originally bought simply to lube the splines on my '85 Kawasaki. I've even used it to slug the barrel of my Mosin Nagant. :goofy:
Well, I used to live in Upstate NY, a stone's throw from Canada, and with a name like "Canuck", he gets my attention. Miss my occasional excursions up into the wilds of Canada to train for nordic skiing.
...
Not that I had to go too far north to find the wilds of Canada... Didn't even have to go as far north as Whitecourt!
Working on the same issue: thermostat, 5th gen. Anyway, I cannot seem to get the throttle body wiring connector separated (left side, just above the radiator).
Is there a trick to it? Push down on the plastic tab and pull, yes?
Working on the same issue: thermostat, 5th gen. Anyway, I cannot seem to get the throttle body wiring connector separated (left side, just above the radiator).
Is there a trick to it? Push down on the plastic tab and pull, yes?
Should be. Perhaps a spray of WD40 will help free it?
Working on the same issue: thermostat, 5th gen. Anyway, I cannot seem to get the throttle body wiring connector separated (left side, just above the radiator).
Is there a trick to it? Push down on the plastic tab and pull, yes?
Based on the date, it's likely you already solved this, however, if you didn't or for the sake of anyone else with this issue, I just flipped the throttle bodies up and to the left and never did unplug them.
Based on the date, it's likely you already solved this, however, if you didn't or for the sake of anyone else with this issue, I just flipped the throttle bodies up and to the left and never did unplug them.
I did just the same, even left the throttle/choke cables attached, and pulled the TB's up and forwards, tied to the triples.
End of thread · 20 posts recoveredWayback Machine snapshot 2 Jul 2017