VFRDiscussion ARCHIVE / READ-ONLYREAD-ONLY

1985 VF500 ... Out of hibernation

79 posts Started 10 Mar 2017 Last recovered post 10 May 2017 Wayback Machine snapshot 6 Jul 2017

#1

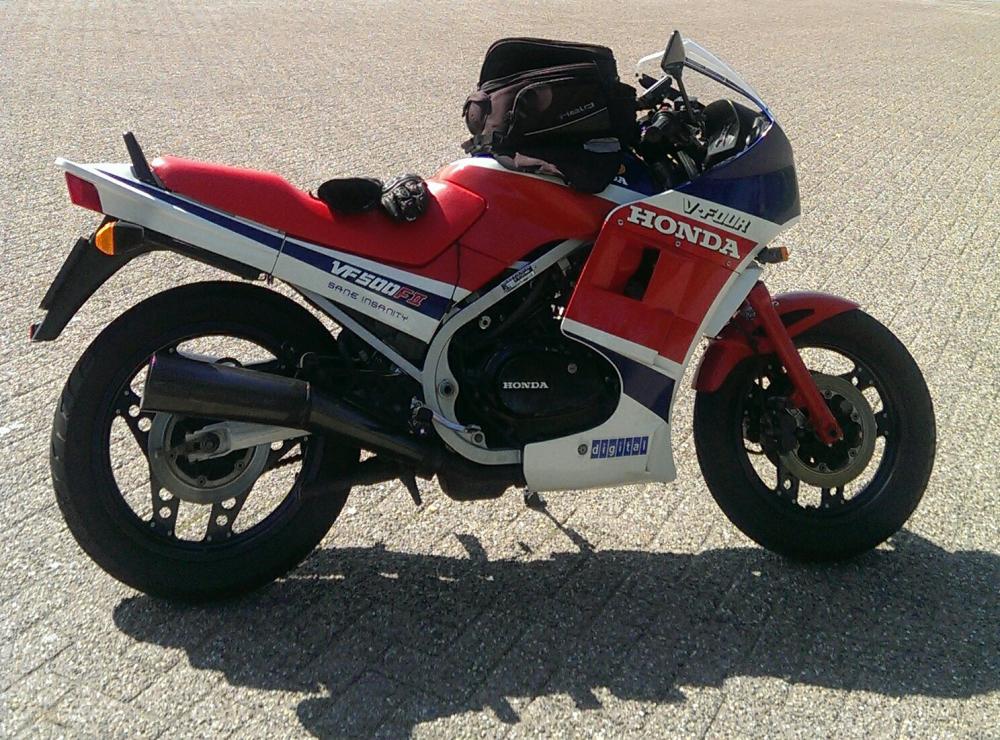
 Hey guys and gals. First post here, but I've been lurking and Googling for a few weeks. Why, you ask? Because I was researching this lovely '85 VF500 Interceptor! It belonged to my boss, who's owned it for 31 years. Technically, he's the third owner, but he bought it when it was a little over a year old, and owner number 2 was basically flipping it.

 I had some reservations about getting it. I think it's beautiful and I love the middleweights. I'm more of a '70's bike guy, as far as wrenching experience goes. Some Yamaha XS650's, but a bunch of SOHC4 Honda's, with a sweet spot for the 500/550. The VF is way more complicated than what I'm used to. And, to be honest, there seem to be two camps on not just the 500, but all First Gen VF's: Those that love them and encouraged me to grab it, and those that loathe them and call them fragile hand grenades, just waiting to blow up.  :unsure:

 This particular bike was parked about three years ago and the tank and carbs were drained. The tank is solid and spotless inside. Front tire is shot, rear is new, but now several years old. It's in need of all fluids and all the normal "sitting bike" stuff. The clutch is limp, the rear brake was dragging until we pried the pistons back, fork seals are good (but oil will be changed), and it'll need a battery, of course. Full Kerker exhaust. Only very minor scratches and blemishes here and there on original, still shiny paint. There's a homemade "tail tidy" on it, but the rear fender is included. All stock except the grips and exhaust. 

 I think the price was fair, considering the history and condition. I plan to go through it completely over the next few months and would love to be riding it by this Summer! Tell me what you think, and point me in the right direction if I start screwing up, please!

 As it sat, in his basement:

[image: 16298851_10208567329406802_4685628290489]

[image: 16265636_10208567329566806_2708826134132]

[image: 16388183_10208567329966816_5791927453632]
[image: 16265606_10208567329886814_3862055308734]

[image: 16195225_10208567329606807_1988252796983]

#3

Welcome from another VF500F(2) owner.

Enjoy!

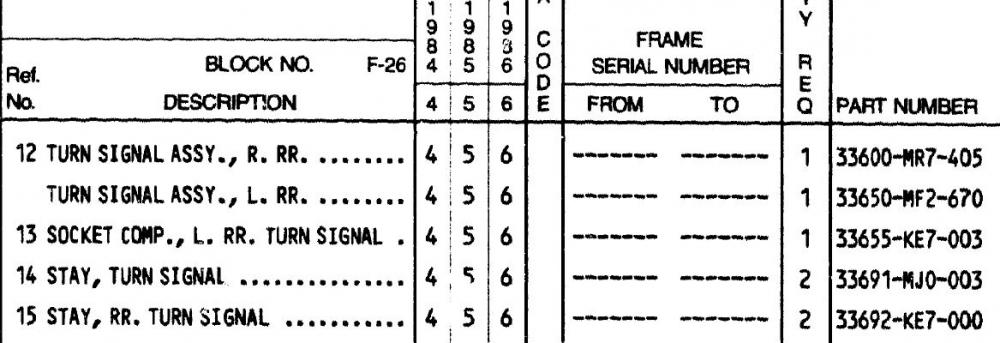
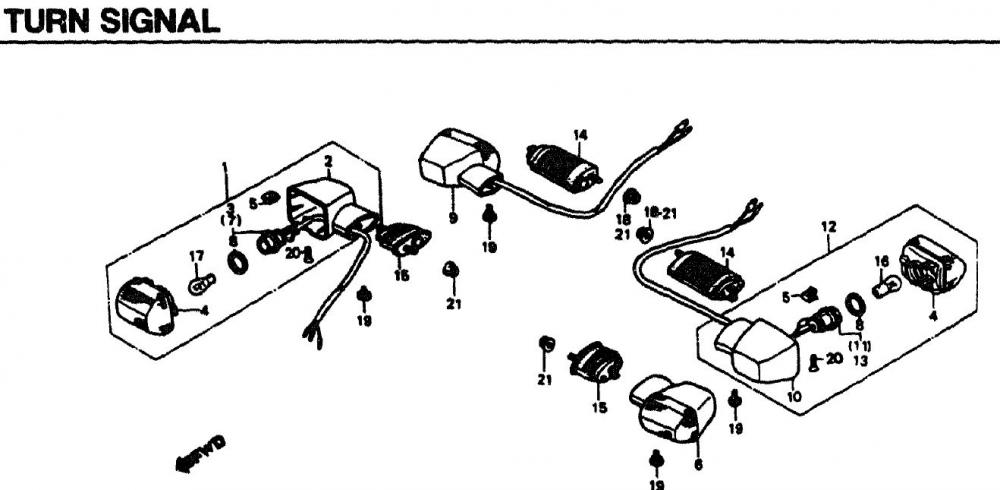
PS: them rear indicator stalks are waaaay long... Was the PO called Howie?

I'd get smaller midsections.... :-)

#4

 Punch List

*ALL fluids. Clutch, brake, oil, forks, coolant, etc.

*Check clutch master and see why the clutch went limp during storage

*New braided stainless brake lines, probably in black to mimic stock and make them stealth

*Valve adjustment (this is the only BIG concern for me, not just doing it, but also because there's an unknown history on them. The P.O. doesn't remember ever doing them  :blink:  )

*Carb clean. Even though they were stored dry. Luckily, there's a guy within walking distance of me that's familiar with them and has done several VF series carbs.

*Tires

*Sand and coat header. It's solid, but had surface rust.

*Air filter? Depending on condition. Stock or K&N?

*I read about a headlight upgrade? Tell me more about this.

*General spit polish and shine.

 If there's anything I'm missing, or if you guys can save me a headache, please let me know.

#5
4 minutes ago, Dutchy

Welcome from another VF500F(2) owner.

Enjoy!

PS: them rear indicator stalks are waaaay long... Was the PO called Howie?

I'd get smaller midsections.... :-)

 Hmm....never noticed that before. Are they stock? 

#6

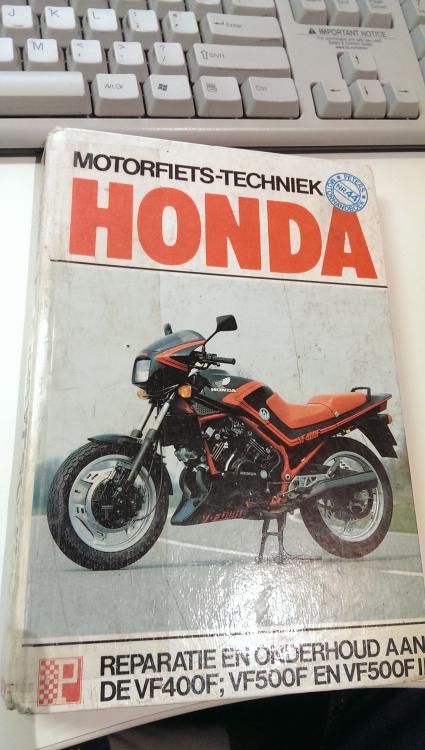
 Oh, yeah.... I'm a hard copy kind of guy when it comes to manuals. Factory manual the best one to get?

#7

You are a very lucky man. That is a nice bike. The valve clearances are important on this bike but despite what you hear, they  are quite easy to do as long as you prepare yourself and don't rush it. Consider it all part of the ownership of a classic bike experience. If it were mine. I would do the bare minimum to get it road worthy and then ride it for a while. Any faults will emerge in time and you fix them as they occur. Don't arse about with a carb clean. Just see if it runs. If it does ride it.

#8

They are stock alright...

But with those from the front they look nicer/less beanstalk (imho)

Capture.thumb.JPG.9c410f6b8fb493fe1eb184c2febabe8b.JPG

Capture1.thumb.JPG.c570bd38b5d166eb8295b6009eaa41a4.JPG

Ebay has them too...

#9
19 minutes ago, ScottSturgis

 Oh, yeah.... I'm a hard copy kind of guy when it comes to manuals. Factory manual the best one to get?

Unless you understand Dutch... :-)

IMAG6580.thumb.jpg.c11a7da831a6d466228ceb543028c777.jpg

#10

Don't know anyone in this world to collect all the VFR series, building as a museum, how spectacular it is, by the way, I like this one, especially the red, white and blue coating, very classic! sorry,my english very pool ,,,

#11

 I do not understand Dutch! LOL

 Forgot to mention spark plugs, but I'll do those, too.

 I considered just adding gas and a battery, but I REALLY want to make sure the valves are right. Too many of the horror stories I've heard concern the valves. And if I'm that far into it and the carbs are off....

 I've also heard that the tiny pilot jets and passages are probably gummy even though he drained the carbs.

 And brakes and clutch master need attention before I could even take it for a test spin.

#12

Nice bike but I cant help noticing, you've got three bikes in your living room.  That's showing a true love for those bikes.   :beer:   My wife would throw me out if I even thought about that.  

#13

 The first pics are of the P.O.'s basement. All my bikes are in the garage. Now.. the spare bedroom, that's another story! It looks like a parts store in there! My current CB500/550 build parts are in there; everything from engine parts to exhaust to seat to chrome pieces, etc.

#14

Awesome find.  The first bike I ever truly loved.

#15

Real nice looking 85.  Hell yes.  You're gonna love it.  

#16

 Give me some thoughts on the limp clutch lever. Think a flush will bring it back? Need a rebuild? 

#17

 Also, thoughts on K&N vs. UNI vs. stock paper air filters?

 Same question for oil filter: Regular old Fram or HiFlo OK?

#18
32 minutes ago, ScottSturgis

 Give me some thoughts on the limp clutch lever. Think a flush will bring it back? Need a rebuild? 

Of course try and flush and bleed first.  Prob will be fine.

#19
1 minute ago, Captain 80s

Of course try and flush and bleed first.  Prob will be fine.

 Yeah, just pulled the lid and found this.

[image: 17265147_10208899167062536_2528399770640]

 I'll clean it out better and flush some fluid through it. The good news is that I can hear some fluid squishing around in the plunger when I pull the lever and there was no sign of leakage before. Might get lucky!

#20
18 minutes ago, ScottSturgis

 Also, thoughts on K&N vs. UNI vs. stock paper air filters?

 Same question for oil filter: Regular old Fram or HiFlo OK?

Don't know if I want to touch this one with a 10 foot pole.  2 of the most debated subjects after oil.

I personally run K&N air filters ONLY because I can clean them.  I have zero illusions about any claimed power gains.  Could be hurting performance on some of my bikes.  Don't care. 

I run Honda oil filters.  Haven't ventured into others yet because I haven't depleted my stock.

#21
Just now, ScottSturgis

 Yeah, just pulled the lid and found this.

[image: 17265147_10208899167062536_2528399770640]

 I'll clean it out better and flush some fluid through it. The good news is that I can hear some fluid squishing around in the plunger when I pull the lever and there was no sign of leakage before. Might get lucky!

Ahhhh....  the apple butter.  You're gonna be bleeding from nothing anyway so you might as well undo the hose and pull it off the bike.  Now get some brake clean and a tooth brush and go to town.  Pull that little metal cover in the well and make sure the little hole underneath is clear.    Reinstall and bleed and hope (don't forget to reinstall that little cover, it will squirt you in the face if you don't!).  Bet you will be OK.  And if not, it's your first hurdle.

#22

 Some mystery bits. The tank was still loose from where the P.O. drained it years ago. These were in the tray with the bolts. Top left looks like a collar that goes under the rubber at the front, but I watched him put that bolt in and I'm pretty sure all those parts were still there.

 Bottom right part is soft rubber.

[image: mystery%20bits_zpstht2h17r.jpg]

#24

 And yet another question... Until the manual gets here. 

 The parts fiche lists no less than 7 different spark plugs. What's preferred for my '85?

 (EDIT: Just remembered the owners manual is under the seat. I'll dig that out for a little light reading :) )

Edited March 11 by ScottSturgis
#25

Brake question(s): The rear caliper was stuck and we had to push back the piston to get it to roll. Going by the rust on the front rotors, only one of those calipers is working.
A full flush is in order, but do you think I should go ahead and order seals and pull the pistons?
Also, in the pic below, isn't that enough to do both front calipers?  I can also get just the seals from Honda (and not the dust seals and plunger seals as shown in the pic). Should I just go ahead and replace them all?

[image: 81610102h_zpsbtck4mx7.jpg]

#26

Also, I've ordered some genuine Honda parts.
-carb insulators
-oil filters
-a factory service manul
-some NGK DPR8EA-9 plugs

 I also got some new grips. I'll check the air filter when I get in there, just to make sure there isn't a cleanable UNI or K&N before I order a replacement. If I need one, I'm going with genuine a Honda paper filter.

#27
20 hours ago, ScottSturgis

 Some mystery bits. The tank was still loose from where the P.O. drained it years ago. These were in the tray with the bolts. Top left looks like a collar that goes under the rubber at the front, but I watched him put that bolt in and I'm pretty sure all those parts were still there.

 Bottom right part is soft rubber.

[image: mystery%20bits_zpstht2h17r.jpg]

Collar is not the tank collar.  That style is used by Honda typically in plastic to prevent overtightened and squishing plastic.  Perhaps rear fender.  

#29
5 hours ago, ScottSturgis

Brake question(s): The rear caliper was stuck and we had to push back the piston to get it to roll. Going by the rust on the front rotors, only one of those calipers is working.
A full flush is in order, but do you think I should go ahead and order seals and pull the pistons?
Also, in the pic below, isn't that enough to do both front calipers?  I can also get just the seals from Honda (and not the dust seals and plunger seals as shown in the pic). Should I just go ahead and replace them all?

[image: 81610102h_zpsbtck4mx7.jpg]

Disassemble first.  And get some Red Rubber Grease.  Often it is a matter of cleaning and re-assembly.  But, if your budget allows, pre-order and rebuild.  Yes, that is enough for both front calipers.  The sliding pin boots can be split and the pin rusted in place.  Sometimes, in a pinch, you can get away with removing the pads and pumping the pistons out a bit to allow removal of the crud ring allowing the pistons to retract properly.

#30

 Red Rubber grease? What's that? Never heard of it.

#31
2 minutes ago, ScottSturgis

 Red Rubber grease? What's that? Never heard of it.

Pretty sure that's what's in the picture with the seal kit.  Get a tub of this:

https://www.amazon.com/Millers-Oils-5196TB-Rubber-grease/dp/B00JFF4VF6

Best stuff in the world.  OK to use for assembly internally.  And some silicone lubricant for the slider boots:

https://www.amazon.com/Super-Lube-97008-Lubricating-Translucent/dp/B01MR4RYVT/ref=sr_1_3?s=automotive&ie=UTF8&qid=1489277993&sr=1-3&keywords=super+lube

And welcome to the Honda world.  Get some of this:

https://www.amazon.com/Sta-Lube-SL3330-Moly-Graph-Pressure-Multi-Purpose/dp/B000KKJQL4/ref=sr_1_3?s=automotive&ie=UTF8&qid=1489278160&sr=1-3&keywords=molybdenum+grease

#32

It was WAY down on my list of stuff needed, but Chaparral had a sale on tires, so I ordered a set of Pirelli Sport Demon's for this beaut!

#33

 Pleasantly surprised to find a K&N filter in the air box. Looks like it was cleaned and oiled just before storage. I also cleaned out the clutch and front brake master cylinders. Both are moving fluid just as they should. New piston seals for the calipers are on the way. Factory service manual and spark plugs showed up today.

 I plan on addressing the brakes, forks, clutch and tires first, then I'll move on to the engine.

[image: stripped_zpsfh9gykoa.jpg]

#34

How hard is it to R&R the exhaust? I'd like to pull off the header and paint it or have it coated. The front doesn't look to be an issue. The rear looks like it's in a tight spot.

#35

Nice find, Mr. Sturgis!  I have an '86 just north of you in Huntersville.  It too is in very good condition (24K miles), fun, light.  I don't run it above 8,500 RPM as suggested by Daugherty Motorsports in an attempt to ward off evil valve train spirits.  I have an '86 parts bike if you're interested, mostly complete (sans tank and plastics).  Don't know if the exhaust headers would be compatible with the Kerker system, but it may get you the '86 sump, pump and pan.  I'd like to get it out of a friend's garage.

#36

 Thanks for the offer! The '86 sump won't clear the Kerker. Does the parts bike have the stock exhaust?

#37
29 minutes ago, ScottSturgis

Does the parts bike have the stock exhaust?

Yes it does.  Most everything mechanical is there.  

#38
ScottSturgis, 3/10/2017 at 7:39 PM

 Some mystery bits. The tank was still loose from where the P.O. drained it years ago. These were in the tray with the bolts. Top left looks like a collar that goes under the rubber at the front, but I watched him put that bolt in and I'm pretty sure all those parts were still there.

 Bottom right part is soft rubber.

[image: mystery%20bits_zpstht2h17r.jpg]

That rubber bumper on the right resembles something similar on my fifth gen. Without going out to my back-forty garage, I think it goes under the side of my fuel tank and against the frame.

I've found many rubber vibration dampers all over these machines, eliminating a lot of buzz. I think it's one of those. Consider it a puzzle piece and look around. I can't find one in my machines parts fiche.

Check out this source (something like part #13):

http://shop.powersportscompany.com/fiche_section_detail.asp?section=2538542&category=Motorcycles&make=Honda&year=1985&fveh=132472

#39

 I have the body work off right now and nothing jumped out at me as being obviously missing. I'll check the underside of the tank too and see if there's a place for it. The P.O. has several other bikes and there's no guarantee that these are even for the VF500.

#40

 Got the fork oil changed and pulled the wheels so I can clean them up and mount the new Pirelli Sport Demon's. I'm STILL waiting on piston seals for the calipers. Why in the world does it take two weeks to send 10 ounces of rubber seals from Florida to South Carolina?!

[image: 17361956_10208979210983584_7107927190410]

[image: 17308872_10208979211023585_5508587980155]

 I pulled the collars, or sliding sleeves, on the calipers, too. That's probably part of the reason they weren't retracting properly, don't ya think?

[image: brake%20collar_zpsohj4kyjw.jpg]

#41

Those caliper sleeves are a real PITA along with the rubber seals. They always corrode / perish. I have a bag full of corroded crappy examples. I get titanium alloy ones now. Can't skimp on brakes IMO.

#42

yep, them sleeves look familiar.  Started cleaning mine up (when I bought the bike) but thought better of it and bought new ones....

Tita alloy sounds good, if you have a link......   yes please!

#44

"Pull the carbs", they said. "They'll be dirty and plugged even though they were drained", I was warned.

 The manual shows about four steps to remove them. Then why did it take me and the GF an hour and a half and moving a bunch of hoses and stuff out of the way to get them out?! And...yeah...you guessed it: They're clean as a whistle from everything I can see. On the inside, at least. All throttles, slides, diaphragms, etc. I pulled one bowl and it looked pretty damn good.

[image: carbs%20before2_zpsaqy783z9.jpg]
[image: carbs%20before3_zps9tq048xd.jpg]

 I am NOT looking forward to installing these things. I can see getting the barrels from the cables back into the carbs, but how do you get to the 10mm nuts to set cable freeplay/tension when the carbs are installed? I'm dreading that job.
 Also, one thing that was really in the way was the fuel inlet. Is it pressed in or threaded in? Could I have removed it to clear the frame rail/clutch line and make the job easier?

[image: carbs%20fuel%20inlet_zpsofs4wbgb.jpg]

#45

Beautiful bike in the first pics. Good luck getting it going again.  :beer:

#46

I don't touch the clutch line when installing the carbs. To install I attach the cables with the carbs rotated 90degrees (along the long axis of the bike) then I rotate back and push them into the inlet rubbers. It is fiddly but possible. 

#47

 The fuel inlet fitting was hanging up on the clutch hard line. I had to take the lower soft line out of its bracket so I could move it out of the way enough to clear the 90 degree fitting on the carbs.

 After looking at it closer last night, it appears that handling the carb cables will be MUCH easier with the radiator out of the way. I'll be removing it soon anyway for the valve adjustment. I'll leave it out until the carbs are back in.

#48

The carbs are out and appear really good, but please tell me you're still going to go through them.

The cables are adjusted when hooked up right before carb re-installation.  You do it with the carbs flipped to the side just enough, then just set them down in the V and check freeplay and snap back at full lock both ways.  Make sure the cable adjuster up by switch is in a good middle position for final adjustment in either way.

#49

 Yes, my carb guy is going to go ahead and do a full check/clean/rebuild on the carbs. I did read about doing the cables beforehand.....slightly less terrifying, especially with the radiator out.

#50

 The bolts holding the master cylinders to the bars were hopelessly stuck. The clutch master was dry and full of crystals, but cleaned up, bled and operated properly. HOWEVER....it eventually started leaking after a few days. 
 The bolts just rounded out, and the ones on the brake side were going to be just as bad.


[image: clutch%20bolts1_zpsk1yrh83f.jpg]
[image: clutch%20bolts_zps48mr7acp.jpg]

 A friend came over and used his Matco extractor set to get the bolts out. They were stuck TIGHT. Funny thing is, only one of the four showed any corrosion.
 I had ordered rebuild kits for both, but canceled the order because new master cylinders are less than rebuild kits.
 The clutch is 14mm and the brake is 16mm. Most replacement sets I see are both 16mm. What would that mean for the clutch side?

#51

 I also degreased the engine and took some sand paper strips and cleaned the exhaust. I read a tip about using aluminum foil to mask the engine. I'll let the exhaust dry out a bit, treat it with rust converter, then spray it down with ceramic heat paint.

 Be-fore:

[image: collector%20before_zps1h0mmluu.jpg]

During:

[image: collector%20after_zpseu0izmqa.jpg]

 Before:

[image: headers%20before_zpsoidujzdl.jpg]

 During:

[image: headers%20after_zpsvaxjzoba.jpg]

#52

 I hear about people wrapping their bikes....am I doing it right?

[image: foil1_zpsmhruknwf.jpg]
[image: foil_zpsudl2cbh8.jpg]

 At least the aliens or the government can't see me know.  8)

 Nah, I made a brief attempt to loosen and remove the rear exhaust nuts and quickly decided that IF I could get them off, I'd probably never get them back on. I read about this on the internet and gave it a try. I think it'll work OK. The exhaust was sanded down and now has three coats of ceramic heat paint on it. I'll cure it in once I get the bike running.
 Oh, and got the oil and filter changed today, too.

#53

:goofy:    clever solution, never seen this before. which goes to show one is never too old to learn....

#54

 Got the valves adjusted on today. Man, that was.....fun....

[image: 18118413_10209265057769575_5928728626180]

 The good news is that the lobes, cam chains, etc., all look beautiful. No wear at all that I can see, Everything internally that I've seen on this engine is awesome.

[image: 18156953_10209265058329589_2905403620607]

 The job would have gone even quicker if I didn't have to spend an hour trying to fish out this damn wrench. It slipped, dropped, slid and fell....RIGHT into the oval hole on the INSIDE of the swing arm! My buddy was actually successful in fishing it out for me using a couple of magnets. I was thiiiiiissss close to removing the damn swing arm!

[image: wrench_zpscvgtiyqn.jpg]

#55

 Carbs should be done tomorrow. To be honest, it gives me the heeby-jeebies seeing the parts like this. I would have used Tupperware, ziploc baggies, etc., but my carb guys knows his way around these things and is something of a mad scientist. I've yet to get a set of carbs back from him that weren't flawless.

 He said I made a good call in pulling them. All O-rings, bowl gaskets and fuel tees were shot. Otherwise, not too bad. "After" pics coming soon.

[image: carbs%20apart_zpsocdqrixc.jpg]
[image: carbs%20apart1_zpsspk40asu.jpg]

#56

I'm the same, completely stripped down two 6th gens to make one bike and just put all the bolts in one box (per bike). I remembered where they all went. Maybe twice had to think for a minute. I was already very familiar with the 6th gen though. Then I can never remember if my sister's birthday is the 6th or the 8th of January.

#57
AuspanglishI'm the same, completely stripped down two 6th gens to make one bike and just put all the bolts in one box (per bike). I remembered where they all went. Maybe twice had to think for a minute. I was already very familiar with the 6th gen though. Then I can never remember if my sister's birthday is the 6th or the 8th of January.

What's important is important, no?

Sent from my HTC_PN071 using Tapatalk

#58

 I hope I remember how all  the hoses, wires and cables are routed. I usually take pics, but I wasn't expecting this to drag out quite this long. And there's a whole lot of "unclip this wire and drape it over here so I can reach this" kind of stuff on this bike.

#59

That kind of stuff is pretty obvious. I'm in the same position at the moment. Engine on bench, cables and hoses all over the shop. Sometimes hard to believe it can ever result in a functioning 100mph machine.

#60
17 hours ago, ScottSturgis

 Carbs should be done tomorrow. To be honest, it gives me the heeby-jeebies seeing the parts like this. I would have used Tupperware, ziploc baggies, etc., but my carb guys knows his way around these things and is something of a mad scientist. I've yet to get a set of carbs back from him that weren't flawless.

 He said I made a good call in pulling them. All O-rings, bowl gaskets and fuel tees were shot. Otherwise, not too bad. "After" pics coming soon.

[image: carbs%20apart_zpsocdqrixc.jpg]
[image: carbs%20apart1_zpsspk40asu.jpg]

That dude must be good at jigsaw puzzles!

#62

 Heard from my carb guy tonight. Carbs are done! Now you see why I use him, especially on carbs this complicated. I still do some carbs at home, but if they're even a little bit iffy I just drop them off. 
 I plan on picking them up in the morning and hopefully getting them back on the bike in the next few days.
 
 Before:
[image: carbs_zpsaatrenmy.jpg]
[image: carbs1_zpssiyy6xsz.jpg]
[image: carbs2_zpsmyqt5ehu.jpg]
[image: carbs%20apart_zpsocdqrixc.jpg]

 After:
[image: carbs3_zps8pvcwsgj.jpg]
[image: carbs4_zpscvfruzbb.jpg]
[image: carbs5_zpsnma3sa32.jpg]
[image: carbs6_zpsoff8ac6t.jpg]
[image: carbs7_zpsjp3bvbky.jpg]
[image: carbs8_zpskyk7c5lq.jpg]
[image: carbs9_zpsfez15ttu.jpg]
[image: carbs10_zpsugeywdep.jpg]

#63

 Carbs are in! Now to just get the cooling system back on and filled and install the new battery. You might also notice that I cleaned up the Kerker mufflers a little bit, too.


[image: carbs%20in_zpsl6zxngpk.jpg]

#64
You know, today I'm pretty bummed about this bike/project. I truly thought I was coolant away from firing it up and getting the bodywork back on. I'm not getting 12V to the headlight and tail light and can't figure out why. Then I noticed that the plunger in the aftermarket master cylinder (I know...should have listened) isn't retracting fast enough and the brake switch stays on. In an attempt to check the start switch to see if it's the cause of the no-headlight, I now have a dragging throttle, which wasn't like that until I opened up the RH control again. I see no real way to fix that or access the start switch without taking off a bunch of stuff and getting back down to the carbs. The carbs that I just had rebuilt and installed two days ago. So....instead of going for a ride in a day or so, I know have several things on the punch list that I don't know how I'm going to fix. Maybe I'll go work on my CB550 project. I can do those in my sleep.
#65

Good luck. I've had good luck stepping away from a project for a while. Inspiration sometimes comes from a lack of pressure to get things done.

Be warned though; as a procrastinator, sometimes the step-back is prolonged, it seems, forever.

#66

 The good new is, SHE LIVES!!!! And once it was running, all those weird electrical things started working. The headlight is still a little hinky. It's got something to do with the little switch inside that turns off the headlight when starting. The little spring/pin doesn't spring back as it should. I sprayed a little WD40 in there and I can make the headlight work. Hopefully, it'll get better in time. 
 The engine sounds smooth as silk with zero valve train noise. No smoke or leaks. I'll keep tweaking the carbs 'til I get them just right. 
 I had to bypass the fuel pump to make it run. I'm seriously considering leaving it bypassed and just unplugging it, unless someone can tell me why I shouldn't.
 It feels good to have a few things go right!

#67
The fuel pump doesn't seem to work. I'm OK with bypassing it, but I'd like to know the proper procedure for doing it. What to unplug, etc. Or....if it's really beneficial to run it, what replacement are you using? OR..... now that I've primed the carbs and made it run, should I try hooking it back up? I don't hear it doing anything. Didn't even see fuel in the filter until I bypassed it.   Also, I've only got ~1700cc of coolant in it so far, including the overflow. I've ran it, burped it, squeezed the hoses, etc. It's full to the rim of the neck when not running and drops down some when it is. Should I continue trying to get the last ~300cc in there?
#68

A lot of times its the fuel cut relay, not the pump itself.  Near the pump there is a small relay.  Unplug the connector and jump the wires on the harness side and see if the pump works.

#69
1 hour ago, ScottSturgis

 The good new is, SHE LIVES!!!! And once it was running, all those weird electrical things started working. The headlight is still a little hinky. It's got something to do with the little switch inside that turns off the headlight when starting. The little spring/pin doesn't spring back as it should. I sprayed a little WD40 in there and I can make the headlight work. Hopefully, it'll get better in time. 
 The engine sounds smooth as silk with zero valve train noise. No smoke or leaks. I'll keep tweaking the carbs 'til I get them just right. 
 I had to bypass the fuel pump to make it run. I'm seriously considering leaving it bypassed and just unplugging it, unless someone can tell me why I shouldn't.
 It feels good to have a few things go right!

Glad it's running.  Do yourself a favor and start looking for a slightly newer design Honda starter switch assy.  Like a CBR-F2.  Those early VF switches are old and fragile.  I think the F2 is literally plug and play.   At the very worst you might have to release a couple wires from the connector and relocate to match the harness side.  I am re-fitting all my VFs.  

#70

I rode it today! Stayed in the neighborhood and kept it under 5K RPM, but so far so good!
The replacement front master cylinder works great but the switch is crap. Brake light stays on most of the time. And still no neutral light (and neutral is a tiny bit hard to find when coming to a rolling stop).
No complaints, though. I think I'll like it!

Even though I tested the fan during the rebuild and know it works, I never heard it come on. The temp was slow to climb and never reached halfway across the gauge. I did make several short trips and it's overcast and cool here today.

And I noticed that even though the '85 calls for 2 turns out on the mixture screws, it seems to like 2.5 better. I'll go through the procedure in the manual for setting them later on. At two turn out, there's a fine line between a 1,000 RPM idle (or barely above) and a 2,000 RPM idle. No air leaks...I checked. At 2.5 turns it sounds better and I can get an ~1,100 RPM idle or a tick more. I'll keep adjusting them until I can get 1,300 RPM or so, per the manual.

[image: done3_zpsuyjw6dgf.jpg]
[image: done_zpsotqfqubc.jpg]
[image: done2_zpsgogwaucr.jpg]
[image: done1_zpsar8z5owt.jpg]

#71

Wahey!!!!!!! :cheerleader:

#72

Looks great!  Good Job.  With stock pilot jets, you'll need to be at at least 2.5 turns out.  If you find yourself going past 3, you prob need the next size up (40).  Did he document what was in the bike?

Also when you go past 3 turns out the spring pressure on the screw is less and they can be prone to vibrate out into the v of your engine.  Sometimes I give the spring a little "stretch" when I know I might be going that far out.

Again, very pretty bike.  It will get attention.

#73

Fixed (for the most part) the front brake switch and neutral light. I was about to take a break from this thing yesterday, today I'm loving it!

 I set the mixture screws at 2 turns out because that's what the FSM says. It says 2.5 for the '86. My carb guy actually had them at 2.5 and I went back in. All internal jets are stock.

#74

FSM is for stock and the lean factory setting.  As the weather warms up you will prob go back to 2.5

Especially since you have stock jetting with a full aftermarket exhaust.

#75

I put about 135 miles on it over the last couple of days. One full tank of gas and then some. I found out where reserve is  8) .I also found out that I can lock up the rear wheel if needed.
 In mixed riding, with some idling and carb fiddling, some around town and some interstate (70-75 MPH for 70 miles or so), I got 45 MPG. I don't think that's too bad.

 The clutch sometimes has an ON/OFF switch feel from a dead stop, but period magazine articles report the same thing. The repro brake master works and the front brakes are good, but the return spring in the bore is weak or something. The plunger is slow to return and the brake light stays on too long. I just unplugged the wires for now. I've been talking to a guy that can restore and rebuild the stock ones. Not just kits, but media blasting, powder coating, new sight glasses, rebuild kits, etc. It's not cheap, at around $150/ea., but I'm seriously leaning that way. As I get older, I really appreciate genuine parts and stock stuff.

#76

31 years and counting....

:beer:

IMAG7066_2.thumb.jpg.340247b5519cf22aa088a632f0391d2d.jpg

#78

So this happened yesterday. I had ridden to a local shop to pick up something and noticed a tapping noise on the way over. I recognized it from past experience and, sure enough, the chain was tapping the center stand. I had adjusted it not long before, but chains can stretch, etc.
 I adjusted it in the parking lot and only made it a couple of miles down the road before I heard something again. Luckily, I was rolling to an intersection that angles across traffic. Not much more than a couple miles an hour. Went to pull out, there was a click/thud....and nothing. For a second, I though I had lost the transmission. "F%@#, this bike's junk now..."
 Coasted across the street to the sidewalk and the chain is sitting just as neat as you please on top of the chain guard. Zero damage to me or the bike. Not even a nick or scratch.

[image: broken%20chain_zpsi2igqxdf.jpg]

 I remember when I had the chain off for the rear tire replacement, and I thought then that something looked odd at the master clip. Almost like there were places for two of them, but I only removed one. The master clip was still in the chain. I can only surmise that maybe it had two at one point and one was lost over time? 
 I got very, very lucky. Installed a new riveted chain today and back on the road!

#79

Very lucky.  On many levels.  Whew.

End of thread · 79 posts recovered Wayback Machine snapshot 6 Jul 2017