Credit for the inspiration for this endeavor goes to veefer800canuck!
I can't leave well enough alone, I admit it! When I found out that I could swap out my stock shock for a CBR929 unit with only a small amount of modification (and $), I thought, "Why not?"
My bike has about 40-odd thousand miles on it, so the stock shock is fairly worn by now. I paid $35 for the 929 shock on Ebay. It's a 2000 vintage Erion Racing (oooohhh....) shock with the legendary white spring. (IMG:style_emoticons/oldemoticons/wink.gif)
My first order of business was to buy a new upper shock mount, so I could modify one and leave the other alone, in case I (or a future owner) wished to return the bike to stock.
Next, I set my sights on Ebay and found several 929 shocks to choose from. I settled on one that was located about 40 miles away. Soon I had the basic items on hand.
Removing the stock shock is fairly easy.
1. Huck the bike onto the center stand, remove the muffler and the rear wheel, then support the swingarm with a jack.
2. Remove the seat, the fuel tank, and the battery. Then remove the rear ignition coils (leave them mounted on their bracket), and the metal front of the battery box. You won't be able to remove the shock unless you do this. Gently remove the starter relay before you pull the metal bit out.
3. From there it's easy. Just remove all the bolts from the triangle linkage, remove the bolt that connects the shock to the upper mount, then tilt the shock back and slide it up and out. You can remove the upper mounting bracket last.
Once I had the 929 shock, I measured it and the stocker. The difference I recorded was 35mm. I've heard other numbers being quoted in other threads; my advice is: do your own measuring!
Deciding what to do for the spacer took a while. After digging around at my local hardware store, I decided to go with an aluminum spacer. I found a place called Metal Supermarkets which sold me a 2.5" long chunk of 1.5" round bar stock. Eventually, I found a machine shop that shortened it up to 35mm and drilled a 10mm hole right down the center.
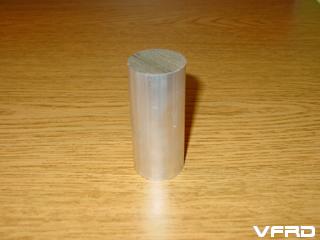
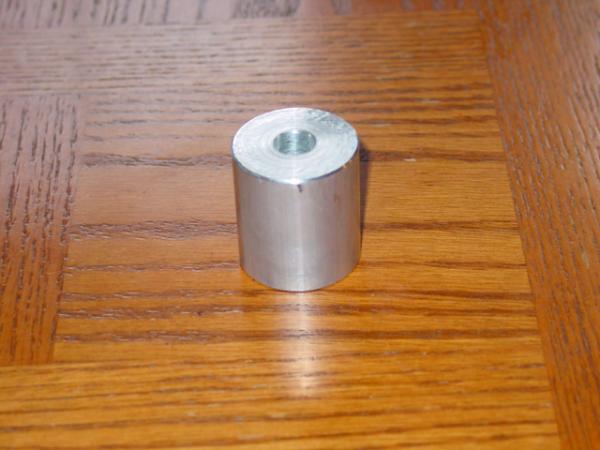
For the new upper mount bolt, I bought a 120mm x 10mm bolt with a nylock nut.
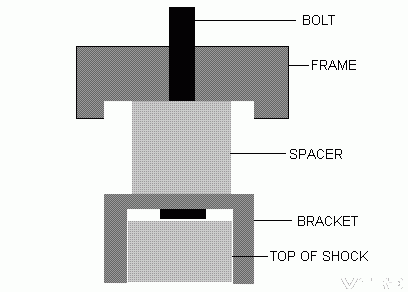
In the normal setup, the upper shock bracket fits into a recess in the frame. This keeps it from turning when the nut on top is torqued. With my setup, I have nothing to keep the shock mount (and the upper shock body) from turning. If you can find or make a spacer that's the same width as the bracket (and you weld it to the bracket), you won't have to deal with that issue.
Solution: I had the bolt head welded to the bracket (a good idea in any case), and as the upper mount nut was torqued, I held the top of the shock in place with a large crescent wrench (that's a spanner to you Limeys, Aussies, Kiwis, and Canucks). (IMG:style_emoticons/oldemoticons/goofy.gif) I ground down the head of the bolt to clear the shock eye. It doesn't take much; just go slow and only remove what you have to. I left about 12mm of extra bolt length (above the nut) so that I can add ride height later. The extra length doesn't interfere with the fuel tank.
Deciding how to orient the shock took a while. In the so-called 'normal' position, the shock reservoir comes fairly close to the rear exhaust headers. Also, the rear ignition coils cannot be in their normal position if the shock is thus mounted. I tried lots of different ideas to gain clearance for the coils: modifying their mounting bracket, flipping them upside down, etc, etc. Nothing seemed to offer a clean solution.
Finally, I tried rotating the shock 180 degrees. There's definitely enough clearance for the reservoir, as the stock preload adjuster normally lives in that spot. It's about an inch or so from the cylinder head, but I imagine there's less heat coming from that than comes from the headers. The coils fit perfectly in their normal spot. I won't be able to easily adjust the compression and rebound settings, as they are now on the right side. Still, I can get to them if I really want to, and it's not like I'm going to be trying different suspension setups every weekend.
At the moment, I have the preload set to 5 out of 9, and the compression and rebound settings are in the middle. We'll see how that works.
Notes: Watch the routing of the fuel vapor lines that run in front of the shock/swingarm when you button up. I replaced those (and the fuel lines and filter) while I was in there. I also replaced that rubber splash shield that goes around the shock. Beware: if you need to order this part, there are none in the US, and you'll wait 3 weeks like I did to get one from Japan. This is also a good time to clean all the chain lube and other gack off the rear of your bike. Check your brake pads and chain tension as well.
------------------
Ride report: I just took it out yesterday for a quick spin to make sure it's still ridable. I only rode around town, and I kept my speed down (gravel everywhere). I didn't notice any major changes to the handling; other than the rear end seems 'tighter' (no jokes, please) than before. I'm praying for a bit of warmer, drier weather soon. I'll be able to push it harder and tell whether the 929 shock is an improvement or just a sideways upgrade.