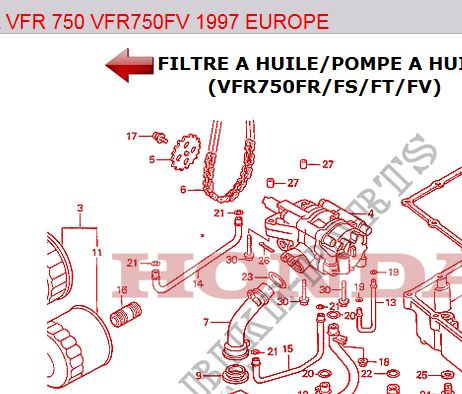
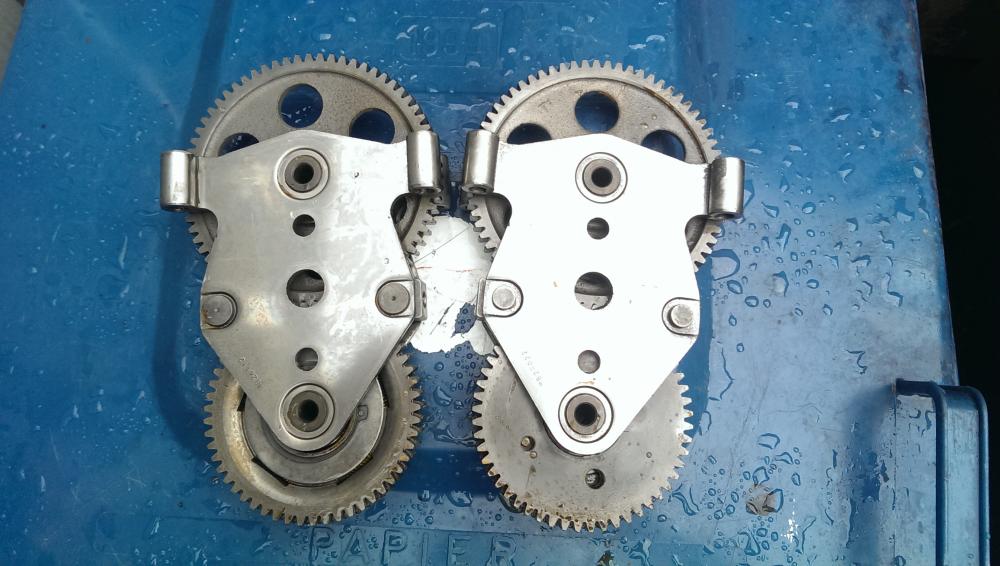
Broken links to pictures
Hi Benoit. Welcome aboard!
It is an exciting and fun journey. Since you don't have special budget allocated, don't track how much you have spent on the restoration. It will be more fun that way :wink:
You will get lots of help, advise and encouragement here, but the first thing I would suggest is to remove the plugs and expel all the water and mud from the cylinders.
And you will need to change the oil couple of times before all the water and dirt are out.
Post lots of pictures of your progress - we like pictures here.
Good luck!
Put...... !!! :goofy:
You got your work cut out there.....
But,
welcome!! :beer:
Wow
What is it with those 4th Gens recently... they have a tendency of getting themselves flooded! :goofy:
This is the third I've heard of in a couple of months!
Anyway, good luck with the restoration. And welcome! :smile:
nick84What is it with those 4th Gens recently... they have a tendency of getting themselves flooded! :goofy:
Did not mention it in my initial post but mine is from 1993 so 3rd gen. When I was 17, the 4th gen went on sale and I really was in love with it because it looked like the NR and it has the same air intakes on each side as there is on Ferrari F40 bonnet ;-)
But now that I'm older, I like the more discrete charm of the 3rd gen more.
For the moment, I have no final idea about what I'm going to do with the fairings. I really like the original look of the VFR. But I also found those topics where guys used more recent CBR fairings and the result is nice too. For the color also, the only remainder of the origin is the tank but the paint is cracked. But I really like this (British Racing?) green so I have no idea for the color either...
We'll see ;-)
bdouvill,
if you like understated, stoic qualities of the 3rd gen... here's a pic for thought...

vfrgobdouvill,
if you like understated, stoic qualities of the 3rd gen... here's a pic for thought...
that's a take on the white on white theme that honda did in the factory.. its Cadillac mother of pearl paint, with ice white powdercoated wheels.. all other bits are done in gold, red and touches of blue.. two brothers racing left hand exhaust - which will be up for sale soon... i've also sourced a Crobin with white piping since that pic... just a thought... and maybe a vote for the desire to go with original fairings. there's something special with the way that the fairings are proportioned... fat tail and all. :)
Here's my take on that theme:
Now that, is a project! It will be interesting to see where you take it. Keep sending us pics!
SEBSPEEDWow
my thoughts exactly.....
If you're very lucky, the engine won't have had much water inside, but the airbox isn't air tight, so chances are it got water in there too. I'd take the spark plugs out, disconnect the CDI, put on a new battery and try to crank it over to see what comes out...
Your gauges will be damaged beyond repair. I have a full spare set (km/h) if you find yourself in need, that you can have for cheap. You'll also need to take apart the carbs and clean them out well, check all the electrics, etc.
Your tank may also have had water inside, so that'll need cleaning.
If someone tried to crank it over with the CDI connected, it may have fried it. You'll find out later. Your wheel & swing arm bearings will also need attention and I'd service the forks & brakes too, before trying to ride it.
Essentially, mud & water will have seeped into most places.
It's possible to get it running again, but a lot of work. Big project to make a fully running bike with fairing, etc. Keep us posted.
Welcome and best of luck sir!
bdouvillnick84What is it with those 4th Gens recently... they have a tendency of getting themselves flooded! :goofy:
Did not mention it in my initial post but mine is from 1993 so 3rd gen. When I was 17, the 4th gen went on sale and I really was in love with it because it looked like the NR and it has the same air intakes on each side as there is on Ferrari F40 bonnet ;-)
But now that I'm older, I like the more discrete charm of the 3rd gen more.
For the moment, I have no final idea about what I'm going to do with the fairings. I really like the original look of the VFR. But I also found those topics where guys used more recent CBR fairings and the result is nice too. For the color also, the only remainder of the origin is the tank but the paint is cracked. But I really like this (British Racing?) green so I have no idea for the color either...
We'll see ;-)
Good Luck on the project! since I read your post I thought I would post up a picture of the best of both worlds :cool:


You'll probably find a kindred spirit in this thread of a 1990 3rd gen that was also flooded and brought back to life.
http://www.vfrdiscussion.com/forum/index.php/topic/75528-1990-running-after-22-years/
Thank you all for your comments and support 😉
I already started last week to make the inventory of all parts the previous owner removed for cleaning that I have to figure how to mount back on the bike.
I also removed the dashboard cluster, opened it and cleaned everything. Not a lot of pictures but there was a very thin layer of dry mud everywhere.
[image: DSC_0185_1024.JPG.bc57d94c723327e747d359996ef12218.JPG]
Thanks to my wife who patiently cleaned the different parts, we got this:
[image: DSC_0192_1024.JPG.01f46d47179aea88cd81b4812eae5a54.JPG]
And back on the bike with the battery connected and contact cleaner inside almost all connectors:
[image: DSC_0196_1024.JPG.82bffda2db95bab972d6e9d0e61cf954.JPG]
Next step is to determine whether there is still water inside the motor, and check valve timing.
I try to see that next week-end.
Edited June 7, 2018 by bdouvillA little bit of news 😉 and lots of questions too...
I am trying to launch the starter to rotate the motor and eject some water eventually. I started by removing the commands on both handlebars because I was not sure if contact were going well, especially when launching the starter.
Without surprise, they were both full of mud that dried out:
[image: DSC_0203_1024.JPG.c41cc07daebc62ef575ff588f04df5c7.JPG]I dismantled everything:
[image: DSC_0204_1024.JPG.b93eed503a7b23570a12ff14b5e09e39.JPG]
And again with my wife help, we cleaned everything. I tested all contacts with my multimeter, everything seems fine on this side.
So I tried to launch the starter and... nothing, no clicks from the relay side. I have some serious doubts about it and the connector that goes to it.
[image: DSC_0207_1024.JPG.78ab5c4a810299d0b66cca811f96521c.JPG][image: DSC_0210_1024.JPG.953fda78673dad299f41e47f1bc92251.JPG]
For the connector, image speaks for itself. For the relay, I am not able to separate the green part from it that is supposed to be removable. Plus the starter casing is broken and water enters inside, so no idea of its state nor how to test it.
So I have several questions I'd like to share with you:
1/ How can I test my starter relay?
2/ Shall I cut the connector and replace it with single connectors?
3/ Shall I pull the clutch lever to be able to ignite the starter? I noticed that there's a clutch relay too and I have no idea what it stands for nor how to test it. Also I intrigued because the neutral signal does not light on the dashboard. I tested continuity along the main harness and it's ok. But I don't know how the clutch relay interfers here.
4/ I did all my tests with the CDI removed because I believe it should not matter but I might be wrong. Am I?
Many thanks in advance for reading and helping me going on 😉
Edited June 7, 2018 by bdouvillOutstanding progress! The instrument cluster looks great (by the way - your wife's a keeper :smile2:)!
You can test the relay by grounding it and then applying power to the input - you should hear an audible click. While power is applied you could also check for continuity across the outputs (switch inside would be closed). If it were sealed sufficiently for no water to enter it's probably fine. If water did get in though, it may never work well and you may well destroy it to get it open. You'll just have to experiment and see what you can find. The clutch, neutral and sidestand switches should be known good before deciding the starter relay is bad. Since your neutral light is not working there's probably some diagnosis to do there as well. If you watch ebay you can probably find a wiring harness that could supply the electrical components you have that are beyond repair.
Keep us updated.
Please don't crank the motor over with the starter.
Instead, pull the spark plugs and dump oil in the cylinders, then remove the right side cover and turn the motor over by hand, using a socket wrench.
SEBSPEEDPlease don't crank the motor over with the starter.
Instead, pull the spark plugs and dump oil in the cylinders, then remove the right side cover and turn the motor over by hand, using a socket wrench.
What Seb said.
If you have water in cylinders and crank with the starter, that will be the end of the motor.
If there is no water, you most probably have some rust. You want to soak that with oil before cranking.
I'm just shuddering at the thought of having dirty, muddy water inside the engine. The only real fix for that is a complete disassembly and overhaul. Just a tiny bit of dirt is all it takes to score a cylinder wall or clog a vital port, or, or, or...
RiceSEBSPEEDPlease don't crank the motor over with the starter.
Instead, pull the spark plugs and dump oil in the cylinders, then remove the right side cover and turn the motor over by hand, using a socket wrench.
What Seb said.
If you have water in cylinders and crank with the starter, that will be the end of the motor.
If there is no water, you most probably have some rust. You want to soak that with oil before cranking.
Understood, and thanks for the tip. In which direction should I rotate the crankshaft when I'm facing right side of the motor? Clockwise or counterclockwise?
How much oil should I put inside the cylinder through the spark oil? One glass (like 20ml) per cylinder? I believe I should then wait before I rotate the engine manually (if mud has dried).
Exhaust is removed, so I believed I should expect oil + whatever will come out to come out via exhaust holes, right?
Browse through here
http://www.vfroc.nl/forumVFR/index.php?showtopic=25895&p=406708
You may have to sign up to see and it is all in Dutch, but there are lots of pictures....
I'd put 1-2 oz in each cylinder. Let it sit there for a few hours and then turn clockwise until the motor starts turning freely and w/o grinding. Do not replace the plugs. .
Then, you can use the starter to turn it faster and spit out the oil through the plug holes.
WD40, fogging oil, or other aerosol oil should also be used, it will coat the walls better than pouring a liquid in.
I think in your situation, I might use ATF and a spray, instead of oil.
That project looks like what I started with. Someone posted my story already. I ended up getting a new to me motor instead of rebuilding the original. I had a lot of water in my motor and the valves were stuck open, I wasn't going to be able to fix them. I have full faith in this running again. Keep up the good work! I can't wait to see more progress. As for the fairings, it took me 8 years to find all the right ones on eBay. There are companies out there that sell complete kits for our bikes, but I'm not sure of the quality. Finding originals are harder and harder to find.
SEBSPEEDWD40, fogging oil, or other aerosol oil should also be used, it will coat the walls better than pouring a liquid in.
I think in your situation, I might use ATF and a spray, instead of oil.
All in all, if I disengage the chain from the sprocket, I'm only 4 screws away from removing the motor from the frame and that will be then easier to remove the rear wheel and swingarm to check for bearing states. Then it will be easy to remove the rest (front wheel and fork). But I still did not decide if I just clean the inside of the chambers with your method or if I dismantle the whole motor, at least to get an idea of the gearbox state. I am not really thrilled by the idea of dismantling both heads and needing to buy new gaskets.
Btw, what does ATF stands for?
snowman11That project looks like what I started with. Someone posted my story already. I ended up getting a new to me motor instead of rebuilding the original. I had a lot of water in my motor and the valves were stuck open, I wasn't going to be able to fix them. I have full faith in this running again. Keep up the good work! I can't wait to see more progress. As for the fairings, it took me 8 years to find all the right ones on eBay. There are companies out there that sell complete kits for our bikes, but I'm not sure of the quality. Finding originals are harder and harder to find.
Thanks for the support ;-)
My wish is to be able to ride it some day, probably not before next summer, and probably without front fairings in the first place (there's enough technical stuff to check/solve to keep me busy for a moment). I'll keep you posted.
Automatic Transmission Fluid.
RiceAutomatic Transmission Fluid.
Is that different from manual gearbox oil? I have some in my garage.
bdouvillRiceAutomatic Transmission Fluid.
Is that different from manual gearbox oil? I have some in my garage.
Yes. Different. I don't pretend to be the expert on this, but from what I understand is, manual transmission uses Oil, while Automatic uses Fluid, which is Oil + other stuff. See, I toldya I was no expert :wacko:
Spent some time in the garage this week-end but rather on the Bandit (scratched my head with LED turn signal, LED relay and unexpected current outage when riding, quite scary).
But I decided I should remove the VFR engine from the frame for better inspection (on my terrasse, my wife is super happy). Also, it will ease swingarm removal for bearings inspection. So I understood I need a special socket to remove the nuts for the engine and the swingarm (and apparently, it's 2 sockets in fact).
With a little help from Google, I found this:
For the engine nut:
and for the Swingarm:
Is it correct? I must say that in the same ebay shop, I also found this:
and to be honest, I can not figure the difference between this "set" and the engine Mounting Nut Socket alone.
I emailed the seller but got no answer yet. Any idea?
Got the answer from the seller:
You are correct you do need the the 2 tools one for the engine and one for the swinging arm.If you have a grinder and some cutting discs, you can make your own tools from old (or new) sockets in a pinch.
A little bit of news. Spent some time last week in the garage but mainly on the Bandit.
Back to the VFR, I ordered the special sockets (as I did not feel like making my own) because I fell like it's easier to have a proper look at the engine now. I am still not sure how far I'll check: I will check valve clearance but I am not sure I'll remove both heads (= 2 new head gaskets...) but this is the only way to ensure that the cylinders are ok. Also, I'd like to check that there are no missing teeth in the gearbox and that the bearing near the sprocket is in good condition. I see what I can do without opening the casing in half.
Here is the engine now standing on my balcony:
[image: WP_20151213_001_1024.JPG.1bb905533172f9760354ab081cad01ae.JPG]
Now, it's also easier to remove the swingarm and check all bearings: swingarm, both front and rear wheel, stem and change the oil in the fork before I put the engine back in the frame and try to crack it 😉
Edited June 7, 2018 by bdouvillIf you can rent or borrow an inspection camera it would allow you to visually assess the cylinders without dis-assembling anything.
Hi,
I'm currently working on the bike. I continued dismantling the bike for sanity checks (like bearings) and durt / mud / chain grease clean-up. I separated the frame, swingarm, rear wheel, shock, suspension linkage and fork. I also have apart front and rear brake systems, clutch command, dashboard and harness. Pictures will come soon.
But when I say fork, I mean front wheel, fork tubes and lower triple clamp. I did not succeed in removing the front axle shaft after I removed the bolt. On my Bandit; you need a 12 mm allen bolt to unscrew it but here I did not understand how you remove it. Is it screwed or just slipped into the rear fork leg then the front wheel then the right fork leg? I did not try to push it from the left side. Can anyone confirm?
Thanks a lot in advance.
It simply slides in
once you removed the nut on the axke, you loosen the pinch bolts at the bottom-front of each leg (there are either one or two)
The axle should have (one the side opposite to where the nut sits) a hole in it.
stick a long screwdriver and rotate while pulling outwards.
bonne chance!
Cylinders can be checked using compression tool. Even on the bench. Just make sure to hold the engine down lest it tries to jump around.
Gear box is bulletproof and chances that it is missing teeth are slim to none. I wouldn't bother. What you can do, is remove the oil pan and look for bits in it. If there are none, then your gears are OK.
Axle - As Dutchy said: One large bolt on the end and some pinch bolts are all that's holding it. Yours just needs a little persuasion.
Extension socket and a rubber mallet will see the axle out in a few seconds. Pingggg!
Thanks for your answers about the front axle, this was pretty straightforward indeed 😉
And now, some pics as promised.
1st: frame arrived on my balcony, engine felt a little bit lonely 😉
[image: WP_20151225_013_1024.jpg.e3d193fe0130107bd90b621597156fd9.jpg]
As you can see, still some mud on it but mainly grease from the chain and I suspect still a little bit of water inside.
[image: WP_20151225_005_1024.jpg.99fb1b693271ef63434a4ebd4a3ef102.jpg]
My plan is to remove most of the grease/dirt then probably "carwash" it, then let all water get out... Also, I kill a thread when removing the side stand. Not sure the 2 remaining bolt are enough with the weight of this beast...
[image: WP_20151225_018_1024.jpg.c739e48a6b4be7f908824f57db46ccd4.jpg]
The swingarm needs some cleaning too. Don't have 46 mm socket yet. Will see the internal later.
[image: WP_20151225_023_1024.jpg.dcbcb9b69ff9d383a7067f77a64c038d.jpg]
On front end, I have both front wheel bearing toasted. Rust does not come from the few days in water but from the 20+ years of usage.
[image: DSC_0263_1024.JPG.82b079dfa0f86e885ff4eca46bd50617.JPG]
Front tyre is also dead, almost flat on the left side:
[image: DSC_0270_1024.JPG.28645332f42cb4249efbc10d5bf9f948.JPG]
I did not plan on changing the front tyre before I am able to crack the engine, but I will definitely not ride it either this way... Rear tyre still got some life in.
Also, stem bearings also need a replacement from its past usage, there are both rusty.
[image: WP_20151225_033_1024.jpg.6e3994608c3cce4195329fe52af2a34d.jpg][image: WP_20151225_034_1024.jpg.a40408c71c60c05e4eb6f9f6cc1d12e8.jpg]
Edited June 7, 2018 by bdouvillMore pictures:
Shock before and atfer my wife stroke, I guess you'll find which one come before/after 😉
[image: WP_20151223_003_1024.jpg.f41f444a6f4a5864a2ea7a15691c4c99.jpg][image: WP_20151225_045_1024.jpg.004b54103ab665a3b5c5fb5481d2934f.jpg]
Preload adjuster works fine. But the screw at the bottom does not turn at all:
[image: WP_20151225_039_1024.jpg.3a6e4989575b1649842a8b357572cebb.jpg]
I guess this is not normal. I would say it is the compression setting, can anyone confirm? Also on the opposite side, you can see this:
[image: WP_20151225_040_1024.jpg.2bffaa5f9a91a009dcd005add7b4fd93.jpg]
I am not sure whether this is the same screw as the marks suggest the screw can not be turned/moved. On page 1-13 of the service manual, it is written that shock has both a compression and a rebound adjuster. Until now, I can not figure where is that rebound adjuster (assuming the previous screw is really the compression adjuster).
I cleaned and regreased the rear suspension linkage. Thanks to the seals, all bearings are in good condition, no water ever came in 😉
Also, I removed a metal plate from the left side on the frame, I have no idea of its function. Is that to deviate air to the regulator or something?
[image: WP_20151225_036_1024.jpg.80ce719db8fdad2808ac8ac11a2157aa.jpg]
The 2 marks are light rust. I have no mean to sand it, will see what I can do with this.
To finish, picture of myself fighting in the garage (until then, I won).
[image: IMG_1888.JPG.f21ed5d234baf233ec13b1c5d420ffae.JPG]
Edited June 7, 2018 by bdouvillScrew at the bottom of the shock is really a combined low speed rebound/comp adjuster.
It should turn really easily.
RC36RiderScrew at the bottom of the shock is really a combined low speed rebound/comp adjuster.
It should turn really easily.
I know. I had a GSXR 750 Showa shock on my Bandit 400 and you could easily adjust the screw position. But here, nothing happens. Can it be linked to the marks at the back that prevents the screw from turning?
That looks like peening rather than accidental damage but I'm not really sure.
I have a 4th Gen shock lying about at home. I can take a look tomorrow night if nobody has an answer until then.
For front wheel and steering bearing, I found that All Balls Bearings make some replacement kits that seem widely available in Europe thanks to Bihr dealers. Any comment to prevent me from ordering and rather go for Honda parts?
Edited December 27, 2015 by bdouvillbdouvillFor front wheel and steering bearing, I found that All Balls Bearings make some replacement kits that seem widely available in Europe thanks to Bihr dealers. Any comment to prevent me from ordering and rather go for Honda parts?
all the shops i have worked in use all balls . as for the neck bearings.. go for the tapered roller kit.
bdouvillCan it be linked to the marks at the back that prevents the screw from turning?
It definitely does not turn along with the adjuster screw on the other side on my 4th Gen shock.
Seems that it is just a plug that is peened in place to prevent tampering while the shock is under nitrogen pressure.
All Balls are okay, but they tend to use no-name bearings in their kits (unlike Honda). Bearings are fairly standardised parts, so if you can find an automotive bearing supplier in your neck of the Med, you can order most of the bearings and seals you will need for a lot less money than either Honda or All Balls. See my bearings page for part and bearing numbers (and elsewhere on the site is a lot of other information about the RC36-I).
The tools you have ordered (I think) will allow you to tighten the frame and swing arm bolts, but not accurately set the torque. That requires an offset tool. However, you may become comfortable with guessing... :wink:
Getting the 46mm nut off the swing arm will be difficult. The preferred method is to do it with the swing arm on the bike, the chain and sprockets in place and the bike in gear. Too late now! I have a couple of eBay swing arms I will need to attack somehow, so please let me know how you do it!
The metal plate on the frame is to deflect the heat from the rear exhaust pipes. Riding your bike in summer with heat pouring onto your lower leg could be very uncomfortable without it.
The OEM rear shock does not have separate compression and rebound adjusters. I believe the combine the two (like some aftermarket shocks, like Hagon, do), but it may just be for rebound. The pre-load adjuster only moves the spring a few mm, but they tend to do nothing at all once the fluid leaks out... Can be re-filled at home, though, if you're intetrested. Might be time for a new shock, anyway.
For the stripped side stand thread, you can fix it with an insert. I've never used them, but they are well-regarded, assuming they are installed correctly. Helicoil and Timesert are the best known. The OEM thread for those holes is/was M10 x 1.25, which is the typical fine-pitch used on Hondas and other Japanese motorcycles. (M10 x 1.5 is the "normal" pitch, but there are no such threads used on your bike.)
Ciao,
Not sure how many miles your rear shock has dome, but they are pretty crap to be honest.
If funds allow, get a new one, makes sense as the bike is stripped.
If you do, avoid Hagon, I had one for a very short while on my '93 and it was worse than the original.
I now have a Nitron on the rear and Ohlins linear springs up front with a 7.5 weight oil.
The difference is astounding
First of all, happy new year to all of you that spend some time reading this thread and helping me. I wish you had quality time with your family and friends during that period of the year. 2015 has been a tough year for us Froggies, but I guess other people had their share of bad things too...
Anyway, let's go back to your topic ;-)
In no specific order:
JZHAll Balls are okay, but they tend to use no-name bearings in their kits (unlike Honda). Bearings are fairly standardised parts, so if you can find an automotive bearing supplier in your neck of the Med, you can order most of the bearings and seals you will need for a lot less money than either Honda or All Balls. See my bearings page for part and bearing numbers (and elsewhere on the site is a lot of other information about the RC36-I).
When having a look at the swingarm, I noticed that all bearing from the swingarm and rear wheel need to be replaced as well. I had a look at Honda prices and they are freakin'... Some rear wheel bearing cost 132€, fu%$...
So I started to look for dimensions and possible replacement and Google lead me on that very same page. Now, I need to figure how I can eventually replace all bearing by myself. The cost in saving might be worth investing in some quality tools. I was told we have a bearing specialist in the area and there's Internet as well. 123Roulement, French company, proposes all bearing possible sizings, both in 1st price and big manufaturer quality (they have Koyo, NTN,...). My only concern is for the bearing that requires an hydraulic press, not sure the shops in the area will be ok with replacing the bearings if I provide the new ones. I need to figure this out.
JZHThe tools you have ordered (I think) will allow you to tighten the frame and swing arm bolts, but not accurately set the torque. That requires an offset tool. However, you may become comfortable with guessing... :wink:
I believe I'll go with guessing first then we see how it goes.
JZHGetting the 46mm nut off the swing arm will be difficult. The preferred method is to do it with the swing arm on the bike, the chain and sprockets in place and the bike in gear. Too late now! I have a couple of eBay swing arms I will need to attack somehow, so please let me know how you do it!
That's a good point that I started dismantling everything rather than just taking care of the engine because when I tried that 46 mm nut, I just found that it was not tighten at all. No idea if it has been done by the previous owner in his attempt to save the bike or not but who knows how it could have ended on the road...
JZHThe metal plate on the frame is to deflect the heat from the rear exhaust pipes. Riding your bike in summer with heat pouring onto your lower leg could be very uncomfortable without it.
OK, so I see later how I can properly remove the rust and spray it with heat paint.
SnowdogFor the stripped side stand thread, you can fix it with an insert. I've never used them, but they are well-regarded, assuming they are installed correctly. Helicoil and Timesert are the best known. The OEM thread for those holes is/was M10 x 1.25, which is the typical fine-pitch used on Hondas and other Japanese motorcycles. (M10 x 1.5 is the "normal" pitch, but there are no such threads used on your bike.)
Maybe I see that one with one of the shops in my area.
JZHThe OEM rear shock does not have separate compression and rebound adjusters. I believe the combine the two (like some aftermarket shocks, like Hagon, do), but it may just be for rebound. The pre-load adjuster only moves the spring a few mm, but they tend to do nothing at all once the fluid leaks out... Can be re-filled at home, though, if you're intetrested. Might be time for a new shock, anyway.
SnowdogNot sure how many miles your rear shock has dome, but they are pretty crap to be honest.
If funds allow, get a new one, makes sense as the bike is stripped.
If you do, avoid Hagon, I had one for a very short while on my '93 and it was worse than the original.
I now have a Nitron on the rear and Ohlins linear springs up front with a 7.5 weight oil.
The difference is astounding
I believe in the beginning, I will try to ride with this one. Remember my initial idea was to restart the bike. My idea now is to make it back to its default look (probably with replica fairings) and keep it as long as I can. The only mod I would be interested in are stainless steel exhaust pipe with aftermarket can (I follow carefully the TBR replica thread) but more importantly suspension upgrade. In my baby Bandit, I have Racetech linear spring and Gold Valve emulator in the fork and an M-Shock rear shock from Shock Factory (see here). That's the best bang for the buck you can get in Europe. I mounted it 4 month ago. Only rode like 2000 km since but I am really pleased, definitely better than my Showa from a 04-05 GSX-R 750. I believe for the VFR, I'll renew my trust in Shock Factory and see for Racetech or DMr for the fork.
For rear shocks, we also have EMC in France which has a good reputation. Mike Capon who is the founder of Shock Factory is a former employee of EMC. Its website only lists one model with only one setting (both for compression and rebound) which is very similar to EMC SportShock one, but I know he proposes also a newer version with 2 settings (one for low speed movements, the other one for higher speed ones) similar to EMC Sportshock 2. I heard Mike sells a lot of those for Yamaha MT09/FZ09 which are known to have terrible rear shock as standard (I saw one MT09 with that shock).
I am considering buying tools to change the bearings by myself. I am thinking about a Motion Pro bearing remover set and also the driver set. This is good investment I think. So I could do the front wheel and the swingarm pivot.
But I am worried about the bearings that need an hydraulic press (rear hub and sprocket carrier). We can find cheap hydraulic presses here via Amazon but they are from China (what a surprise!) and quality does not seems to be always there (according to reviews). I had this or that in mind. Also I did not have in mind to start a repair shop (and I live in an appartment, so limited space/storage).
Once on forums, I found an interesting Mc Gyver option, see here:
[image: roulementPresse.jpg.dcb72705397c2b5ee3ed60f6589d8ea0.jpg]
All you need is a bottle jack and 2 solid walls. Extracting old bearing seems feasible but inserting new one would additional care to be sure the whole installation is in line. Anyone has already done that? What would be the pressure needed for such a move?
Thanks a lot in advance for your feedback.
Edited June 7, 2018 by bdouvillbdouvillI am considering buying tools to change the bearings by myself. I am thinking about a Motion Pro bearing remover set and also the driver set. This is good investment I think. So I could do the front wheel and the swingarm pivot.
But I am worried about the bearings that need an hydraulic press (rear hub and sprocket carrier). We can find cheap hydraulic presses here via Amazon but they are from China (what a surprise!) and quality does not seems to be always there (according to reviews). I had this or that in mind. Also I did not have in mind to start a repair shop (and I live in an appartment, so limited space/storage).
If you do not plan on using the tools again, go to a local shop and pay them to press the bearings. It will be simpler and probably cheaper than dealing with buying and then owning large tools, which you will probably not need again.
If you do decide to buy the press, do not worry about it being made in China. It isn't good enough for a professional daily use, but for home mechanic, they are perfect - Cheap and get the job done. Especially simple tools, like a press. I own "that" and have been happily using it for a while now.
Hi,
A little bit of an update for those who are following this thread 😉
Since the last post, I did not do much on the VFR, mainly cleaning some stuff like swingarm, chain cover and slider chain (damn those slider chain bolts were hard to remove) and evaluating the list of bearing references I need to order (thanks to JZH for sharing his information). I also spent some time searching on the Internet the technique(s) to remove the old steering bearings (and their cage) and put in place the new ones (without damaging the lower one). Sounds like I'm gonna have some fun.
In the meantime, I performed basic maintenance on my wife car. I also purchased a bearing removal set (like this) and started using it for rebuilding the rear suspension linkage of my Bandit 400. It helped me removing the 2 middle needle bearings. I'll use it to remove the front wheel bearings and the swingarm radial bearings (of the VFR).
In parallel, at work, I requested to my management to enter the PMP certification preparation program and I got enrolled, just knew that when I was back from X-mas holidays. To keep it simple, I work in a pretty big IT company and PMP is an external certification for Project Managers (recognised in various industries, not only IT). If I can get it, that's an important achievement for me and my career. The counterpart is that's an exam to pass that requires personal work: around 100 to 150 hours of personal work between now and beggining of July 2016. So look what is on my nightstand:
[image: WP_20160127_001_1024.jpg.6d0789de1d6879a836a224fe956ce871.jpg]
The Haynes just arrived today, but my concern is on the left side, that's like 560 pages... Hopefully, I already started stydying.
My point is the VFR restoration will suffer (a lot) until I complete the program but will keep it to clear my head when needed. I'll keep posting my progress(es) here and let you know how things are going (and of course keep reading the forum).
Thanks for reading 😉
Edited June 7, 2018 by bdouvillGotta do what you gotta do to earn your checks. More income means more money for your project some day hopefully ;)
atxGotta do what you gotta do to earn your checks. More income means more money for your project some day hopefully ;)
Sure ;-) It means more money at some point in the future (just don't know when exactly yet). And when I'm done (mid July this year), then definitely more time to spend in the garage!!!
So I spent 2 hours this Saturday in the garage. First, I was able to remove pretty easily the old lower inner bearing race from the steering stem (to install tapered roller bearing instead).
Then I tried my bearing removal set. I was able to remove the 2 roller bearings off the front wheel and guess what... there was still some water inside the wheel 😞 Both bearings were dead, one was barely able to rotate (from let say 10 degrees max), the other was completely blocked. I also removed the 2 ball bearings from the right side of the swingarm, also both were dead, not able to turn at all (but they had no mark of rust or anything else).
Here is a pic of the front wheel spacer that goes between the 2 bearings:
[image: DSC_0293_1024.JPG.12ef72590be2086276f64fb43df9a811.JPG]
The metal is corroded, and I believe sanding it (with proper sand paper) will not be enough, I'd rather replace it.
Then, I was not able to remove the needle bearing on the left side of swingarm. The manual states you need to insert a driver from the other side and press it out but you can barely touch the back of the bearing due to the shape of the recess behind the bearing. Does anyone have an idea of the shape of the needed driver? Maybe I see with the dealer close to me if he can arrange to remove it.
Edited June 7, 2018 by bdouvillBen,
I think I had a shop replace my bike's swing arm bearings, but I have since acquired some Facom bearing pullers, for use with a slide hammer.
The internal bearing pullers look a bit like this set off eBay:
Of course, a friendly dealer would be the easiest option! Probably cost just a few euros, if you just bring in the swing arm--not attached to to bike!
Ciao,
Guess what, I am not dead :-) I just keep on working to prepare my exam in June.
Since my last post, I sourced some rear bearings and let my mechanic handle those I would never be able to handle myself (without an hydraulic press). I meant especially the rear hub (2 bearings), the rear sprocket (1 bearing). Also, I was not able to remove myself the needle bearing from the swingarm and I asked him if he could put an insert for the frame thread I broke when I removed the side stand.
[image: 20160312_092153_1024.jpeg.5e298ee7a131cdc35d86fda1f0e3f2d8.jpeg]
For the rear hub, I went for the original needle bearing (with integrated inner seal) but I replaced the ball one (a double 12mm thickness bearing that you can not find anywhere else than at your Honda dealer) with 2 12mm ones (16€ each). For the rear sprocket, I also went for replacement Japanese quality bearing (20€)
On that picture, you can see the state of old bearings, none of them is functional...
[image: 20160516_112844_1024.jpeg.30ffca55e23a26a17ba06527556acb46.jpeg]
Note that when removing the swingarm needle bearing, the mechanic broke his (professional) bearing puller 😞
Even with the new one, check what's left from the bearing... The swingarm also exhibits some traces of heat near the bearing location.
Edited June 7, 2018 by bdouvillGreat to hear you are alive :) . I enjoy reading the rebuild threads, great work so far!
Back to business ? PMP exam was last Saturday, results will come later this month or early next month.
So I took the opportunity of our National Day here in France to try to open this engine that has been sitting on my balcony since at least last Christmas. This has been bothering me for too long now...
So I removed the cylinder head covers and the cams but got stuck when I tried to remove the cylinder head bolts... My 12 mm (pretty standard Facom) socket is too thick to reach any of the bolts. Same story for the 2 10 mm bolts. Anyone has an idea of what kind of socket I would need for that?
I'll post some pictures tomorrow or on Saturday.
Sounds like you sleep on it and you find the answer ;-)
My Facom ratchet uses a 1/2 square (which is pretty standard, at least in my mind). It comes from my grandpa who was a mechanic ;-) I also have 1/4 which is too weak for that. I just realized that I probably need a solid 3/8 extender and 3/8 square sockets (both in 10 and 12mm).
Edited July 15, 2016 by bdouvillA few pics from yesterday, I know you guys enjoy a lot 😉
This is exactly where I can not insert my 1/2 12mm sockets to untighten the cylinder head 😞
[image: 20160714_141153_1024.jpg.ce4c35a84cd515979923c151b2288f6c.jpg]
[image: 20160714_144406_1024.jpg.1aa4903ce1948bebdaaa24402340b780.jpg]
[image: 20160714_144538_1024.jpg.cefdac42f81c7572b22fc8ffc16ceda8.jpg]
I removed the clutch plates to clean them. I am not experts but all friction plates look like the pictures below and seemed pretty toasted to me... Also, the bearing in the middle does not rotate freely and is probably dead as well... I need to figure out how to separate it from its axle.
[image: 20160714_150139_1024.jpg.c52a39d7853bd8334f6148c4a0ce1e26.jpg]
Edited June 7, 2018 by bdouvillAwesome read - keep up the good fight @bdouvill - it'll be worth it when it's finished!
Clutch friction plates look a bit fried. I replaced mine with a Barnett kevlar clutch and the bike felt like it had picked up a few hp.
I think a 3/8" drive socket might do the job for the cylinder head bolts.
Great work so far!
I think i have that clutch baring at home, will check on saturday if you have not alraeady sourced it (or it cannot be sourced in France)
Clutch friction plates have a minimum tolerance, check the manual.
I separated gently the bearing from its axle. It is a pretty standard Koyo 16003 (35x17x8), only 9€ at a bearing specialist (I still have other to sources).
@Dutchy Thanks for the offer anyway ;-)
For the clutch plates, they are within tolerances according to Haynes manual (around 3mm when service limit is 2.5mm). Spring are within the tolerance as well (all are around 4.32mm long when service limit is 4.12mm). EBC clutch plate kit (CK1206) can be found at 55€ on the net and clutch spring kit (CSK028) at around 10€ only. On the other side, Barnett clutch kit seems attractive but for the moment, I only found it from the US at around 135$ (delivery to France + custom charges will increase that a lot). I will think about it.
To remove the clutch center nut, there's a special tool required. I looked like the one use to remove the swing arm nut but obviously, this does not work. That would have been a good opportunity to check on the needle bearing behind the drum :-(
For the cylinder head, I ordered some Facom 3/8 long sockets;
While waiting for my special 3/8 sockets to arrive, I decided to clean up the swingarm a little bit. A few month ago, it was like this, remember?
[image: WP_20151225_023_1024.jpg.dcbcb9b69ff9d383a7067f77a64c038d.jpg]
Now that all parts are removed and that I cleaned it up, I found some strange marks that makes me think the swingarm is originally painted and some chain cleaner has been sprayed and ate the paint, what do you think?
[image: 20160721_202447_1024.jpg.26f09da7dfb6124c9a7fe45160c33991.jpg]
[image: 20160721_202453_1024.jpg.7436f0c51406cc5f1527770e7b38781e.jpg]
[image: 20160721_202458_1024.jpg.53bc427f12220448b232c9b8a3027e3d.jpg]
Should I try to clean more and spray it? I Don't really want to go for full professional quality sandblasting and painting. Any tip to do something clean?
Thanks a lot in advance for your feedback 😉
Edited June 7, 2018 by bdouvillSomething may have etched into the aluminium--I don't think the swing arm is painted or laquered, but I suppose it could be.
Some of my bikes are Datatagged in ridiculous places like that...Grrrrrr. Makes me angry every time I see it. What were they thinking?
Ciao,
So I received the Facom 3/8 sockets and the 1/2 to 3/8 adapter. Here is what I used to untighten the rear cylinder head:
[image: 20160722_192139_1024.jpg.487a98c0c21c3a27086d6094daf0480c.jpg]
I used the socket in the middle for the 8 12mm bolts. I was able to remove the 2 10mm bolts with a 1/2 10mm socket with 1/2 extender because there is more space around the cam gears. I also used a vacum cleaner pipe to increase the lever 😉
Here is the inside of the 2 rear cylinders:
[image: 20160722_192034_1024.jpg.cd706ea3ff010abbca944cc07452781a.jpg]
The picture is not really good.
Against what I thought, there was no mud inside, only carbon deposit on the top of the cylinders. The sides were really clean, no marks, except carbon deposit on the top, from the top position of the cylinder to the head (like 2-3mm). After I cleaned just a little with soft tissue/kitchen towell, it gave me this:
[image: 20160722_194320_1024.jpg.0439379515a0e695f45b48bf7e6b78cf.jpg]
The thing is I now think it was not really needed to open it and I will not open the other side. It will take definitely more time to clean the surface on both side to put a new cylinder head gasket than it took to clean the inside of the cylinders. But I had to see it, now I know. I will order one cylinder gasket and 2 gasket head covers.
I also remove the cam gear (you got it between the 2 pictures above).
[image: 20160722_194303_1024.jpg.31789ff6417673fcdf4f212374c44e99.jpg]
You can see on the right that I started to clean it. That is really strange: I don't know if this comes from the mud that mixed with the old oil of from 23 years of poor service... Anyway, I'll try to open other covers to try to clean the most of this crap.
To be continued...
Edited June 7, 2018 by bdouvillGreat work bringing the 3rd gen back to life.
Hey guys,
It's been a long time since I gave some news here. In September, I was on holidays for 2 weeks but I decided to focus mainly on the maintenance of my Bandit. It took many many days, I changed the cooling hoses for some silicone hoses, changed the cylinder head cover gasket to cure some oil leaks, changed the carb seals and checked the valve tolerance. Since I dismantled the cards, I had a lot of troubles when I put them back, the bike started at no less than 4000 RPM... Anyway, I cured all my problems and went back on the VFR which is the point here 😉
Since my last update, my wife convinced me that since I had the engine out of the bike, I should open the second half and check the combustion chambers. So I ordered a second cylinder head gasket and open the other part. Found no more mud than inside the other side. But all in all, that was a good idea. Here are some pics:
Cylinder head gaskets. Did not order the 2nd one from CMS since shipping was killing it for only one part. Anyway, both seems original parts (or equivalent):
[image: 20160902_162513_1024.jpg.ac9e3e99f92da19aec08001bfc29ea54.jpg]
Front cylinders after cleaning:
[image: 20160902_162528_1024.jpg.7c4ba3b02c891c3e4b85455bebf2b8bb.jpg]
[image: 20160902_162536_1024.jpg.d6d05fda4d35ba8f886034bd4ee3bed6.jpg]
After I put the camshaft back. I oiled a lot the cams and especially the part where they rotate.
[image: 20161101_111129_1024.jpg.d5ce138c833d860335b9cc80786219e7.jpg]
Hopefully, I turned the crankshaft and checked because I put the intake rear camshaft in a wrong position (was shifted about one teeth) so I put in back into the correct position.
I also opened the rest and changed the paper seals. Look at all the crap that was at the bottom of the engine. I started to doubt about the amount of care this bike received before me.
[image: 20161029_115726_1024.jpg.16d674d0cbb4f0ab0fe2b4e21a28a187.jpg][image: 20161029_115739_1024.jpg.12a979bcb1c52933a65bcf5303dd2524.jpg]
Then after cleaning:
[image: 20161029_124956_1024.jpg.9c44e527dadc975fbdf6617dfd971c73.jpg]
Engine is now almost ready to go back to work (at least for a try). I am only waiting for a new clutch kit. I ordered an EBC SRC-003 kit.
In parallel, I finished preparing the swingarm. I put almost everything back and did my best to reduce those marks on the side.
[image: 20160828_141711_1024.jpg.eb4c2bc05d0a3abe71575089b22d7669.jpg]
[image: 20160828_141801.jpg.8437c528ea300c588e37a91d4b189120.jpg]
In the coming days, I will try to re-assemble the chassis, the swingarm, the fork and the wheels. I just sourced the missing bearings for the steering stem (both tapered bearings), the front wheel (with new dust seals) and for the clutch plate.
The engine has been on my balcony since December last year so almost a year. It's time to see if we can rev it a little bit. My plan for the coming weeks it to assemble it in the chassis, rebuild the carbs (I already have the Liteon kit) and try to fire it up (even without the pump and the tank - I have an auxiliary one). Then, I'll be first very happy and proud of myself, and second, I'll see what I do for the fork, rear shock and brakes.
See you later 😉
Edited June 7, 2018 by bdouvillThanks for the update. It looks like things are coming along nicely - everything looks great. Nice job!
1 hour ago, bdouvillThen, I'll be first very happy and proud of myself,
And so you should be. Great job. :fing02:
Bdouvill, only joined VFRD recently, so only reading this thread now.
Well done, amazing work and you're sticking to it.
I'm only going to make one negative or reflective comment....since you have found mud and water in pretty much every hole, and mud in the belly pan, I would be pulling the bearings caps off the crankshaft and checking there, also what about the oil pump?
You're doing all the right things by your bike and if you crank it over with dirt in it, all efforts wasted.
Glad I got to catch the tail end of this. Awesome...
Craig
Sent from my HTC_PN071 using Tapatalk
I can send you an (free) oil pump if you like, the one from redslut (RC36-2 1994-97)
Not sure of it would fit/is identical....
[image: 20160722_194303_1024.jpg?raw=1&key=c312c]
Are they spinning freely? They should be....
Mine came out "clean" so that dark brown is mud/water for sure..
after a little degreaser...
![]()
As I was not consulting the manual much in my disassembly for scrap, I did wack one with a rubber mallet as it was not coming out. I missed that one little bolt... :-)
So now I have one that really spins very very freely, the other one not so much...
Thanks a lot guys for all your feedback and support.
8 hours ago, ForbesBdouvill, only joined VFRD recently, so only reading this thread now.
Well done, amazing work and you're sticking to it.
I'm only going to make one negative or reflective comment....since you have found mud and water in pretty much every hole, and mud in the belly pan, I would be pulling the bearings caps off the crankshaft and checking there, also what about the oil pump?
You're doing all the right things by your bike and if you crank it over with dirt in it, all efforts wasted.
Glad I got to catch the tail end of this. Awesome...
Craig
Sent from my HTC_PN071 using Tapatalk
I understand your concern but I am not so worried. When I drained the oil from the engine, it has been contaminated by water but everything came out. All the walls inside the engine have a very thin layer of very old oil, as you can see on the cam gears. I did my best to degrease everything that I could.
On the contrary, the bottom of the belly pan had something I would call a skin of old oil (like cream forming on top of milk or sometimes in paint containers that have been used before, you can find the same kind of layer of paint on top that became more or less solid). I believe basically this is because no one ever removed the belly pan since 1993. Hopefully, this was not sucked by the oil pump so I expect that no "solidified" oil went into the oil galleries (to lubricate the crankshaft and the gearbox shafts). Checking that would mean splitting the case in two which is a lot of work (and troubles). For example, I have no idea where to find the socket to remove the clutch gasket. But I take the advice and will check on the oil pump as soon as I can. Depending on what I find inside, I'll advise.
@Dutchy
Thanks again for the proposal (for the oil pump) ;-)
21 minutes ago, Dutchy[image: 20160722_194303_1024.jpg?raw=1&key=c312c]
Are they spinning freely? They should be....
Mine came out "clean" so that dark brown is mud/water for sure..
after a little degreaser...
![]()
As I was not consulting the manual much in my disassembly for scrap, I did wack one with a rubber mallet as it was not coming out. I missed that one little bolt... :-)
So now I have one that really spins very very freely, the other one not so much...
For the cam gears, I got them clean with brake degreaser. One of them was not rotating freely, but some WD40 and some fresh oil later, works great again. I rotated the crankshaft like at least 2 times 720 degrees, works without efforts and camshafts are properly synchronized, no worries about that :-)
As promised, I checked the oil pump. I opened the oil pan again and removed all the pipes. I did not remove the pump since removing the bolt on the gear that is driving the pump means removing the main clutch gasket. There's definitely nothing to worry about but that was a good idea. I found a little bit of contaminated oil in the small pipes and water trapped into the oil filter :-( I cleaned everything and put a new oil filter.
Some pics
[image: 20161120_153728_1024.jpg.2965c39b99b03f68d48fa8bd67c34f0e.jpg]
[image: 20161120_153712_1024.jpg.d55438283dc8268e31876171ac3e6698.jpg]
Clutch kit is on its way. I should be able to mount it next week-end :-)
Edited June 7, 2018 by bdouvillClutch received and mounted last week-end:
[image: 20161126_113150_1024.jpg.b50aed9bacbe32234cf345f4df11e2c5.jpg]
I let clutch plates in fresh oil to wet them:
[image: 20161126_113201_1024.jpg.718567c1aae63e11d5c2912925d50d5d.jpg]
Now, engine is back in the garage. It left my balcony after almost one year :-)
Re-assembly started almost at the same time.
New stem bearing (thanks to @JZH again for all the info about the bearings):
[image: 20161119_123529_1024.jpg.5edc73eb80fddc63957829b160c838fd.jpg]
[image: 20161120_114725_1024.jpg.e106e959c8ba5a790daeabe68e166c9b.jpg]
Already assembled frame, swingarm and rear suspension:
[image: 20161130_193703_1024.jpg.6640e73f0468087440863b06e3d810b5.jpg][image: 20161130_201032_1024.jpg.db190d47155f37c4c1797388453e8f5e.jpg][image: 20161130_201050_1024.jpg.e4b908c1382115872af50e53ef46133a.jpg]
I could not resist in putting back the rear wheel (it's sooooo beautiful):
[image: 20161130_201756_1024.jpg.218a22540bf2ca3dba4e4ef77504010c.jpg][image: 20161130_201830_1024.jpg.1c255cb17eeb40296d84722eaec90ddf.jpg]
Next step is putting back the engine in the frame. I hope to do that next Saturday 😉
Edited June 7, 2018 by bdouvillShe's going to be better than new. :fing02:
RC36Rider She's going to be better than new. :fing02:
bdouvill, 11/30/2016 at 9:53 PMNext step is putting back the engine in the frame. I hope to do that next Saturday 😉
And this is done!!!!
[image: 20161204_171309_1024.jpg.b6e50c17a6c6beef5ae48bd6a7f47d26.jpg]
I have to warmly thank Josh for his time and patience on Saturday and Sunday. On Saturday, we tried, every piece found its place except for the upper front right bolt, engine and frame were absolutely not in line. After reading carefully the Haynes manual, we gave it a shot on Sunday, fought a little bit but came out victorious!
I still have plenty of stuff before hearing it rev again. To be continued 😉
Edited June 7, 2018 by bdouvill
Updates from last week:
- Cleaned and put back front sprocket
- Cleaned lower triple clamp rust marks on fork tubes and put them back on the bike together with the front axle
- Put back the oil radiator after I cleaned it
- Put back the gauges
- Put back the tail frame
Here are a few pics:
[image: 20161210_140507_1024.jpg.ebc476902d59b72d29ace403645f347b.jpg]
[image: 20161210_141130_1024.jpg.9da37d5f22b40d51755c0e00f240e968.jpg][image: 20161210_161151_1024.jpg.05212ac646f643e5a805940875c2e12b.jpg][image: 20161210_161227_1024.jpg.f7eeebf1fa1c97b67f13d6f91bacb526.jpg]
Concerning the front fork, I put it back knowing that I'll remove it later. Fork seals clips are completely rusted and need to be changed. I'll take the opportunity to change the oil seals as well and the dust seals, and the inner bushings. The oil is probably from 1993 according to the V shape of the front tyre. And I plan to go for Racetech compression valve... and maybe all of that on a VTR fork if I can find one at a decent price.
I also carefully inspected the wheels. Hopefully, they have no dents, only a few scraches to the original paint (like on the picture below, see on the left).
[image: 20161210_133603_1024.jpg.031bcfa4dc23e1ddebc8b9bfe1a73150.jpg]
That gives me 3 options:
1/ Get them epoxyed
2/ Get them painted
3/ Paint them myself (paper sand, wheel spray and lots of time/effort)
I'll ask for some quotes as soon as I find a decent car/motorcycle painter and an epoxy professional in my area. That can wait until I figure if the engine can run. I am not concerned with the engine now, more with the electrical magic I'll find...
On the bad side, I found that cooling radiator is slightly leaking apparently on the left side. I need to check carefully as well...
Edited June 7, 2018 by bdouvillHow good does it feel bringing something back to life! Keep it up, enjoyment around the corner.
Sent from my HTC_PN071 using Tapatalk
The last 3 week-ends brought visible changes. It starts to look like a bike after one year completely torn apart. Feels good :cool:
1 hour ago, bdouvillAnd I plan to go for Racetech compression valve.
Your forks have old style Showa 3 port pistons which are fairly similar to RT's Type 1 Gold Valves.
If you want stiffer compression damping, get some extra .15 x 17 mm shims. Much cheaper than a GV kit.
1 hour ago, bdouvillThat gives me 3 options:
1/ Get them epoxyed
2/ Get them painted
3/ Paint them myself (paper sand, wheel spray and lots of time/effort)
AFAIK, getting them professionally epoxied costs about 80 € including sand blasting.
The very cheapest DIY paint job will likely run you 30 € in materials and quite a few hours of tedium for a result that might not be as good or durable.
Unless you actually highly value doing it yourself, it's just not worth it IMO.
5 minutes ago, RC36RiderYour forks have old style Showa 3 port pistons which are fairly similar to RT's Type 1 Gold Valves.
If you want stiffer compression damping, get some extra .15 x 17 mm shims. Much cheaper than a GV kit.
Got it! I have read gold valve installation multiple times, including yours. Any idea where I can get extra shims online?
Also, I have a spare pair of 0.85kg/mm Racetech front fork springs. Bought them for my Bandit 400 according to Racetech online calculator. It turned it was way (waaayyyyyy) too stiff so I switched to 0.80 which was at the time the lightest available and are ok to live with. I think that 0.75 would be perfect, they are available from Racetech now.
Good thing is they are compatible with 3rd gen. Racetech calculator tells me to go for closest to 0.93 kg/mm for my 3rd gen so with my experience, I'll give my 0.85kg/mm a try and determine if I need to go to 0.90kg/mm or not.
AFAIK, getting them professionally epoxied costs about 80 € including sand blasting.
The very cheapest DIY paint job will likely run you 30 € in materials and quite a few hours of tedium for a result that might not be as good or durable.
Unless you actually highly value doing it yourself, it's just not worth it IMO.
If this is less than 100 € per wheel, I won't bother doing it myself. Thanks for the info.
3 hours ago, bdouvillIf this is less than 100 € per wheel, I won't bother doing it myself. Thanks for the info.
What I have heard is about 80 € for both wheels. Might have been quite a few years ago, though.
Worth getting a quote at any rate.
3 hours ago, bdouvillAny idea where I can get extra shims online?
They are not overly easy to source in small quantities. RT sell packs of 10 for $16 or so but I think they charge quite a lot for shipping.  :huh:
25 minutes ago, RC36RiderThey are not overly easy to source in small quantities. RT sell packs of 10 for $16 or so but I think they charge quite a lot for shipping.  :huh:
So it depends on how many of those packs I might need to adjust compression and rebound stack.
Found interesting stuff reading this post again (@RC36Rider this is the one I mentioned as "your post", thought it was you who created it).
Just in case I found a way to source those shims, can anyone indicate me what is the inner diameter of those shims for 3rd gen fork - both for compression and rebound? According to the pics in this post, I would say 6mm...
Yup ! 6 mm ID, 17 mm OD for the face shims on both comp and rebound.
I might have jumped the gun a bit. You need smaller OD shims to build a tapered stack which you apparently don't have in the stock forks.
44 minutes ago, bdouvillJust in case I found a way to source those shims
Do share, please. :smile:
I have been looking (on and off) for a cheap and easy online source for us in Old Europe but couldn't find one. :wacko:
5 minutes ago, RC36RiderYup ! 6 mm ID, 17 mm OD for the face shims on both comp and rebound.
I might have jumped the gun a bit. You need smaller OD shims to build a tapered stack which you apparently don't have in the stock forks.
Do share, please. :smile:
I have been looking (on and off) for a cheap and easy online source for us in Old Europe but couldn't find one. :wacko:
For sure I will :wink:
Regarding the number of shims required, you can download the RT instruction sheets right here on VFRD:
Compression
Rebound
I gather that you are not looking for a rock hard setup so I'd say you won't be needing anything beyond C35 / rH19 at most.
Edited December 13, 2016 by RC36Riderbdouvill, 13/12/2016 at 11:05 AMFor sure I will :wink:
Not that I'm in a hurry but...
For some reason, I never until now searched for French Websites. Silly me. :wacko:
I found these two so far:
Any other address to share ?
17 hours ago, RC36RiderNot that I'm in a hurry but...
For some reason, I never until now searched for French Websites. Silly me. :wacko:
I found these two so far:
Any other address to share ?
@RC36Rider I completely understand, my first reflex is always to ask Google in english :wink:
So far, I spent little time on that but only bookmarked US and Australian providers... Thanks a lot for sharing those links :cheerleader:
Quick question for the experts concerning my (coolant) radiator:
Will a 4th gen model fit my 3rd gen? I can found some on Craigslist here at reasonable price but I am not sure it will fit. Honda's reference is different between 1993 (19010MT4003) and 1994 (19010MZ7003). Would the rest (like fan brackets, coolant lines,...) fit?
Thanks a lot.
The only difference i know of is that the overflow pipe, just below the filler cap, is facing forward instead of backward on the RC36-II.
That is why i want a RC36-I one for a cleaner look on a naked RC36-II.
for other options: http://www.vfrdiscussion.com/index.php?/forums/topic/84635-any-other-rads-fit-the-4th-gen/
They look the same to me, and I've just bought an alloy replacement radiator for my 3rd gen that is supposed to fit all of the RC36 models (a "Worley", just like the one shown in the thread linked to by koekum), but as I have a 3rd gen, I never noticed the position of the overflow tube (it is the same as my OEM!)
Ciao,
Thanks to @koekum and @JZH for those clear inputs. The super cheap I found (less than 40 euros) is for a 4th gen with the overflow pipe going forward when it goes backward like the main coolant pipe on my 3rd gen.
I will try to check for leaks again and eventually try to fix it (will give LOCTITE EA 3455 a try). If that does not work, will start to chase for a spare one or a new Chinese one.
Hi there,
Some news. I tested again my radiator and found no leaks... I put the lines on and filled them with water to add some pressure. Seemed good to me.
[image: 20161227_121833_1024.jpg.35d073bf27549e6d0297314364e9044a.jpg]
Now I put back the wiring harness (what a mess...) and found that I had a tiny part missing. Could anyone give me the Honda reference for that part going from the neutral switch to the main harness? I took me some time to understand that this was missing and caused the starter not to start. Look at my McGyver option here 😉
[image: 20161227_172246_1024.jpg.43255b655861feb3e5293e5b16614cc5.jpg]
With that, then starter went back to life but the battery went in smoke right after... Need to get a new one.
Edited June 7, 2018 by bdouvillI had a spare dead battery from my friend 675 Street Triple. Charged it for almost 24h before it was fully charged. Mounted it in the VFR and (drum sound) tadahhhhh starter rotated the engine!!!! I have spark on the 4 cylinders. I put the new sparks plugs that I have.
For the previous question, I asked because I did not find this part on Honda exploded views (but I tried). For the time being, my McGyver wire can do the trick but I need something more reliable to ride it.
Awesome, back from the dead...
Sent from my HTC_PN071 using Tapatalk
bdouvill, 28/12/2016 at 7:39 PMFor the previous question, I asked because I did not find this part on Honda exploded views (but I tried). For the time being, my McGyver wire can do the trick but I need something more reliable to ride it.
I had a long hard look at the parts fiche for the 3G and could not find that piece of wire either.
I then checked on my 4G and the wire that goes to the neutral switch comes straight out of the pulse generator wiring loom.
Are you positive that you have routed it correctly ?
@RC36Rider thanks a lot for checking ;-) I am sure, there is the same kind of wire from the water temp sensor to the main harness, as you can see here:
[image: 20161227_153815_1024.jpg?raw=1]
This one is green as mentioned in the wiring diagram - look at the picture background ;-) - so I expect to have one black for the neutral switch but I don't have it...
I considered carefully the parts fiches but can find any (neither the temp one nor the neutral one)...
Mine connects directly to this bit here:
[image: sketch-1483119778229.png]
The extra piece of wire that connects to the temperature sensor is #18 on the wiring harness fiche.
I wondered about it as well as it does indeed look like the bit you're missing.
All I can say for sure is that my 4G has the same (odd) extra wire to the temperature sensor as yours but no extra wire to the neutral switch.
Edited December 30, 2016 by RC36RiderBesides, it looks like the extra wire and its connectors are explicitly drawn on the wiring diagram :
[image: sketch-1483129952759.png]
No such symbols to be seen for the neutral switch.
bdouvill, 12/28/2016 at 10:59 AMNow I put back the wiring harness (what a mess...) and found that I had a tiny part missing. Could anyone give me the Honda reference for that part going from the neutral switch to the main harness? I took me some time to understand that this was missing and caused the starter not to start. Look at my McGyver option here ;-)
[image: 20161227_172246_1024.jpg?raw=1]
With that, then starter went back to life but the battery went in smoke right after... Need to get a new one.
Is that the correct wire? Here's the other end of mine:
[image: 20170104_122305x.jpg]
The fabric-sleeved wire goes directly to a female bullet connector that attaches to the sender.
Could your wiring harness be incorrectly positioned?
(And you're missing an M6 bolt!)
Ciao,
@JZH the black wire on my own picture is the other side of the one displayed on your picture for sure. This is the part displayed on CMS picture in @RC36Rider post. So I am pretty sure of me ;-)
The 10$ question is what is the reference of the missing wire???
And you are right, I have a missing M6 bolt. The beginning of the thread is damaged, I have to find a slightly longer one. I have a spare one like 1 cm longer but it's too long...
RC36Rider's pic is a little misleading, because the wire he circled looks like it is going the wrong way. It goes down, directly to the neutral switch on the lower engine casing. There is no missing wire! I think your wire routing must be the issue.
PM me your address and tell me the length(s) of your missing bolts. I have them all and would be happy to post to you, gratis.
Ciao,
Finally understood that I probably misrouted the whole connector and that nothing is missing. Will have a look this week-end ;-)
I hate to say "I told you so" but... :goofy:
:laugh:
Problem solved. Thanks to both@RC36Rider and@JZH for your help.
Next is carbs rebuild [image: emoji6.png]
Envoyé de mon SM-A510F en utilisant Tapatalk
I could not resist to put a picture. I got 2 words for you... Gold Wheels!!!!
[image: 20170119_122250_1024.jpg?raw=1]
I'll try to take better pictures this week-end if the sun comes back ;-)
Also carb rebuild is done, got to post the pictures as well.
8 hours ago, bdouvillGold Wheels!!!!
Nice ! :fing02:
Freshly powdercoated ? How much ?
Got them sandblasted, prepared and powdercoated in a small business next to my place :-) I paid 90€ ex-VAT per wheel but it's well executed. They did not paint the front wheel bearing location nor the threads used to mount the brake discs. They can also sandblast my exhaust pipe. Will do that in a month or two, that did not prevent to try to start the engine with the exhaust pipe as it is now.
Got to get some rubbers mounted now. I trashed the front one but kept the rear one: it's outdated (made in late 2011) but not really used (except it is a little bit dry now). I will use it for now in order to remount the bike and change it when it's fully running. Will save some € until then...
Looks sweet!
You should scrape the paint off the mating surfaces for the rear wheel and the drake discs, though.
Ciao,
I got a weird thing with my front disk brakes... The center of the disk is painted in black but got some scratches and I found this would be bad with freshly painted wheels. I cleaned them with brake cleaner (the exterior face only) and the black paint just vanished!!! See the pics:
The back:
[image: 20170128_123129_1024.jpg?raw=1]
The front after I applied brake cleaner...
[image: 20170128_123107_1024.jpg?raw=1]
I can clean them better, I know that ;-)
I just wonder whether the inner part is likely to rust with humidity (so I need to repaint them with proper paint) or not. It is likely to see brake discs completely rusty after the rain but it goes away as long as you use the brakes again. It does not apply to the inner part unfortunately and that would be kinda ugly - that would ruin the work on the wheels.
I will let the one on the pic outside for a couple of days and see what happens.
I cannot imagine that brake cleaner can do that to the OEM finish. :ohmy:
I'd guess they have been repainted with shoe polish applied with too stiff a brush hence the "scratch" marks. :laugh:
Joke aside, it could be that you have merely stripped them back to the OEM finish although I must say it looks a bit bare in the "after" pic. :unsure:
Few pics of the carbs. I rebuilt them a few days ago.
When I opened them, found plenty of mud in each carb fuel reservoir...
[image: 20161230_112125_1024.jpg?raw=1]
[image: 20161230_112132_1024.jpg?raw=1]
[image: 20161230_113911_1024.jpg?raw=1]
So I had to split everything to clean properly anything including the fuel line.
[image: 20170102_124326_1024.jpg?raw=1]
I used a Litetek kit that I ordered at the same time as the one for my Bandit 400 last summer. So yes, I already knew what a pain it can be to put everything back together, especially being sure the balancing mechanism ensure full range of motion around the balance point.
[image: 20170114_152040_1024.jpg?raw=1]
Putting back the top plate (that was removed by the previous owner) what a real PITA. I hope I don't have to split them again...
[image: 20170114_162839_1024.jpg?raw=1]
Next is putting the bike on its two wheels (I don't feel confident with the front stand) so I can put the carbs and the exhaust back and see how it goes. I'll see for the fork after that.
Not sure where the bike came from but I've rebuilt a lot of carbs and a pair from an airhead BMW from Texas had a lot of dried brown stuff in the float bowls. Some of it comes from contaminates in the gas. If the bike's been sitting, check the tank with a good led light and see what's inside. Metal Rescue (from Amazon) is a great product for getting rid of rust. Good luck.
25 minutes ago, Mac MorganNot sure where the bike came from but I've rebuilt a lot of carbs and a pair from an airhead BMW from Texas had a lot of dried brown stuff in the float bowls. Some of it comes from contaminates in the gas. If the bike's been sitting, check the tank with a good led light and see what's inside. Metal Rescue (from Amazon) is a great product for getting rid of rust. Good luck.
The bike has been flooded in 2 meters of water (and lots of mud) for at least 3 days, see the 1st page of this thread and you will get it ;-)
Apart from that, the inside of the carbs is quite ok for a 24 year old lady.
Things are progressing and this starts to look like a bike. I was even able to get it out of the garage ;-)
[image: 20170211_160100_1024.jpg?raw=1]
[image: 20170211_160222_1024.jpg?raw=1]
I am having troubles with the carb throttle cables. My bandit 400 only has one cable and this is easier to set... I found the cable routing drawings from the Honda manual not super clear so I have some doubts. Nevertheless, there's something wrong. When I am at full turn on the right, I open the throttle and it does not come back at all. No problem when turning on the left.
[image: 20170211_161116_1024.jpg?raw=1]
[image: 20170211_161109_1024.jpg?raw=1]
[image: 20170211_161054_1024.jpg?raw=1]
Can someone have a look at my pics and tell me if something is wrong? In particular, I don't like how the 2 cables get out of the frame. The upper cable is bent has the pics show and this might be the reason why the throttle does not come back when cables are tights.
Thanks a lot in advance.
Some news. Most important is that it fires!!! :cheerleader:
Okay, not for long cause I have gas supply issues. Plus the exhaust header is not bolted at the back, that's a pain in the ass to do especially since the 2 front parts don't want to separate from the rest and that I plan to get the header sandblasted. So exhaust gas is leaking from the back and it's really loud... Anyway, already a good point, isn't it?
I solved my throttle cable issue, just tension that was not correct.
Current issue is gas pump is simply not pumping... I googled and understand I can bypass the gas pump relay which I did. So I don't know if the relay itself is working but when I bypass it, I have +12V at the pump connector. So I guess it's simply not working.
Here is the inside:
[image: 20170311_142209_1024.jpg?raw=1]
[image: 20170311_142216_1024.jpg?raw=1]
Any advice? I believe I can change the mechanism only but I don't know if it's worth it. Spare pump might be more or less in the same condition.
Also, the interior of the tank definitely needs a lifting ;-) I consider buying a tank restoration kit from Restom. Did that on my Bandit (long ago before gravity got me and the tank felt in the garage...) and that works really well.
It will run fine without the fuel pump, except for the last few liters.
What you could do is 1st get is roadworthy and once you go on a longer tour, knowing that fuel level is empty, take a 5 liter jerrycan with you. that way you know what mileage you can expect end either live with that or spend $ on a pump....
You probably need a new pump, but the points can be replaced with an optical trigger made for a KTM 950, I think it is. A dutch guy on ADVrider sells them.
Ciao,
Thanks for your inputs @Dutchy & @JZH. Will wait to cure the pump for now.
I removed the exhaust pipe in order to get it sandblasted then will spray it with high temp paint.
Will also remove the front fork for inspection, change of oil/bushing/seals and review of the compression/rebound stack.
Wow nice thread! Im glad I found it. Question with the carbs. I just did the same with mine rebuilding with the Lite Tek kit. Now putting them back togeher Im having a tough time getting the choke slides to function properly. I imagine the carbs are ever so lightly twisted or out of line (even with both plates on). If I losen them, I can get them to function properly but once tightened they seem to adjust and lock up.
any pointers on putting these back together?
@NISxMO I know what you mean. All I can suggest is that you start with disconnecting the choke mechanism for carbs #2 and #3. This is done by unscrewing the 2 bolts noted #34 on this diagram:
http://www.cmsnl.com/honda-vfr750f-1993-p-france_model5630/partslist/E__1600.html#results
Then choke lever should at least open correctly carbs #1 and #4 with the 2 long arms noted #22. If that works ok, then you have to adjust the position of smaller arms #20 one remaining carb at a time. You should then be able to open all 4 carb lever with the left hand side bar lever.
I hope it helps.
Just removed the 2 fork legs. Only open one that had the fork seal leaking.
This is how oil of a never serviced fork looks like: like engine oil way over the service due milage... I would guess service was needed somewhere at the end of the 90's (remember we are in 2017?)
[image: 20170325_145314_1024.jpg?raw=1]
Fork seal is... I have no words to describe it:
[image: 20170325_160203_1024.jpg?raw=1]
Bushings look normally worn to me, will change them anyway.
[image: 20170325_160317_1024.jpg?raw=1]
This is how far I was able to go:
[image: 20170325_160103_1024.jpg?raw=1]
I understand the right part is where the magic happens (as Dutchy would say). I did not understand how to dismantle this assembly (noted fork cylinder assembly in the manual).
Does anyone has an idea on how to proceed?
Google gave me the answer:
http://www.vsource.org/VFR-RVF_files/BVFRforkservice.htm
Here it the bottom of the cartridge:
[image: 20170326_122843_1024.jpg?raw=1]
You can just push the bottom part - which is in fact the compression rod - with your finger. It is retained with a C clip:
[image: 20170326_122928_1024.jpg?raw=1]
Remove it and you can separate the whole assembly ;-)
[image: 20170326_123924.jpg?raw=1]
Have to order the Honda parts: fork seals and bushings, dust seals. And extra shims to upgrade the compression and rebound stacks. Will also order a fork seal driver :-)
To be continued...
I found some water inside the 2nd fork leg... I cannot figure out how, the fork seal was not even leaking...
Envoyé de mon SM-A510F en utilisant Tapatalk
Blimey, that fork seal is...beyond words! I think everything on this bike should be inspected--I wouldn't take anything for granted. (Check inside the tyres!)
Ciao,
bdouvill, 25/03/2017 at 4:32 PMFork seal is... I have no words to describe it:
Are you sure that needs replacing ? :goofy:
bdouvill, 3/25/2017 at 11:23 AM@NISxMO I know what you mean. All I can suggest is that you start with disconnecting the choke mechanism for carbs #2 and #3. This is done by unscrewing the 2 bolts noted #34 on this diagram:
http://www.cmsnl.com/honda-vfr750f-1993-p-france_model5630/partslist/E__1600.html#results
Then choke lever should at least open correctly carbs #1 and #4 with the 2 long arms noted #22. If that works ok, then you have to adjust the position of smaller arms #20 one remaining carb at a time. You should then be able to open all 4 carb lever with the left hand side bar lever.
I hope it helps.
Thanks Bdouvill! I took them apart multiple times and could not for the life of me figure out what was wrong, especially when the plates were all lining everything up..... in the end I realized the center plate may have lined up but it was actually flipped 180 degrees from the correct position.
Keep up the good work! Im enjoying following your thread!
JZH, 3/26/2017 at 10:03 PMBlimey, that fork seal is...beyond words! I think everything on this bike should be inspected--I wouldn't take anything for granted. (Check inside the tyres!)
Ciao,
Hopefully, I guess I now opened the last parts that was meant to be opened which were the fork legs... I had the tyres removed once to get the wheels restored so no more water there anymore...
The only thing that I did not touch yet (of all parts that I got) are the brakes (front and rear) as well as the clutch system (master cylinder + line + receiver). Will flush any fluid (will report if I find any water in there) and upgrade to new braided lines anywhere. Probably try to get quickly some Brembo Red pads (front at least).
Opened the cartridge yesterday and broken the compression and rebound stack:
[image: 20170402_181952_1024.jpg?raw=1]
[image: 20170403_081939_1024.jpg?raw=1]
Compression stack is on top, rebound on the bottom.
Got some questions for the suspension gurus here:
Where is the compression stack? C5 to C7 or should I include C3 and C4 (to replace with Racetech recommended tapered stack)?
Same for rebound: I would say stack is from C4 to C8 included but I am not sure I should count C9 to C12 as part of the rebound stack.
For the records:
C5, R7 and R8 are ID 6mm, OD 17mm, width 0.15mm
C6, C7, R4, R5 and R6 are ID 6mm, OD 17mm, width 0.10mm
Thanks a lot in advance.
5 hours ago, bdouvillWhere is the compression stack?
Strictly speaking, the comp stack is C4-7.
C3 is a spacer, C4 is the all important clamp shim which looks nothing but actually influences overall stiffness as it defines the fulcrum against which the other shims bend.
2 minutes ago, RC36RiderStrictly speaking, the comp stack is C4-7.
C3 is a spacer, C4 is the all important clamp shim which looks nothing but actually influences overall stiffness as it defines the fulcrum against which the other shims bend.
So I assume that - let say I will go for Racetech C32 tapered stack - that I should put this stack between C3 and C8, right?
5 hours ago, bdouvillSame for rebound:
Same story, R9 is the clamp shim.
The rest are spacers which you can add or remove depending on actual stack height. Their function is to make sure you don't run out of thread when tightening the nut.
The RT instructions mention this but if you're like me, you'll only understand them fully AFTER you're done. :goofy:
3 minutes ago, bdouvillI assume that - let say I will go for Racetech C32 tapered stack - that I should put this stack between C3 and C8, right?
Correct.
If I got it well, C4 to C7 will flex when the fork is compressing when C3 is too thick to bend. Same story on rebound, R4 to R9 will bend as well when R10 to R12 are too thick (on purpose) and are just here as spacers. Am I right?
Awesome work bdouvill, learning a lot reading this rebuild thread!
2 hours ago, bdouvillIf I got it well, C4 to C7 will flex when the fork is compressing when C3 is too thick to bend. Same story on rebound, R4 to R9 will bend as well when R10 to R12 are too thick (on purpose) and are just here as spacers. Am I right?
Almost correct.
The clamp shims do not actually flex either because their backs are fully supported by a wide, thick "spacer" but they are an integral part of the shim stack definition.
Wider and/or thinner clamp shims make the whole stack stiffer and, conversely, narrower and/or taller make it softer.
I guess you got the idea right but did not express it completely correctly.
Which oil grade should I use? My local shop should have Motul Factory Line in 10W, 7.5W, 5W and 2.5W.
Stock is Showa SS-7 which is a 5W. I'd stick with that viscosity grade.
Nothing wrong with Motul of course.
Edit: In case, you are not entirely happy with your shim stacks and begin to tinker, do stick with the exact same oil, though. There is really no need to introduce an unknown variable in the equation.
@RC36Rider thanks a lot for the inputs, very much appreciated.
Just ordered additional shims from http://motoshop-online.com - will start by upgrading the shim stacks and putting back together the 2 cartridges.
Ordered Honda inner and outer bushings from CMS, plus missing bolts here and there. Also ordered oil and dust seals from Louis.de, together 41mm oil seal driver and 1L of Motorex fork oil. Got to wait until all of this come to my place now.
A quick update. I received almost everything to rebuild the fork, but not all, so I still have to wait :-(
4 shims are missing from my order...
Here is a comparison of original and modified shim stacks for compression first then rebound:
[image: 20170415_143533_1024.jpg?raw=1]
[image: 20170415_144737_1024.jpg?raw=1]
For the new rebound stack, I will re-use the 2 0.15mm shims for a total of 5 (the 2 darker shims on the left of the Racetech stack).
Here are the inner and outer bushings, oil seals, oil seal driver from Louis.de (20€ only, will let you know if that what worth the price) and 5W fork oil. Still missing the dust seals.
[image: 20170415_145611_1024.jpg?raw=1]
No special pics for the 0.85 kg/mm Racetech straight rate fork springs ;-)
I got to buy a 32mm PVC pipe to cut some spacer since those springs are shorter than the Honda ones.
And I have a question to help me understand how to cut the spacers.
Which of those 2 settings is maximum spring preload? Left or right?
[image: 20170415_192814_1024.jpg?raw=1]
I would say left but I am not sure... :-(
4 hours ago, bdouvillI would say left but I am not sure.
Yup ! Left it is.
RC36Rider
Yup ! Left it is.
To come back a little bit on the fuel pump.
bdouvill, 3/11/2017 at 8:21 PMHere is the inside:
JZH, 3/12/2017 at 1:38 PMYou probably need a new pump, but the points can be replaced with an optical trigger made for a KTM 950, I think it is. A dutch guy on ADVrider sells them.
Ciao,
I contacted the guy on ADV Rider forum who is very nice. Speaking about my pump, he told me to check that the pump rod is still movable which is not (like not at all) so the pump is dead for sure. I might go for a chinese replacement that are like 30€ on ebay.co.uk (75€ for the same shit on ebay.fr...). I'd like to replace the original mechanical trigger with the optical trigger. Here is what he told me (apart the fact that my pump was dead):
Looks similar, not exactly the same. I cannot guarantee it will work, but it is likely to work.
(my kit has been used for several Hondas, including CBR600, carb version)
Biggest issue with the Honda's is that sometimes (like RD07a, Afrika-twin) they have a 'thyristor' fuelpump 'relais' in front of the pump (switching the 12V to the pump). It works when this is a regular fuelpump relais, but there are problems when this is a 'thyristor'version that gets its signal froim the ignition. There are a few solutions to this.. but all with their (dis)advantages.
Do you know if the original fuel pump relay is a basic one or a what he calls a 'thyristor' based one?
The fuel pump relay is called the "fuel cut" relay, and no, it is not a typical automotive relay. It is located next to the ECU on the LHS of the rear subframe; it is black with a white 3P connector. The good news is that it is potted and fully sealed, so if the connector contacts are okay, it should still work (assuming it worked before the bike got flooded!) This: 36100-MN4-008. (It is the same one used on the Africa Twin...)
I've never had one fail, or even heard of one failing, btw.
Ciao,
Small update.
I was finally able to put the fork back together. I received the 4 shims that were missing. I have the exact same shim stacks as per the previous pictures + 0.85 linear Racetech springs + 5W fork oil (set as per the manual: 175 mm more or less from the top of the fork).
Here is the difference between standard springs and Racetech ones, much shorter. I add to fabricate some spacers with 32mm PVC tube, around 80mm long to have approximately 10-12mm of spring preload.
[image: 20170527_172457_1024.jpg?raw=1]
[image: 20170527_172503_1024.jpg?raw=1]
Then here is how I MacGyved the fork leg to work alone ;-)
[image: 20170528_163839_1024.jpg?raw=1]
Small tip given by my good friend Thierry to be able to push the rod back and force to remove air:
[image: 20170528_163856_1024.jpg?raw=1]
Legs are ready to rejoin the frame. I ordered a spare fuel pump, it's on its way too.
Another basic question:
The clock light bulb is broken and I cannot figure the bulb reference or if this must come as one part (bulb and holder).
I was able to use a car one but it's too deeps and I cannot close the cover 😞
is it not #2?
[image: Knipsel.JPG.d2900a62e0243fdf2d2a3e8dde65245f.JPG]
hhhmmm "Clock Assembly is #18 but where in the Fiche is it??? :goofy:
Hi @Dutchy
https://www.cmsnl.com/honda-vfr750f-1993-p-france_model5630/partslist/F__0200.html#.Wx6-Ue6FM3g
#2 is the light bulb for indicators and dashboard lightening, this is a W5W. The lightening for the clock is #3 and apparently bulb comes with holder. If it's only a few Euros, I will order it with my next parts order. Unless I can find a standard reference since it looks a lot like this:
https://www.autobulbsdirect.co.uk/r509tybk-1.4w-t5-14v-1.4w-indicator-and-panel-bulb-black-base.html
Is this what you mean?
[image: PB120009.thumb.JPG.212ecffb30c4bf052b28d760701e2cea.JPG]
I don't have the fairing (or the cables--they're attached to the fairing) on the bike at the moment, but it's not complicated to get them to where they need to be at the tank.
Ciao,
11 hours ago, JZH Is this what you mean?
[image: PB120009.thumb.JPG.212ecffb30c4bf052b28d760701e2cea.JPG]
I don't have the fairing (or the cables--they're attached to the fairing) on the bike at the moment, but it's not complicated to get them to where they need to be at the tank.
Ciao,
@JZH I figured how they connect to the lever as we see on your pic, but I don't understand the route around the coil that is managing the left rear cylinder. I would appreciate if you could share some pictures [image: emoji16.png]
Envoyé de mon SM-A510F en utilisant Tapatalk
Sorry, the cables are off the bike at the moment, so when I re-fit the fairing I will have to figure it out again myself, but I've done it many times and I don't remember any problems?
Ciao,
And this is finally time for my first ride report, like for real folks!!!!
Date:
01 July 2018 - not far from 3 years after I collected her. Seemed like an eternity.
Conditions:
Fu$%ing way too hot in full (summer) gears. It was 02:00PM and like 30 degrees C (86 deg F apparently), no wind.
General idea:
Go to the gas station, put some gas and put tyres to correct pressure, and ride it in the neighborhood so if it stalls for any reason, I can push it back to home (neighborhood is more or less flat, rather more than less if I have to push the bike).
Rationale:
My baby Bandit (she still has no name) failed for various reason in various locations, lots of memories I'd like to avoid repeating. That includes no more gas (classical), forgot to open the reserve (also classical), broken throttle cable (that is scary when someone might be right behind you), fuel tap closing for no reason... on the highway (super scary), bike stalling when hot (ring on one of the 4 spark plugs got crooked between the plug and the engine so air gap when hot),...
Previously in this thread:
Current state is that engine is smoking some oil. My friend (the ex-mechanic) told me to ride it so we can assess whether this phenomenon drops with use or not. Then we assess what to do next (probably open the engine again and change the valve seats).
I rode only 1 km to the gas station, waited long in the sun to access the tyre air pump. Then I rode it for only 5 km and that was enough for the day. Here are my thoughts on this first ride:
- It starts well, even if not started for something like 10 days. Idle is good considering I never synched it with an angled screwdriver (remember I burnt my hand back in September last year). Overall, this is not bad.
- The Koso voltmeter in the cockpit is nice to have. For now, voltage stays in the 14.1V range when operating. I think I did a good job with the harness to adapt the Shindengen RR.
- The engine character is different from my 1992 Bandit 400 which is an inline 4. This is the only machine I have a decent experience with. I have it since 2010 and made almost 33 000 km with it (the odometer is currently around 99500 km). Next is 100 km I made with my friend 2008 Triumph Street Triple 675. I only rode Vivian for 6 kilometers this day and really slow (I only reached 60 km/h, in city), I don't think I went over 6000 rpm even once, more in the 2000 to 4000 rpm range and all l can tell for now is that is different. More vibey. I am pretty sure you might tell me this is Vivian's soul but I need to reset my mind because this is something else compared to the Bandit. Especially since I really like the smoothness of the inline 4 engine.
- Brakes: this is a problem. Rear is ok but front is nowhere near decent. Was ok when moving the bike inside the garage or at very low speed when I tested her but now that's a real issue. To be honest, I did not even flushed them (neither from nor rear) because as always, I am torn between doing everything at once (new braided lines, new fluids, new pads maybe, new seals surely) and doing things step by step. But since I want more experience with it, I will flush the front at the end of the week so I can ride it again and longer (and faster maybe).
- Now the real issue: the oil smoke. As long as you ride it, it's ok because you don't notice but when you stop, it's smoking like crazy. You can clearly see white smoke coming out of the exhaust and it stinks. It's worse than any scooter from any pizza delivery guy around here (for US reader: in France at least, those guys are still running 50cc 2 strokes scooter). This is why I stopped after only 5 km because you never know the oil level before the oil pressure indicator pops out. I thought that was enough in terms of emotions so I put it back in the garage.
I checked the oil level the following day and it was still to the maximum. Next is new fluid for the front brake then I try to ride it to work (10 km in the morning, 10 in the evening) and will check the oil level to see how it goes.
To finish, a few pictures. She looks like I got it from a demolition derby.
[image: 20180701_145412_1024.jpg.ca7d8aafd809bea1db9e26e47097aa10.jpg]
[image: 20180701_145357_1024.jpg.29e00c1eb4ac304f37373e91493e9c6b.jpg]
The 2 bikes together, I am officially suffering from multiple bike disorder 😉
[image: 20180629_181345_1024.jpg.4aefa83978da3543eb337bc516f1ef8a.jpg]
I only have the 2 main parts of the top front fairing, in very bad shape (but I paid only 35 euros for them). The mirrors are the original and both broken. The previous owner gave me 2 brand new mirrors which are not OEM but are officially crap (they don't stay in place). Screen is I think an Ermax - touring version in dark green. I don't like it but it's ok for now. I do prefer the kind of screen John (@750 ) has on his VFR. I believe it's a Skidmark double bubble screen. Shape is more modern and I like it when transparent of lightly tainted.
[image: 20180629_181332_1024.jpg.8753eea97d1cef755cc2f1db5680949d.jpg]
To be continued (again)...
Enjoy the bike, always nice to see one of the old girls resurrected.
Just jumping in on the flooding part of this topic. How to properly flood a motorcycle:
https://www.youtube.com/watch?v=1EtHUzfdYqE
7 hours ago, sfdownhillJust jumping in on the flooding part of this topic. How to properly flood a motorcycle:
Sounds like I did all of those things including praying 😉
Skidmarx, from the UK. The clear version is practically invisible.
Glad it runs!
Ciao,
The story continues...
So today was my 2nd ride. I went to work back and forth 2 times (I went back home for lunch) for an incredible total of 48km, yeehah!!!! :cheerleader:
It went smoothly, fires really quick at startup, no weird things, that was really cool... except for the temperature... This thing is so hot, I feel like she's trying to rost me :biggrin:
Good thing is that white smoke really dropped even if still there, but that is less dramatic than during my first ride. I'll check the oil level tomorrow but I think I will barely notice the difference in terms of oil level.
I quickly bleeded the front brake last week-end (I know this should not be done quickly...). But they need a rebuild. Since I did exactly that last week on my Bandit (I have a track day planned in 10 days), I figured this is not rocket science and seals are cheap. Original brake lines will be replaced by braided ones. I see later for new pads (I like red Brembos).
Also, I need to address the front fork. I think the stem nut is not tighten enough so I feel (what I believe is) movements on bumps. Also, there might be some preload missing. I'll address that during the weekend.
Here are 2 pictures from work.
[image: 20180719_174757_1024.jpg.adb8e292604d6e69202220b6c6d4cf4c.jpg][image: 20180719_174810_1024.jpg.25cd18898cfb4663f767cb2341f4e4d1.jpg]
Note about the white smoke:
I bought from the bay a valve seal kit from a seller in Sweden (39€ vs 160€ at Honda) and received it yesterday. This seems good quality but I wonder why all 16 look identical when Honda has 2 references (1 for intake, the other for exhaust). The sellers told me his records says they should be the same.
[image: 20180718_185543_1024.jpg.0bab2bfafc976b4e9b24a9eefe9df445.jpg]
Anyone who know if they are supposed to be identical or not?
Because I don't want to accept easily the defeat, I dismantled the engine again...
I removed it from the engine, removed the 2 cylinder heads to change the valve seals. I took this opportunity to lap all 16 valves properly with this tool which worked great. The seal I got from the Bay were fine. Some old one were ovals, no surprise they were leaking.
[image: large.20180922_171020_1024.jpg.7948c258903b9474de15bf83f2bb6c0c.jpg]
That was obviously before:
[image: large.20180828_210524_1024.jpg.76f8715e945f3fbc48b3b3b68ebfd082.jpg]
and after the lapping
[image: large.20180922_155832_1024.jpg.503f8837e2dd503309fd4ac0715e192c.jpg]
The whole thing took me more time that I thought. Engine is now back in the frame and I synch'ed this bad girl. Fires like a charm and gone is the white oil smoke 😉
I am currently in the brake rebuild process: new seals and lot of red grease, braided lines, new fluid.
Let's hope I can run it again before Christmas.
And I just noticed that I started this thread 3 years ago (and 6 days). It's definitely the time to ride it...
Hi guys,
I am not quitting, just got plenty of things going on for the last 10 months, including no more garage at my new place and an insane new toy (2009 Kawi Ninja ZX-10R) as a daily driver.
[image: large.20190612_133309_1024.jpg.5019e6d744b9a40eb1804b4d4b72c44d.jpg]
[image: large.20190612_133319_1024.jpg.865f91c0400a839ab63c7aa633ceed08.jpg]
I just got to get my VFR back and ride it. It has been almost 4 years since I got it and "only" slightly less than 300 km. I probably rode around 200 km last summer, then I re-opened the engine to change the valve stem seals which proved to be efficient since the bike is not smoking anymore 😉 I did not ride it enough to measure the final oil consumption. Time will tell.
Next problem to fix is poor stopping power from the front. I rebuilt the calipers but I need to check I flushed them properly, might be some air trapped into the circuit.
Rear brake is working fine but lever is bent (from a previous crash?) so it makes it difficult to find with my right foot. Will have to find only the lever and that will be fine.
Also I am about to switch to late VFR800i mirrors from Thurn because mine are broken (both). Security first, look will come after.
To be continued...
New rear view mirrors from Thurn. VFR800Fi 2000-2001 mirrors.
[image: large.20190623_123802_1024.jpg.27dffda991044b641ee23d581ee81639.jpg]
I flushed the front brakes again and seems ok now. Not impressed with the stopping power but ok for now.
Next is rear tyre replacement. It's from 2011 (ouch) but there's something worse.
It's a 180/55 which is supposed to be no problem on a 3rd Gen rear wheel bit I noticed again that on some part of the rotation (let say over 10 degrees), the tyre actually touches the swingarm which is really bad!!! It only happens for a small portion of the rotation but I don't like it (and it's not normal). I noticed again when cleaning/greasing the chain yesterday.
I measured the rear tyre width with a caliper and found between 188 and 189 mm (189 is where it comes in contact with the swingarm). I measured on a friend's bike and found 183 mm which seems more in line with the official 180 width.
This is probably linked to some shape change linked to time. It's a Dunlop (made in France BTW) and I hope this being pretty uncommon.
Did anyone ever face this?
Tyre widths can vary quite a lot. I discovered this a long time ago when I was doing an NC30 rear wheel conversion using a 5" VFR750 rear wheel. I measured a mounted 170/60ZR-17 Metzeler on a 5.5" wheel that was 1mm narrower than a mounted 160/60ZR-17 Dunlop on a 5" wheel!
But your Dunlop actually seems like it has been badly mounted or has been damaged.
Ciao,
JZH
19 hours ago, JZHTyre widths can vary quite a lot. I discovered this a long time ago when I was doing an NC30 rear wheel conversion using a 5" VFR750 rear wheel. I measured a mounted 170/60ZR-17 Metzeler on a 5.5" wheel that was 1mm narrower than a mounted 160/60ZR-17 Dunlop on a 5" wheel!
But your Dunlop actually seems like it has been badly mounted or has been damaged.
Ciao,
JZH
Thanks @JZH for the feedback. This seems like the same story for me. For sure, the tyre is good for a replacement, it has been manufactured in 2011 and it's pretty dry. I already felt it sliding at least twice on quick change of direction.
I found a used Michelin Power 3 manufactured in 2017 in 180/55 size for 30€. Will get it and have it mounted then check that this one does not touch the swingarm.
I measured consumption over my last tank. I only run for 6-8 km to go to work, mostly in lower gears so consumption has been pretty high: 7.75L/100km. This corresponds to 30.35mpg (which is pretty low). I hope a correct tyre will have a positive impact on fuel economy.
I keep the bike parked until this is solved. I share the result with you, I hope during July 😉
TBC...
Hi guys,
I hope you are all fine during those troubled days.
Some update and also some questions.
I noticed a small oil leak on top of the clutch cover. Seems like there's a cut-in the top crankcase so the pulse generator can get out of the case. It's leaking there. The plastic housing that fits in this cut is not available on its own, you can only get the whole pulse generator... So I will order a new gasket for the clutch cover and will clean and use some crankcase sealant. I will change oil and filter at the same time.
[image: large.20200427_091410_1024.jpg.53c14694a4e86506469472f0341e8ca7.jpg]
Then I have some fairing questions for you guys.
I found some decent parts for the left part of the bike.
[image: large.20200427_091335_1024.jpg.778636f202a2b697f05c4f9aa0459f0f.jpg]
There are a few broken tab but I feel confident Plastifix will handle it.
I went to look at the bike to evaluate which bolts and screws I might be missing and here is what I found:
[image: large.20200427_091034_1024_A.jpg.e946ca66c265155ef38e3368879926b5.jpg]
[image: large.20200427_091255_1024.jpg.bb2733b4f452cc4fff853c8f97556401.jpg]
Don't ask me why but it feels like the coil holder seems like it's not in the right place. I am writing this and I feel like the answer is in front of me. The holder bolt should go through the left hole that we can clearly see on the last picture, is that correct?
I hope this is an easy fix since this bolt is holding the engine and I remember well putting the engine in the frame is not an easy task. I am pretty sure I have the same problem on the other side of the bike 😞
Thanks in advance for your answers.
Stay safe.
Additional photos of the holders. The marks tell me my assumption is correct and I mounted them incorrectly. Can anyone confirm?
[image: large.20200427_090345_1024.jpg.bb7e2ab3c54fb914b524043c35c716f9.jpg]
[image: large.20200427_090253_1024jpg.jpg.9477cee2051bde84f77cfc8a700308ab.jpg]
5 hours ago, bdouvill[image: large.20200427_091034_1024_A.jpg.e946ca66c265155ef38e3368879926b5.jpg]
I'm pretty sure those bolts are wrong. I think the ones you want look like these:
[image: 1803966164_IMG_4395(2).jpg.69a81e2207c3a03471e573050c9d780c.jpg]
I can spot one of them in your last picture, above. Just by the oil filler cap. Others may have to verify that. Good luck. Always good to have extra fairing bits when you can find them. You'll be able to fix those up just fine. 🙂
@Gebruiker thanks for the notice. I knew that I had missing bolts and/or incorrect ones. I originally took some pictures of the bike to count how many I need to order from Honda. Then I noticed the wrong placement of the coil holders.
10 hours ago, bdouvillI need to order from Honda
The bolts I've tried to get from Honda are fabulously expensive. Like as much as $10 for one bolt. So you may want to consider other sources for either new or used. They're out there...
On eBay, some bike breakers, like my local breaker, sell used bolts in bags.
The good thing about my local breaker is he keeps them separated by brand. Anytime I go there, I sit down with his Honda buckets and sort through, looking for common bolts my bike takes. He’s roughly $5USD per pound. Can’t beat that!
I used to buy the "bags of bolts" from UK breakers on eBay, but had to stop when I ran out of room to store kilos of old bolts...
Yes, definitely the bolts are in the wrong holes on the coil brackets. The middle hole is huge! Not sure how you even managed it!
[image: 1364137906_2017-04-1820_34_30x.thumb.jpg.b1ae736fc6857c1e96f57a9ac6046171.jpg]
Ciao,
JZH
Thanks for the picture @JZH
Sure when you realize it, seems obvious I used the wrong holes. Just remember when you put it on, you're in the middle of mounting the engine in the frame which I did twice already and is not fun at all... I clearly remember now you have to put one specific bolt first (front right side) and I guess the frame twists itself for the rest to go. Otherwise, this crazy b... never goes in... There's something like 2-3mm between the hole in the frame and the engine mounting point.
I hope I can remove the holders one by one and put them back without issue. Will probably put a jack under the engine to support part of its weight.
I ordered some of the missing bolts from CMS. I know that's crazy expensive (look at the price of the fasteners for the side panels).
So far, I only have experience with Japanese bikes (all 3 of mine come from Japan, only missing a Yamaha and will have one of each 4 brands). What I can say is that if you buy a bike in spare parts, will cost you probably around 100k€... This is insane 🤥
Hi,
Performed my first oil change after 1800 km and 18 months. Usually, I do an oil change at least once a year or at 5 to 6000 km max.
At the same time, I mounted the fairing on the left side. I relocated the coil holders without issue (I jacked the engine just in case). I also rebuilt the broken tab on the lower left fairing with Plastifix (damn that works well) but I forgot to take a picture.
Now I have a mixed condition fairing parts with top heavily damaged, bottom damaged but ok and side panel in excellent condition... I have a bad condition right side panel (with missing air duct) but no lower part. I struggle to find it on Ebay (in Europe). But I'll find it (or I'll try to order a replica from LineaMoto in Italy). I also have a (broken) red V fairing but I need to mount the right side before repairing (and mounting) it.
[image: large.20200514_170621_1024.jpg.171669eda0599368c8b36c830bebdf34.jpg]
Now I see that the combination of color is not original by not bad (I mean the silver rear is matching the silver bottom of the front fairing).
[image: large.20200514_170630_1024.jpg.114b24bf43e7ba6cb207251a05fbe9b5.jpg]
Cheers.
Thanks for updating. I'm having fun following your progress. If you need inspiration, our bikes can someday look like this guy's