Got my R&G sliders and the bottle in the post last week. Fitting was quite easy and took about 2 hrs and lots of patience. I purchased the entire kit - Coolant bottle, the crash guard came with the engine rod, spacer bolts and the sliders.
1) Remove both the side fairing panels
2) Disconnect the coolant bottle pipe ...I pinched the tube so it does not leak. The bottle is on one screw...just undo and fit the new one.
[image: Posted Image]
01. VFR800 R&G Coolant bottle
3) Undo the engine bolt, don't slide it out all the way. I dabbed a little grease and white tack (used for putting up posters) on the rod.
[image: Posted Image]
02. VFR800 R&G grease&tack
4) Fit the left side fairing back. I just fitted the bolts near the coolant to keep the fairing in place
5) Push the engine bolt from the right side till it touches the fairing from the inside. Maintain enough pressure so the tack sticks to the fairing.
6) Remove the left fairing again.
[image: Posted Image]
03. VFR800 R&G marking On The fairing
7) Mark the center of the impression made by the tack. Drill a pilot hole from the inside and refit the fairing back just to be sure that the rod and the hole are aligned.
8) R&G suggest to use a 16mm hole bit but i used a 18mm saw hole to guide
[image: Posted Image]
05. VFR800 R&G 18mm Saw hole
9) Cut out the hole from the outside to the inside (this way the paint does not chip of)
[image: Posted Image]
05. VFR800 R&G 18mm Hole
10) Push the R&G rod / tie bar through the original engine rod - right to left. NOTE : there are spacers in between the engine and the frame, if the rod come out completely they fall out. (learned the hard way)
11) With the R&G rod in place, repeat steps to make hole on the right side of the fairing (steps 3 onwards)
12) Fit both fairing panels back to see that all holes and the rod position align.
13) Blur out the holes to finish.
14) Push the rod through to ensure it is in the center and fir the extensions - tighten using the 22 mm spanner. (Can't torque this)
15) Fit the fairing back.
16) Fit the bobbins - tighten to torque 30nm
[image: Posted Image]
06. VFR800 R&G Sliders fitted
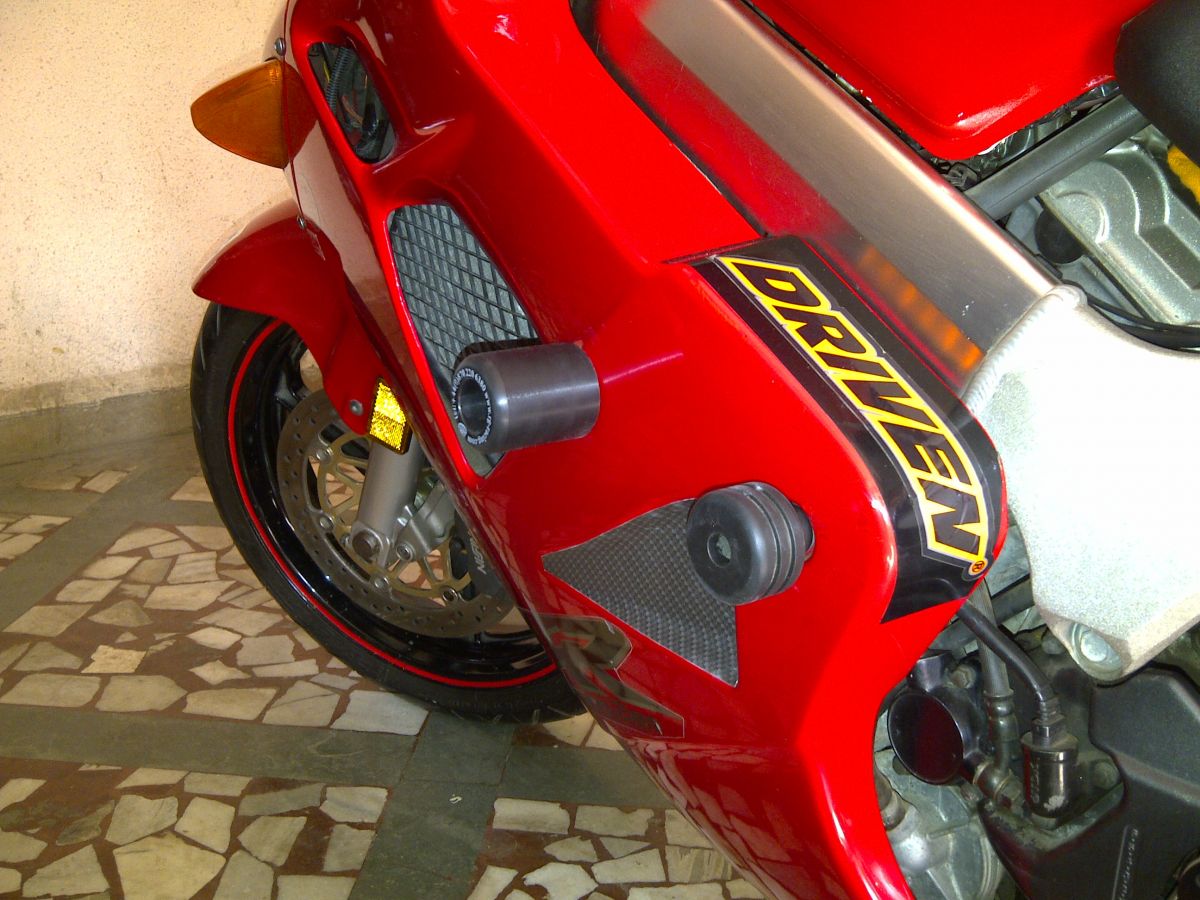
07. VFR800 R&G Sliders fitted
1) Remove both the side fairing panels
2) Disconnect the coolant bottle pipe ...I pinched the tube so it does not leak. The bottle is on one screw...just undo and fit the new one.
[image: Posted Image]
01. VFR800 R&G Coolant bottle
3) Undo the engine bolt, don't slide it out all the way. I dabbed a little grease and white tack (used for putting up posters) on the rod.
[image: Posted Image]
02. VFR800 R&G grease&tack
4) Fit the left side fairing back. I just fitted the bolts near the coolant to keep the fairing in place
5) Push the engine bolt from the right side till it touches the fairing from the inside. Maintain enough pressure so the tack sticks to the fairing.
6) Remove the left fairing again.
[image: Posted Image]
03. VFR800 R&G marking On The fairing
7) Mark the center of the impression made by the tack. Drill a pilot hole from the inside and refit the fairing back just to be sure that the rod and the hole are aligned.
8) R&G suggest to use a 16mm hole bit but i used a 18mm saw hole to guide
[image: Posted Image]
05. VFR800 R&G 18mm Saw hole
9) Cut out the hole from the outside to the inside (this way the paint does not chip of)
[image: Posted Image]
05. VFR800 R&G 18mm Hole
10) Push the R&G rod / tie bar through the original engine rod - right to left. NOTE : there are spacers in between the engine and the frame, if the rod come out completely they fall out. (learned the hard way)
11) With the R&G rod in place, repeat steps to make hole on the right side of the fairing (steps 3 onwards)
12) Fit both fairing panels back to see that all holes and the rod position align.
13) Blur out the holes to finish.
14) Push the rod through to ensure it is in the center and fir the extensions - tighten using the 22 mm spanner. (Can't torque this)
15) Fit the fairing back.
16) Fit the bobbins - tighten to torque 30nm
[image: Posted Image]
06. VFR800 R&G Sliders fitted
07. VFR800 R&G Sliders fitted