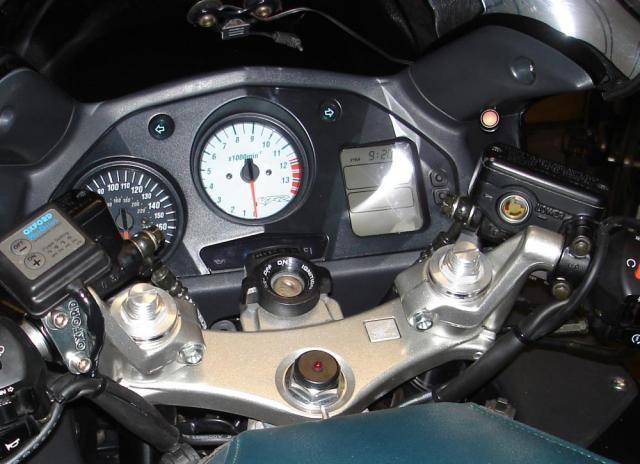
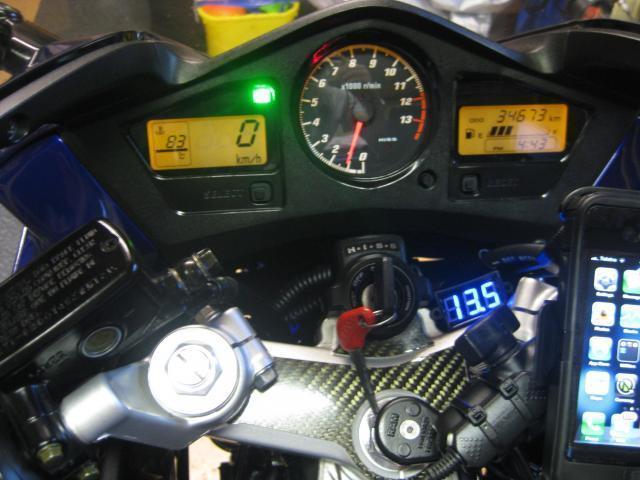
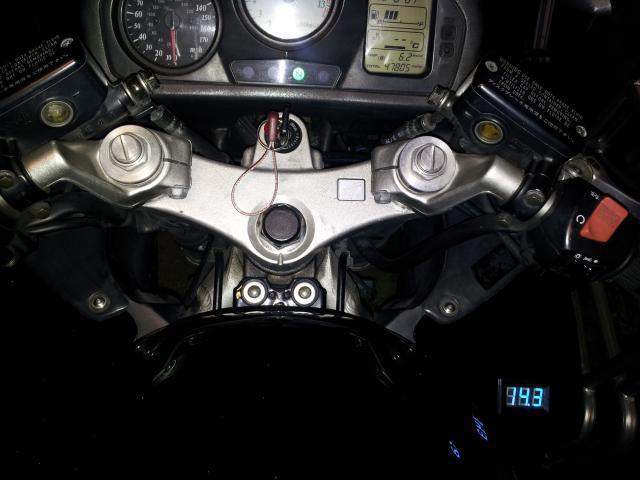
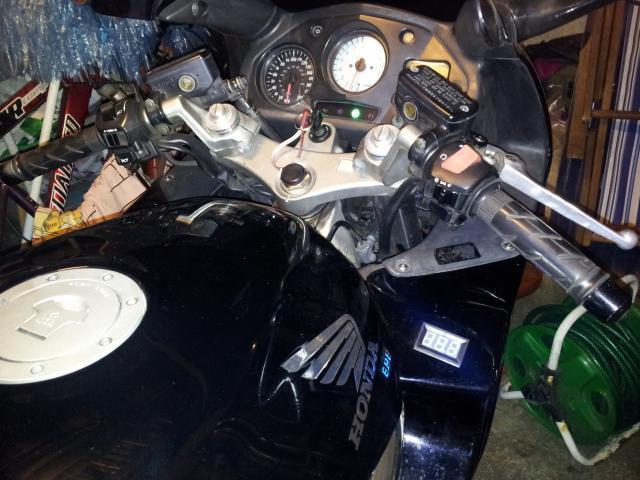
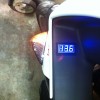
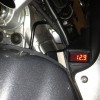
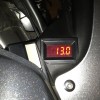
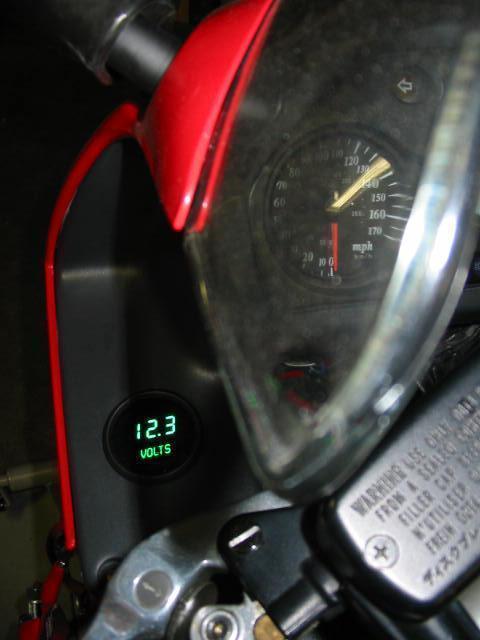
I am adding a voltage meter to my 5th gen. I just purchased the Lascar DMV-1200, and have seen several threads on mounting / wiring. I thought there might be other creative installers and fabricators out there, so i want to pull together a thread of custom mounting ideas. If you have a voltage meter how about posting up pics of your mount and pros and cons of the location now that you have used it awhile!
Thought I had some pics of my Fifth Gen, don't see any. I have a Datel LED meter mounted on the top of the left side fairing, just below the black plastic, beside the tank. Wired through my switched accessory fuse panel under the seat.
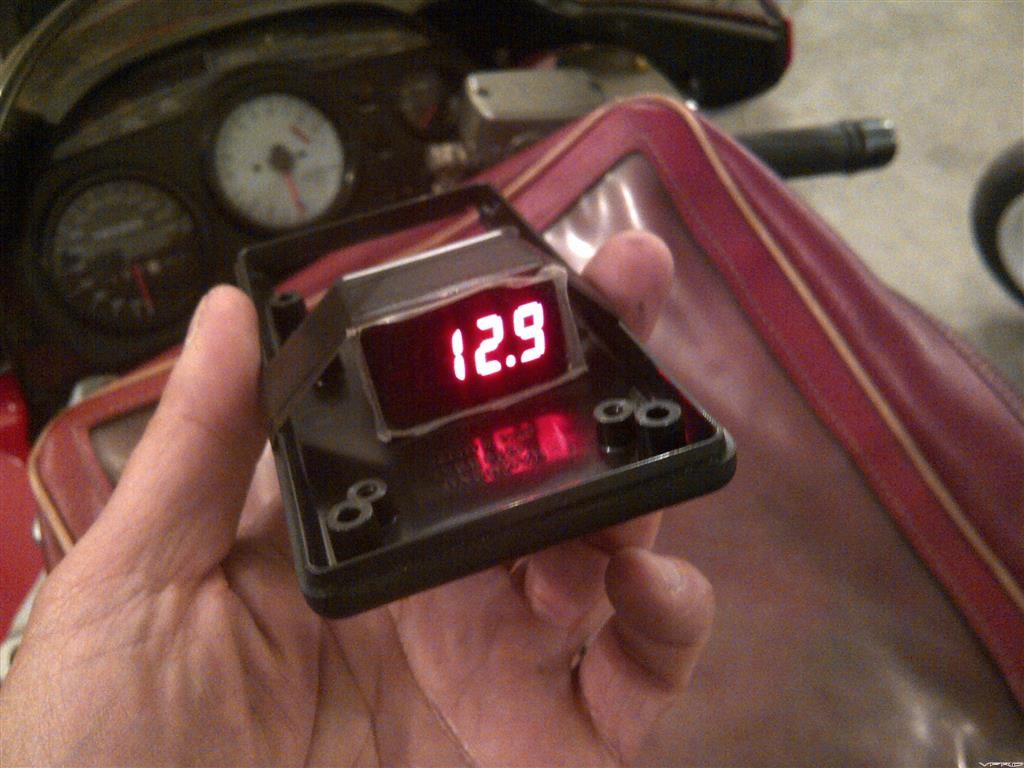
Lascar volt meter on my SP1, wired into the tag light plug:
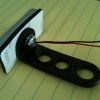
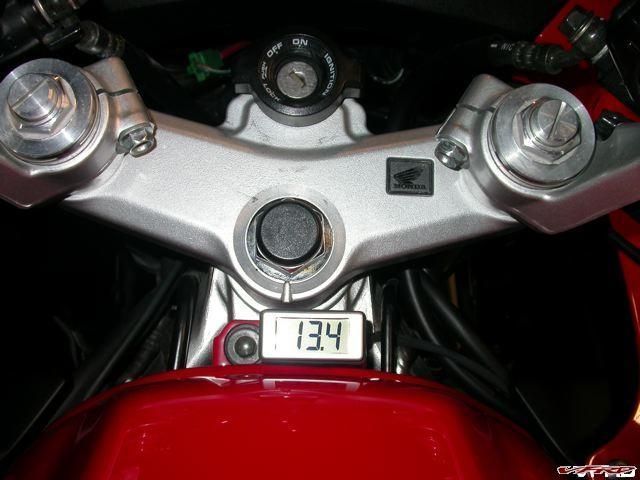
Had this bracket laying around, so I used it! I mounted it on the triple clamp bolt.
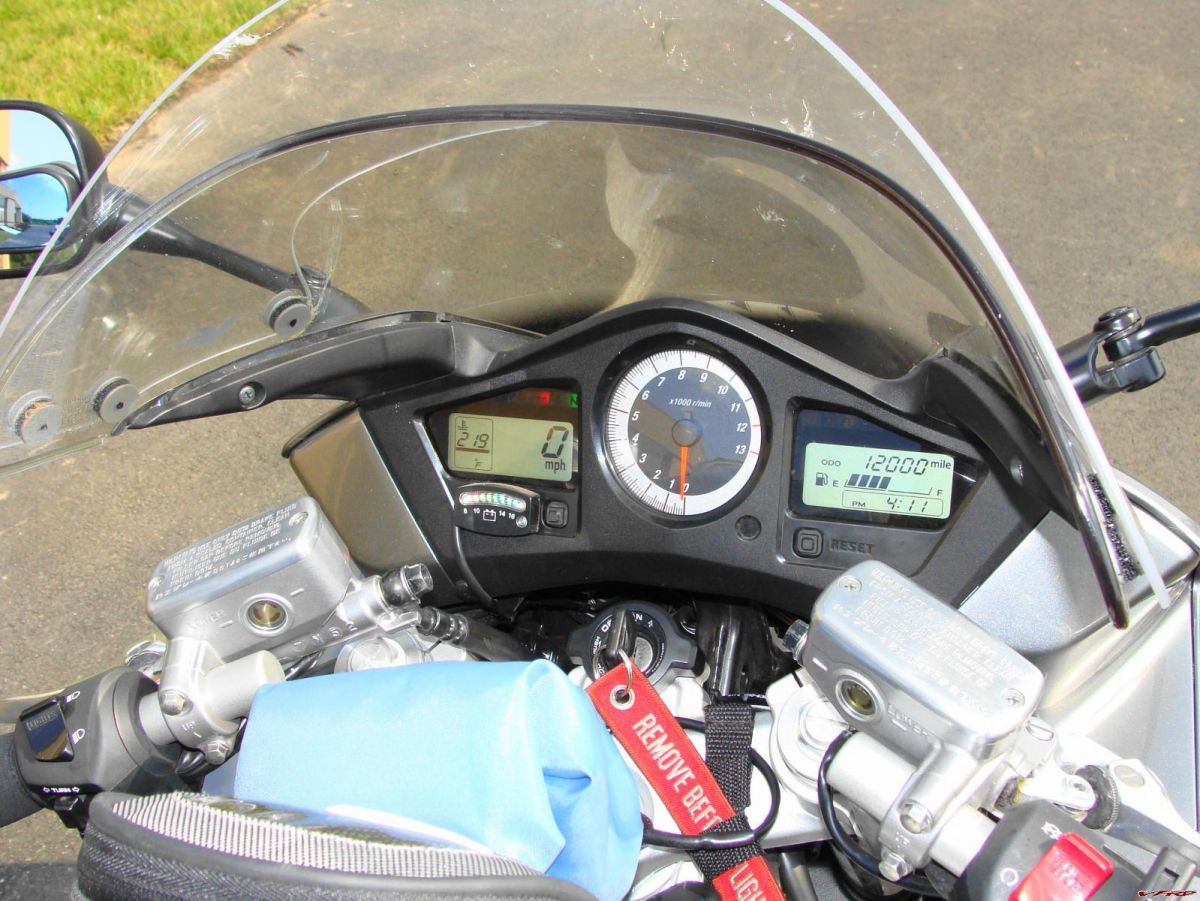
I went with Talus' tank screw mount for the Lascar. (I even stole his picture here. Mine looks identical--except its centered :) For now its wired directly to the battery because I like to see the status before I power it up. The current draw is pretty minimal. I suppose I should add a switch at least. Probably will do just after it drains the battery in the middle of nowhere. (I think I understand that Veefer800 did it this way with no problems though.)
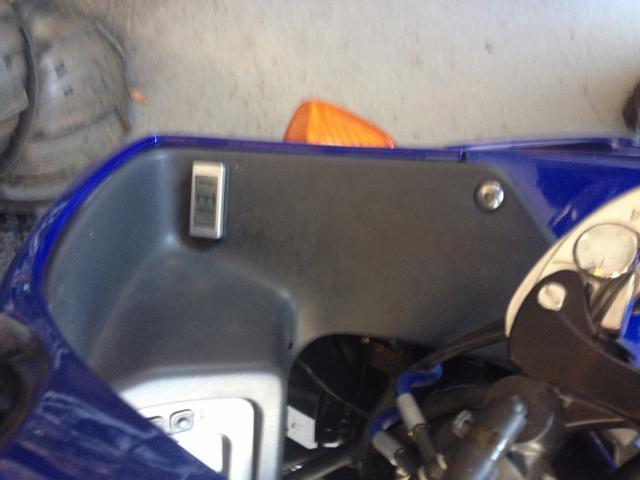
I mounted mine where the right side plastic cover is under the seat. Since fixing my problems I didn't want it right in my face. The pros are that it's out of the way, fairly protected from weather and easy to read from the side of the bike. The con's - you can't see it when you are riding. I ordered mine from Ebay - Joe-Florida for about $12 and I hooked it through my accessory fuse box under my seat.
Lookng good all. Keep them coming. So far I like the talus / skymon mount as the "least intrusive" to the factory plastic.. My only thought is, "how readable is it when riding?" I Like to keep my head up to prevent sudden stops via impact ;)
Mounted using 2 pieces of 1 inch width aluminum stock. Bottom piece has holes drilled that line up with the tank mount holes and then 2 that are wider to accomindate the top piece. Used 1/2 inch spacers on the wider hole mounting and 1/4 - 20 bolts to put it together. I botched the paint and will redo it at some point. mbe powder coat the brackets. (Rattle can in a 50 degree garage, bad idea.)
Mounted using 2 pieces of 1 inch width aluminum stock. Bottom piece has holes drilled that line up with the tank mount holes and then 2 that are wider to accomindate the top piece. Used 1/2 inch spacers on the wider hole mounting and 1/4 - 20 bolts to put it together. I botched the paint and will redo it at some point. mbe powder coat the brackets.
Mounted using 2 pieces of 1 inch width aluminum stock. Bottom piece has holes drilled that line up with the tank mount holes and then 2 that are wider to accomindate the top piece. Used 1/2 inch spacers on the wider hole mounting and 1/4 - 20 bolts to put it together. I botched the paint and will redo it at some point. mbe powder coat the brackets.
I like it, is it easily readable when riding?
I just did it this winter so I really have zero miles on the thing. But I was conserned about reading it and just sat on the bike on the centerstand. I thought it wasnt all that bad to see. - -- You could do a quick check while riding, if you can see the tank bolts your good.
It was kinda tricky to put together in that you have to sneak the wires into position where you want it to torque the tank bolts. I have the top bracket bolts pointed threads up, so then you can sneak the top bracket in place to finish with the nuts. -- Its like a 3d jigsaw puzzle.
Lookng good all. Keep them coming. So far I like the talus / skymon mount as the "least intrusive" to the factory plastic.. My only thought is, "how readable is it when riding?" I Like to keep my head up to prevent sudden stops via impact ;)
For more accurate reading you will need to get
a volt meter with three wires (1-ground,2-powered source,3-direct battery) or
a 2 wire volt meter and use a Cutout/relay to connect it
Lookng good all. Keep them coming. So far I like the talus / skymon mount as the "least intrusive" to the factory plastic.. My only thought is, "how readable is it when riding?" I Like to keep my head up to prevent sudden stops via impact ;)
For more accurate reading you will need to get
a volt meter with three wires (1-ground,2-powered source,3-direct battery) or
a 2 wire volt meter and use a Cutout/relay to connect it
goodluck
I started out with a relay powered on/off by the taillight but decided I didnt like it. Went with a simple toggle under seat in line with the positive side and fused. With this set up I can flip it on and check the battery before I turn the key on and fire it up. I find only a tenth of a volt difference between a multimeter direct on the battery and the meter up front. --- -- I like.
This is a Datel on my 6th gen. I have it wired through my fuse block under the seat.
[image: DSC02656.jpg]
What's the flap on top of the pivot?
I think you're referring to the center of the top triple clamp - that's a Powerlet outlet - good for GPS or other accessories. It's wired directly to the battery through its own fuse so it's hot all the time - that also makes it very convenient for hooking up the battery tender. I got it from Tightwad when I ordered some other parts from him.
Can you tell us how you removed the mirror and cleared the glass?
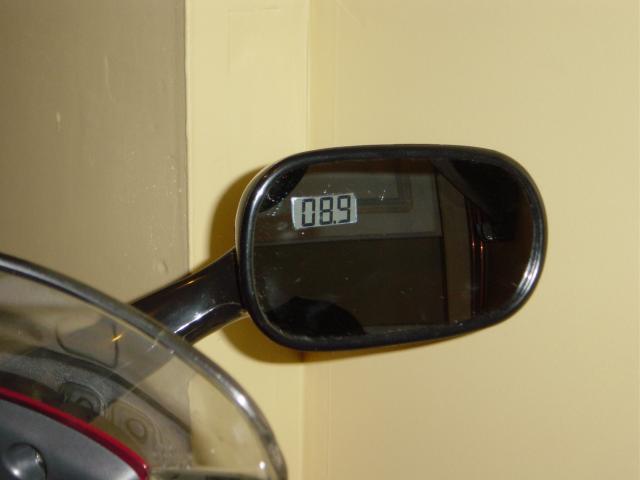
I removed the mirror from the fairing stay, and placed it under a halogen light until it was soft. I used a plastic putty knife that also was heated and slid that between the glass and plastic housing until the glass was worked out of the housing. I heated everything back up for install.
I used a dremel tool with a slight buffing wheel to remove the coating on the back of the mirror. i siliconed the volt meter to the back, wired it up and ran the wires down through the condoms. (I'm the only one who likes those...) I driled a small hole under the metal mounting plate, through the fairing and into the void behind the inner panel.
I wired mine drectly to the battery as it uses little to no juice while parked. My volt meter is within .05 volts of what a multimeter reads. It did warn me of trouble prior to the event.
This is a Datel on my 6th gen. I have it wired through my fuse block under the seat.
[image: DSC02656.jpg]
I have a Datel ready for this install & I had thought of the same location. It looks like you have the Datel in a box. The meter is waterproof so I am intending to just use the bazel for asthetics. Do you have other pictures?
This is a Datel on my 6th gen. I have it wired through my fuse block under the seat.
[image: DSC02656.jpg]
I have a Datel ready for this install & I had thought of the same location. It looks like you have the Datel in a box. The meter is waterproof so I am intending to just use the bazel for asthetics. Do you have other pictures?
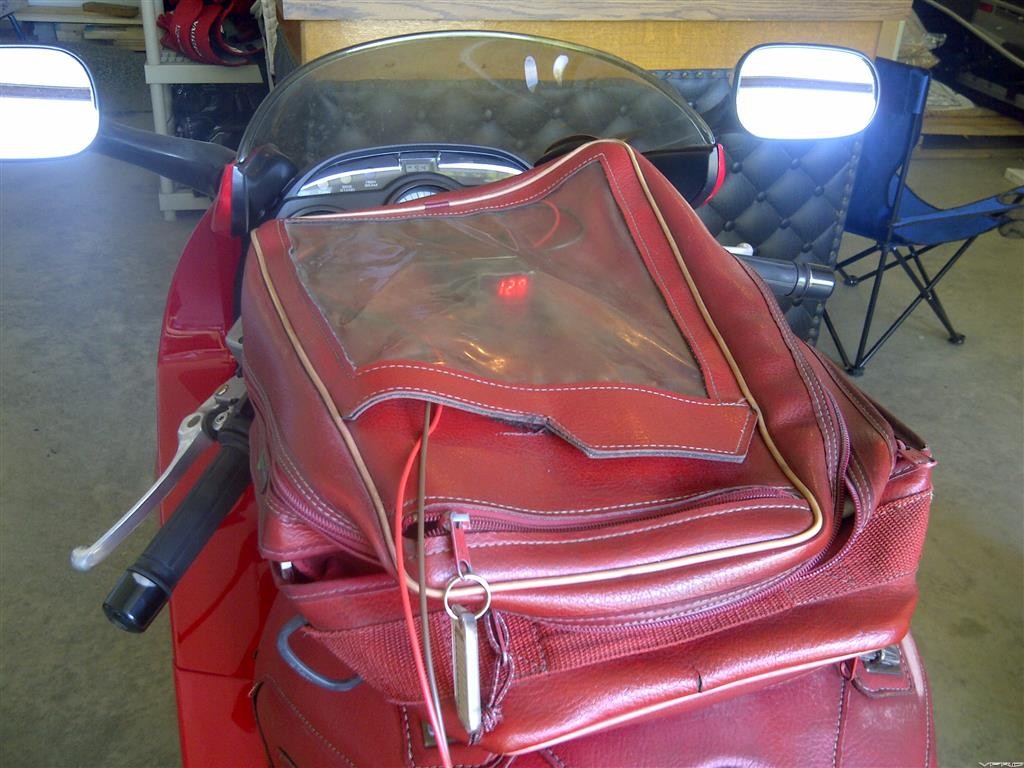
I did a detailed write-up of it last June (wow time flies!). Although it looks like it might be hard to see, I can clearly see it while riding, even over a tank bag.
Can you tell us how you removed the mirror and cleared the glass?
I removed the mirror from the fairing stay, and placed it under a halogen light until it was soft. I used a plastic putty knife that also was heated and slid that between the glass and plastic housing until the glass was worked out of the housing. I heated everything back up for install.
I used a dremel tool with a slight buffing wheel to remove the coating on the back of the mirror. i siliconed the volt meter to the back, wired it up and ran the wires down through the condoms. (I'm the only one who likes those...) I driled a small hole under the metal mounting plate, through the fairing and into the void behind the inner panel.
I wired mine drectly to the battery as it uses little to no juice while parked. My volt meter is within .05 volts of what a multimeter reads. It did warn me of trouble prior to the event.
I like it as it is almost a heads up display.
A big kudos to your creativity on your install. Very slick. :fing02:
Bought a Lascar, but have decided to go the SDC route. I'm more likely to notice it than I am to keep checking the voltage while I ride. Less to think about. Anybody want a Lascar EMV1200 for $20 + shipping?
It's a digital temp and volt meter by "Motofizz". The temp probe mounted next to the RR to warn me of any burnout tendencies.....
Not waerproof though, but I don't ride in the rain. I suspect I could open it up too and make it waterproof with a bit of creative silicone sealant applications.
Bought a Lascar, but have decided to go the SDC route. I'm more likely to notice it than I am to keep checking the voltage while I ride. Less to think about. Anybody want a Lascar EMV1200 for $20 + shipping?
Done. Kept honking the Stebel, testing the heated grips and 12volt outlet and now my new voltage monitor says it's time to charge the battery.
Does it stay red even when your RPM's are say 1,000 above idling?
Mine goes to red when idling at traffic light (both headlights are always on), but as soon as I'm reving up it goes to solid green.
If yours stays red with heated grips on and something draining from the socket even when revved up, it may not be your battery, you may not produce enough current/volt or whatever it is called (no techie myself)
Recently mounted a Kuryakyn voltmeter on my 5th Gen. Some mentioned this meter was pretty bright and could be distracting so I opted for something out of my direct view. That led me to a variation of Mello Dude's tank bolt mount using a cut, sanded and painted portion of the metal strip found in the expansion slot of an old PC. For wiring I tapped into the license plate circuit with an inline fuse - seems to work fine.
So I installed a signal dynamics volts light in mine, but this thread plus the air temp thread got me thinking. Wouldn't it be fairly simple to build a converter box (easy for someone like my son, who's an EE) so that the voltage is changed into the correct signal for the air temp gage? I can't imagine it'd be that hard, even if it had to be manually mapped on each .1v from 11.5 to 15v. You'd lose the decimal, but it seems the most stock looking and cleanest way to monitor your voltage.
Edit: I wasn't very clear on that. The stock air temp gage probably uses a variable resistor which changes resistance with the air temp. The gage cluster feeds it say 5v, it gets back 3.19v and it knows that at 72.5* that's what resistance it has, so it displays 72.5* (note that I totally made up the numbers) It seems like it wouldn't be too terribly hard to fill a box with magic smoke and wires that would instead see 14.4v and create whatever resistance was necessary to make the gage think it's 144* outside. 12v would make 120*, etc.
Arrgh, I rolled the bike around in the garage today while bleeding the brakes, and when I turned the bars to the right, I crunched my waterPROOF digital LCD voltmeter, which was not attached, because the bodywork was off.
It was just hanging by the wire.
I think the triple clamp hit it, and cracked the face. Gauge still works, but the clear cover has a nice gouge and a long crack in it, so it ain't waterPROOF anymore.
AND, to make matters worse, the company who made it is long out of business. It was an I4C voltmeter.
My RC51 mounted Lascar unit vibrated itself apart over two days at Road Atlanta... Just came apart. I guess cause it was solid mounted to the top triple, and not more isolated like some of the fairing mounts I've seen. For example, Earthshake's Fifth Gen which has since moved ownership to CornerCarver, then survived our trip to muddy NY Catskills ride and back. Not to mention multiple TMac trips with both owners.
Mine is just like earth shake but further back, I kind of have to peer over the bar to see but it's no biggie. If I was to do it over I'd move it further up. My grip heaters are under the bar but it's closer to reach and by feel I know that the middle is off.
[image: DSCN2759.jpg]
[image: DSCN2761.jpg]
if you play your cards right and trim just a little at a time the datel will drop right in there.
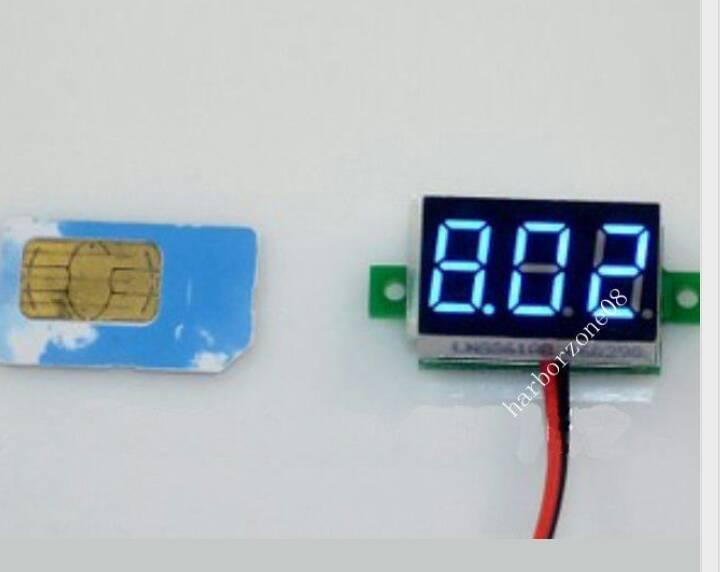
To replace my cracked I4C LCD voltmeter, I bought one of these off Fleabay, and will sift through the ideas in this thread for ideas. Probably place it where Dferrell shows above.
Thinking of wiring it through a relay to the battery, and firing the relay off a switched 12v source.
$8.20 with free shipping.
Waterproof, 4.5-30 volts, blue display to match my blue gauges. Dimensions: 50 x 30 x 27mm
LED voltmeter, about 3 pounds off Ebay from China or similar. Marked it out on masking tape so it looked straight by eye, drilled the corners and cut it with a coping saw. Used a cheap file to straighten the edges and fit in the meter. Wired in with a fuse to the brake light switch just by the connectors next to the rear brake reservoir. Wiring it to the switch cable means it only comes on when the ignition is on, but does so before the bike is actually started. I also fitted a waterproof connector so I can remove the fairing still. Before fitting I took the meter out of the housing to put a bit of liquid gasket around the display for a bit of waterproofing.
I might, if I did it again, fit it on the left as I think there's more accessible wiring that side however I picked the right as i seem to take the fairing of less often. I'm happy with it as it is though, I've achieved what I wanted.
Did my voltmeter install. I mounted it in the same place that Dferrell did above, and wired it into the ign wire leaving the key switch. Hot only when the bike is on.
It reads about 0.3v lower than the battery voltage measured right at the terminals. BUT, it was an easy install. No routing of wires back to the battery nor figuring out how to fire a relay, etc.
So, i seem to have lost power to my voltmeter, as well as the heated grips after hooking up my new battery tender. Have not been able to investigate yet, but I hope it is something as simple as a blown fuse from a surge from the tender, or missing hooking up a wire.
Anyone else lose their voltmeter while newly connected to a battery tender? Any ideas? Hope to look into it this weekend.
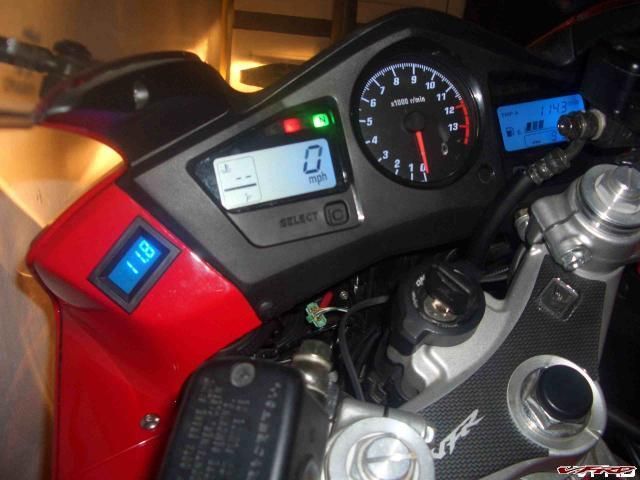
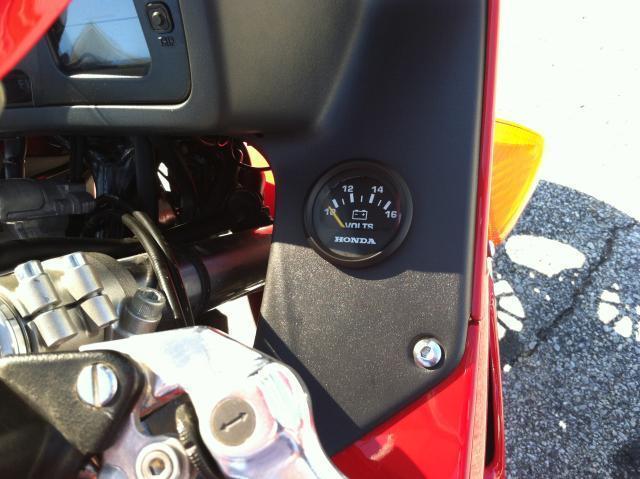
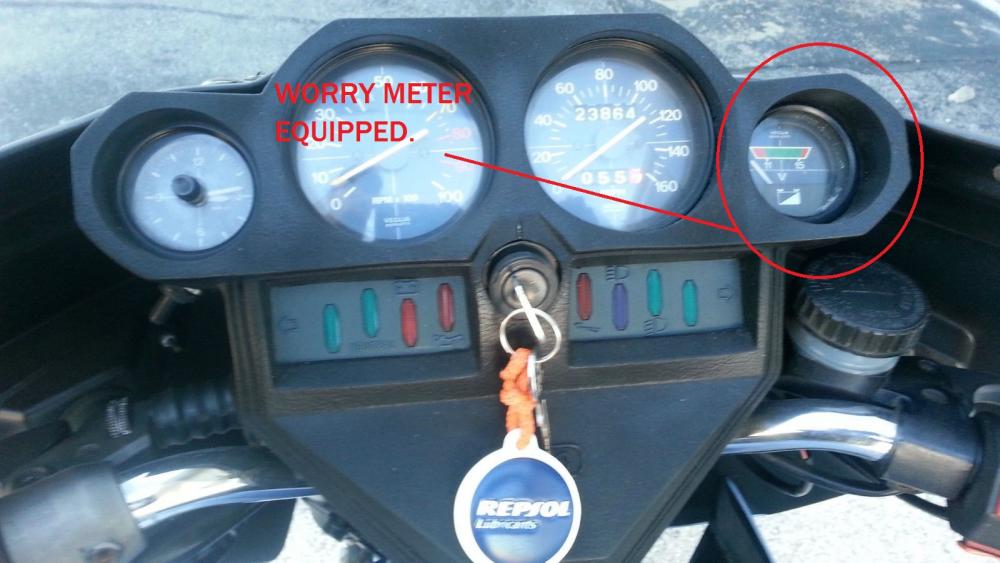
Here's a pic of my Honda marine voltmeter on my 5th Gen. I think the retail on this was about $50. Digital would have been more accurate, but this is waterproof and matches all of the OEM instruments perfectly. They also offer it in white. The one downside is that it can be a bit difficult to see over the bars, but that is my fault where I wanted to mount it.
DC 8-28 volts LED technology Three wire connection: Red power, Blue voltage signal, Black ground Wiring allows the voltmeter to measure a different source than what is powering the meter. Connect power and ground to a switched connection and the meter will turn on with your vehicle. 22mm high X 40mm wide X 19mm deep. Wires are 30cm long. US$25
You get a 10% discount if you're an inmate/member at ADVRider...
Fittted with some alu section had lying around, some strong glue and velcro strips... attached to rhs top triple bolt
A Honda factory part, supplied through the marine parts catalog. Waterproof. I think it cost me about $35 3-4 years ago. 2" hole in the LH fairing, wired to switched power off a relay. Lots of people thought it dead stock.
Did my voltmeter install. I mounted it in the same place that Dferrell did above, and wired it into the ign wire leaving the key switch. Hot only when the bike is on.
It reads about 0.3v lower than the battery voltage measured right at the terminals. BUT, it was an easy install. No routing of wires back to the battery nor figuring out how to fire a relay, etc.
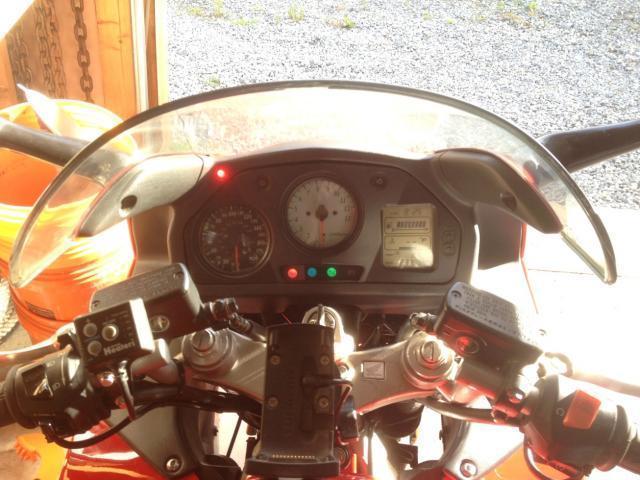
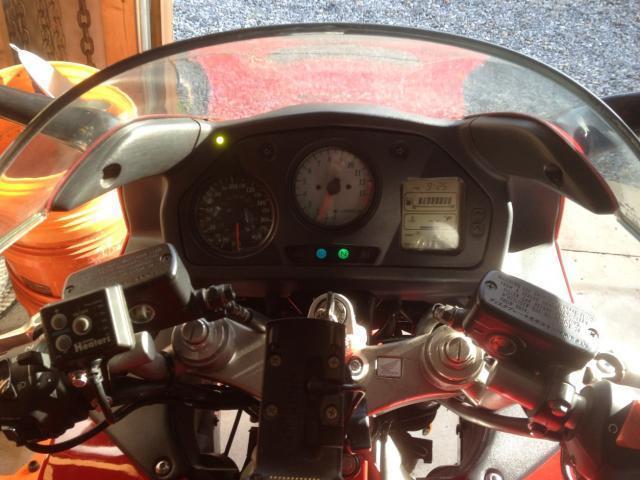
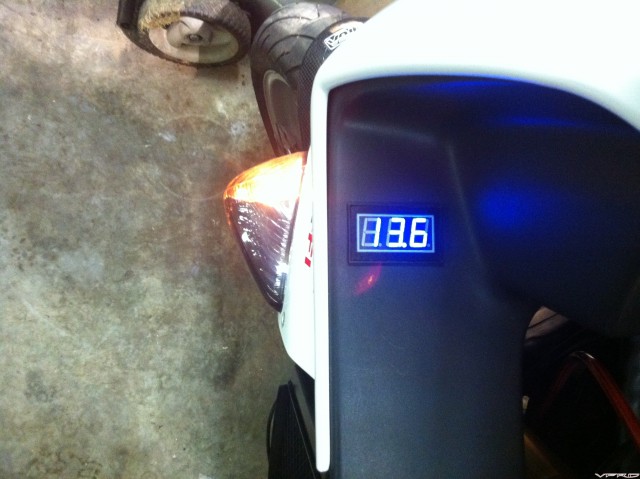
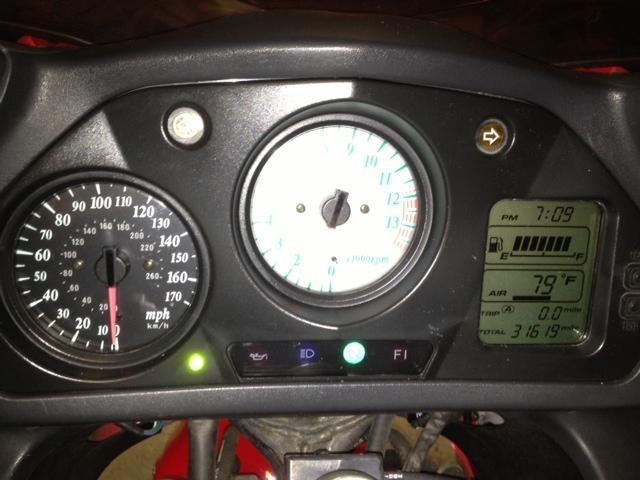
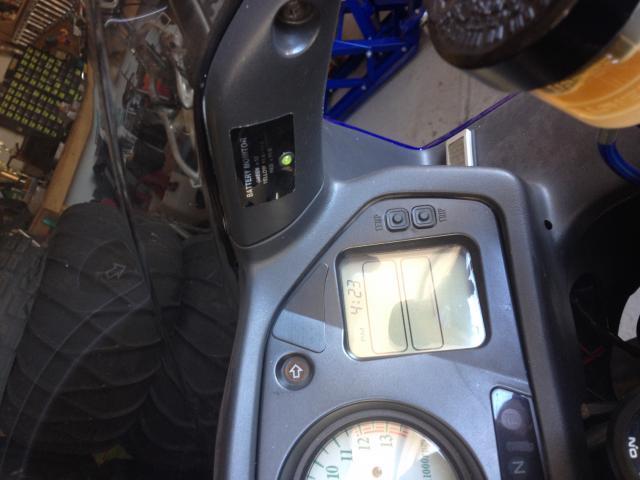
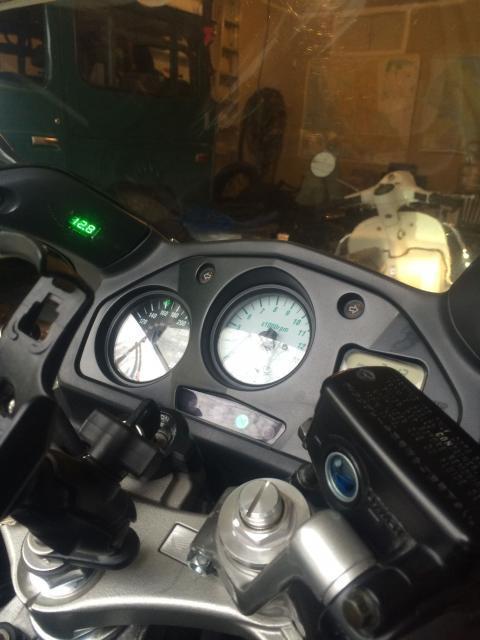
Crappy iphone picture:
I mounted mine in almost the exact same position, same color, and by the look of it, same voltmeter.
The install was easy and hookup was easy but it's a little difficult to read in some lighting conditions.
I haven't ridden with it on a sunny day yet, from what I've read they aren't quite as visible as the Datels in bright light. I'm still very pleased with it though, especially for the money (25 bucks!). I'm also working on coming up with a way to make a bezel for it. That's it. Cheers.
I haven't ridden with it on a sunny day yet, from what I've read they aren't quite as visible as the Datels in bright light. I'm still very pleased with it though, especially for the money (25 bucks!). I'm also working on coming up with a way to make a bezel for it. That's it. Cheers.
You cant see them during day no matter where put them except maybe in the helmet, hey just had a idea in the helmet .
That is where I want to put mine. How / where did you hook it up to? Which wiring and did you go back to the battery?
Sort of anal about this because this is my field. Voltmeters on bikes. I always run a new wires [pos and neg] (fused) directly from the battery via a relay that is closed with iginition power.
That way IMHO your gauge is reading actual battery voltage, minimizing voltage drop as much as possible.
That's a good plan. I ran the voltmeter from the unused tag light connector on my RC51 and it reads 1 volt lower than battery. It is consistent, but I just have to remember.
I spent a good three or four minutes trying to figure out what kind of offroad vfr you had in front of your bike lol
haha yeah, the traffic jam in the garage leads to not having enough space to put stuff down... without putting it on another bike. Thus we have the XL250 with VFR tail section.
not very sano, but if you look at the top right of my cockpit, there is a round volt meter. I just had it laying around and I wanted to see if it fit.....and it has been there ever since.
That is where I want to put mine. How / where did you hook it up to? Which wiring and did you go back to the battery?
Sort of anal about this because this is my field. Voltmeters on bikes. I always run a new wires [pos and neg] (fused) directly from the battery via a relay that is closed with iginition power.
That way IMHO your gauge is reading actual battery voltage, minimizing voltage drop as much as possible.
Would you be willing to explain this a little more: "via a relay that is closed with ignition power." I'm not an electrical guy so wondering what this looks like?
A "standard automotive relay" has four terminals: two of them are used to "trigger" the relay (this is what SinNH would have connected to something in the ignition (switched) circuit), and the other two are the "triggered" circuit (in this case, a direct connection between the battery (+) and the voltmeter). Hooked up that way, the relay is "normally open" and no voltage is fed to the voltmeter from the battery, but when the ignition circuit is activated, the relay closes and the voltage is allowed to go to the voltmeter. HTH.
A "standard automotive relay" has four terminals: two of them are used to "trigger" the relay (this is what SinNH would have connected to something in the ignition (switched) circuit), and the other two are the "triggered" circuit (in this case, a direct connection between the battery (+) and the voltmeter). Hooked up that way, the relay is "normally open" and no voltage is fed to the voltmeter from the battery, but when the ignition circuit is activated, the relay closes and the voltage is allowed to go to the voltmeter. HTH.
Got my meter installed using the relay setup. Also add blue LEDs to my dash for a matching look. So far totally loving it. Thanks to everyone for your input.
Universal Mini 12 Volt LCD Voltmeter LED, voltmeter, voltage, battery, gauge, meter
SKU: 16015932
The RaceTech Electric 12V Digital LCD Voltmeter is a high quality charging gauge. It is easy to mount with an included threaded stud, washer and nut. Just drill a small hole in your mounting surface. The LED Voltmeter has simple installation with Black & Red ring terminals attached directly to your battery. It draws very low current when powered up. This meter features a third Blue wire that is a switch function. The Blue wire attaches to ignition switched +12V, and turns the meter on automatically with your key switch. Now you can easily monitor your charging system at a glance!
Was: $39.95
Sale: $24.95
I havent ridden for 5 months now but from what I remember, not at all. And I can actually read it on the sunniest of days fwiw.....no relay, its wired directly to the battery. Affords me the ability to check it without a key....draws nothing as I have left it on for weeks.
I just put a voltmeter on my 6th Gen yesterday. I cut and bent a piece of Aluminum to hold the meter and then powdercoated it black just so it would match a bit better. I wanted it connected directly to the battery to hopefully get the best readings, but I did put it on a switch so I can turn it on and off. It was reading just .1 below my fluke meter. The switch is just below the left grip so it is easy to access when riding as well. I just velcro'd the mount to the dash on the backside. It is so lightweight that I think it should hold just fine. Plus if I ever want to move it, I can easily. I am waiting on my gear indicator so when I get it I may move the voltmeter over just a bit.
I just put a voltmeter on my 6th Gen yesterday. I cut and bent a piece of Aluminum to hold the meter and then powdercoated it black just so it would match a bit better. I wanted it connected directly to the battery to hopefully get the best readings, but I did put it on a switch so I can turn it on and off. It was reading just .1 below my fluke meter. The switch is just below the left grip so it is easy to access when riding as well. I just velcro'd the mount to the dash on the backside. It is so lightweight that I think it should hold just fine. Plus if I ever want to move it, I can easily. I am waiting on my gear indicator so when I get it I may move the voltmeter over just a bit.
[image: VoltMeter_20140323_0002.JPG]
Instead of the switch, you could have used a relay and get a direct power from the battery, however you would need a switch powered source so it only works when the key is on.
I just put a voltmeter on my 6th Gen yesterday. I cut and bent a piece of Aluminum to hold the meter and then powdercoated it black just so it would match a bit better. I wanted it connected directly to the battery to hopefully get the best readings, but I did put it on a switch so I can turn it on and off. It was reading just .1 below my fluke meter. The switch is just below the left grip so it is easy to access when riding as well. I just velcro'd the mount to the dash on the backside. It is so lightweight that I think it should hold just fine. Plus if I ever want to move it, I can easily. I am waiting on my gear indicator so when I get it I may move the voltmeter over just a bit.
[image: VoltMeter_20140323_0002.JPG]
Instead of the switch, you could have used a relay and get a direct power from the battery, however you would need a switch powered source so it only works when the key is on.
thanks Anik
Understood, I wanted something I could check without the switch being on as well.
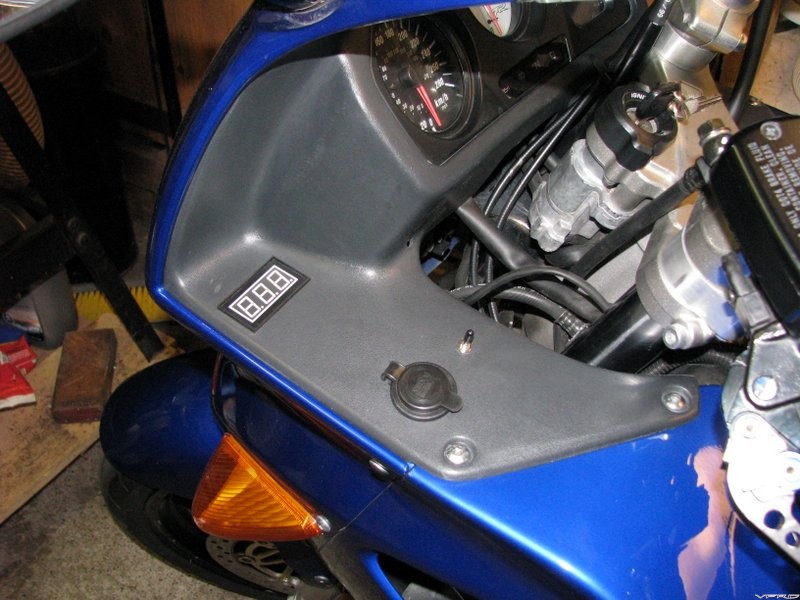
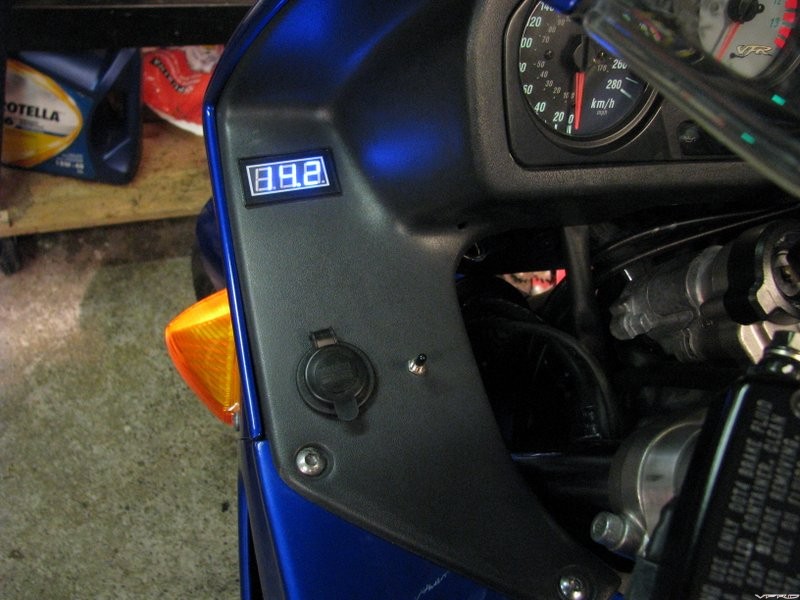
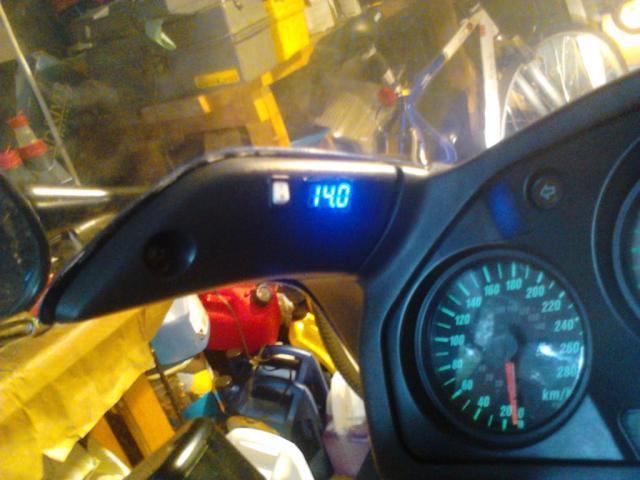
Well I decided to go for Left Cowl Upper... I went with Green to match the dash lighting,,,,
I found the smallest waterproof gauge on fleabay - note there are a lot out there that are much cheaper and larger you need to look at the dimensions... this one is 27mm...
After install I was really impressed - on quality and brightness..
I installed it onto my fused main terminal of my aux fuse panel - switched of course...
I've used it for about 100km so far and it's not in direct line of vision (too bright and bothersome) is what I wanted but is still easy to read without any head movement...
Crewwolfy
That looks incredibly difficult to read while riding, but I imagine it's easier than it looks...
I know my bike is a 4th Gen but Iam quite please the way my dash has turn out the two digital meters (volt & gear) cost less than £20 and that work perfectly but there was a lot of hours of labour involved.
[image: sml_gallery_20492_7044_956368.jpg] .
bigb
I know my bike is a 4th Gen but Iam quite please the way my dash has turn out the two digital meters (volt & gear) cost less than £20 and that work perfectly but there was a lot of hours of labour involved.
bigb
I know my bike is a 4th Gen but Iam quite please the way my dash has turn out the two digital meters (volt & gear) cost less than £20 and that work perfectly but there was a lot of hours of labour involved.
[image: sml_gallery_20492_7044_956368.jpg]
.
BigB
Me and my dremmel and the digital gauges from China !
bigb
I know my bike is a 4th Gen but Iam quite please the way my dash has turn out the two digital meters (volt & gear) cost less than £20 and that work perfectly but there was a lot of hours of labour involved.
[image: sml_gallery_20492_7044_956368.jpg]
.
BigB
Me and my dremmel and the digital gauges from China !
bigb
I know my bike is a 4th Gen but Iam quite please the way my dash has turn out the two digital meters (volt & gear) cost less than £20 and that work perfectly but there was a lot of hours of labour involved.
[image: sml_gallery_20492_7044_956368.jpg]
.
BigB
Unfortunately I didn't take any photo's as I was going along but the next time I have the dash apart I will take some pic;s and post a how to do.
bigb
I know my bike is a 4th Gen but Iam quite please the way my dash has turn out the two digital meters (volt & gear) cost less than £20 and that work perfectly but there was a lot of hours of labour involved.
[image: sml_gallery_20492_7044_956368.jpg]
.
BigB
All my own work just me and my dremmel and a lot of measuring and quite a lot of luck. LOL.
Finally got around to installing my voltage meter--hid it behind the left handlebar so I don't have to see it when driving down the road. Peeking over the handlebar reveals the info~
It's connected directly to the battery for now...plan to install a switch later. Used a Dremel tool & utility knife to cut/shape the install hole. I have a video I'll upload later.
I think it is time for me to add a voltmeter! When I re-started the bike on Saturday (while warm) the starter hesitated ever so slightly, and the clock re-set. I'm thinking this is more likely an ageing battery problem rather than the R/R, as all the cables and connectors look perfect.
I'm thinking of mounting my voltmeter right on the steering nut, and running the cables up through the stem from below. I have run a fused power supply direct from the battery through a relay triggered off the headlight circuit. I'll use a piece of rubber hose as a conduit so the wires don't get attacked by the steering action.
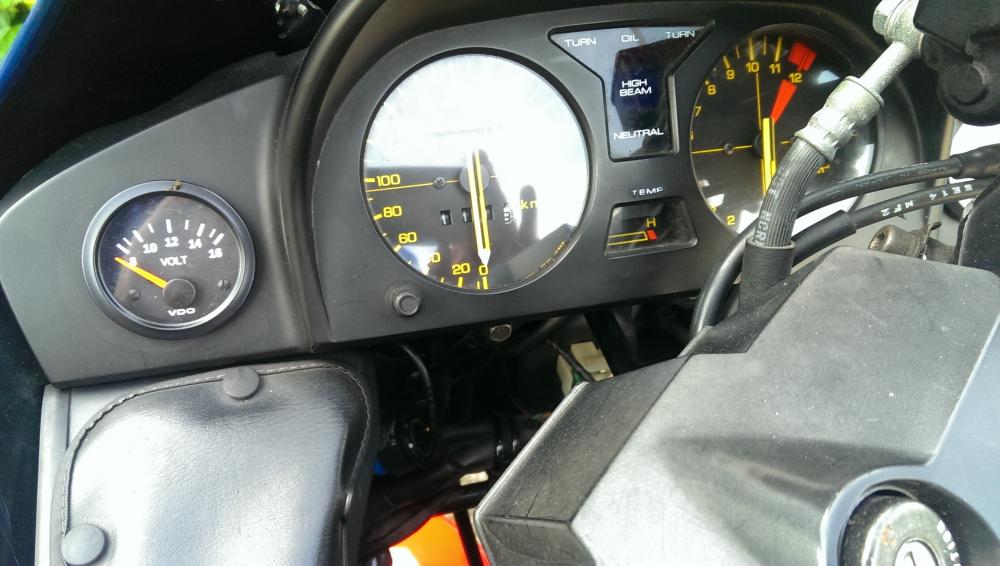
I just noticed that there are at least three different Honda round voltmeter gauges in just this thread. Mine was made by VDO (post #67), but the ones in post #124 and #60 are both somewhat different and may have been made by other companies (for Honda). Hmmm.
Thanks for putting this thread up. I have ordered a bunch of el cheapo Chinese digital voltmeters.
Today, I received the first one, see pict attached.
Now question, where should I hook it up in terms of providing power and wiring?
You'll get lots of answers to this - anything from running a fused wire directly from the battery to tapping in to another circuit. IMO the main thing to consider is whether you want it to be hot all the time - showing voltage with the ignition off - or if you want it switched off when the ignition is off. I chose the latter, running it off a switched fuseblock I got from Tightwad on his website. Double checking it with a shop meter across the battery I get the exact same reading, so no losses I can see by going through a relay and fusebox. YMMV.
Thanks for putting this thread up. I have ordered a bunch of el cheapo Chinese digital voltmeters.
Today, I received the first one, see pict attached.
Now question, where should I hook it up in terms of providing power and wiring?
You'll get lots of answers to this - anything from running a fused wire directly from the battery to tapping in to another circuit. IMO the main thing to consider is whether you want it to be hot all the time - showing voltage with the ignition off - or if you want it switched off when the ignition is off. I chose the latter, running it off a switched fuseblock I got from Tightwad on his website. Double checking it with a shop meter across the battery I get the exact same reading, so no losses I can see by going through a relay and fusebox. YMMV.
Thanks for your input. Honestly, I don’t want really fancy work, but I don’t want LEDs to be running all the time and eventually burn.
What I was thinking was to install a small toggle switch and run wires directly from the battery and just use double sided tape and stick display somewhere where it’s visible. Because then in that case if this el cheapo meter burns out, just replace it with a new one.
More like keeping the circuit open and then using toggle switch(closed circuit) when I am on the bike. Is this approach good or no?
P.S: Is tapping into any other circuit a good approach? Asking, because I don’t want to deal with any later electrical issues.
A manual switch would definitely work. A relay however is just a switch that's triggered by current from a circuit that becomes hot with the key on. Often the tail light is used for that purpose but any circuit that becomes live with the key on will do. It's a more elegant solution than a manual switch. I wanted to take my reading directly off the battery so that what's going on in some other circuit does not affect the reading. If you run a dedicated wire from the battery be sure to place a fuse close to the + terminal. I used a 3A fuse as there's practically no current draw.
Thanks Cogswell. I am definitely planning to do a dedicated wire from the battery.
What I was thinking was to use two straight wires, with an eyelet hooked with battery + and - terminals. Do I need a fuse with it? If so, how should I hook it up?
Here's mine. I may add Tightwad's digital monitor as well but needed this one as it's in my face and will let me know if it changes ASAP by virtue of its location!
AnikMankar
this will give you exact voltage reading
faran
Thanks for putting this thread up. I have ordered a bunch of el cheapo Chinese digital voltmeters.
Today, I received the first one, see pict attached.
Now question, where should I hook it up in terms of providing power and wiring?
have added these same ones in my meter
+1 on the direct battery hookup with a relay,
I noticed that going through something the tailight circuit displays slightly lower than actual voltage values, maybe because of other systems in the circuit(?)......
AnikMankar
this will give you exact voltage reading
faran
Thanks for putting this thread up. I have ordered a bunch of el cheapo Chinese digital voltmeters.
Today, I received the first one, see pict attached.
Now question, where should I hook it up in terms of providing power and wiring?
have added these same ones in my meter
+1 on the direct battery hookup with a relay,
I noticed that going through something the tailight circuit displays slightly lower than actual voltage values, maybe because of other systems in the circuit(?)......
Or... skip the relay and wire the voltmeter direct to the battery with fuse and switch in line on the + side. You can check the battery voltage/health before starting the bike in this setup. ...................Flip meter switch, check volts, start bike......
Not a 5th gen but I had the same location on my 4th as I do on my 6th gen. I just velcro-ed it to the leading edge of my ignition box. I've never had it come loose. Just make sure you put it low enough that it clears the lower edge of your instrument cluster because it turns with your bars!
That's how I mounted mine too, tho it's permanently attached. I would have preferred Datel made a unit with green output, but the red works ok. They also make a daylight readable unit now, but it requires a 5v power supply so it's a more complicated install.
Mine just uses colour & flashes to indicate voltage state. I prefer this to a digital readout since it woks fine most of the time so I don't need to know the exact voltage, just that it's within spec. If it changes colour to Amber or Red or flashes Red, than I know there is an issue and I can check the decode to see what the value is.
It is light sensitive too so dims when it goes dark.
Thanks man, now I know what I'm getting for my 99.
Those lights are nice... but a healthy vfr charge system will run in the high 13s to mid/low 14s Volts and over time if something is going amiss will drift down to the low 13s and 12s. By the Eclipse meter, you never know the trend of what is happening and if it goes amber, surprise! Your hosed.
- The overcharge side looks good. ------ But again if you have a digital read out, you know what is happening before you are stranded.
Thanks man, now I know what I'm getting for my 99.
Those lights are nice... but a healthy vfr charge system will run in the high 13s to mid/low 14s Volts and over time if something is going amiss will drift down to the low 13s and 12s. By the Eclipse meter, you never know the trend of what is happening and if it goes amber, surprise! Your hosed.
- The overcharge side looks good. ------ But again if you have a digital read out, you know what is happening before you are stranded.
Can't disagree.....a digital gauge tells you exactly what's happening.
But I have enough to concentrate on when I'm riding and reading another gauge of digits is another distraction, whereas a simple coloured light is easy.
I don't know enough about electrics but my 6th Gen is always green, once running. My 5th Gen, before I retired her, was always amber except when hot & below 2500rpm (something to do with R/R output I think) when it went green. Ran beautifully for 000's of miles showing mainly amber.
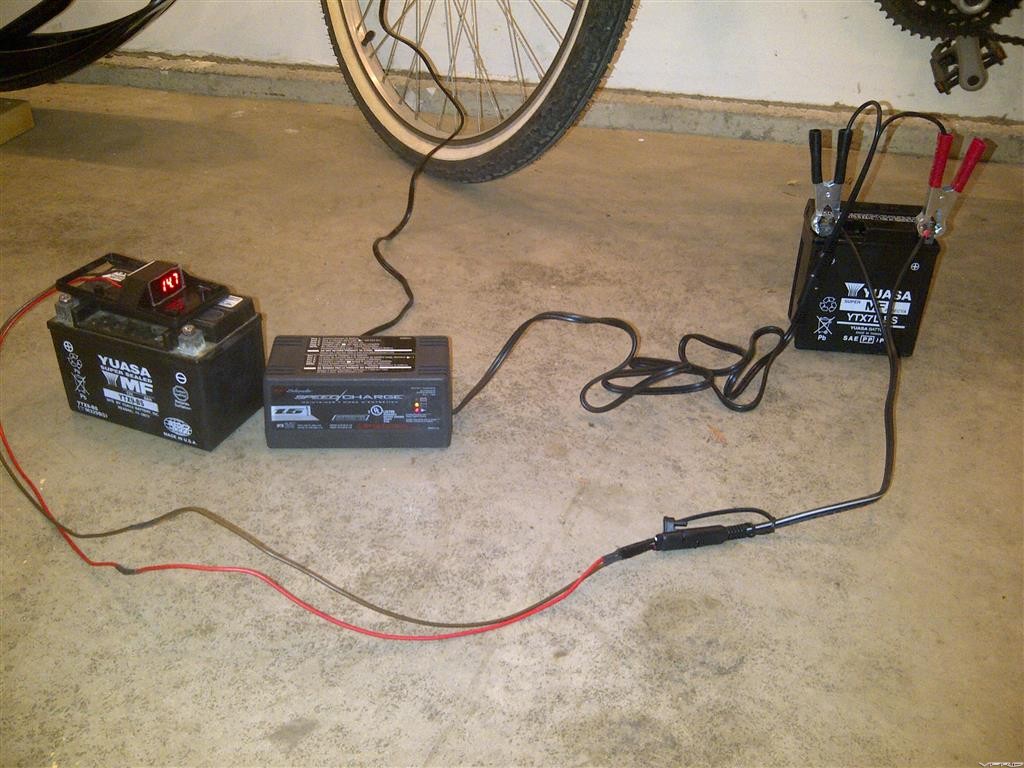
Quick guestion, was reading this thread around 2 am last night, was there mention of having a digital meter plugged into the tickle charge harnes off the battery.
Sorry, to lazy to read all 15 pgs again. I liked the mount that with alittle piece of metal mounted to the triple tree top bolts , okay thanks
I have an earlier version of the SparkBright, there's no sexy name along with it (not sure if it's auto-dimming, which would be useful--I'll have to check), and there is another company doing similar LEDs on UK eBay: Link. Not auto-dimming, though.
I'm a belts and braces kind of guy, so I have a voltmeter and an LED monitor, "just in case"... :wink:
Here's my take on the voltmeter. It's sort of like a Swiss Army Knife solution.
I orginally wanted to install a Datel 2-Wire Voltmeter, but I didnt' want to have to cut any plastic. I settled on running two Battery Tender SAE connectors up front. On one I placed a Battery Tender USB charger QDC (Quick Disconnect). On the other a Battery Tender Digital Voltage Indicator with LED Display (also Quick Disconnect). The USB connector powers my cel phone/music/gps/etc. The Digital Voltage Indicator shows a digital readout of the voltage when the ignition is on and the button is pressed. It also has red, yellow and green light indicators (again only when the ignition is on and the button is pressed).
I currently have these hooked up to a relay in my Denali PowerHub 2 Fuse Block which allows "switched" or "unswitched" connections.
I also cut a 15' Extension Lead in half and ran it directly from my battery to the tail of my bike (the SAE connector) where I use the quick disconnect to connect my Battery Tender Charger. This also allows me at any time to use the quick disconnect and add any of the available accessories to the tail of my bike.
My SparkBright Eclipse mounting. I love this thing. Its just my personal preference to have an unobtrusive go/no go indicator. I don't want numbers, multiple led gauges etc. I have it hooked to the always hot side of my Centech Ap2. Strolling through the garage out of the corner of my eye I can verify Tender function and on road trips battery state when the old girl is parked. Andrew is a great guy and will program your LED functions to suit prior to shipping. I was going to order one up for my home stand by generator, if one of you electrical guru's would suggest better "engine running" values for a fifth gen VFr I would get one set up like that and use this one on the genset. I'm fine with the battery status numbers. http://www.sparkbright.co.uk/sparkright-eclipse-battery-voltage-monitor.php
Here's my take on the voltmeter. It's sort of like a Swiss Army Knife solution.
I orginally wanted to install a Datel 2-Wire Voltmeter, but I didnt' want to have to cut any plastic. I settled on running two Battery Tender SAE connectors up front. On one I placed a Battery Tender USB charger QDC (Quick Disconnect). On the other a Battery Tender Digital Voltage Indicator with LED Display (also Quick Disconnect). The USB connector powers my cel phone/music/gps/etc. The Digital Voltage Indicator shows a digital readout of the voltage when the ignition is on and the button is pressed. It also has red, yellow and green light indicators (again only when the ignition is on and the button is pressed).
I currently have these hooked up to a relay in my Denali PowerHub 2 Fuse Block which allows "switched" or "unswitched" connections.
I also cut a 15' Extension Lead in half and ran it directly from my battery to the tail of my bike (the SAE connector) where I use the quick disconnect to connect my Battery Tender Charger. This also allows me at any time to use the quick disconnect and add any of the available accessories to the tail of my bike.
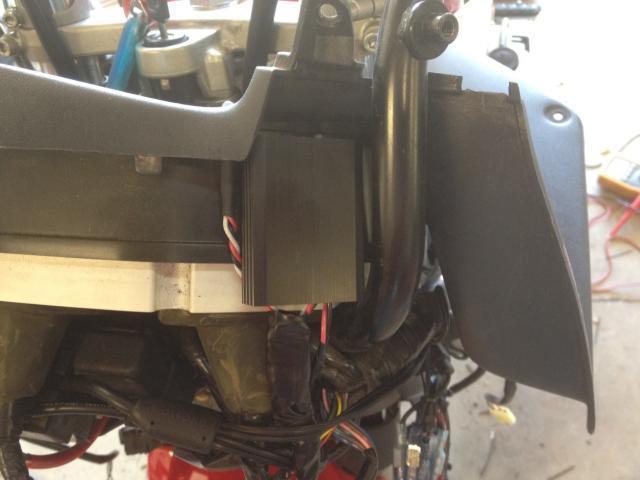
I had the same concerns / objections about using a Datel on my 6th gen. I avoided cutting any plastic by mounting it in a small project box and installing it under the gauge cluster. I can scrounge up a photo if you'd like.
Not a 5th gen but I had the same location on my 4th as I do on my 6th gen. I just velcro-ed it to the leading edge of my ignition box. I've never had it come loose. Just make sure you put it low enough that it clears the lower edge of your instrument cluster because it turns with your bars!
I bought a voltmeter from Wire my Bike two years ago but haven't attempted to install because i don't know squat about wiring. I thought about wiring it directly to the battery with a simple on-off switch so it doesn't draw current when not operating.
My SparkBright Eclipse mounting. I love this thing. Its just my personal preference to have an unobtrusive go/no go indicator. I don't want numbers, multiple led gauges etc. I have it hooked to the always hot side of my Centech Ap2. Strolling through the garage out of the corner of my eye I can verify Tender function and on road trips battery state when the old girl is parked. Andrew is a great guy and will program your LED functions to suit prior to shipping. I was going to order one up for my home stand by generator, if one of you electrical guru's would suggest better "engine running" values for a fifth gen VFr I would get one set up like that and use this one on the genset. I'm fine with the battery status numbers. http://www.sparkbright.co.uk/sparkright-eclipse-battery-voltage-monitor.php
Wow, it seems that someone else is as neurotic about wiring as I am. Pictures of my system coming soon, I ended up cutting and rebuilding large portions of my wiring harness. No more OEM fuse box, no more switching 4 circuits with the ignition switch, better charging circuit, RoadsterCycle R/R, weatherproof connectors...
I just noticed that there are at least three different Honda round voltmeter gauges in just this thread. Mine was made by VDO (post #67), but the ones in post #124 and #60 are both somewhat different and may have been made by other companies (for Honda). Hmmm.
There are a few Honda branded marine voltmeters including with white (which would be good for folks buying a new Pearl 800) or black bezels and faces, as well as flat or domed lens, different dial/face types and side lit or back lit.
A long time ago I made a note of the following part number: 37450-ZW5-000ZA. Searching on that leads to all sorts of stuff. Or just look up honda marine voltmeter. Here is a nifty page:
For those that didn't see it on my build thread, here's my voltmeter. Not so bright that it glares at night, but readable in direct sunlight. A tinted shield helps.
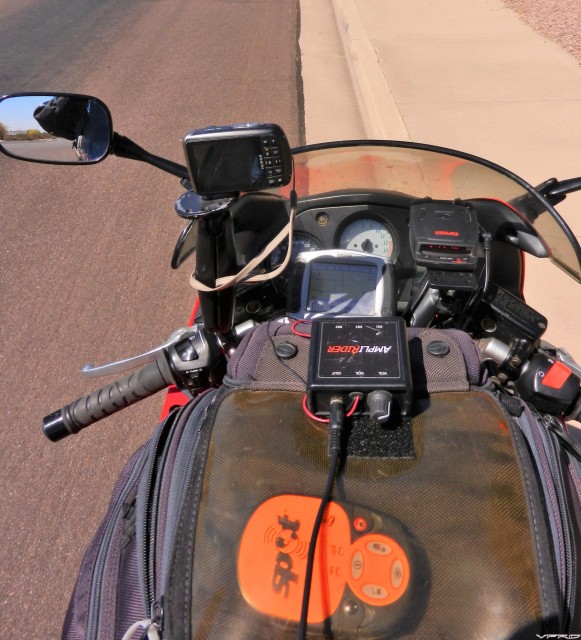
In addition to my Electrical Connection idiot light voltmeter, I have been running a radar detector recently. One of the modes of the Redline is to show volts. Works great even direct sunlight.
For those that didn't see it on my build thread, here's my voltmeter. Not so bright that it glares at night, but readable in direct sunlight. A tinted shield helps.
In addition to my Electrical Connection idiot light voltmeter, I have been running a radar detector recently. One of the modes of the Redline is to show volts. Works great even direct sunlight.
Seriously, you need all that stuff when out riding?
That's the sort of thing I would screw up & then it would not look good at all.
It was not too bad, but it didn't turn out perfect either. Just patience and an Xacto knife. If you screw up, a new replacement piece is much cheaper than an entire gauge surround.
In addition to my Electrical Connection idiot light voltmeter, I have been running a radar detector recently. One of the modes of the Redline is to show volts. Works great even direct sunlight.
Seriously, you need all that stuff when out riding?
That is my full tour kit. Most of it is handy when I am on big tour say in Canada.
[image: med_gallery_2144_4694_408609.jpg]
Although on short day rides out of the house I do take just the RD....seriously!
That's the sort of thing I would screw up & then it would not look good at all.
It was not too bad, but it didn't turn out perfect either. Just patience and an Xacto knife. If you screw up, a new replacement piece is much cheaper than an entire gauge surround.
Does it create any problem if you need to take that small cover off to do something like change the shield?
My problem is the very small gauge the wires are that are on it. Not sure the actual gauge but they're the same as the phone wires in my old house. I'd say they're the smallest that wires come.
I want to figure out a way of connecting them to the 16g wires that my bike is already wired with which are for the volt meter that I'm replacing. I'm thinking twisting them together & then soldering them but I have very little experience with soldering.
It also came with a Transient Voltage Suppressor(TVS) which Lascar says should be used to protect the meter from voltage spikes when it is used in automotive applications. Would you use it? Not sure how I would connect that either.
I've got one of those. In fact I've had it for several years. The wires are very thin. Very dumb design.
I wound up removing the back of the meter and soldering in new wire. I used several feet of model airplane servo wire so I could run it all the way back to the battery, complete with a servo connector on the end. It was a very delicate soldering operation, so I probably would not recommend it if you're not experienced with small electronics. Sorry, I guess that's not much help.
Oh, be aware that it's not waterproof, so mount it in a place that won't be exposed to direct rain.
They're tough (if not impossible) to find at retailers. A local NAPA store has a limited selection of a knock-off brand in the most common types. I ordered from their website and am really happy with their products. I have a selection of them in various places on my 6th gen - they work great. Usually the smaller packages on their website have free shipping.
Here's mine. Just installed it this weekend. More to this than meets the eye so I'll post on a separate thread as it includes installation of a PDM60 power module.
I just installed this cheap unit. We shall see how long it lasts.
[image: 41-gT5MdB-L.jpg]
I also have one of these and they were within 0.1V when riding/testing yesterday. So both are either spot on accurate or off by the same amount :goofy:
Here's mine. Just installed it this weekend. More to this than meets the eye so I'll post on a separate thread as it includes installation of a PDM60 power module.
I also have one of these and they were within 0.1V when riding/testing yesterday. So both are either spot on accurate or off by the same amount :goofy:
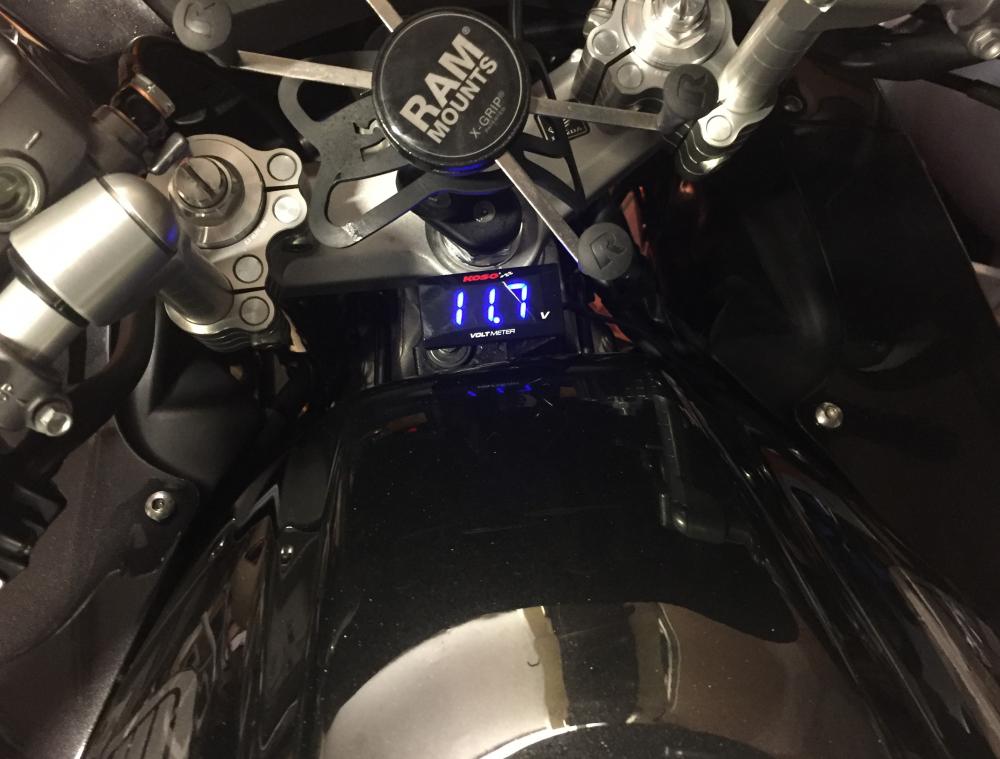
A little Z bracket with two holes drilled for the tank bolts to pass through. Connected it to the switched ignition wire group. soldered and taped and forgotten. Monitoring is smart!
All the discussion on R/R failing made the R1 piece and this meter the first mods I did. But I didn't want to spend too much money on my first attempt putting a meter on. So this was the result. Working well so far.
I was too afraid to cut holes in my lovely new (to me) VFR800, so I decided to go 'old school' and fit an LED voltmeter to the mounting bracket for my heated grips. The end result may look a bit 'Radio Shack', but I think that the two units match each other very well and that the LEDs don't really look out of place next to the heated grip control. YMMV :wink: , of course.
Now just need some advice on what wire I need to attached to it.
I've got a choice of buying 3, 5, 8, 17, 27 amp.
So which should I use?
If it's just a voltmeter you are buying it won't have a current rating, as it doesn't draw any current (for the purposes of this discussion).
Based on this, you probably mean you need to specify a voltage rating which will determine the measurement range of the gauge. In which case, the nearest best choice is 17v, as your 12v car/bike battery will have ~14v as measured when it's running (charging from your alternator/stator).
My first attempt at fitting a voltmeter involved using this rather 'Radio Shack' looking, multi-LED device, which I mounted on the bracket for the heated grips controller :unsure: ...
However, it was hard to read and so I finally decided to take the plunge and have a hole cut in the right hand side fairing, so that my brother could kindly fit this one for me :cool: ...
Now just need some advice on what wire I need to attached to it.
I've got a choice of buying 3, 5, 8, 17, 27 amp.
So which should I use?
Old thread, but just saw this. The meter reads 5-15v, which is a bit low, considering that "in-spec" goes all the way up to 14.8v on this model of VFR. Anyway, the wire gauge required for a voltmeter is not large at all. Use the smallest wire that is sturdy enough to survive the motorcycle environment.
DATEL 8V-50V meter wired into the R/R side of the Roadstercycle relay, so even if fuses start popping or before the breaker trips, I can see how much voltage is coming out of the R/R. This is very important to diagnose what went wrong. I used a relay, triggered by the license plate light, used Velcro for the mounting, and drilled a small hole for the wire.
Purchased a small 3 wire voltmeter from fleeBay. The beauty of a 3 wire device (positive and negative sense wires and a power source wire) is it can be connected directly and permanently to the battery which is what I want, the third wire is then connected to any switched positive to power the voltmeter, the voltmeter only powers up with Ignition to ON. No relay/switch required. Had this on for the last 12 months, works great. Just for info the 8gen has a very stable 14.5v output under all conditions, says a lot for the fancy new R/R.
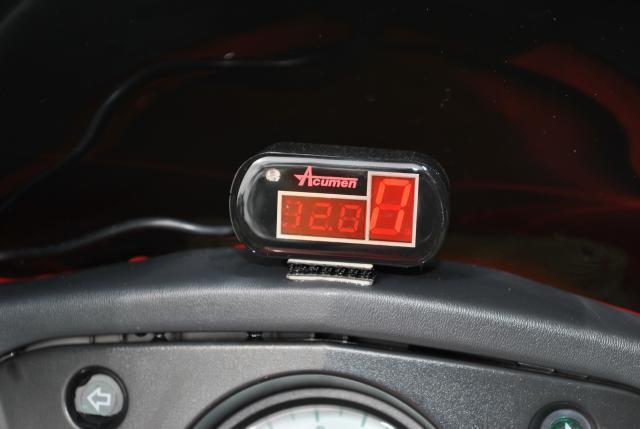
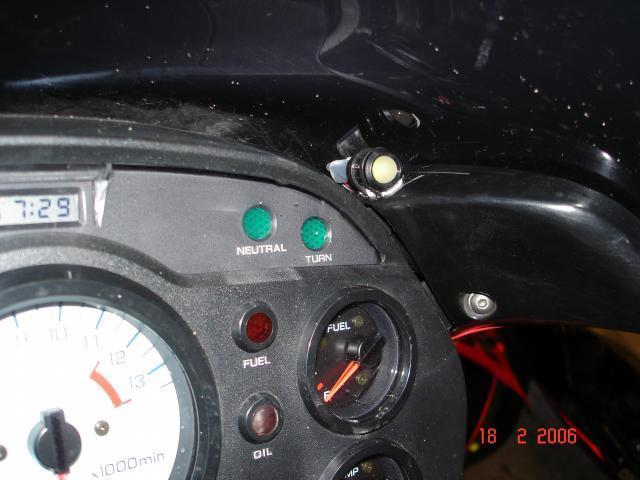
I admit a blue meter would fit better woth the theme... No holes needed. Its Just held on with double sided tape. The little green LED is the cruise control status indicator.
[image: 20180818_120014.jpg]
End of thread · 225 posts recoveredWayback Machine snapshot 9 Apr 2020
![[image: emoji1.png]](http://emoji.tapatalk-cdn.com/emoji1.png)
![[image: 001.jpg]](http://s1259.photobucket.com/user/h1brevival/media/random/001.jpg.html)
![[image: 011.jpg]](http://s1259.photobucket.com/user/h1brevival/media/JG/011.jpg.html)
![[image: 20150406_183314_zpspz0zz9ty.jpg]](http://s36.photobucket.com/user/MarantzManiac/media/Honda%20VFR/20150406_183314_zpspz0zz9ty.jpg.html)
![[image: 20140826_201153_zpsa0c8eb3f.jpg]](http://s36.photobucket.com/user/MarantzManiac/media/Honda%20VFR/20140826_201153_zpsa0c8eb3f.jpg.html)
![[image: IMAG0322_1_zpsmt5uwvct.jpg]](http://s37.photobucket.com/user/SCbassboy/media/IMAG0322_1_zpsmt5uwvct.jpg.html)
![[image: PDM%20Install%2003_zpsazhma1s7.jpg]](http://s872.photobucket.com/user/FSSGrp/media/Misc%20VFR%20Stuff/PDM%20Install%2003_zpsazhma1s7.jpg.html)
![[image: 3a8dc641359af33c110d42ee389a036b.jpg]](https://uploads.tapatalk-cdn.com/20170716/3a8dc641359af33c110d42ee389a036b.jpg)
![[image: 76bf6160caa1a307246b84921ab264c3.jpg]](https://uploads.tapatalk-cdn.com/20170716/76bf6160caa1a307246b84921ab264c3.jpg)
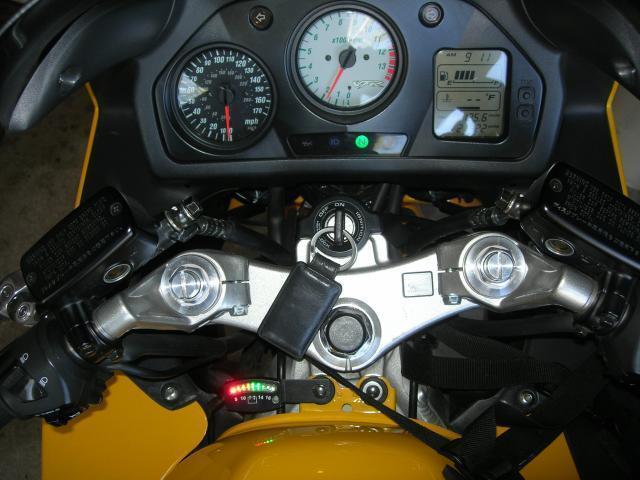
![[image: 2017_07_18._P1000794__DMC-LX100_with__le]](http://i130.photobucket.com/albums/p279/Bluenile32/Honda%20VFR%20800%20-%202001/2017_07_18._P1000794__DMC-LX100_with__lens_at_37_mm_sup1frasl_sec_at_fnof_-_4.0_at_ISO_800.jpg)
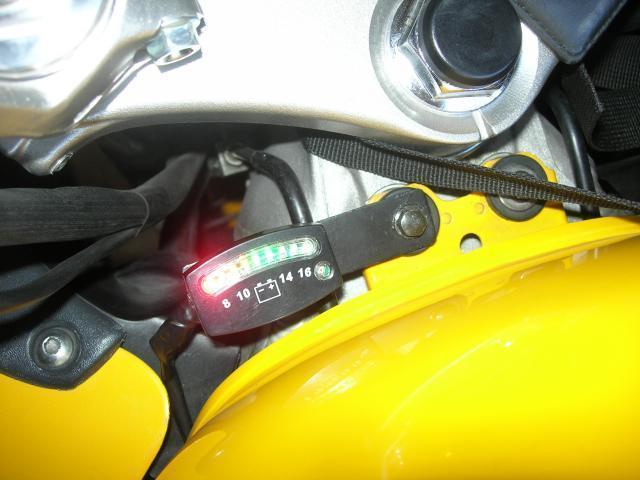
![[image: 2017_07_18._P1000795__DMC-LX100_with__le]](http://i130.photobucket.com/albums/p279/Bluenile32/Honda%20VFR%20800%20-%202001/2017_07_18._P1000795__DMC-LX100_with__lens_at_37_mm_sup1frasl_sec_at_fnof_-_4.0_at_ISO_500.jpg)