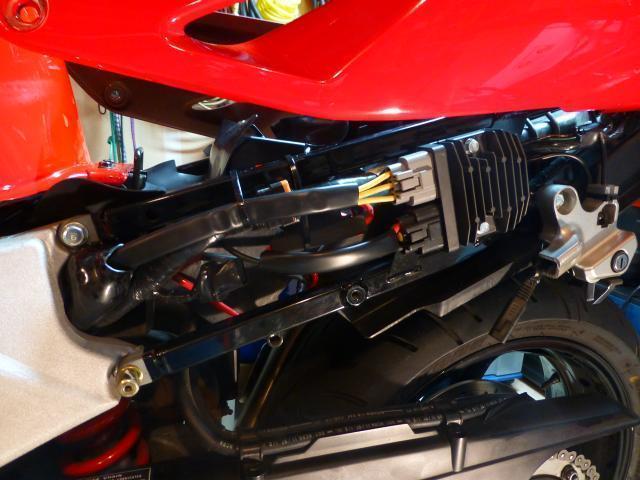
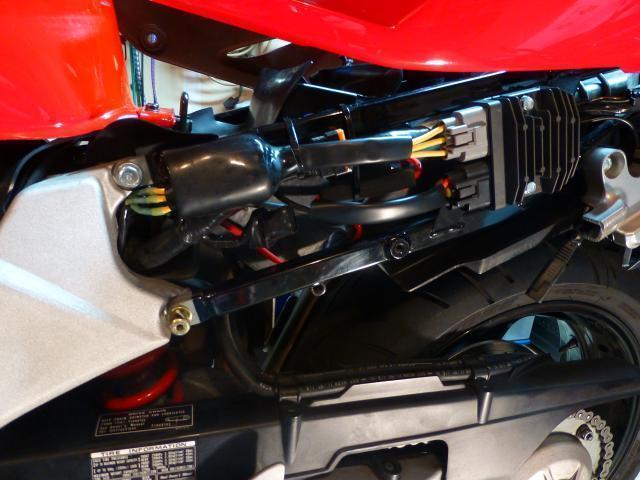
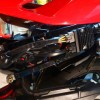
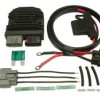
I'm sure many of you are already aware of the FH020AA rectifier / regulator upgrade. I just thought I would share a couple photos of my rectifier / regulator upgrade on my 5th Gen (1998). I went from the stock RR to a Shindengen FH020AA Mosfet RR (Super Kit) from Jack at roadstercycle.com. I can't say enough good things about the kit and Jack himself. He was very nice on the phone and via email correspondence. He answered all my questions and even customized the order for me. Best part is my bike is now running a steady 14.4v.
The installation was very straight forward. I just made sure to take my time with it. I really focused on trying to make it clean and tidy. I think I achieved what I was wanting. I had to drill the mounting plate to orient the RR the way I wanted. I was originally going to use a Metri-Pack 630 connector from the RR to the stator, but I decided to use the heat shrink bullet connectors Jack included with his kit instead. I'm glad I did. I think it will make it easier if for some reason I need to make a field repair and/or add a new stator in the future. I chose to crimp instead of solder. I used a ratchet crimp tool and feel confident that it did the job right. All in all I think it was well worth the cost and time.
I have found the FH020aa to be a quality part and have used it on a couple of local repairs. My personal preference is to use the Metripack connectors to the stator.
Nice! I found Roadster while looking up suppliers for the connectors. I already had the previous iteration of that R/R (FH012), but was replacing the stator, and he was willing to sell me the terminal ends to replace in my connector.
Anyone know the difference between this and the on from wiremybike? Preferences?
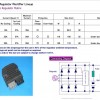
Wiremybike sells Ricks products. Roadstercycle is the Shindengen FH020a R/R. Pics of that are above.
Is there any difference between the rectifiers?
Also, anyone have a concern about the vertical position of the Shindengen? The stock is horizontal. Not sure if airflow of the bike from front to back cools the rectifiers of if this is a non-issue.
Corkey, did you clip the 3 and 4 p connectors and wire straight to them with the upgrade? If so what was your wiring pattern?
I removed the old rectifier/regulator, then cut off the 3-pin connector coming from the stator and used the heat shrink bullet connectors included with the Super Kit to directly connect to the new FH020AA rectifier / regulator (no specific order/pattern is needed, just connect the 3 yellow wires from the stator to the 3 yellow wires from the rectifier/regulator). I then sealed up the old power connector and ran the positive and negative wires (with included in-line fuse) from the FH020AA rectifier / regulator straight to the battery.
You can see both the heat shrink bullet connectors and the sealed up power connector in the photo on the right.
Is it (the RR) a shunt or series type? Even though the RR will run cooler (if it's a shunt type), the stator will be putting out full current all the time ( actually a tiny bit more) Correct?
Can someone please tell me the difference between the Ricks MOSFET unit and Jack's as it would seem that Jack's goes back to the battery but Rick's doesn't. I am not sure if this is required but with the amount of problems I have had I want to do this right.
I also see on Jack's website that there is the FH020AA MOSFET type but now the newer SH775 Series type both from Shindengen but on the Shindengen website it shows the values between them being different in the Current (Aave) * 1 column although I have no idea what these values mean.
I am also wondering if I use Jack's units will this affect the warranty on either a Honda or Ricks stator by cutting off the block connector.
My rewound stator plug burnt on one side and after using a temporary measure of bullet connectors from the stator to reg/rec I found the wires got really hot, hot enough to melt the bullet connectors to the wires.
After doing lots of research on this subject, I too decided to go w/ the FH020AA super kit from Roadstercycle. This post was helpful as I basically just duplicated your installation. Now I'm getting a nice steady 14.3V and I won't have to focus so much attention on the "worrymeter" (voltmeter) anymore. The first thing I did after I purchased this bike was install a voltmeter. Once I noticed some really irregular voltages with the OEM R/R I made the switch.
I just installed my new OEM stator and Jack Roadstercycle Super Mosfet Kit, I will post some pic's of the R/R/ mount I modified using the existing OEM one.
My question is, since I will be running the ground and positive directly to their respective locations and NOT using the OEM connector, how are folks handling the OEM R/R connector?
Leave it there with liquid tape or something else?
Cut off old connector on OEM R/R and connect new R/R using OEM connector?
Just looking for how others (besides this post) are handling the install.
In regards to the OEM power connector, I just sealed it up with electrical tape and left it alone. You can see it in this photo.
I figured if I ever needed to swap out my Shindengen FH020AA R/R in the field with an OEM R/R (I don't think this will ever be the case but...) all I would have to do is crimp the three yellow wires from the stator to the OEM R/R and then connect the OEM R/R to the OEM power connector.
This is why I always carry 3 spare crimp/heat shrinkable bullet connectors like the ones that came with the Super MOSFET FH020AA Kit.
In regards to the OEM power connector, I just sealed it up with electrical tape and left it alone. You can see it in this photo.
+1 on that. I did the same. I have a lot of confidence in the reliability of the super mosfet kit so I'm not carrying spare parts, but that seems like a good idea.
I'm glad this thread came up, I'm going to order the super mosfet kit today, since I have hard starts and my dash clock keeps reseting. Voltage was already weak when I got my bike.
In regards to the OEM power connector, I just sealed it up with electrical tape and left it alone. You can see it in this photo.
+1 on that. I did the same. I have a lot of confidence in the reliability of the super mosfet kit so I'm not carrying spare parts, but that seems like a good idea.
On the OEM power connector....... Typically being the OCD engineer.....
First grab a mating connector and go to town with Liquid tape (fun stuff)
[image: Liquidtape1.jpg]
Back to the OEM connector a slop some more on it with the Liquid Tape
[image: likwidtapestock3.jpg]
Plug it in to the OEM connector
[image: plugedstock1.jpg]
And Since 1 inch heat shrink is available (cool stuff)
Great writeup and images. I have this on my to do list over the winter. I did the same mod on my 6th Gen with a super kit and want to do the same on the new to me 99 5th Gen. Did you order any extra length wire on the stator side or the battery lead side? I did an extra 12" on both for the 6th Gen and was glad that I did. Let us know so that it makes it easier to order the kit. Also did you order a mounting plate from Jack or just drill the plate on the frame to mount the new R/R?
For the RR to battery, 20 inches total length with the positive cable being 6 inches shorter worked well for me (considering the terminals on the battery are roughly 6 inches apart).
I just drilled the existing plate on the frame, but mounted it horizontal rather than vertical because it fit better that way (cables went straight in instead of bending).
For the RR to battery, 20 inches total length with the positive cable being 6 inches shorter worked well for me (considering the terminals on the battery are roughly 6 inches apart).
I just drilled the existing plate on the frame, but mounted it horizontal rather than vertical because it fit better that way.
Good advice. I basically mirrored your install as well. No need for the adapter plate for the Mosfet RR.
I just finished mine over the holidays. Looks just like the OP when done and went together easy. The stock lengths of cable in the Super Kit were fine and if anything the battery cable length is a bit long. I crimped with a ratchet crimper I borrowed from work and soldered the connections as well before shrinking over them. Now I just need to finish my volt meter installation and I am ready for spring.
I just ordered the Mosfet FH020 kit thanks to all of you (92 VFR750). I have not yet received it yet. The OEM power lead is wired into the starter relay. From reading this thread, all of you have wired the power lead directly to the battery and sealed off the old RR connector. Will the starter relay still function correctly? Not sure if the 5th and 6th gens are wired up the same.
Everything will work correctly. You will still have the original wiring harness hooked up to the battery, and an additional postive & negative lead hooked to the battery from the new RR.
Hmmmm....I found the Super Mosfet Kit to be just a little short when installing on my 6th gen. I could install with the kit but the cable to the battery was exposed. An extra 6 - 9 inches allowed me to install the wiring so that everything was hidden.
End of thread · 38 posts recoveredWayback Machine snapshot 24 Aug 2017