Many have been following my Chinese fairings build thread found here:
http://www.vfrdiscussion.com/forum/index.php/topic/81765-viffercrabs-chinese-fairings-build-thread/
But, that thread is a bit lengthy, and I've taken it off topic at times, but there's one part of it that I feel deserves it's own thread, just because of the awesome sauce of it. And that's this SebSpeed clear clutch window. Many of you are familiar with him, and his work, but I, being new to the VFR world was not. I'd actually never heard of such of a thing before in my life, but I've been out of the bike world for a few years now, focusing mainly on cars and family, so it's no wonder I was a bit out of touch on the cool things going on in the bike world.
During my hunt for ideas for my custom job on the fairings, somehow I fell upon a thread or two that showed the SebSpeed clear clutch cover. The very first one I saw, I knew I had to have it. It's so just damn cool, I don't care who you are, the cool factor is off the charts. My VFR was originally purchased as something to just get me back in the game, and had a little curb appeal to it. At no point, did I think it was going to morph into a full-on rebuild, but alas, he were are.
I sent Seb a PM on here, and he got back to me immediately with price, timeline and the confidence that he'd help me through uninstall and reinstall of the cover. I'm a confident wrench on a car, but I'd never as much have even take a fairing off on a bike before in my entire life. After doing the full faring swap, adding exhaust, and a couple other low skill mods, I felt like with his help, we could do this.
He literally gave me a play by play on how to take the cover off, take the pressure plate off, and reinstall when I get it back. I can't tell you how many messages we've exchanged. Let's just say it's a lot. I know he's getting sick of me, but to his credit, he's never let on to that, and has been nothing but helpful. More than helpful if I'm being honest. He's been holding my hand through this whole thing. Means a lot to someone like me...
The day (night) came where I was going to attempt to take the cover off. Not really having the exact tool needed for the final step (a rubber mallet), I was ready to give up for the evening. He took the time away from his family to exchange how-to pics, and exact instructions on how to get it off, using less than optimal tools. He taught me a trick on how to use a 2.5 sledge and a Playboy magazine. Well, it ended up being a kids Skylanders magazine, but let's just say Playboy to make it interesting. Sure enough, did exactly what he said and BOOM, cover is off. Pressure plate is a piece of cake, not much instruction needed there.
So, in a box it went, and he was even nice enough to offer to have it and my pressure plate sent of to powder for me, instead of me having to do it on my time. Again, means a lot to someone like me...
Some of these pics are in my build thread, but let's put em here too, for when that thread slows down and is relegated to page 15 from the home page, never to be seen again:
[image: 12143143_10205340406330784_3812356659077]
[image: IMG_4191_zpswmxcvivg.jpg]
[image: A22EFDC6-C278-49F5-997D-C7340E25B8FE_zps]
And here's the replacement gasket you need for the cover...
[image: post-33389-0-81185200-1445009082.jpg]
[image: post-33389-0-36634100-1445009100.jpg]
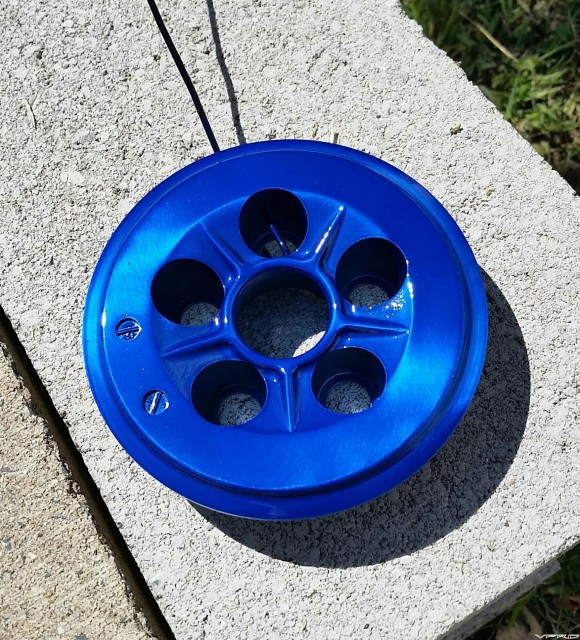
And a few short days later, he sends me this picture.... Look at that work! He's a skilled dude, for sure.
[image: DB6F43F5-ECCA-4BE3-B1E7-E0BD5A773621_zps]
So now, it's off to powder coat, and then back to me.
Can't stress enough how awesome he's been from start to this point. A true pro, very patient with me, and even offering his personal opinion when asked, about color and finish.
Will update...
My Sebspeed Custom Clear Clutch Cover Experience
111 posts Started 16 Oct 2015 Last recovered post 18 Oct 2016 Wayback Machine snapshot 17 Jul 2017
Seb is awesome!!!!
But after this teaser I will be awaiting pics of the final product...
While you have the fairings off, check you stator connector (three yellow wires) for any discoloration due to heat. Clean and burnish contacts.
PolarbearSeb is awesome!!!!
But after this teaser I will be awaiting pics of the final product...
Yup. So far, he's been nothing short of outstanding. I can't wait myself, to see how it looks...
AllyanceWhile you have the fairings off, check you stator connector (three yellow wires) for any discoloration due to heat. Clean and burnish contacts.
I took a peek when I first got the bike at the big fuse and wires near the battery. That looked good, plus I put a multi meter on the battery, and from what I remember reading at the time, all looked well. Bike has about 10K miles on it (2002), but I'll put eyes on that connector as suggested. Thanks....
I wholeheartedly agree. Sebspeed was tops when he did my cover. A ton of compliments since I have had it installed. Top notch work and a great overall person to deal with.
Seb is indeed a fantastic guy to deal with and he was very helpful with my cover removal and install as well. ALL HAIL SEB!!
[image: post-25028-0-53617100-1445052079.jpeg]
Looked so cool, even the Porsche was jealous. LOL
[image: post-25028-0-45856300-1445052210.jpeg]
Gorgeous. Love the polished pressure plate. I always have trouble with Porsche chassis codes... 997 GT3?
Sent from my iPhone using Tapatalk
Edited October 17, 2015 by VifferCrabI've never understood how this mod works -- probably because I don't really understand the details of the engine layout or how the clutch works. Normally, all these gears are swimming in motor oil, right? So you drain your motor oil and pop the right-side cover which you send off to Seb. He skillfully adds a little submarine port window made of what? Glass? And then you reinstall the modded cover and fill the case with motor oil. But then shouldn't greasy black oil immediately begin filming the window and obscuring all the pretty polished bits behind it?
Nope
[image: post-8974-0-27092800-1445095927.jpg]
VifferCrabGorgeous. Love the polished pressure plate. I always have trouble with Porsche chassis codes... 997 GT3?
Sent from my iPhone using Tapatalk
I've never really understood them either but it sure was cool to drive. It drove fairly calm and sedately for a 500hp normally aspirated Porsche 911 but you had a sense that the beast behind the firewall was always waiting to be uncaged and let run. Sort of felt like walking a really large dog that always tugs a little at the leash because it just wants to run. LOL. My only complaint was that for a daily driver it would be hard to live with as the exhaust note once the tach swings north of 3000rpm is really loud, even at half throttle. Since it is a customers car I would never open her up, but I can only imagine how loud it would get near WOT. Sounded cool though.
Don't forget to post up some photos with the new cover installed. What color did you choose for the pressure plate??
Since having installed the SSCCC I've had many strangers walk up and comment on the cover. Lots of great conversations started by this modest farkle.
Highly recommend!
RobFI've never understood how this mod works -- probably because I don't really understand the details of the engine layout or how the clutch works. Normally, all these gears are swimming in motor oil, right? So you drain your motor oil and pop the right-side cover which you send off to Seb. He skillfully adds a little submarine port window made of what? Glass? And then you reinstall the modded cover and fill the case with motor oil. But then shouldn't greasy black oil immediately begin filming the window and obscuring all the pretty polished bits behind it?
my thoughts exactly Rob... id like a little clarification on the workings of it also. and, yeah, what is the clear part made of?
zoomzoomAccording to Seb, it's Power Ranger sparkling red unicorn.Don't forget to post up some photos with the new cover installed. What color did you choose for the pressure plate??
I have no clue, actually.
As for materials used, I'll leave that up to Seb.
Sent from my iPhone using Tapatalk
Edited October 17, 2015 by VifferCrabdon't forget to add some led"s
[image: post-27283-0-55257700-1445103918.jpg]
[image: post-27283-0-68164600-1445103929.jpg]
[image: post-27283-0-90796000-1445103938.jpg]
jerrittdon't forget to add some led"s
Not a fan of LEDs on bikes but this is the exception to the rule...Nice!
Are the leds inside?
Looks like something out of an Iron Man movie with the L.E.D's
That is seriously friggin bitchin.
Dave
That alone would make an owner want to get out and ride it at night!
RedRicerThe oil level when the bike is sitting upright on the center stand is about an inch below the level of the "Window" on the clutch cover. When the bike is leaned to the side in a corner would likely be the only time the window would be bathed in oil, but it drips off very quickly. I think, though not 100% positive, that the window is clear lexan plastic approx 1/8" thick. The outer ring presses the clear window against a rubber o-ring seal that is recessed into a groove in the ring that Sebspeed welds to the outside of the cover. Have not had a single issue with the cover leaking any oil, and it looks fantastic. As for the LED's, hmmmmm, now I may also have a winter project. RGB color changing LED's maybe, or perhaps even color changing with strobe effect. LOLRobFmy thoughts exactly Rob... id like a little clarification on the workings of it also. and, yeah, what is the clear part made of?I've never understood how this mod works -- probably because I don't really understand the details of the engine layout or how the clutch works. Normally, all these gears are swimming in motor oil, right? So you drain your motor oil and pop the right-side cover which you send off to Seb. He skillfully adds a little submarine port window made of what? Glass? And then you reinstall the modded cover and fill the case with motor oil. But then shouldn't greasy black oil immediately begin filming the window and obscuring all the pretty polished bits behind it?
pics of the led install? curious the steps taken to do that.
I didn't take pictures when I installed the lights. Take off the clutch cover with the window installed there is a lip you can glue the lights to I ran a bead of silicone (high temp oil res. silicone) on the lip placed the lights on the silicone so its not touching the window (enough room for everything to expand when hot) also I put silicone on the inside and out forcing it into the hole where the wire is coming out wait for it to cure and reinstall. As for the wires I connected them to a switch that aready controls other lights on the bike
here is some pics of wire placement
[image: post-27283-0-20511200-1445173370.jpg]
[image: post-27283-0-26467600-1445173398.jpg]
[image: post-27283-0-29917800-1445173420.jpg]
This is not meant to be thread hijack, but thought I would add to the chorus signing Sebastian's praises. My VTEC was disassembled back in 2011 and I did not have the time, energy and some of the skills needed to put it all back together thanks to the birth of my daughter and her growing up.
I convinced Seb to take on this re-assembly and mods project and boy did he deliver. Trucked the bike and parts to him in August and I went and picked it up last weekend.
I did not see the value of the clear clutch cover mod, but he told me I should consider it and I'm sure glad I did.
Not only does he do good work and charge modestly, his attention to detail is the icing on the cake and you leave knowing that the job could not be done any better!
Unsure whether he has the time in his pretty full appointment book to attend to your project, but if you want someone capable to work on your bike and not the underpaid and barely trained monkey at most local bike dealerships, he's the guy to go to.
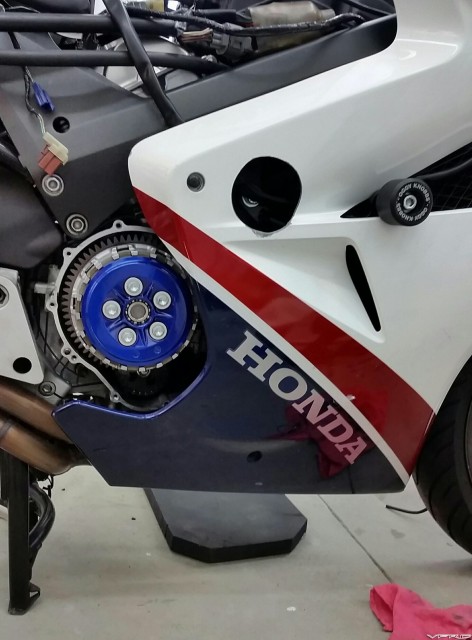
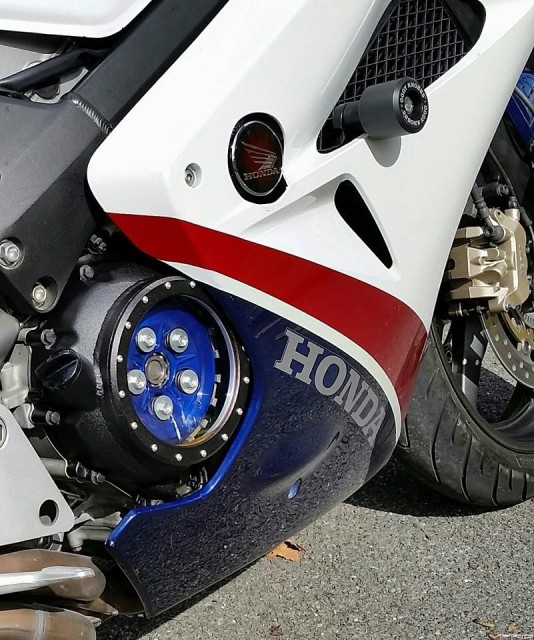
Here is Sebastian himself....
[image: 01d37e6015c204a27e20c9c9629662525adab211f4]
The blue looks great! Perfect match for the RWB color scheme.
Very cool mod, looks great on all of the bikes but that blue one is really a killer!
That's effing gorgeous. Wow.
Sent from my iPhone using Tapatalk
Seb did a fantastic job job on mine and suggested using Duplicolor Metalcast paint. I also found that VHT black metallic high heat engine paint is about 99.99 percent of a match to the factory Honda engine case paint. I think it turned out pretty good. The red on the pressure plate looks a little darker in these photos but outside it is a perfect match for the red striping on the bike.
[image: clutch%20cover_zpslprd2uow.jpg]
[image: vfr_zpstplw5ibc.jpg]
Seb's Clutch cover window is indeed very cool. However: Never use glue, caulk, paste, et. al. in an engine where there is even the slightest chance of it joining the engine, final drive and/or transmission oil stream. I've seen the results in an automatic transmission and found the particulate in OHV valve cavities and drain oil.
On the same subject: Molybdenum additive will build up, over time in transmissions and final drives. More is not always better. The advantage of Moly is it's yclept plating or cling-ability. When Moly is used there is always some left in any gear box after draining. It clings to bearing cages, porting and the interstices of all close tolerance spaces. Do not stop using Moly, where specified. The amount as an additive in gear oil is enough. R3~
Those RWB bikes are the tits, guys! Wow.... I like it better than my custom scheme, to be honest.
jerritthere is some pics of wire placement
Thanks for sharing... I'll probably make this a winter project. Right now, I just want everything back, so I can ride it. I miss riding.... :(
Edited October 19, 2015 by VifferCrabThank you for all the kudos guys. :blush: I am sincerely humbled and proud to have made so many folks happy with this mod!
Got word that the cover and pressure plate should be in the powder booth in the next day or two. In the meantime, I went ahead and ordered these washers from ProBolt, and Seb was nice enough to send along the bolts I'd need. *tips cap*
I've brought this color down into the chain and sprocket bolts as well, so this should tie in nicely with the pressure plate color...
Excited to get it all buttoned back up.
[image: 8d75476739c16b32814580a64a3511d1.jpg]
[image: 7f4fc7e8caea97e7af61a3a042678372.jpg]
Sent from my iPhone using Tapatalk
Edited October 30, 2015 by VifferCrabWhat detonates the 07 RWB colour scheme are white wheels, and Sebs cover. Frankly. Atomic.
And also not necessarily in the order I stated. They all add up to magnificence. :-)
My .02c
Dave
Yup, deffinatley one skilled dude. Have a cover an awesome member gave me, so while I'm waiting on my inserts from Jamie, I just have to drool over the pictures. ..
[image: 7_zpsekbspwri.jpg]
VERY SWEEEEET. Not to privy on clutches, that outer plate, is it easily removable? and no doubt its powder coated correct?
Those few bolts you see on the outside are all you have to remove to take the pressure plate off.
You don't have to remove the frictions or steels if you don't want to.
My pressure plate is rattled canned primer, red and clear coat. alls 3 cans together <$10...
DutchyMy pressure plate is rattled canned primer, red and clear coat. alls 3 cans together <$10...
Mine is just Duplicator MetalCast red over bare scuffed plate. <$4. Same for the blue on Mario's plate. Gives a nice anodized look
Someone didn't locate the tab between the mid cowl and the upper.... ;-)
Supposed to be arriving Wednesday! Will update...
BOOM!
[image: 20151031_121447_zpseaezbkmz.jpg]
Edited November 3, 2015 by VifferCrabYou won't be taking the finished bike outside, will you Clayton? You do realise that you'll get it dirty???
DUTCHY, were did you get that front wheel decal????? I want!!!
i3v4My VTEC was disassembled back in 2011
WTF? How'd that happen?
Edited November 3, 2015 by wgregtTerryYou won't be taking the finished bike outside, will you Clayton? You do realise that you'll get it dirty???
I know, right? Why the hell would I ever want to actually ride this thing? I can't be held responsible for washing it too.
Pffft... Up for sale, F this thing... :)
Got it mocked up, with full install coming this weekend. I'll probably rattle can the one machined part with the bolt head (don't know the name of this piece) but I think it looks a little off with that part not black. Easy fix.
And I wanted to thank member here, tomk1960. He's the one that did the powder coat on the cover, bezel, and pressure plate. It's perfect. You need yours powdered? Send it to him, and don't think twice. That good.
Okay, I did a little post processing on these pics because of the severe lack of light in my garage, but the pressure plate matches my fairing bolts, and other aftermarket red accents nearly perfect. As you see, I went with Pro-Bolt silver bolts and Pro-Bolt anodized gold washers, to bring some gold on that side of the bike, to go along with the rear sprocket bolts and chain links. Anyway, here's some quick mocked up iphone pics, with much better pics coming after this weekend.
[image: BEAF74EA-7A0F-451C-B088-940579822F7B_zps]
[image: D6C79821-3483-43E2-BCA9-D3CF75E46A9E_zps]
[image: 556ACBDE-FAE7-44D4-A742-2B010811C78A_zps]
Edited November 5, 2015 by VifferCrabWell, got it mostly put back together. I'm waiting for the RTV to setup overnight on the cover , before I put the fairing back together fully. Couldn't resist slapping two bolts in there to see how she looks.
[image: 7f39eb2df503165ef2cb0271967cd917.jpg]
Sent from my iPhone using Tapatalk
Edited November 8, 2015 by VifferCrab[image: 6b464372f8190130ef732bf0333949f7.jpg]
[image: da6f5943fbaafc0845c7e2b3ed5451e4.jpg]
Sent from my iPhone using Tapatalk
I never got no decals with my cover.... :wacko:
But Crab, that is is one fine looking RWBlack looking motor! :beer:
DutchyWell, duh. I share pics of my *too hot for me* wife. That's why I get the stickers. ;)I never got no decals with my cover.... :wacko:
But Crab, that is is one fine looking RWBlack looking motor! :beer:
I goofed something up. Clutch is slipping now under medium throttle.
Sent from my iPhone using Tapatalk
Edited November 8, 2015 by VifferCrabdid you fit new clutch friction plates?
did you soak them in engine oil a few hours prior to fitting?
No sir. All the same parts. I think I didn't torque the pressure plate down enough maybe
Sent from my iPhone using Tapatalk
DutchyI never got no decals with my cover.... :wacko:
But Crab, that is is one fine looking RWBlack looking motor! :beer:
Now you done it .
Like those decals. Sebs doing my clutch cover now. Hope he sends me some :smile2: :smile:
Did you install the plates in the exact same way they came out if not it will slip.
Ps if anybody over there or here wants a clutch cover i have one they can have free for the cost of the postage ($30) from UK to US. Its only damaged where Seb cuts away.
I've only recently had the stickers made, I send one out with every cover now.
I'm actually running low & need to get more!
Hope you got one for me :smile: Please.
SwitchbladeDid you install the plates in the exact same way they came out if not it will slip.
Hmmmmmmm
How would one tell the correct order they're supposed to be in. You know, in case someone broke into my garage and rearranged those plates when I was asleep. Because there's no way I'd do something like that. No way...
Sent from my iPhone using Tapatalk
They have seated, clutch plates have seated to the friction plates . If you did not install back to there original setup it will slip.
Make the same mistake on a 93 . Had to replace with new clutch pack.
adeyrenPs if anybody over there or here wants a clutch cover i have one they can have free for the cost of the postage ($30) from UK to US. Its only damaged where Seb cuts away.
Clutch cover gone to member in Atlanta
adeyrenadeyrenPs if anybody over there or here wants a clutch cover i have one they can have free for the cost of the postage ($30) from UK to US. Its only damaged where Seb cuts away.
Clutch cover gone to member in Atlanta
Your a good man !
adeyrenPs if anybody over there or here wants a clutch cover i have one they can have free for the cost of the postage ($30) from UK to US. Its only damaged where Seb cuts away.
bummer........ i have it posted up in the classifieds that i need one....
and viffercrab: looks so good! i got my rear sets and passenger brackets powdercoated black and it makes them just disappear.
Edited November 9, 2015 by RedRicerDid you remember to install the outer clutch plate in the shallow slot in the clutch outer NOT aligned with the rest (page 339 of the manual download)
RedRiceradeyrenPs if anybody over there or here wants a clutch cover i have one they can have free for the cost of the postage ($30) from UK to US. Its only damaged where Seb cuts away.
bummer........ i have it posted up in the classifieds that i need one....
and viffercrab: looks so good! i got my rear sets and passenger brackets powdercoated black and it makes them just disappear.
Thank ya, kindly. That's next on my list actually. That and I'm going to carbon fiber wrap the exposed frame... That'll be a winter project for sure.
AllWeatherDid you remember to install the outer clutch plate in the shallow slot in the clutch outer NOT aligned with the rest (page 339 of the manual download)
Taking it apart this afternoon to have a look-see, and see what's what. I'll check the manual.. .thanks for the head's up.
VifferCrabRedRiceradeyrenPs if anybody over there or here wants a clutch cover i have one they can have free for the cost of the postage ($30) from UK to US. Its only damaged where Seb cuts away.
bummer........ i have it posted up in the classifieds that i need one....
and viffercrab: looks so good! i got my rear sets and passenger brackets powdercoated black and it makes them just disappear.
Thank ya, kindly. That's next on my list actually. That and I'm going to carbon fiber wrap the exposed frame... That'll be a winter project for sure.
ooooo. that should look awesome!
The time has come to spill the beans, and wear the dunce cap. I'm sharing this in hopes of helping a future dummy, from being super duper dumb, like me.
Couple things happened that I'm going to file away in the "you rushed this and didn't think it through" file.
Today, my pressure plate looks like this:
[image: f7d24bb0b71a3cd2d07392c1f957b1c0.jpg]
[image: d4c27db796daf7bac9d272ed66ef11c3.jpg]
Here's how we got there:
The day I sent me clutch cover and pressure to Seb, I cleaned off the old gasket from the block, and saw all of those pretty clutch discs just calling my name. A sane person would leave something they have no idea about alone, but the engineer in me just HAD to take em all out to see how shit works. Seemed simple enough. Clutch disc, backing plate, cutch disc, back plate, etc...
So, I took them all out, and using my vast Honda VFR 800 clutch assembly experience (none) I put them all back in, just like they came out. Or so I thought....
Fast forward a few weeks and a get my amazing looking cover and pressure plate back. Let's just slap this thing together and take it for a spin. You're like a pro now, eff the service manual, you remember reading 9 ft-lbs on the spring bolts, have at it....
Unfortunately, the only torque wrench I owned at the time, was a big boy, 50-250 ft-lb, so meh..... I'll hand snug them, then add a 1/4 turn. Seems legit.
Button it all up, add a few drops of fuel from my gas can I use for the lawn mower, fire it up, make sure nothing leaks or goes boom, and off I went. Clutch slipped bad with anything resembling medium throttle. I limped it to a gas station, filled it up since it was empty for the custom tank paint job, and limped it back home.
Initial thought was not enough torque on the pressure plate bolts. So, off to Sears I went, and purchased a shiny new torque wrench capable of 10 ft-lb minimum.
Figuring I can torque the nuts by just removing the window, I remove just that part. Decided to back all of the bolts back out, reinstall in star pattern again, with wrench set to 10 lbs. As member AllWeather mentioned above, the outer most plate needs to be inserted in the shallow grooves in the basket, not the deeper grooves like the rest of them. That too, was a very real possibility so with the window off, I'd pull the pressure plate, realign the last plate, and reinstall the bolts.
Lesson number 1 learned. The plate is a hair too big to be removed through the port hole.
Lesson #2 learned - when attempting to move the pressure plate at all through the window, the last clutch plate can (and did) mis align itself without you knowing it.
Having realized now, that inspection requires removal of the fairing and removal of the entire clutch cover again, I decided to just try retorqueing the bolts with my fancy new wrench. Ran them hand snug, then applied the torque wrench. I didn't get 1/4 turn before I heard that gut wrench pop. Please no! Let that be the spring compressing, something.... Anything but a crack.
So, off the cover came. My heart sank when I saw the pressure plate. Turns out, the last clutch disc was aligned with all of the rest, instead of one tooth off, into the shallow groove. Then fiddling with the pressure plate without removing the cover, most likely made it slip out of the basket. Tightening the pressure plate down on an uneven surface was my culprit. Boom. Disaster.
I already have another pressure plate overnighted to member Tomk1960, who did the amazing powder coat job originally. To his credit, he's agreed to give me a lightning fast turn around, and I should have it back this time next week.
So, anyone doing this, leave your damn clutch basket alone, or read page 339 of the manual to refresh your memory when reinstalling.
My pain, your gain. But whacha gonna do? Lesson learned. The bike looks outstanding and Sebastian and Tom have been beyond awesome helping me get through this.
Will update...
Sent from my iPhone using Tapatalk
Edited November 11, 2015 by VifferCrabVifferCrabHere's how we got there:
...
It is a generous act to share one's mistakes. It's one of the ways we educate each other. Thanks for sharing.
Glory2Viffercrab for openly admitting he is wrong :beer:
What about some red lug nuts?
Do not know if they are specced for mc rear rims, but since you are modding.....
http://www.workwheelsusa.com/product.php?category=45&wheel=121
Good man for the honesty and the pics, which will surely help me someone else avoid this same mistake :)
DutchyGlory2Viffercrab for openly admitting he is wrong :beer:
What about some red lug nuts?
Do not know if they are specced for mc rear rims, but since you are modding.....
http://www.workwheelsusa.com/product.php?category=45&wheel=121
Red lugs were on my list as sat there and looked at the bike every day I was waiting on the cover to come back. I actually wrote Tom, the powder coater, about matching my lug bolts to the pressure plate. Problem was, bike was sitting on it's side stand so I didn't have to drain the oil when doing the cover, so I didn't want to risk pulling the lug bolts off and having the bike put it's weight on the lugs, themselves. So, I added it to my 'winter list' along with a few other things. I haven't had time to actually scour the Interwebz looking for an anodized set..... so THANKS for that link. The honda car scene is chock full of kids that add things like this to their cars, so I just need to figure out what honda car, the VFR matches up with.
Anyone happen to know that off the top of their head?
That sure is a bummer on the cracked plate but at least it is a reasonably quick and not too expensive fix
I am really tempted to get one of these clutch covers done ........just got to find a job first or sell a kidney
Yeah, thanks for the condolences guys. Twas a nice big slice of humble pie, fo sho. I'm a confident wrench on a car, and one would think motorcycles are the same, just smaller. Truth is, I've come away from this entire build with a new found respect of the hourly rates of motorcycle mechanics.
The pressure plate wasn't expensive to replace, and I next day air'd one to Tom the very next morning. So all I've lost, is some of my man card, and the precious little riding time left this season. All I've wanted to do, is strut that shiny slut down main street for the last 2 months, and it's nobody's fault but my own, that it's going to be another week until I can.
Learned a lesson, and even with my new membership here, this forum has already provided me a wealth of knowledge. Done business with a few great folks here already, and I plan on sticking around. So, money and time well spent. Hopefully my threads have/will help some others in the future, to repay my debt.
Will update.
AllWeatherThat sure is a bummer on the cracked plate but at least it is a reasonably quick and not too expensive fix
I am really tempted to get one of these clutch covers done ........just got to find a job first or sell a kidney
You should do it man. Christmas present to yourself. Sebastian's pricing isn't out of line, and when you see his work on your bike, you'll forget all about what you paid. Tom's powdercoat on the cover looks like it came from factory, you can tell he knows what he's doing. It's not an expensive endeavor and every time you look at it, you'll smile. I expect it'll be quite the conversation piece once I get mine back on the road....
Just do it. :)
I was afraid of that but lessons learned and move on .
I learned my lesson concerning low torque values and aluminum parts. After fiddling with click stop torque wrenches I finally realized that only a higher end wrench would end the cringing as you tighten routine. I purchased a CDI 502LDFNSS wrench that goes 0 to 50 lbs. in 1 pound increments. No more snapping sound nightmares and now I sleep tight (pun intended).
[image: post-24160-0-20982500-1447293534.jpg]
expvetI learned my lesson concerning low torque values and aluminum parts. After fiddling with click stop torque wrenches I finally realized that only a higher end wrench would end the cringing as you tighten routine. I purchased a CDI 502LDFNSS wrench that goes 0 to 50 lbs. in 1 pound increments. No more snapping sound nightmares and now I sleep tight (pun intended).
+1 I have the same one .
Torque wrenches can save the day!
I love mine:
[image: TECH2FR100.jpg]
Now that must have cost a pretty penny!
But when prevent a 1 hour job from turning into 2 days they are worth every cent.
The lesson is get a good one. Don't scrimp, these are an investment. And will pay you back in saved parts and peace of mind. :smile2:
Crab,
If you start riding with it for the first time and you see a sludge on the inside of the window, donot panic, this is normal and will clear after a while.
Thanks for sharing VC.
Any answer on the lug nuts????
SCguyTorque wrenches can save the day!
I love mine:
[image: TECH2FR100.jpg]
Not to hijack the thread but an important 2c about correct torque. When I first started working on my own bikes I insisted that I had a calibrated elbow. Never used a torque wrench. Had lots of mechanical disasters (oh the stories) but none were torque related. Except maybe for learning the value of an impact screwdriver with a good JIS bit. After stripping a screw head. LOL. At which point I was also shown how a soft propane flame, a Dremel and a good blade driver bit can help.
Then when I had my 4th gen VFR, I went through a recurring issue with the big upper bolts that secure the rear subframe loosening up. Thanks, NYC road "maintenance". So I would crank 'em "farmer tight" and a few months later I could feel the back moving around again. Then one day a good friend put his nice Snap-On digital torque wrench in my hand and looked up the correct values. Which felt like half the torque I had been applying previously. And the bolts never came loose again. Seems un-intuitive, right?
So this same friend of mine - who happens to have been an auto mechanics instructor and owned his own shop for a while - has been letting me use his garage. Nice to have a pneumatic lift, a loaded Snap-On cabinet and good tire and balancing machines. :cool: (Which reminds me, I think I need to get an adapter for the balancer for my 8th gen wheel.) But anyway, we hang out in his garage while I try not to f*** up what I'm doing too badly, he gives me advice where necessary (teach a man to fish), and the big thing: He insists on precise torque for pretty much every fastener on the bike.
And now that I've been using a torque wrench, I'm pretty sure that "calibrated elbow" of mine was about 50%-75% on the high side! Yikes. If my friend ever moves I may just have to buy my own torque wrench...
Torque wrenches do not have to be the click type or dial type as the beam type (generally cheaper ) will do the job as well just a little more difficult to use .
I have a Snap-On click style myself, but honestly even the harbor freight ones do a good enough job and come in like 4 sizes. I realize we all adore our bikes, but they arent military aircraft.
RedRicerI have a Snap-On click style myself, but honestly even the harbor freight ones do a good enough job and come in like 4 sizes. I realize we all adore our bikes, but they arent military aircraft.
Nope, but realizing I was putting, say, 60 ft-lbs on a bolt that was spec'd for 35, is not a small error and not guaranteed to be inconsequential. And if the failure happens when you're mid-corner at 2-1/2 times the posted recommended speed, well...
DutchyCrab,
If you start riding with it for the first time and you see a sludge on the inside of the window, donot panic, this is normal and will clear after a while.
Yeah, I read enough threads to not be alarmed about that. And sure enough, it fogged up on its maiden voyage, I was ready for it.
Thanks for the heads up though...
Sent from my iPhone using Tapatalk
duccmannThanks for sharing VC.
Any answer on the lug nuts????
Haven't inquired yet, to be honest...
Sent from my iPhone using Tapatalk
RectaltronicsRedRicerI have a Snap-On click style myself, but honestly even the harbor freight ones do a good enough job and come in like 4 sizes. I realize we all adore our bikes, but they arent military aircraft.
Nope, but realizing I was putting, say, 60 ft-lbs on a bolt that was spec'd for 35, is not a small error and not guaranteed to be inconsequential. And if the failure happens when you're mid-corner at 2-1/2 times the posted recommended speed, well...
oh totally agree. just saying to those with a tighter budget, a less expensive option will at least get you well within acceptable tolerances.
Just found this on ebay uk if anyone wants one. http://www.ebay.co.uk/itm/Honda-VFR750-FL-FM-VFR750FL-FM-VFR-750-FL-FM-90-93-Engine-Clutch-Casing-Cover-/231735395492
Member tomk1960 came through again. After my debacle, I overnighted him another pressure plate. He did his thing and overnighted it back. Should have this beauty back on the road tomorrow. Clutch discs in proper alignment this time for sure.
[image: 092b7bcec110e8667b99710e199292d0.jpg]
Sent from my iPad using Tapatalk
Edited November 18, 2015 by VifferCrabThat red looks awesome. Tom showed me a blue that looks equally nice. Decisions, decisions!
He says it came out better than the first, due to casting pot marks on the original.
Sent from my iPad using Tapatalk
VifferCrabShould have this beauty back on the road tomorrow.
I'm from VA originally, so I know your ridin' time is slippin' away fast. I usually put mine up around Halloween when I lived there. I can feel the seconds slipping away from you as you try to get it out for "one more ride." Good luck getting out there soon...
Greg, the weather here for the last month has been so unseasonably warm. It's been killing me that I haven't been able to get out there. Gonna be about 60* during the afternoon today and tomorrow, so I'm even gonna take the day off today, so I can wait for the post lady and get this thing buttoned up, just to have a ride this afternoon. Not making that up.
My lovely wife has been throwing jabs at me about not being able to enjoy the last couple weeks that were in the upper 70s and low 80s on a few days.
So weird that she was so pissed when I bought it. After her very first ride, that she did begrudgingly, I can't keep her off the damn thing. Funny how that works....
Sent from my iPad using Tapatalk
Edited November 17, 2015 by VifferCrabThere is an easy solution to your problem - own multiple bikes! Evidently you don't suffer from MBS...yet. :wink:
Yep. Same reason I have. Got tired of waiting on parts etc with one bike. Now, if somethings down for repair or customizing or whatever, even if it's a month or more, there's another to ride. Plus, you get calls like "I'm off for a week and I'm flying to CA and taking something out of your garage, and I'll bring it back whenever I damn well please, with worn tires and an empty tank. You are welcome to join me if you like." and be able to accomodate these so-called friends.
tomk1960There is an easy solution to your problem - own multiple bikes! Evidently you don't suffer from MBS...yet. :wink:
Strange, we both live in "Worcester" and suffer from the same syndrome :wink:
Yeah, a second bike seems like a reasonable solution.
Hey look! Got something in the mail. One of these has less cracks than the other. Weird.
Amazing customer service and lightning fast turnaround on the powdercoat, Tom.
Thanks again.
Let's try this again....
[image: 52ad9b6cdb8374a922439254cf68e26b.jpg]
Sent from my iPhone using Tapatalk
adeyrentomk1960There is an easy solution to your problem - own multiple bikes! Evidently you don't suffer from MBS...yet. :wink:
Strange, we both live in "Worcester" and suffer from the same syndrome :wink:
We're obviously twin sons of different mothers. And neighbors as well!
Tense moment tightening everything down. As you can imagine, I was a little gun shy about torquing everything down again. But before any of that could take place, I had to message Seb yet again. The pressure plate wasn't backing right up against the last clutch disc as I remember it being. There was a large gap there, even though the bearing was completely seated, no matter how much effort I gave it, by pushing it in by hand, to snug up. A message to Seb confirmed that the gap was not supposed to be there. Since I had the broken pressure plate, I decided to put that one on, and see if the stock bolts would reach the threads, and sure enough they did. Very slowly I started running them in, and I saw the gap closing up. Figured I was in the clear, so pulled those back out, swapped in the new plate, and very very slowly, in a star pattern, ran the aftermarket bolts in.
Sigh of relief. It's back together! Took it for about an hour ride today and I can report it didn't blow up, and the clutch no longer slips.
I'll get some proper pics soon, but here's a pic of the gap. For those doing this, don't worry, just run the bolts back in and you should be good.
[image: 56c240169bf80b33851cb251df3487a5.jpg]
Sent from my iPhone using Tapatalk
If you put the bike on the side stand, you will not need to drain the oil.
The gasket should be fine. If you don't rip it when you pull the cover, you can reuse it.
Sounds like the starter gear could be bound up - maybe that's why the dowels wouldn't line up perfectly?
Take some pics when you get it apart?
There's a chance your battery could be low, if you didn't have it on a charger while the cover was off. Give that a rest before you take anything apart.
The gasket should be fine. If you don't rip it when you pull the cover, you can reuse it.
Sounds like the starter gear could be bound up - maybe that's why the dowels wouldn't line up perfectly?
Take some pics when you get it apart?
There's a chance your battery could be low, if you didn't have it on a charger while the cover was off. Give that a rest before you take anything apart.
If you put the bike on the side stand, you will not need to drain the oil.
The gasket should be fine. If you don't rip it when you pull the cover, you can reuse it.
Sounds like the starter gear could be bound up - maybe that's why the dowels wouldn't line up perfectly?
Take some pics when you get it apart?
There's a chance your battery could be low, if you didn't have it on a charger while the cover was off. Give that a rest before you take anything apart.
Whoops, sorry for the double post. Finally took off the cover. Nothing is obviously bound. Will try to attach pics.[image: image.jpeg] [image: image.jpeg] [image: image.jpeg]
Is the battery charged enough?
OK, got it figured out....will post on the off chance that someone else is as unlucky/inept as I. Battery was never the issue..plenty of juice.
when I first removed the cover eons ago to send off for upgrade, I must have pulled out the cylindrical shaft upon which the reduction gear
is mounted. The reduction gear is the one dead center of pics 1 and 3 above. It rides on a shaft AND has a washer (shown resting just below
where the shaft would sit (shaft not shown in photos).
When I initially put it back together, the shaft wasn't properly seated--that's why mounting the cover was such a bear.
After removing/replacing a cover to reassess a couple of times--and finally looking carefully at the schematic in my manual, I discovered that
the washer lives *behind* the reduction gear. It had fallen out and I mistakenly placed in outboard/in front of the gear.
Once the washer was placed behind the gear and the shaft was fully seated, everything went together fine and she fired right up.
Cheers,
Varsity
That washer the obvious clue, but by the time you posted the pictures, I was sound asleep :-)
:cheerleader: :cheerleader: :cheerleader:
Glad you got it sorted sir. Enjoy, and don't forget the pics :wink:
The clear clutch cover on my Gen 5.5 is the pièce de résistance of my build! Thanks Seb
[image: post-24302-0-30915900-1453756804.jpg]
[image: post-24302-0-85135200-1453756831.jpg]
[image: post-24302-0-32900300-1453756856.jpg]
[image: post-24302-0-58317600-1453756893.jpg]
This thread was instrumental for me deciding to install the Sebspeed clutch cover and those of you who followed the thread may remember that VifferCrab suffered a pressure plate casualty in the process. A cracked pressure plate??? I should be so lucky. Let me go on record and say that is mere child's play compared to my F-up. VifferCrab I feel your pain and then some.
Like VifferCrab did, here are my lessons learned so that others can avoid a similar fate:
Lesson 1: Don't be in a hurry.
Lesson 2: If the starter gears come off when you are removing the original clutch cover (or removing Sebspeed's work of art because you forgot to put the guide pins in the first time you installed it), don't assume you know how they go back on. Open up the service manual (section 20 for you 6th gen owners) and read the instructions. That's why you bought/downloaded the service manual, isn't it? So you wouldn't F things up?
Lesson 3: Make sure you mate the clutch cover to the crankcase (no space between the two) before you even think about installing the bolts. If you can't get the two to mate then something is amiss. DO NOT THREAD AND ABSOLUTELY DO NOT TIGHTEN BOLTS UNTIL THE TWO PIECES ARE COMPLETELY MATED!!! (Yeah I'm screaming at you because a very bad thing could happen)
Almost forgot Lesson 4: Once you successfully install and fire up the bike and hear what sounds like an intermittent knock, it probably means that you didn't tighten the timing hole cover you dumbarse.
And that is all I'm going to say about that...
Here is the final product...still absolutely worth it!!! Thanks Seb!!! And thanks Tomk1960 for the powdercoat work.
[image: IMG_0407[1].JPG]
All very good tips, and I'm happy to see you did get it all back together and looking great!
I don't think I saw it specifically addressed, but the reason the pressure plate isn't flush initially is because the clutch cylinder is pushing it out. There's a spring inside that pushes out the cylinder all the time. Only the clutch springs (once the bolts are properly tightened) pushes it back in at rest. Also the reason to strap a zip tie or something around the cylinder if it's off the bike for service.
End of thread · 111 posts recovered Wayback Machine snapshot 17 Jul 2017