VFRDiscussion ARCHIVE / READ-ONLYREAD-ONLY

What can you tell me about my VF500?

100 posts Started 13 Oct 2016 Last recovered post 9 Dec 2017 Wayback Machine snapshot 19 Jan 2019

#1

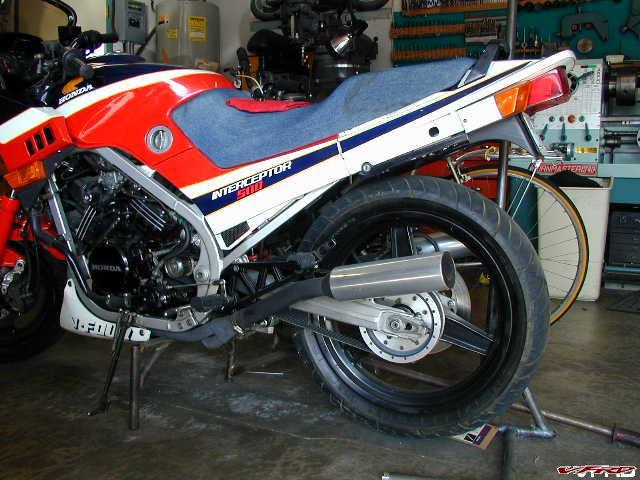
I bought this VF500F earlier this year as a project bike and my second ever motorcycle. I have been working on making it look better and work as it did in the '80s(while modernizing where I can). I thought I was buying a 1985 VF500F, but have since found out from the MTO history documents that it is an '84. Its got 56 thousand km on it, but it runs and it was cheap. I have been told that one of the previous owners restored it using a few donor bikes and based on the frame paint and what not I'd say it has. I have been taking it apart and learning how it works so that I can fix up anything is out of date or falling apart. It has been fairly straight forward so far using guides and chatting with people on this forum, but I have a few questions and am looking for general advice.

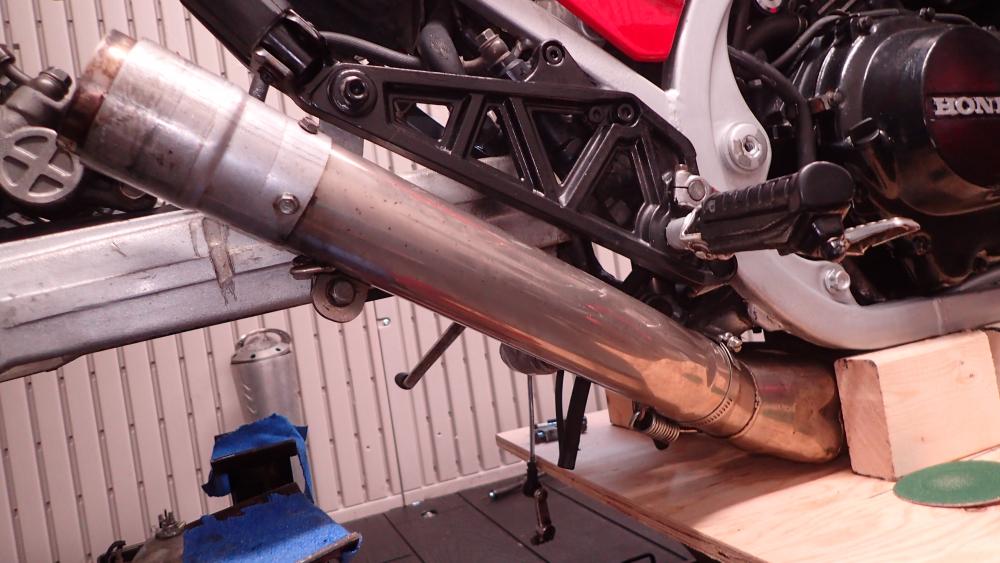
I've been thinking about the exhaust on this bike for awhile. The bike has some sort of upgraded 4-1 exhaust on it and I think I've identified it as the Hindle 4-1 pipe. It shows it's age though. There is rust pitting and an odd cloudy texture on the metal. How do I resurface the pipe?

Also, the can that was on the end was a SuperTrap, but its kinda broken and I'd like something lower profile too. I have been considering leaving the end open as a straight pipe, except the end of the pipe is messed up and has an adapter bolted straight through it. To fix this I want to remove the end bit of the pipe and fab my own stainless side exit. Would this be viable? Will it mess with the tuning too much? I am aware of the carb jetting I'd need to do in order to make it work and I can do it. All that I've been reading from GAZ's topic about building his own pipe has put me off though.

I'd also like to know what having this pipe means compared to stock.

Besides the exhaust I am open to advice for things to fix. So far my list of things to do looks like this:

  • Tires
  • Repainted wheels
  • Lights
  • Speedometer
  • Redone seat
  • Chain and sprockets
  • Wobbly clutch lever(How do I fix this?)
  • Carb sync and clean
  • Carb jetting
  • Mirrors

I am going to link an album of pictures here for the pipe. http://imgur.com/a/RmqqA

P.S. - I am not keeping the original look of this bike, but I am a huge fan of the engineering behind the VFR series and I've wanted one of these since I first got into bikes. If anyone in Ontario needs red plastics or stock parts I can hook you up. This is an ultra-low budget D.I.Y. build, since I'm 18 and in school(before anyone suggests super sonic builders who can do it for me). Why is mine red?
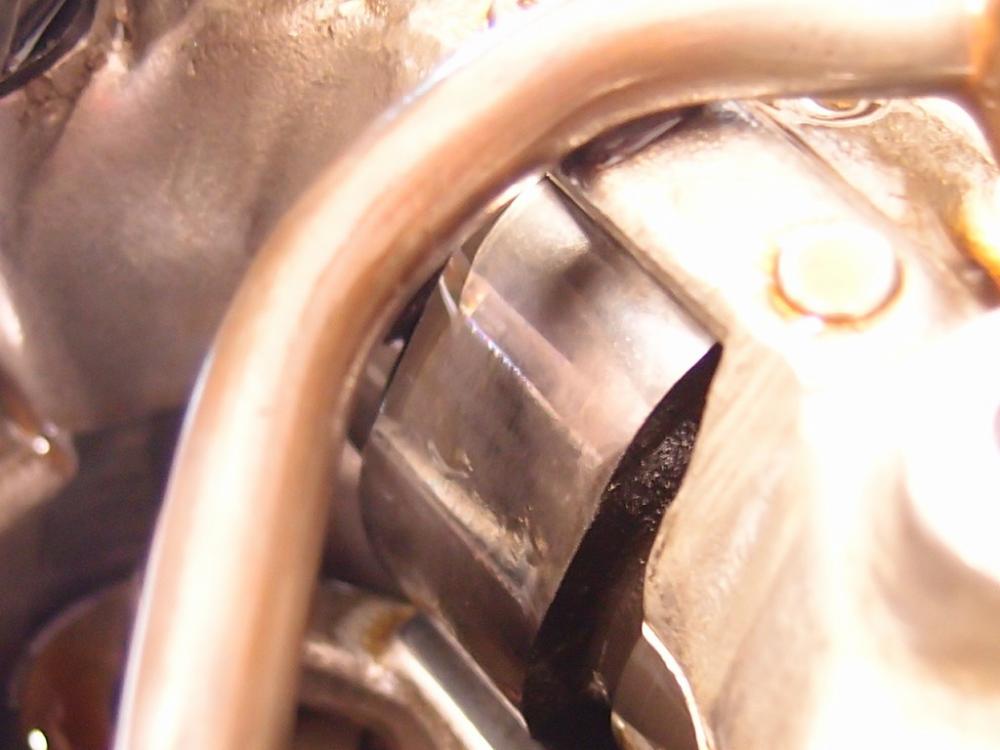
PA130166.JPG

#2

For your exhaust, I recommend pulling it off the bike, sanding it yourself, then taking it to someone who can ceramic coat it.  Doing the sanding yourself saves you money.  Ceramic coat everything including headers, downpipe, and muffler. 

I owned the final year of the VF500F in 1986...my first bike.  Yeah I'm old.

[image: 5216207254_7085c2ed6d_o.jpg]

#3

Valve inspection is the first thing I would do, right after a cylinder compression check. Great engine, but not reliable if not watched with a careful eye. Eventually I'll finish putting my 500 engine back together after a valve dropped, punched a hole in the cylinder, and did a bunch more damage. This is somewhat typical. But if you keep an eye on things it should be fine.

#4

From your Imgur page:  “What caused that gash in my swingarm? I have matching cuts on either side that look like mini craters cutting through the ridge on the side”…

Interesting.  I too am new to the VF500F (got a really nice 1986 example) and started looking at the swingarm from your prompt.  As far as I can surmise, the passenger foot peg bolt extends too far out the backside, and when fully loaded (with a less than a great rear shock) the bolts make contact with the swinger.  Just another reason for me to pull the passenger pegs.

IMO, I'd attempt to migrate back to an OEM exhaust as these bikes really purr and pull nicely w/the original piece.  Making a less than complete 3rd party exhaust work with this complicated V-four may provide many hours of headaches.

I've read virtually everything I can find concerning the valve failures:  Heed the advice given by YoshiHNS and check your valve train clearances.  One popular guy in the know, Jamie Dougherty, has suggested not taking it above 9,000 RPM.  Whether that will result in a net gain in longitivtiy probably has yet to have been proven, but I will follow this advise until it is proven wrong.  Yoshi, which cylinder did you lose?  Care to enlighten us as to what was transpiring when the valve dropped?  Seems the left front cylinder is prone to eating exhaust valves, but have no real data to support.

15 hours ago, Rogue_Biker

For your exhaust, I recommend pulling it off the bike, sanding it yourself, then taking it to someone who can ceramic coat it.  Doing the sanding yourself saves you money.  Ceramic coat everything including headers, downpipe, and muffler. 

Good advice.  I ceramic coated a set of pipes on a CX500 a few years back and it held up very well.  I did notice it was prone to scratching, so be mindful.

FYI, I added an OPT7 LED headlamp and the difference is incredible.  As a matter of fact, I rode it in this morning and the nice white light really illuminates my path.  Simple to do with the OEM fairing, but if you're going to drift from the original parts, you may have problems stuffing it in a standard light can (I couldn't fit it in the huge GSE1100 "train" headlight I added to my '88 GT647).  The placement of the LED's in the bulb housing fairly well mimics the light path of the standard bulb.  As a matter of fact, I think I need to adjust it slightly upward (not down).

How 'bout a few overview pics of the bike?  Like to see the red you reference.  Inquiring minds need to know...

#5
4 hours ago, flyinelvis

IMO, I'd attempt to migrate back to an OEM exhaust as these bikes really purr and pull nicely w/the original piece.  Making a less than complete 3rd party exhaust work with this complicated V-four may provide many hours of headaches.

I understand the tuning they put into the stock pipes, but I ran the bike for awhile(I soon realized it was spewing oil because the hydraulic clutch rod was not depressed with sprocket cover off) with the can off and it sounded like it belonged in WSBK, just in idle. I did a straight pipe on my Grom with a 6'in can on the end and it isn't that obnoxious either. Maybe I don't know what I'm getting into with a 500cc bike, but I'd love for it to growl through a starightpipe. I like the idea of ceramic coating it, but I still don't know what I should do about the tip. Given the fact that its getting a jet kit, would it be feasible to do a short side exit or would this create back-pressure problems? For the valve adjustment, does anyone know how much the OEM adjuster tool costs or would a makeshift tool be ok?

I am replacing the front fairing with a Street Fighter Esq headlight assembly. It takes 55w H3 bulbs if that compares to LEDs at all. I looked at the footpegs and I agree with your hypothesis, there are matching marks on them.

Here's a picture of what it looks like right now, its a little stripped down. http://imgur.com/A0SPT4w

I am going for a white/red colour scheme. I reshaped and covered the seat myself. Tell me what you think. I have been trying to decide whether I should paint the flat half the seat with a stencil and matching red vinyl paint. Also, has anyone tried cleaning up the tail? I have the mudguard and rear fairing gone here, but the fairing is coming back once I put new blinkers in. I just don't know what to do with the metal rods or the tail light.

#6

From what I learned from "The Dutchy", regular valve clearance checks at 5-6,000km and oil change is key to long life.

So upon buying mine, he checked them (and will teach me next...).

took some piccies, they got the thumbs up...

P7189139_zpsq5c22n31.jpg

P7189142_zpscg31k3tp.jpg

P7189143_zpsssvpuw1i.jpg

P7189146_zpslxesrwhx.jpg

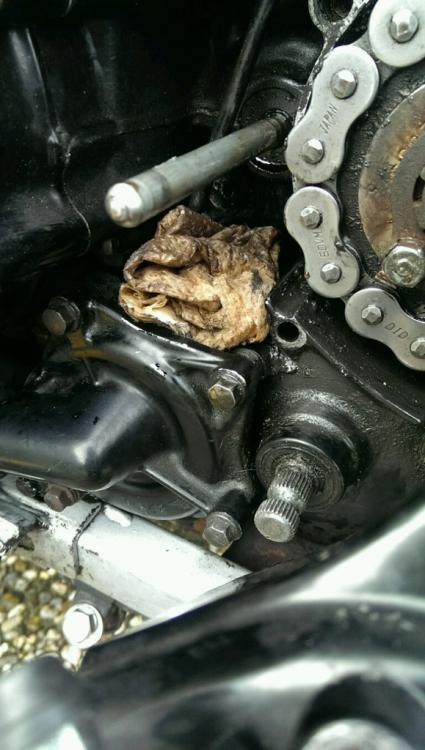
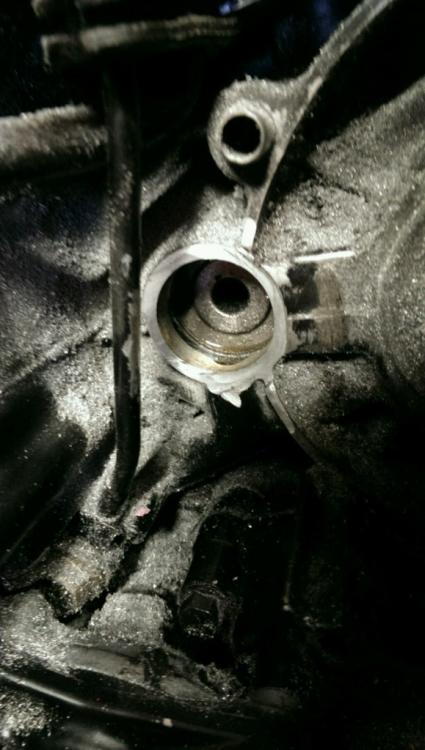
The seal around the gear rod can develop a leak. Honda-san wants you to take out the engine and split cases. There is a different way....  :-)

IMAG3326-768x1358 2_zpsjrwtoodj.jpg

Dremel is your friend...

IMAG3554-1024x1811_zpsmu4s9iky.jpg

#7

If you want to enjoy this bike for longer periods, beside all the good advice already provided, I'd suggest to install the oilpump and sump of a 1986 model.

The sump holds more than halve a quart of oil more than the early models and the oilpump is a bigger one. Honda didn't install that for no reason.

Another thing, the carbrail on the 1984 / 1985 model is fed from the left side. So #1 gets fuel instantly, #4 is the last one to get fuel.

On the 86 there are two fuel lines going inbetween the carbs of #1#2 and #3#4. Also, the 86 is gravity fed and doesn't have a fuel pump.

Racing this VF500. we found out that #3 and #4 were nearly starving for fuel.. Without going to the gravity fed option, which needs a 86 carbrack, we feed the 85 carbs from both sides by making a extra fuel delivery on the # 4 carb. 

For the exhaust system... We left the original collector box installed, carbs are open and rejetted..

[video: https://www.youtube.com/embed/xTELMBFdq1g?feature=oembed]

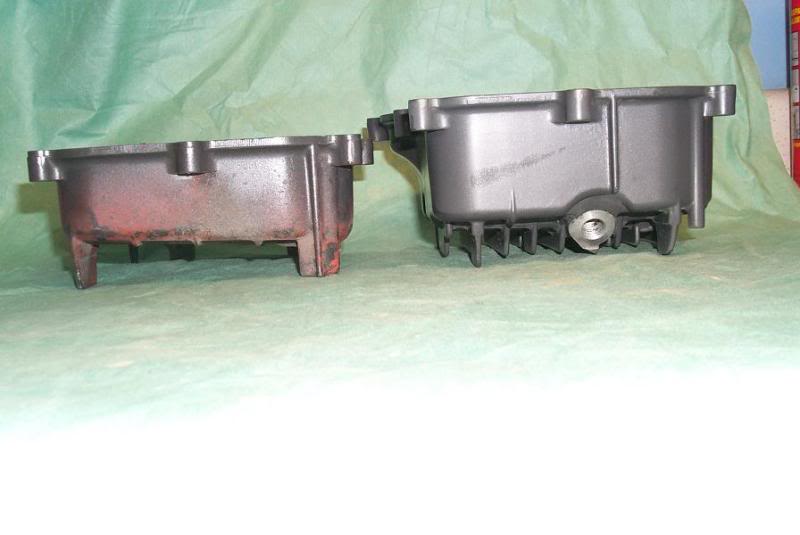
Differences in the oilpan: (84/85 on the left, 86 on the right).. The 86 is easy to recognize.. It has the extra Cooling fins. Remember, it's not just the oilpan... This is the whole list:

#1, used '86 oil pan (OEM part no. 11210-MF2-710)
#2, gasket (OEM part no. 11315-KE7-000- same part number for all years)
#3, used '86 pickup tube + 2 bolts to mount this
#4, used '86 oil pump and check valve assembly

8485vs86.jpg

#8
14 hours ago, TheDutchy

If you want to enjoy this bike for longer periods, beside all the good advice already provided, I'd suggest to install the oilpump and sump of a 1986 model.

The sump holds more than halve a quart of oil more than the early models and the oilpump is a bigger one. Honda didn't install that for no reason.

Another thing, the carbrail on the 1984 / 1985 model is fed from the left side. So #1 gets fuel instantly, #4 is the last one to get fuel.

On the 86 there are two fuel lines going inbetween the carbs of #1#2 and #3#4. Also, the 86 is gravity fed and doesn't have a fuel pump.

Racing this VF500. we found out that #3 and #4 were nearly starving for fuel.. Without going to the gravity fed option, which needs a 86 carbrack, we feed the 85 carbs from both sides by making a extra fuel delivery on the # 4 carb.

Is the oil pump conversion as easy as plug and play? After hearing about the carb problem I did some investigating and found some solid evidence to back up your claim.

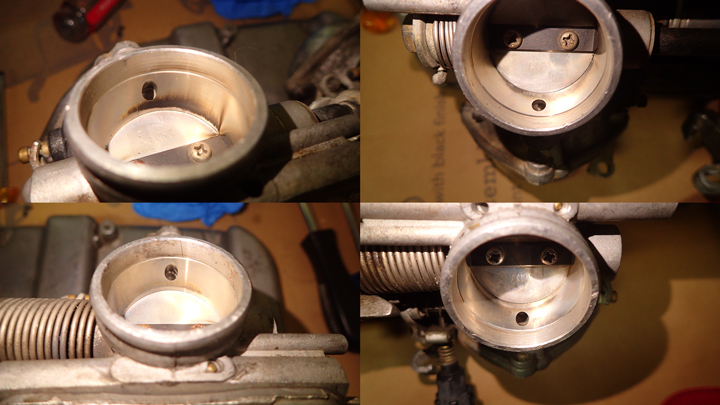
Carbs.jpg

These are carbs 1, 2, 3, 4 from top left to bottom right. As you can see the carbon deposits on carb 1 are huge compared to carb 4.

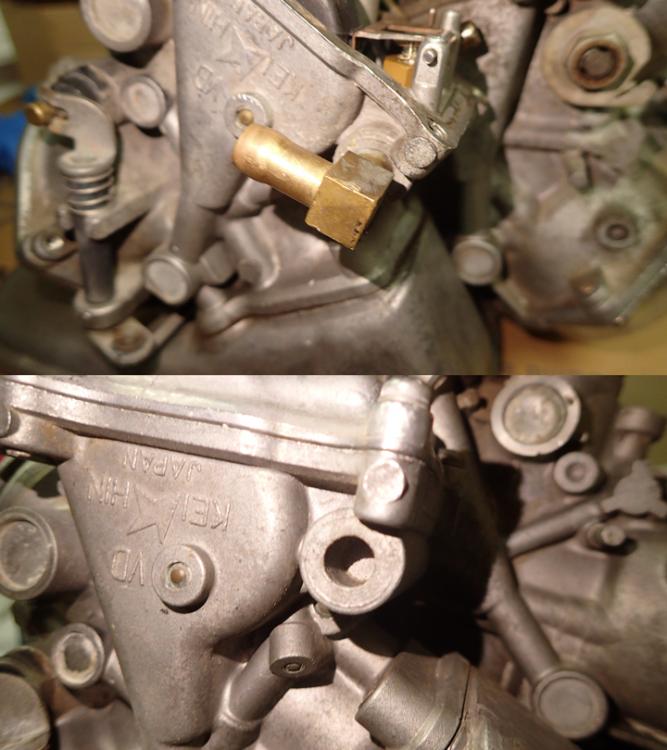
Carb-fuel-in.jpg

Is the process of adding another fuel line as simple as drilling out the inlet on carb 4 and attaching another hose after the fuel pump?

If this mod does not have its own post, it really should.

I am also picking my jets soon while I have this thing open. Any suggestions for size? I'd like a mixture further on the rich side. I am using stock airbox with snorkel removed and a K&N filter. I am going to use the Hindle 4-1 after I resurface it. No can on the back, ~250mm shorter than suggested length for this bike.

#9
8 hours ago, Tyy

Is the process of adding another fuel line as simple as drilling out the inlet on carb 4 and attaching another hose after the fuel pump?

Yes it is.. I have taken the brass intake tube from another carb rack. Drilled out the the fuel delivery hole on the #4 carb. just a bit smaller than the delivery tube. Heated the area of the carb body and pressed the fuel tube in.

Make sure you got the angle rigt on the brass tube because the #4 carb is realy close to the frame.

On the oilpump and sump: If you got all the parts mentioned of a 1986  model, it is a direct fit on a 84/85 model. We didn't encounter any problems, also the original 85 exhaust collector fitted straight back.

#10

Having just replaced a set of 30mm (VD41A) carbs with 32mm carbs (VD56E) on my 86 VF500F2F, I'm puzzled by the necessity to add a another fuel feed to the right hand side of the carb bank. My 86 has no fuel pump so I'm just gravity feeding the left hand entry 32mm carbs. I am not disputing your findings, but how did you come to the conclusion you were starving 3 and 4? Did adding the extra feed make a significant difference? Were you running a fuel pump or just gravity? 

My bike "seems" to run OK with a single feed (after some messing with mains and slow feed jets). I can run full throttle at max speed and I don't get any starvation symptoms. At least I don't think I do. And the bike hits a decent top speed (GPS 182km/h) .

#11
TheDutchy, 10/17/2016 at 0:09 AM

Yes it is.. I have taken the brass intake tube from another carb rack. Drilled out the the fuel delivery hole on the #4 carb. just a bit smaller than the delivery tube. Heated the area of the carb body and pressed the fuel tube in.

Make sure you got the angle rigt on the brass tube because the #4 carb is realy close to the frame.

On the oilpump and sump: If you got all the parts mentioned of a 1986  model, it is a direct fit on a 84/85 model. We didn't encounter any problems, also the original 85 exhaust collector fitted straight back.

you were able to use your 85 collector and headers with the 86 oil pan? really?  I always thought the bigger oil pan needed a different collector and pipes.  

#12

The 86 is gravity fed and has (much) larger fuel lines (as in the feed from the petcock). So you're safe if you have everything lined up from the 86 model..

I have a 85 model with fuell pump with a single line feeding from the side of the carb rack.. Therefore converted it.. Toasted two engines mostly caused by the oilpump but we measured heat balancing issues as well. to cover that, we went to to the dual feed..

Yes, the 85 Original collector didn't have any fittment issues.. The tabs that hold the collector to the oilpan are on the same level.. Also the front headers are clear. I will make some pics this weekend...

#13

It's the aftermarket pipes that can cause problems with an 86 oil pan.  Most systems were designed in 84 and some cross over right under the oil pan.  On my 86 race bike I had to install an 84/85 oil pan and pump.

#14

Hey guys,

Oh man... I have something here that is making me wheeze and groan every time I think about what could possibly be going on. I pulled my spark plugs today.

First of all, everything here is contradictory or way off what our fuel delivery findings would suggest. To remind you, the carbon deposits on the carburetors suggest the cylinders are getting less fuel in order from 1-2-3-4. I have no idea what these plug readings suggest. Here is a link to ultra HD pictures of each plug: http://imgur.com/a/4LAWa

My observations from those pictures are as follows. To start, plug 1 is one set colder than the rest of the plugs. WHY!?! WHATADUGAGAHAWHY!!? This plug to me looks a little slimy. Hot plugs are meant to burn oil residue right? Already this seems so wrong. This plug is the darkest, but the light shines on this one a little, and so it looks brighter. Next, plug 2 is the best out of them all. Although a little rich looking. Then, plug 3 is totally messed up. This thing is white and clean as can be. There is a spot of oily residue on the electrode. Does this plug look like it is firing at all? I have a sneaky suspicion that this plug was changed on its own because the bike came with 3 spark plugs and not 4. I have no way of knowing whether that is the case though. The gap on this plug is also very big compared to the rest. Maybe it is not bridging the gap? Lastly, plug 4 is the third most black and it has lots of deposits on it. Being the furthest away from the fuel I would expect it to match the lean pattern on the carburetor. This plug has the best gap out of them all though. It is nearly on point at 0.85mm, FSM suggests 0.8-0.9. 

I am doing a valve adjustment this weekend and will post anything more I find out. Please tell me what you think is going on with my engine, before I sink into my chair to never be found again. It does run by the way, only complaint the PO had was losing power on the highway near 120kmph.

#15

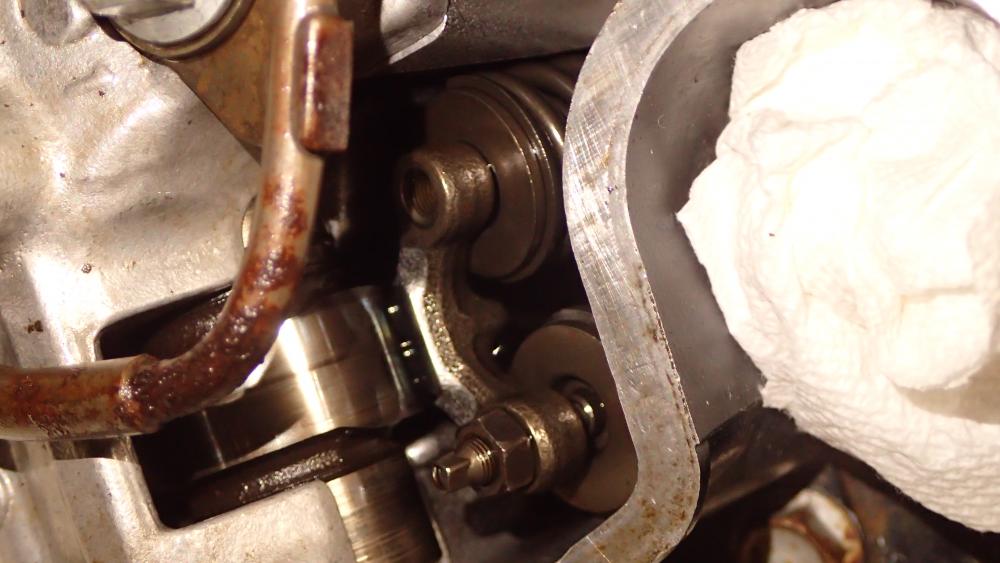
I opened up the engine today and found something. I don't know whether to be relieved or worried. 

PA230311.JPG

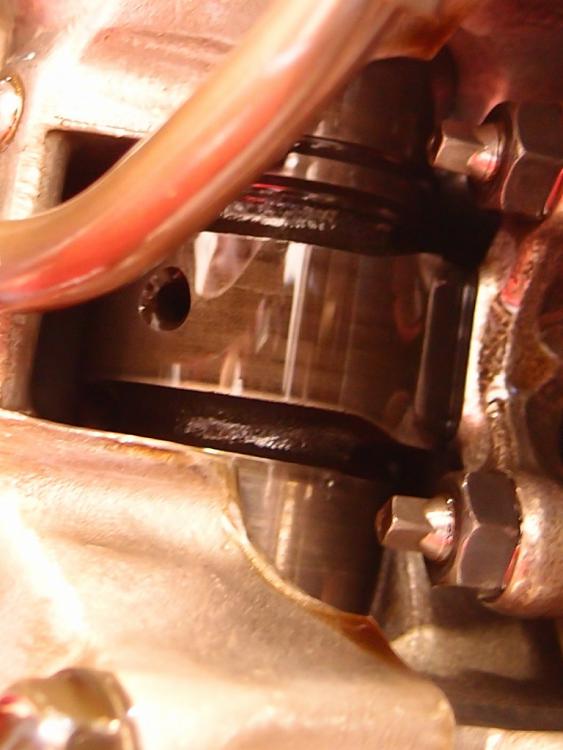
These are a pair of valves on the number 3 cylinder. Maybe you do not see it at first glance, but one of the rocker arm adjusters are missing. That piece with the thread and a nut around it is the adjuster.

What this means is there's an explanation for the spark plug. I do not know if this is an intake or exhaust valve though. It must have rattled out over time, I doubt somebody took it out and forgot to put it back. I am trying to think of where it could be. There are a few pools of oil around that part of the engine. I am going to get a magnet on a stick and fish around in there to see if I can find it. Could it have fallen all the way into the oil pan and does this explain the spark plug?

Hopefully I can find it. I could not find any sources for a replacement part. If I don't find it I will try to make a new one first(its basically a bolt with a nut right?) and call Honda if I fail. One thing I am glad about is, where ever it went, it did not jam the engine and make it explode.

#16

I reckon "The Dutchy" will read this and advise soon :-)

Alternatively drop him a pm...

#17

It is probably in the bottom of the engine. Taking off the sump means taking off the headers and collector if you want to make sure.

Don't think about trying to make a replacement if you can't find it. Get a secondhand head off Ebay, or another engine. The missing adjuster is probably the cause of the misfiring cylinder. 

#18

The missing tappet could be in one of the head oil pockets under the cam, or anywhere else that it will fit around the valves. Use a strong magnet rod to seek it out in the head voids. Do NOT run the engine like that as you could lose the collects on that valve.

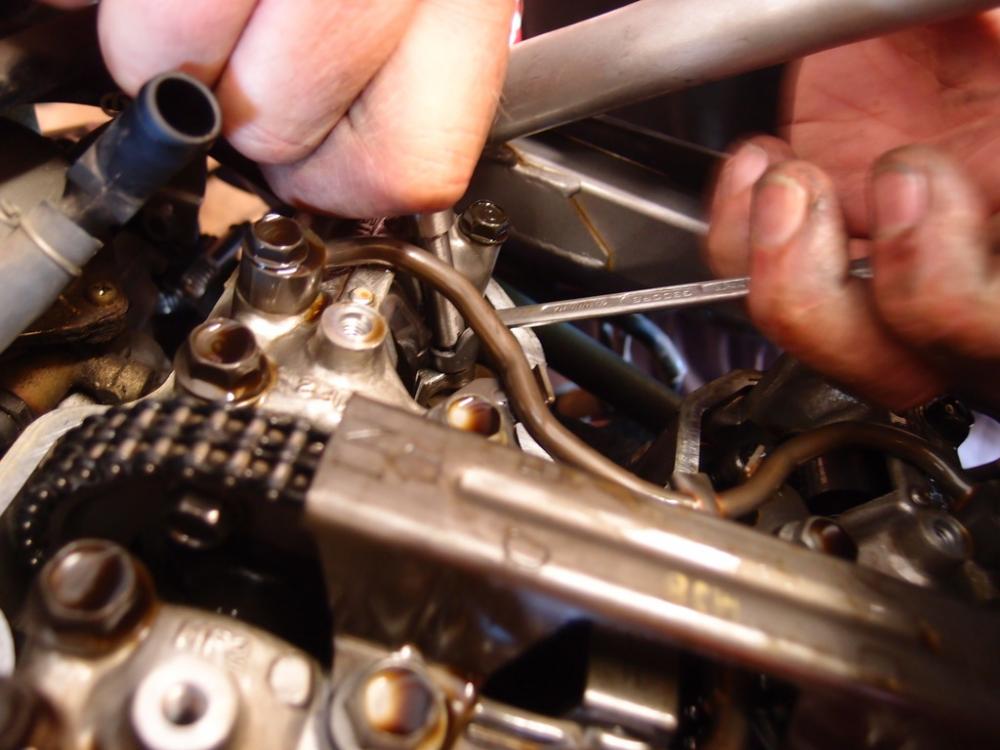
I loved my 500, had it for many years, but was an 86 model. A good tip when adjusting the valves is to use a flat head screw driver to lever up the rocker arm between the two adjusters. This takes any side to side rock out of the rocker, so both valves gets the same adjustment.

Being a V4, the inlet valves are in the middle of the engine & the exhaust valves are to the front & rear of the heads ! 

#19

Wow... Lucky the valve keepers are still in place.. Otherwise the valve would have dropped in causing serious damage..

I don't like loose parts moving around in my engines, it probably went down the tunnel into the oilpan or as suggested still in the oilpools at the cilinderhead. But make sure you find it.

The adjuster isn't a normal bold and locknut. They are very fine threaded.. I have several spares so if needed I can send you an adjuster with locknut..

#20

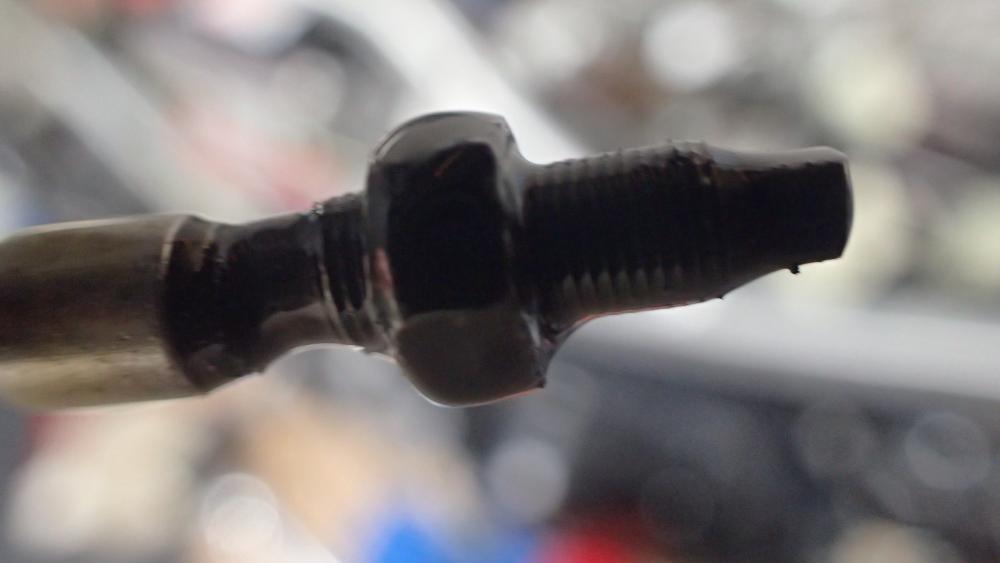
PA240334.JPG

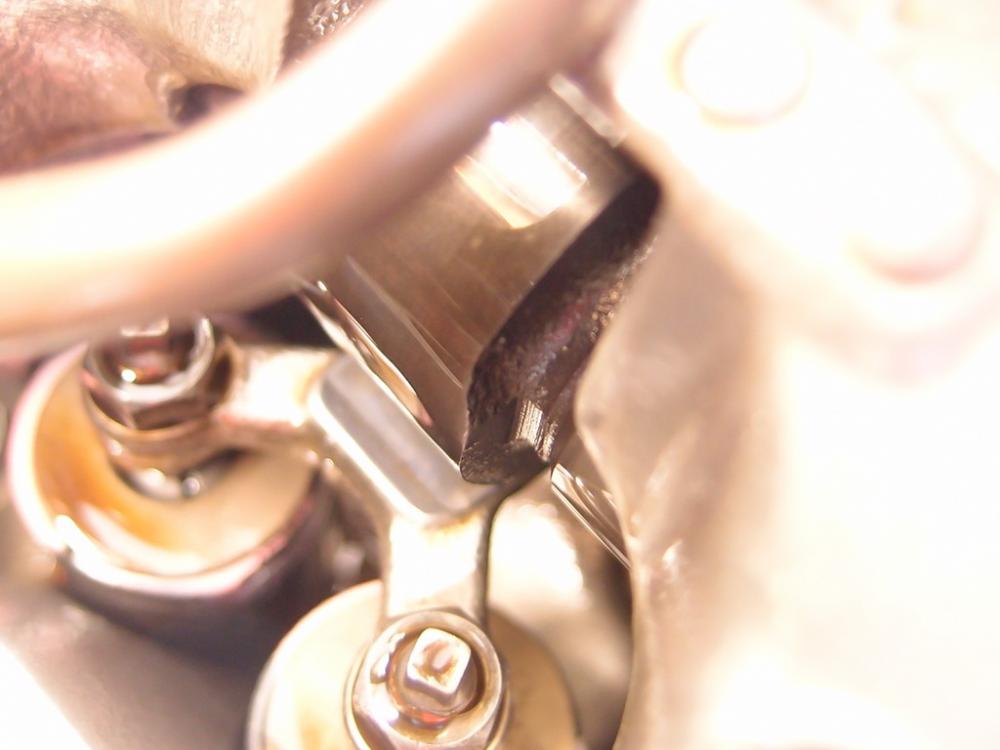
I got it! My dad brought me a miniature magnet on a stick from his tool box at work and I stuck it down in the first little pool of oil beside the valve springs. I had to rotate the engine to get the clearance between the rocker arm and the camshaft. I am surprised it fell down there in the first place, being such a tight fit. It looks like it has been in there for awhile, and you can see how far the bolt worked its way up the lock-nut.

I've run into another problem with these valves though. The timing cover is stuck closed. I tried soaking it in WD-40, using a wrench and screwdriver combo, using a Toonie as a screwdriver, but it wont budge. This means I don't have an indicator for the piston position. My question is, is TDC on this engine after the exhaust valves close? As far as I understand the workings of an engine, it should be. Although when I try to fit a feeler gauge under the valve adjuster there is no room on either set of valves. The time between the exhaust valve closing and the intake opening also seems non-existent. 

Either somebody adjusted these valves wrong or I am missing something. Possibly the last guy also had a jammed timing window?

After the intake closes and between the time before the exhaust opens, is the longest time both the valves stay closed. This is the only time when there is room under the adjusters, but it should not be TDC... right?

#21

As long as the lobe of the cam is pointing directly away from the follower, you should be able to adjust the clearance of the valves. Top dead centre would indeed be after the intake valves close, and before the exhausts open (intakes open on the down stroke then close, the piston rises up to TDC on the compression stroke, is driven back down on the power stroke, then the exhaust opens on the next upward stroke to allow exhaust gas to escape). 360 degrees of crank rotation after TDC, there might be some overlap between the exhausts fully closing and the intakes opening.

#22

+1 what Terry said.  No need to see marks, just make sure lobe is pointing away from rocker.  I had a feeling it would be sitting right there in oil.  Yay!

#23

Very lucky on finding the tappet.

Is the valve stem and everything still there on that valve? It's amazing that it was even running and didn't just break the rocker arm or something. Are the threads on either side damaged?

#24

The first VF500 with VTEC!

#25

Blimey, glad you found it. As per Terry's suggestion re valve clearance, it also makes adjusting valve clearances so much easier, as you just need to turn the engine forwards & every time a valve reaches the right point, check it & adjust if necessary !

A tip for those tappets, is to get a complete (16) spare set & round the tips off. When you next check the valves, replace them all. The reason for this is the angle of the valve wears the end of the tappet, then when you next adjust it, there is less material on the tappet end due to the chamfer wear from the last postion. When finished, just round the ends of the old ones ready for use at the next adjustment !  This means the valve will maintain the correct clearance longer.

If you keep a record over time, you will work out which valves tighten or loosen in the head, so can set the next clearance for best longevity, as inlets often recede into the head thus tightening the clearance & exhaust valves often loosen due to increased wear with the extra heat. Thus inlets can be set on the looser end of the adjustment scale & exhausts on the tighter end, meaning over time they will even out & allow you to extend the clearance interval !

#26

I admire your attention to detail! Don't think I do enough miles to warrant such behavior but I can see your point (or rounded tip).

#27
11 hours ago, Mohawk

inlets often recede into the head thus tightening the clearance & exhaust valves often loosen due to increased wear with the extra heat. Thus inlets can be set on the looser end of the adjustment scale & exhausts on the tighter end, meaning over time they will even out & allow you to extend the clearance interval !

Thanks for the info! I assumed the adjusters would only loosen. I almost left the inlet valves too tight. I will also check the ends of the tappets.

As far as the condition of the valve and runaway adjuster goes, I think everything is as it should be. I'm not sure what a missing valve stem looks like. All I can see is what you can see in that picture. The caps of the springs are on there, and I can see the valve inside.

I think the valves are going to be good to go once I adjust them, but now it is time for another bombshell...

Fork Shortening?

I am a vertically challenged person and I've been figuring out ways to lower this VF500. So far I have re-shaped the seat to make it narrower and lower. I've fitted lower profile tires for a handful of cm on both sides. My next target is the suspension itself. The first logical way to lower the suspension is to slide the forks up the triple trees. I've decided I will do one inch here. This leaves two more options: altering the rear linkage, and shortening the forks internally.

Here is my plan:

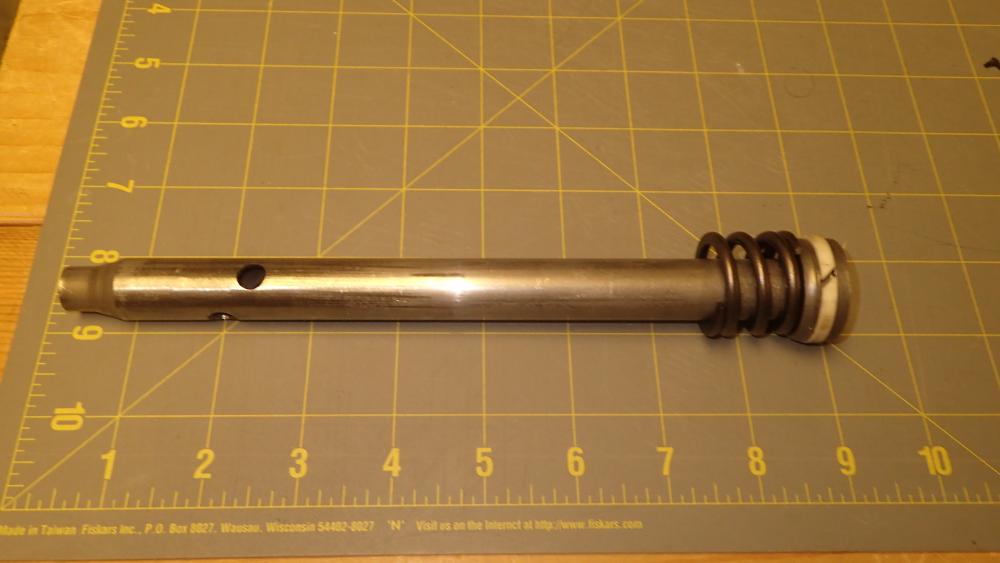
PA260338.JPG

This is where the 5.5 inches of suspension travel comes from. This rod bolts onto the bottom of the fork slider. When the suspension compresses this piece moves inside the fork tube, pushing the fork spring together. If I make a spacer and put it in front of that stopper spring it will lower the initial height of the fork. It will do this by sacrificing suspension travel, it will move the slider up further on the fork tube. This means when fully extended and under no compression the fork will be shorter. 

The downside of doing this will be a stiffer ride. I want to make a 1.5 inch spacer. If I shorten the forks this way the fork spring will stick out of the tube 1.5 inches more than it is supposed to. If I can compress the spring into the tube, without cutting it shorter, and bolt it back together it will maintain the stock spring rate and dampening. The only other thing I need to worry about is the rake and trail of the bike. I can make longer links for the swing arm, effectively lowering it. Alternatively I can send the doglink off to be modified( Wider angle = lower ride).

My questions are: Has anyone done this before, do you have any advice? Do I need to modify the slider bushing?(See second picture) Should I disable my TRAC system?( I read something about this in Dutchy's build)

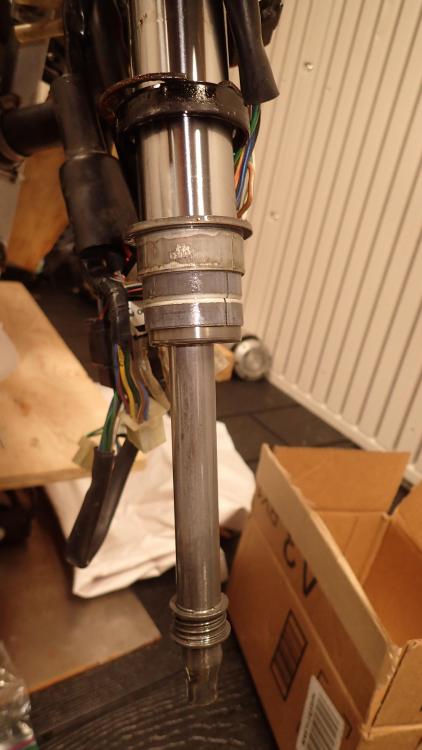
PA240325.JPG

The parts in this picture are from top to bottom: Circlip - Fork seal - Backup seal - Slider bushing - Tube Bushing - Piston(As seen above)

If you need help visualizing what this mod will do. Imagine the piston in the picture above is slid further up into the fork tube. Ta da, the forks are lower.

#28

Can't help you with the lowering i'm afraid.  Fitting the RaceTech emulators called for removing the TRAC stuff (and drilling large oil holes), so that is what I did.

One thing i can think of is that you relocate the claxon for that might start to hit your fender.

#29

If you want shorter forks, just restrict their full length. You have the top out spring on the damper rod, so if you want 1" shorter forks at full extension, then simply add a 1" thick spacer above the top out spring on the damper rod, This will stop the fork expanding to full length, but you will lose 1" of suspension travel.  Or alternately find some shorter stanchions (the chromed leg) of the correct diameter.  Most forks from a manufacturer have the same thread on the top, so Honda used Showa exclusively in that period. I have swapped Kawasaki & Honda fork tops from Showa from bikes made 10 years apart, same thread !

For the rear start by letting the air out of the shock, then add a travel limiter to the shock or add a lowering suspension link, but that might be hard to find for the VF. Other models may have a suitable link to use.

#30

Catastrophe.

Absolute cataclysmic failure.

The intake valve that was missing the adjuster is %100 snaffu. I learned in my attempts to re-insert the adjuster, that the valve stem has fallen out of the keepers. I just finished trying to reattach the valve stem to the keepers by pulling it up with a coat hanger and simultaneously pushing the top of the valve spring down. I'd like to think of this as open heart surgery on a motorcycle. Spoiler alert. The patient died. What happened is, one of the valve keepers popped out of the top of the valve retainer. That's not too bad, until you consider it fell down the abyss that is the center of the engine. Right down beside the cam chain. I am trying to source new valve keepers in the mean-time until I can pull the oil pan off and look for this thing. Even if I find a new valve keeper, my plan obviously is not going to work.

Why did the valve fall out of the keepers? How do I get this all back together? Do I need to pull the entire top half of the engine apart in order to get at this single valve?

When I was doing this I got the valve stem up above the keepers a few times, but it didn't click in or anything

If I cant figure this out, I am considering just having a V3 interceptor.

#31
[video: https://www.youtube.com/embed/b1DmJQ4Fods?feature=oembed]

Lisle valve tool is your best friend..

I already was a bit surprised the valve keepers were still in there.. The valve keepers are held in place bij the spring retainer. Normaly the valve is pushed on the centre of the stem and because the valve retainer is concave its holding everything together.. Without the adjuster installed on the rocker arm, the rocker arm is pushing down on the retainer and not on the valve stem, causing the valve keepers to out of the groove on the valve stem..

The vid shows how to use the lisle valve tool on a valve with the cilinder head removed.. To use it on a engine it is a bit more tricky. Some use compressed air on the cilinder to keep the valve in place, but you can also run a (greasy) cord down the spark plug hole into the cilinder and manualy turn the piston towards TDC. Make sure you don't run the whole cord into the ciliinder but keep one end out to remove the cord after the job is done.. The cord wil keep the valve in place.

The guy is using a hammer, but from my experience, usualy pushing it by hand is enough to get the keepers out and for sure getting them in..

#32

I have no idea how to do it without pulling the head. If you can do it with keeping the head intact, it is the way to go, as OEM head gaskets were hard to find, and not sure about aftermarket. It gets even better when the head gaskets went through different revisions for different year engines.

I probably have some extra parts from my rebuild worse case. Are you sure the valve is good?

Some from one of my engines. PS. Don't bother buying another engine. They are all bad.

[image: 20161101015318-50dd5e51-sm.jpg]

[image: 20161101015319-148c5f41-sm.jpg]

#34

It is nonsense to suggest all VF500 engines are bad btw. There are many reliable high mileage examples out there. I will agree they need much TLC but if looked after they seem to be OK. I have three engines and they all work (so far).

#35

I like the look of this tool designed for the V4 engine. I will certainly use the rope trick instead of hooking a coat hanger through my spark plug. I look forward to hearing how it works for you Jeremy. As for Lisle tool vs. Baxter tool, so far it looks like the Baxter is doing better since you don't need to remove the rockers. I am interested in what you guys think is better; Lisle or Baxter?

All I can say for the state of my valve is that light doesn't seep through when I shine a flashlight into the cylinder. 

#36

I have tried it on one of my VF500 engines. The pictures of the installed tool are here.

https://goo.gl/photos/8n2YNFH5r8Z5gMmX6

It works really well when removing the collets. The force required to compress the spring in the VF500 is really not a lot. When you see the springs then you can see why. The inner spring is shockingly spindly. Which might explain why they take a permanent set after high RPM abuse and exhaust valves drop. However, contradicting this is the fact that the one set of springs I removed from an engine that had 37,000miles were all to spec and way above the service limit. I know nothing about the history of this engine. It was from a spares bike I purchased. 

The downside to the tool is the fact that I found refitting the collets extremely time consuming and difficult. The tool does not fit on the collet retainer square, so the spring is pushed down at an angle which makes the space around the valve stem unsymmetrical. However by judicious spacing of the initial collet and serious compression of the spring I did manage to get them back. I would be concerned that I might be over compressing the spring past its elastic limit. I will take out the springs I refitted to see if I have damaged them. If I have given them a permanent set then the tool is useless.
 

#37

I'd have to measure the springs again to see if they were in spec. but the springs varied a lot.

[image: 20161105041238-872fd37b-xs.jpg]

[image: 20161105041238-6b033366-xs.jpg]

It would be great if there was a full rebuild kit for the VF heads, but with all new valves, springs, gaskets, guides, seats, ect, that would be 2x as much as the bikes are worth. But with how many of these engines went south, there would surely be some demand. Can't say I know of a more powerful 500cc engine off the top of my head.

#38

I have only measured two springs so far so I might see the variation you did. That's the job for this weekend.

I too wish the springs and valves were available but it will never happen. You are right about the output. Even accounting for Honda overestimates the VF500 was a powerful engine with no modern rival AFAIK.

#40

Wow!. If that's true then that's an amazing find. Be interesting to find out how much. I think the springs are the same between all model years so while they say 84-85 I am pretty sure the 86 springs are the same. The valves are different though AFAIK.

Back to the tool I have been using, refitting the collets does get much easier with practice. You need a degree of finesse but you need that anyway working on these engines. I checked I wasn't damaging the springs by over compressing them and I have not changed the free length so all is good.

#41

Used a less "gentile" method while disassembling redslut completely (and permanently...).

Am sure some damage was done, so not advised!

clickerdiclick

#42

I need some advice on my valve issue. An acquaintance of mine who is mechanically adept looked at my engine today and he thinks its possible that the valve was bent. The theory being, why didn't the valve drop inside the cylinder and explode? Either luck, or it was bent when it fell out of the keepers, lodging it in the head. I have yet to buy a tool to fix the valve, I am going to try and build my own first. What I am wondering is how do I tell if the valve is bent once I hook it back together? Where do I get replacement valves if it is broken? Also is it possible to remove the rear head without removing the engine, and another issue, is a seized exhaust valve enough to make the cylinder misfire? If not, I've got to figure out what is.

#43

I don't have brand new valves in stock, but for a replacement, I do have a pile of VF500 valves that are still useful... Just shoot me a PM...

A bent valve, once removed from the engine, is easialy recognezed if you put it in a drill.. If the head of the valve wobbles when you turn the drill, it's bent..

#44

sorry to hear of your troubles, I've been there and done all that with a dropped valve after rebuilding the heads.  Anyway, you must pull the engine.  If you're going to try to keep this bike alive, you might as well learn how to do that well.  I'm pretty sure you can pull the front head with the engine in but the rear one is really tightly in there.  Besides, the rear, top engine mount is part of the rear head sooo... it's just so much easier working on a head without having to maneuver around the frame trying to find the best angles to hook up wrenches or anything.  

You can still buy new valves, they are pretty easy to find (partzilla, ebay, many places still carry them).  Luckily the exhaust valves for the 84-86 are all the same, the intakes did change in 86 though.  If your valve was bent then your guide is probably trashed and putting it back together with a trashed guide will not last very long so you'd have to have a new guide installed.  A machine shop should be able to help you with that along with cleaning up the seat for a new valve.  You'll be relegated to aftermarket head gaskets as well, there are no OEM's out there that I know of.  Plenty of aftermarket stuff though, they've worked fine for me, I just found that torquing them (and re-torquing after a couple hundred miles) just a little over spec works best, otherwise you might get a little coolant seepage on the edges...   Here's a thought:  if you have no real love or commitment for one of these, it's my humble advice to look elsewhere for riding an old(er) bike.  Pick up an 87 of some type or younger...  the headaches will seldom cease with one of these.  The only reason I keep mine alive is that I bought it new when I was 18 and I'm almost 52 now.... so it's just part of my life.  Best of luck, you'll most certainly need it.  

#45
YoshiHNS, 11/5/2016 at 5:24 AM

Well, I found a company that has a spring kit for the VF500 while looking through custom trellis frames.

http://www.rdvalvespring.com/index.html

Under spring kits, honda, bottom of the page. Worldwide dealer network.

Just as an FYI... I bought the 84/85 kit (dual springs, retainers, cotters, spring seats) for just little over $800 (USD), they looked great but were not the right size, too tall and too wide. The owner refunded my money promptly, apologized and asked that I send him some old samples and that he'd have them ready for me in about 2 weeks.  I just elected to go with some springs I got from CMSNL NOS last year instead.  They only had about 1500 miles on them before a valve broke/dropped.  Anyway, doing a complete and correct job on the heads alone with new springs, valves, guides, retainers, cotters, valve stem seals, head gaskets, various o-rings, machine shop labor, etc easily exceeds the value of even a mint entire bike.  Not cost effective by any means but if you want to ride one as reliably as you can afford, it'll cost you.  

#46

It was fairly warm, here in Canada, today and I put a few hours into trying to solve my valve issue. I have concluded that the valve is indeed bent. I made an air compressor adapter for the spark plug socket to try and push the valve up with air. It did not budge. I am weighing the options right now. Should I undertake removing my entire engine to replace this valve? What will a new valve and/or possibly machining cost me? What are the consequences of running my bike with 1 exhaust valve always slightly open(besides the fact that this cylinder is not working)? Is there an easier way around this for the time being? I want to ride this bike, this summer.

#47

The bike will run like sh1t if that valve does not close. Not an option IMO.

My advice is try to get another running engine. They are pretty plentiful over here although I have no idea about Canada. That way you just transplant it in and you then your OE becomes a donor for parts. I agree with Jrodrims27 though. It has to be a labour of love with these bikes now. A later VFR is a much more sensible bike to own if you are going to rely on it.

#48

Option one: Get a used valve and lap the surface to match the valve seat..

Option two: get a good used replacement on the cilinder head..

I do have used valves... I do have complete heads with lapped valves and new seals installed..

I killed two engines on the conrods done to racing. But both engines had their head work done.. They are good..

Let me know if interested.. ( A whole head would be a killer on the shipment costs i think) 

#49

I do not want to give anybody the impression that I am a person who half fasts things. Right now I am just not able to do everything I wish I could for this bike. Whether it be not having the time, money or expertise. I want to learn though and I am giving what I can afford to do this. I am looking into sourcing a new engine. Does anybody have any advice this time around so that I can find an engine that works the first time?

#50

Take your time. Get the engine from someone who seems trustworthy and try to get an 86 with the mods Honda made, although if a good 84/85 comes up don't let that be a show stopper. You get claimed low mileage engines on Ebay every so often. You have to be able to work out why the bike was broken in the first place; you can usually tell by looking at the other VF500 parts the breaker will be selling.

#51

Interesting, so the '86 engine will work on my '84 without modification? What differences would a later engine have?

#52

Google is your friend. 

Loads of small but significant differences but it as far as I know, an 86 engine will fit in a 84/85 frame. It better, because I will be trying it this summer.

#53

Out in the shed right now having issues with my throttle cables. The snap when I release is nowhere near as fast as it want it. Also something really dangerous is afoot. When I turn full lock to the right the throttle sticks. This is screaming disaster at me. I think it may have something to do with where the cables are routed now. I put mine in between the forks and past the right hand side of the steering neck. I don't know if they are getting pinched or something. Does anyone have a close up picture of where youve routed your cables?

#54
1 hour ago, Tyy

Out in the shed right now having issues with my throttle cables. The snap when I release is nowhere near as fast as it want it. Also something really dangerous is afoot. When I turn full lock to the right the throttle sticks. This is screaming disaster at me. I think it may have something to do with where the cables are routed now. I put mine in between the forks and past the right hand side of the steering neck. I don't know if they are getting pinched or something. Does anyone have a close up picture of where youve routed your cables?

You probably just need to add some slack using the adjuster on one of the cables right near the right switch assy.  The adjuster is 8mm with a 10mm lock nut.  Adjust to where the the throttle will still return at full lock both directions.

#55

I found that out when I was half way through tearing it apart to oil the cables. I also learned to keep tension on the cables when they are out of the tube. One of my cables went too far slack an came out of the carb. I decided I could put it back on without removing the carburetor, which turned out to be very hard. With one hand pulling the throttle open, another using improvised chop-sticks, and a screw driver in my teeth. I managed to put it back. In hind sight, I would have exerted a lot less effort removing the carbs. Never the less I feel like I have achieved something... I will accept my trophy of stubbornness now.

#57

I got the bike off of my makeshift motorcycle lift today. I ought to know before I choose what to do next, if you can remove the rear cylinder head without taking the engine out. If I can indeed do that, it would save me an enormous amount of time and effort. I'd like to hear from somebody who has possibly tried this.

#58

Send pm to The Dutchy if he does not chime in today :-)

#59

If you can get the collector box off, taking the engine out is very easy on the 500. The extra access it gives is invaluable IME.

#60

*IF* you get it off yes....   :-)

#61

Hmm... I will test how securely my Henkel pipe is attached in case I do need to remove the whole engine. Actually yeah I need to clean that thing anyways. Just a side note; what have you guys used for surface rust? I bought CLR Metal Cleaner.

#62

As far as i know, you can´t get the rear head removed with the engine in the frame..

Allthough the 500 does have bolts on the outer corners of the cilinderhead, instead of studs like the VF750 and VF1000, the timing chain guides  cause trouble. You can´t raise the head far enough to clear these guides..

#63

Hello all, I have silently been working on the VF500 for awhile. I got everything sorted out except the engine. It runs and drives, but it does indeed lack power on the high end. I assume the power issues are only because of the 4th cylinder not making compression. Recently though, on a ride to the shop to get it inspected, a loud rattle developed in the right side crank case, near the clutch. With the surmounting engine problems I want to swap the engine. This leads me to my current predicament, VF500's in my area have been either too expensive or pillaged for parts. There is however a VF1000 for a fair price. Would an engine swap be possible from the 1000? How similar are the bikes(both are '84s)?

#64

Sorry man, way too big for your frame. Won't even fit into 750 frame. Rebuild or wait for something.

Sent from my HTC_PN071 using Tapatalk

#65
8 hours ago, Forbes

Sorry man, way too big for your frame. Won't even fit into 750 frame. Rebuild or wait for something.

Sent from my HTC_PN071 using Tapatalk
 

Not really relevant here, but the 1000 motor will fit in the 83-85 700/750F frame.  

"The Gimp"

[image: gimp.jpg]

#66

Gimp! Seriously? Haven't had them side by side, but 1000 frame looked to be shaped differently at the front. Does it slot in or some modification? Interesting, have another bike for another project.....

Sent from my HTC_PN071 using Tapatalk

#67

Rejoice! I have got my hands on an engine! Thanks to my aunt and uncles connection with a person from the Vintage Road Racing Association here in Ontario I got this engine for free. It was destined for the dump Ive been told. It looks like it has been sitting for a while, very dirty on the outside and one of the intake ports was not plugged, it has rust on top of the valve. However, the rest of the valves are clean, under the valve covers it is rust free. Everything moves when I turn it over with a wrench. Ive yet to peak inside the cylinders, but I managed to prop it up on some wood to drain the oil. Here's where I am worried. The oil seems milky. I dont know if this is because it has been sitting for a long time or if it is coolant contamination.

[image: isYnvxZ.jpg][image: 3srgE6S.jpg]

I do not know what year this engine is, it has bare metal side covers. Also tell me if this next picture is what I think it is...[image: VsbVCd2.jpg][image: XjwkQDV.jpg]

Lastly here is my engine model number, if anyone recognizes where it is from.

[image: Jmvv73v.jpg]

#68
1 hour ago, Tyy

It was destined for the dump Ive been told.

Maybe they thought it would be a good deed to help a young dude trying to revive a bike nearly twice his age.

Good luck with the project, maybe you are getting to the home stretch. :beer:

#69

Good score....yes, seems you have an oil mod. A motor that's been standing for so long would need to be opened? Compression test?

Sent from my HTC_PN071 using Tapatalk

#70

There was a table with VF500 engine serial numbers, but it got hosted on Phofofucket so it is gone......   :mad:

the oil mod (not that it needs one...) is a sign it was cared for by its owner at some point!

#71
17 hours ago, Forbes

Good score....yes, seems you have an oil mod. A motor that's been standing for so long would need to be opened? Compression test?

Sent from my HTC_PN071 using Tapatalk
 

Do you mean splitting the heads? Is there anything in the way other than the bolts? Can I do a compression test turning it by hand, or maybe a drill?

#72

Yes, that's an oil mod alright. You don't often see them on a VF500. I hope it is all there and it works OK for you.

[image: VF500serials1.jpg]

[image: VF500serials2.jpg]

#73

Its a Magna VF500C engine by the looks of it.

You don't have to split it but you should take the cam covers off and look at the cams and make sure all the valves are present and correct.

#74

Do you mean splitting the heads? Is there anything in the way other than the bolts? Can I do a compression test turning it by hand, or maybe a drill?


Drill may work if all plugs are out! Just jump straight to a battery would be easier.
Someone may have a better method, but I'd be rinsing the motor with paraffin before spinning it to much. If your oil looks as it does from the sump, it's not going to look good in the rest of the motor.

Sent from my HTC_PN071 using Tapatalk

#75

Ummm a Magna engine?? Is this thing going to work? The mounting points seem to be the same. I inspected the engine under the valve covers, since I need in there to do a valve timing, and it looks rust free. My 56'000km engine had rust though. As with the paraffin thing, how do you recommend doing it? A quick google search is trying to tell me its a bad idea.

#76

To only do 110km/h means something is massively out of whack. You are messing with things that might have  small impact on performance. You have a gaping chasm in performance. Is it actually running on all 4 cylinders? Is a brake binding? You have lost over half the horsepower of the engine so something very drastic is amiss. You need to go right back to basics and check all the fundamental things, like plugs, firing all on four, blocked air filter, fuel to all four carbs. 

#77

The (TCI) ignigition timing cannot be adjusted (according to the book).

and just to be sure, you are talking 110KM/H right? (u are in Canada) 

#78

Kilometers per hour. I have checked and rechecked all the major things. I have a suspicion that I was hoping one of you might reiterate to save me the embarrassment. I think it is still just running overwhelmingly rich. I am going to open up the air box and see if it makes a difference, and hopefully confirm something.

#79

Does it need the choke when cold? If it was massively rich it would start without the choke. It would have to be hugely rich to limit to 110km/h. It would stink of petrol and be blowing black smoke. 

#80

I just got back from a ride without the air filter. I did not find the dead spot at the top of my rpms. I took it on the highway and it was still pulling me forward at 120kmph. I let off though because it was screaming like a banshee. Overall I think the leaner mixture is way better for it. How many jet sizes back from 117.5 should I go to simulate no air filter? It does take a little choke or twist of the throttle to get it started in one shot.

#81

I've got some science and a video to share. I had a thought last night and looked up the rear wheel size on the magna. Turns out the tire sidewall makes up for the difference in the circumference of the 16' wheel, but while I was at it I used the same gearing calculator to determine what rpm I am riding at to get a top speed of 120. The rpm needed to reach 120kmph with my gear/wheel/tire setup is 6200rpm, for reference the max possible speed is 218kmph at 12000rpm. This calculator does not include any power numbers. I would assume because the power doesnt relate to the top speed, only how long it takes to get there. With this said, I could potentially reach a higher speed if I gave the engine more time to do it or if I milk more power out. Although I am not too keen about holding it up that high for very long. I want to insert a clip onboard a magna to show you what it sounds like on my end.
https://youtu.be/tOpbJvGbbrY?t=88

(Pardon the hysterical squealing in this video hahah)

This is a video I took yesterday to show you how it sounds now without the air filter

[video: https://www.youtube.com/embed/0YNQ3pE2svI?feature=oembed]

I want to note that I am fairly happy with the bikes performance now. I want to hear any suggestions though about jet sizes or maybe your opinion on running no air filter. I owe you guys a thank you too, @jeremyr62 @Dutchy @TheDutchy @Forbes

#82

Would think power has a lot to do....120km/h is around the breakthrough wind resistance where you use more fuel than if you were cruising at 110.
It's been a good few years, but 750 top speed listed around the 205km/h Mark, had mine around there on clock, but imagine in reality it was around 190 odd...

Sent from my HTC_PN071 using Tapatalk

#83

From that video you are short shifting. Don't be afraid of revving the engine. It's what it is designed for. Some claim you shouldn't go above 9K rpm to save the valves but I don't subscribe to that theory. 

#84

and as for running w/o an air filter......

Here what I shook from the K&N's in my RC51/SP (shortly after I bought it)

[image: IMG_0054 (2).jpg]

Granted, the inlet tract on a SP is "straight" (to the point that Honda let it run through the headstock), but you really donot want any of the above sucked into your carbs....

#85
8 hours ago, jeremyr62

From that video you are short shifting. Don't be afraid of revving the engine. It's what it is designed for. Some claim you shouldn't go above 9K rpm to save the valves but I don't subscribe to that theory. 

I can tell there is a lot more to stretch out, but I definitely have thoughts of high rpm valve carnage in the back of my head.

7 hours ago, Dutchy

but you really donot want any of the above sucked into your carbs....

What setup were you running with 112's exactly? I honestly dont know how many sizes down I should go because without the filter on, this thing seems to be in its sweet spot now

#86

I have not messed with the carbs, maybe the prior owner did....

#87

Put the air filter back on and run a 98 main jet in the front pair and a 95 main jet in the rear pair.

#88

As above, drop the jet sizes...

We are running 112 with open box, open baffles... For street use, I would not recommend that.. But it is an indication that at least you have to resize the 117's below the 112's.. (98/95 is a maybe, you have to trial and error these jetsizes)

Listening to your vid., you take her to about 5krpm. That is about where the main jets start to take over. If you take her above 6k and she starts to stumble heavy at 6 , 7, 8, 9 krpm. The jets are to big.. The engine is choking on the amount of fuel...

And yes, the engine won't mind, neither get hurt taking her beyond 9krpm..  Here the VF500F with a modified '86 engine running on track.. Look at the rpm's

[video: https://www.youtube.com/embed/4IhZqwJem3I?feature=oembed]

The earlier '84 and '85 engines have issues if you run her above 9k for extensive periods.. It will run the conrod bearings out.. The 1986 versions have a modified oilsump and pump that takes care of it.. This same VF500F also runs 4 hour Endurance events.. Imagine a VF500F run for four hours on that same track as in the vid... I know she held up fine..

It took me 8 times getting the carbs out / swapping jets / building the carbs back in / balancing them / and test ride it.. Once we got it right, we never needed to go back into the carbs again.. 

#89
4 hours ago, TheDutchy

As above, drop the jet sizes...

We are running 112 with open box, open baffles... For street use, I would not recommend that.. But it is an indication that at least you have to resize the 117's below the 112's.. (98/95 is a maybe, you have to trial and error these jetsizes)

I am curious whether you run offset front and rear cylinder jet sizes? Would this difference be due to unequal length headers? The pipe I have on now has a lot of unnecessary bends that make me think it is an equal length setup. Also I wanted to mention that I have upped the slow jet by 2 sizes, I want to say its a 48 now. This fuel ratio issue totally describes the trouble I have been having once I get into 6krpms and up. Also that is a sweet video

#90

The slow jet is standard #38.. I wouldn't go beyond #40 on the slow jet. On most of the VF series the slow jet is #38. On my VF750 street bike the slowjet is #40. On the VF750 endurance racer, the slow jet is #42.  I would recommend to install #40 on the slow jet.

On the main jet, it is a different story, it is depending on what carb code is installed. The carb code is printed on the side of each carb housing, just above the mating surface of the float bowl. Different carbcode means different main jet sizes. Standard they came with:

1984 #108 mains all around..

1985 VD41A A  #90 #92

1985 VD41A B #92 #95

1986 #92 #95

The differences are caused by: Different breather lines on the float bowls, different emulsion tubes on the main jets, different vac. slide/membrane, fuel pump / gravity fed..

So, determine the carb code, lower the size of the slow jet, lower the size on the main jet..

#91

I did read somewhere about one carb being jetted differently from the other three, I think on one of the VFR's to correct scavenging issues with the exhaust. Our VF'S run downdraft carbs on the front and sidedraft carbs to the rear....the characteristics of each, flow, gravity etc would be different so a possibility why different jetting!

Sent from my HTC_PN071 using Tapatalk

#92
5 hours ago, TheDutchy

The slow jet is standard #38.. I wouldn't go beyond #40 on the slow jet. On most of the VF series the slow jet is #38. On my VF750 street bike the slowjet is #40. On the VF750 endurance racer, the slow jet is #42.  I would recommend to install #40 on the slow jet.

On the main jet, it is a different story, it is depending on what carb code is installed. The carb code is printed on the side of each carb housing, just above the mating surface of the float bowl. Different carbcode means different main jet sizes. Standard they came with:

1984 #108 mains all around..

1985 VD41A A  #90 #92

1985 VD41A B #92 #95

1986 #92 #95

The differences are caused by: Different breather lines on the float bowls, different emulsion tubes on the main jets, different vac. slide/membrane, fuel pump / gravity fed..

So, determine the carb code, lower the size of the slow jet, lower the size on the main jet..

Please follow this advice.  He is absolutely right.  I have gotten away with some 42 pilots on some of my bikes depending on mods, but 40 is the sweet spot for the 500.  

#94
26 minutes ago, Captain 80s

This is a "track"?!!!!   I can't believe they allow people to stand right at the end of the straights.

Don't get me wrong, I would run it in an instant, but HOLY SHIT!  Seems really un safe.

Yup, this is a track.... It's an abandoned military base in Germany...

In classic events, we don't call it racing, it's a "Test Skill Ride"..  And yes I do agree it has a certain risk level...

On this german event, the levels are elevated, other events, even have higher risk elements, like racing over cobble stones through city streets...

Wasn't it The Boss singing about racing in the Streets ?

[video: https://www.youtube.com/embed/_58fduW_WYQ?feature=oembed]
#95

Or they call 'm "consistency runs", a track made on a industrial estate....   

the winner in theory is he who reaches the most consistent laptimes, but they still give it some welly...

#96
23 minutes ago, Dutchy

Or they call 'm "consistency runs", a track made on a industrial estate....   

the winner in theory is he who reaches the most consistent laptimes, but they still give it some welly...

Whatever they call 'em...   I wish they did that around here.  But there is NO WAY IN HELL that could happen here in the States, no matter how many waivers were signed.

#97

Go little "Mini-Ceptor"...

Before Mr.RC45 I had a love affair with my 86 VF500F Interceptor
bought new from Golden Gate Cycles... I modified it extensively...
Dymags... Billet Clutch basket... Exhaust and even converted the chain
to belt... This became famous Belt-0-Ceptor... I racked up 98,000
trouble free miles... I sold it to my Air Force buddy up in White City
Oregon...
[image: ce5BVi3.jpg]
gallery_3131_51_14630.jpg

Home made Billet Clutch Basket
[image: gallery_3131_51_1687.jpg]

My custom dash with Oh Shit warning...
[image: gallery_3131_51_36605.jpg]


Sometimes being the "Mini-Ceptor" among the Big-Bad-Motors of Death can be a recipe for bruised egos...
[image: qBUdODI.jpg]

#98
BusyLittleShop, 12/7/2017 at 3:16 PM

gallery_3131_51_14630.jpg

What have you got that seat covered in? I am also curious what your wheel setup is in this picture because those look like radial tires!

TheDutchy, 12/7/2017 at 5:11 AM

Different carbcode means different main jet sizes. Standard they came with:

1984 #108 mains all around..

1985 VD41A A  #90 #92

1985 VD41A B #92 #95

1986 #92 #95

I just found something weird out. The jets I took out of my carbs were sizes 102 and 105. The frame is a 1984 bike, so I would have thought they were the same size and larger given it was jetted for a custom exhaust. The only markings I can find are VD on the side and a code that reads: 5 6 B (triangle) W D (and a Japanese letter). The slow jets I took out were 38s, so I definitely have 40s installed. I am going to go with 108s for the main jets. I'm assuming someone more qualified than me set up the carbs and Henkel pipe at the same time, so 3 sizes bigger should account for uncorking the supertrapp and a K&N right?

#99
3 hours ago, Tyy

I am also curious what your wheel setup is in this picture because those look like radial tires!

It looks like that might be a real Dymag wheel.  It's configuration without a cush drive would help adapting the custom belt pulley.  It would be wider than stock and could take a wider, lower profile tire.  Perhaps even a radial.

#100

For the location of the carbcode, here is an example:

[image: carb ID.JPG]

End of thread · 100 posts recovered Wayback Machine snapshot 19 Jan 2019