VFRDiscussion ARCHIVE / READ-ONLYREAD-ONLY

Exhaust Modification-muffler Bypass: Pics Added

67 posts Started 10 May 2008 Last recovered post 4 May 2017 Wayback Machine snapshot 6 Jul 2017

#1

I'm currently in the process of yet another new way to modify the exhaust.

This way, while requiring patience, is very easy and does not require removal of the exhaust, loosening of the exhaust, or even removing the end covers off the exhaust. No welding required...

It can also be done in stages, so you can check & evaluate the sound level before going further. I do caution that you do Stage 1 and ride the motorcycle through at least a tank full of gas, as the sound gets noticeably deeper and louder after running with even the "Stage 1" mod (it has to be the cat deteriorating due to more flow / less restriction through the modified exhaust).

This is a different version of the "new way to 'gut' your exhaust" post, so I suggest that you read that post, then refer back to this one...I will post up the complete process with pics once I've completed the whole job this weekend...if anyone's interested.

The difference is that I used a 1" bimetal hole saw (as suggested by VWRXTDR). I was able to drill between the outer tip and the inner tip of the exhaust exits, which releases the inner pipe from the outer exhaust tip. I was then able to reach into the inside pipe with a Dremel (no extension needed) and cut the inner pipe loose, then pull it out.

The outer exhaust tip stays in place, which helps in a multitude of ways:

1. No fear of water getting into the cans.

2. No fear of the end caps blueing (important for me, as I'll be putting CF covers and end caps on).

3. The tips look good (if you like stock).

4. Sound is mellow and deep; louder than stock, but not in any way excessive. As someone suggested, the tips seem to take some of the "ping" out of the sound.

5. Close to being a "big hole" type gut, as the exit holes are now a full 1" diameter, instead of the 3/4" diameter of the inner pipes.

The beauty of this mod is that you are essentially making the muffler a "straight thru" design, much like a total gut, without all the cutting, beating, welding, removing of the exhaust, etc...It maintains enough baffling to take the edge off, while maintaining a deep tone with a nice volume.

"Stage 1" (Upper pipes in each muffler only) sounds very good at idle (deep and mellow). Very controllable noise level when accelerating (nice when you leave for work early in the morning); can hear the exhaust up to about 50 mph with Stage 1 (which is the top pipe in each can modified).

I will be doing the bottom two pipes in each can this weekend (Stage 2).

If anyone's interested, I'll post pics and try to do a sound clip of "Stage 1" and "Stage 2".

There's also some tricks I learned while doing this that are essential to being able to drill between the exhaust tip and the inner pipe...One other note: The lean surging I was experiencing before at steady throttle while cruising at highway speeds is gone. The VTEC transition is also dramatically smoother. Anyone have an explanation for this?

Roj

Edited May 11, 2008 by veefer800canuck


#2

Here are some pics of mine, I did have to remove the end pipes because I don't have a dremel extension so I could not get in far enough with the end pipes on.

I will have the end pipes welded back on soon.

[image: med_gallery_12176_3371_286054.jpg]

#3
VFRojI'm currently in the process of yet another new way to modify the exhaust.

This way, while requiring patience, is very easy and does not require removal of the exhaust, loosening of the exhaust, or even removing the end covers off the exhaust. No welding required...

It can also be done in stages, so you can check & evaluate the sound level before going further. I do caution that you do Stage 1 and ride the motorcycle through at least a tank full of gas, as the sound gets noticeably deeper and louder after running with even the "Stage 1" mod (it has to be the cat deteriorating due to more flow / less restriction through the modified exhaust).

This is a different version of the "new way to 'gut' your exhaust" post, so I suggest that you read that post, then refer back to this one...I will post up the complete process with pics once I've completed the whole job this weekend...if anyone's interested.

The difference is that I used a 1" bimetal hole saw (as suggested by VWRXTDR). I was able to drill between the outer tip and the inner tip of the exhaust exits, which releases the inner pipe from the outer exhaust tip. I was then able to reach into the inside pipe with a Dremel (no extension needed) and cut the inner pipe loose, then pull it out.

The outer exhaust tip stays in place, which helps in a multitude of ways:

1. No fear of water getting into the cans.

2. No fear of the end caps blueing (important for me, as I'll be putting CF covers and end caps on).

3. The tips look good (if you like stock).

4. Sound is mellow and deep; louder than stock, but not in any way excessive. As someone suggested, the tips seem to take some of the "ping" out of the sound.

5. Close to being a "big hole" type gut, as the exit holes are now a full 1" diameter, instead of the 3/4" diameter of the inner pipes.

The beauty of this mod is that you are essentially making the muffler a "straight thru" design, much like a total gut, without all the cutting, beating, welding, removing of the exhaust, etc...It maintains enough baffling to take the edge off, while maintaining a deep tone with a nice volume.

"Stage 1" (Upper pipes in each muffler only) sounds very good at idle (deep and mellow). Very controllable noise level when accelerating (nice when you leave for work early in the morning); can hear the exhaust up to about 50 mph with Stage 1 (which is the top pipe in each can modified).

I will be doing the bottom two pipes in each can this weekend (Stage 2).

If anyone's interested, I'll post pics and try to do a sound clip of "Stage 1" and "Stage 2".

There's also some tricks I learned while doing this that are essential to being able to drill between the exhaust tip and the inner pipe...One other note: The lean surging I was experiencing before at steady throttle while cruising at highway speeds is gone. The VTEC transition is also dramatically smoother. Anyone have an explanation for this?

Roj

Pics and sound clips would be great...

#4

Here's some pics of what you'll need to do this mod, along with a sequence and details. I'll post a sound clip once I finish up with "Stage 2" tomorrow.

[image: gallery_13183_3825_142384.jpg]

Here's what "Stage 1" looks like, with only the top opening of each muffler modified. You can see the exhaust tip still in the opening, with the inner pipe removed to a depth of about 1.25".

[image: gallery_13183_3825_507377.jpg]

Close up looking down the exhaust tip...outer exhaust tip still in place.

[image: gallery_13183_3825_465257.jpg]

Full rear shot of bike. Looks virtually stock. More mods to come, though!

[image: gallery_13183_3825_291390.jpg]

All the tools and items you'll need to do this mod: Be sure and get two 1" bimetal hole saws, as you'll most likely ruin the first when starting the cut between the two pipes. Once started, use the good remaining bit.

[image: gallery_13183_3825_55043.jpg]

Close up of the hole saw and the dremel cutting wheels.

[image: gallery_13183_3825_578683.jpg]

Shows the 1" bimetal hole saw going over the inside pipe and inside the outer exhaust tip. You'll have to use lots of cutting oil, low rpms on the drill, and be patient. Remove the bit and use a flat screwdriver to wipe out the metal shavings at regular intervals, as the shavings have no where to go, and will destroy the bit if not removed. You will be removing some of the inside pipe, which makes more shavings. Be sure to drill far enough in to cut through the shoulder of the inside pipe that is formed where it's welded to the end of the muffler. Do this before you use the dremel to cut the inside pipe out, or it'll be very hard to do later with the pipe loose (don't ask how I know this). The shoulder needs to be gone to remove the cut off pipe through the outer exhaust tip.

[image: gallery_13183_3825_180836.jpg]

Dremel position when cutting around inner circumference of inside pipe. No need for the flexible extension, as it really doesn't get you any further into pipe. You can remove about 1.25" of the inside pipe with the dremel alone.

[image: gallery_13183_3825_444541.jpg]

Victory! Just do this 3 more times and ride.

Enjoy!

#5

Thanks a lot‼ :biggrin:

Edited May 11, 2008 by ?art West-VL.
#6

Sorry the pics are so small (anyone know how to make them bigger?).

If you need more detail on the pics, you can see them in my photo gallery (they're much bigger in the gallery).

#7
VFRojSorry the pics are so small (anyone know how to make them bigger?).

If you need more detail on the pics, you can see them in my photo gallery (they're much bigger in the gallery).

Fxd.

#8

Interesting... can't wait to hear a sound clip

#9

Nice write up R, Looks like something even I may be able to do. Hey, are you sicking your dog on me? I changed my pic, as I have found one that compliments the one we both liked. I guess great minds think alike, wecome aboard.

#10

Hey Windwalker,

Didn't want to confuse too many people with the same avatar...didn't mean to take yours, so I thought I'd change mine.

One other note on the mod, if you're thinking about trying it. Be sure to use the "old" hole saw to start each cut on each pipe, as it's pretty hard on the bit to get the cut started. Once you get it started, use the good bit.

Thanks for reply...and I like the new avatar!

Roj

#11

I thought this was a great idea so I tried it yesterday... what could go wrong? Thought I'd post something to look out for though...

I basicly followed the steps as set forth by this thread and the other. I did buy 2 hole saws as well, same brand in fact. Actually my cutting blades were the same as well... I think.

One of the hole saws I had, after I opened the package, I noticed that some of the teeth were a little out of alignment which didn't allow it to fit in the hole... no comment... so I just hammered them back into place... no problem.

I got to drilling and it seemed to cut just fine. Apparently when I was finished some of those teeth had grabbed the inside pipe and twisted it beyond recognition. I thought, "no big deal, I need to cut it out anyways, so I did the other top one on the other side... same thing. Then I go to cut it out. Couldn't get my cutting blade in there due to the diameter of the hole... After grinding the blade a little... PIA by the way... I had to grind the blade so small that by the time I got it in there i'd cut for about 3 seconds before the blade needed to be changed.

Well I decided to wait and do the last two holes with the other hole saw... Those worked perfectly... meaning it left the inner pipe intact. So I tried to cut those out... I have to say that ya'll have much more patience then me. By the time I got the blade filed down enough, I went though about 6 or 7 blades... sitll couldn't see I made any impact on the inner pipes...

Any ways, it does sound much better but I haven't gottne the inner pipes out yet, none of them.

Thought I'd just post to make sure the next person is aware of the hole saw... MAKE SURE THE TEETH ARE PERFECTLY ALIGNED!

I'm down, so to speak, but I'm not out yet. I'll give it another crack at it later. I'm going to Austin this weekend to the ROT Ralley so I'll probalby waite until I'm back from that to finish up.

Chad

#12

I did the "stage 1" mod last night on my '02 and it went fairly smoothly. I used oil on the 1" blade and it seemed to work well and keep things moving smoothly. I had to bend in several of the teeth to get it to inside the tip, but it worked out fine. On the first one I cut, I did not saw past the shoulder, so once I had finished the dremel section, I couldn't get the piece out! I ended up having to use a combination of pliers and clamps to get it out and it was definitely a pain. The second one I cut went perfectly. I cranked it up this morning and it sounds good. I'll have to take it out for a spin tonight to really assess the sound.

I guess I just want to reinforce what VFRaj said in his original writeup about making sure you cut past the shoulder. The shoulder weld is about 1/8" of an inch thick, so once you've cut through the inner tip and you can wiggle the inside pipe around, then cut another 1/8" until it's pretty obvious that you can just pull the sucker out once you've sliced it from the inside. I'll post a vid on youtube for sound when I get a chance.

-Ryan

#13

Any follow up on this? Any comments on the difficulties these last few posters have had?? Sound clips??

#14
AuspañolAny follow up on this? Any comments on the difficulties these last few posters have had?? Sound clips??

Just now seeing this thread.

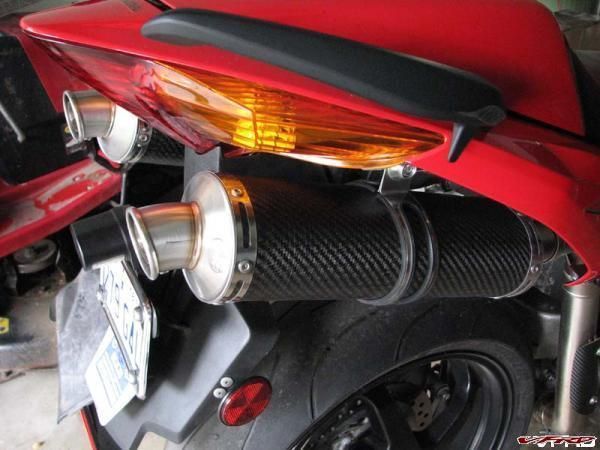
I hate to rain on VFRoj's parade but IIRC this method is the original one from the 2002-03 era. I did my first vtec this way. It sounded great and is one of the best "free" mods around but I eventually got greedy and sawed off the end caps, removed the remaining baffles, and had a welder reattached the end caps for about $40. Big, deep noises that rivaled any exhaust; however, I grew tired of the stock look, weight, and especially the heat of the stainless cans and went with a carbon fiber solution and have used ever since:

[image: gallery_611_303_71630.jpg]

Custom D&D pipes

gallery_611_303_57199.jpg

termi's Ducati Termignoni exhaust on an 02 VTEC.

gallery_611_303_13005.jpg

Custom Termignoni's

gallery_611_2314_46851.jpg

Leo Vince

#16
FotoMoto
AuspañolSound clips??

First sounds like a full bafflectomy while second sound like a lite version:

[video: https://www.youtube.com/embed/zjD12nYM6ak?feature=oembed] [video: https://www.youtube.com/embed/4sz-LhQQgvM?feature=oembed]

Hmmm, the first one is quite impressive. Would be good in these vids if they had an untouched one going by as well to compare the two... but it certainly seems throatier and more resonant... do I detect a slightly tinny aspect?? Still for the price, sounds good... wondering if those pipes that are cut free are just dangling around in there and with time will droop and vibrate against the outer shell??

#18

Well, I bought all the hardware to do this job... even a Dremel which sort of blew the budget but I hope it will come in handy for many a future job...

Thing is, the hole cutters I bought (25mm) do NOT fit over the inner pipe. They butt up against the end of this pipe. The teeth are, as mentioned by others, offset, one inward, one outward and so on... but even if I could straighten them out (they just snap off), I don't think it would fit over the inner pipe anyway... maybe it's a question of slight variations in the sizing from one brand to another as I couldn't find the brand as seen in the photos above.

Frustrating as I've already invested in the Dremel... and them hole cutters ain't cheap either...

#19
VFRojI'm currently in the process of yet another new way to modify the exhaust.

This way, while requiring patience, is very easy and does not require removal of the exhaust, loosening of the exhaust, or even removing the end covers off the exhaust. No welding required...

It can also be done in stages, so you can check & evaluate the sound level before going further. I do caution that you do Stage 1 and ride the motorcycle through at least a tank full of gas, as the sound gets noticeably deeper and louder after running with even the "Stage 1" mod (it has to be the cat deteriorating due to more flow / less restriction through the modified exhaust).

This is a different version of the "new way to 'gut' your exhaust" post, so I suggest that you read that post, then refer back to this one...I will post up the complete process with pics once I've completed the whole job this weekend...if anyone's interested.

The difference is that I used a 1" bimetal hole saw (as suggested by VWRXTDR). I was able to drill between the outer tip and the inner tip of the exhaust exits, which releases the inner pipe from the outer exhaust tip. I was then able to reach into the inside pipe with a Dremel (no extension needed) and cut the inner pipe loose, then pull it out.

The outer exhaust tip stays in place, which helps in a multitude of ways:

1. No fear of water getting into the cans.

2. No fear of the end caps blueing (important for me, as I'll be putting CF covers and end caps on).

3. The tips look good (if you like stock).

4. Sound is mellow and deep; louder than stock, but not in any way excessive. As someone suggested, the tips seem to take some of the "ping" out of the sound.

5. Close to being a "big hole" type gut, as the exit holes are now a full 1" diameter, instead of the 3/4" diameter of the inner pipes.

The beauty of this mod is that you are essentially making the muffler a "straight thru" design, much like a total gut, without all the cutting, beating, welding, removing of the exhaust, etc...It maintains enough baffling to take the edge off, while maintaining a deep tone with a nice volume.

"Stage 1" (Upper pipes in each muffler only) sounds very good at idle (deep and mellow). Very controllable noise level when accelerating (nice when you leave for work early in the morning); can hear the exhaust up to about 50 mph with Stage 1 (which is the top pipe in each can modified).

I will be doing the bottom two pipes in each can this weekend (Stage 2).

If anyone's interested, I'll post pics and try to do a sound clip of "Stage 1" and "Stage 2".

There's also some tricks I learned while doing this that are essential to being able to drill between the exhaust tip and the inner pipe...One other note: The lean surging I was experiencing before at steady throttle while cruising at highway speeds is gone. The VTEC transition is also dramatically smoother. Anyone have an explanation for this?

Roj

hey i was needing help with this mod. for some reason i cant copy these instructions. was wondering if u could email this to me? if u can would appreciate. bctaft@yahoo.com

#20

Took the plunge. Did a 'stage 2' exhaust mod. (this is the four pipe cut, not the full gut/stage 3) I left the pipes mounted, and about 4 hours of work (i have a long learning curve apparently), sweet sweet music!

I learned a lot and now, could probably do it in about 2 hrs....

Thought i'd share some wisdom, perhaps it will save others some money and some time:

This is essentially the same method posted above, except the pipes stayed on the bike and the chrome end pieces remained in place. I also did not remove the endcaps, only cut the internal mufflers approx. 1.5-2 inches inside the can.

Tools I used:

1. Patience. First and formost. perhaps you will doubt yourself as you begin the first cuts, but take your time, the hard work and patience is worth it. Also if you prep your hole saw bits (see below) this helps.

2. Safety glasses. There's going to tons of metel bits everywhere...

3. Bike Cover. See #2.

4. powerful drill. you need one with some balls, a plug in Dewalt or similar works great.

5. 25 mm or 1 inch hole saws. I used two Rigid brand, (Home Depot). (Sears brand has straighter teeth, but the ID (inside diameter) is too tight) One of the most important things i learned regarding hole saws. As mentioned by other posters, the teeth are offset and alternating In/Out. This will chew the Shite out of your endcaps and cause a significant amount of seizing/grabbing. I used a Dremel tool 1/2 in. Sanding drum #407 to take the offset off the tips/realign on both the inside and the outside of the hole saw...just enough to reduce the seizing effect. I did this prep grind after the first cut and noted significant improvement in the smoothness of the cut and decreased seizing. I also used slow steady off/on pressure and the second i got smoke, i pulled out and went to the next hole, allowing the hot one to cool (no need to further harden that weld). I also used plenty of cutting oil. Before i went 'around' again, i hit each hole with the shop vac and compressed air to clear the metel shaving. Overall, this worked very well and went very smoothly. Another thing is to be sure to push all the way through the weld, essentially cleaning off the outside diameter of the exhaust pipe so it can be easily removed. this is very important. Ideally, one would use a 1 inch hole saw with Carbide grind tips, not teeth, but i was unable to find a carbide tipped one smaller than 2 inches.

6. Dremel Tool. I have the flex extension. love it but it's not critical. After a lot of experimentation with mutiple cutting discs (spendy) i have finallized on this. Don't waste your money on the Dremel EZ lock. They cut fine but once you get them down to the 3/4 inches you need to get into the exhaust pipe, you have only a few seconds before you are burned down to the locking mechanism. I used the Reinforeced Cutoff Wheels #456 or #423. One could go through about 30-40 of the heavy duty ceramic wheels and it's a PIA. Or you can grind down the reinforced wheels to the correct diameter.

HERE's the TRICK: It take a hell of a lot of grinding to get them down to 3/4 even on a tool steel file or stone ( burned through a hardened 10 inch file just getting two down to size. don't waste your time. Grab your Shears (I used the Wiss straight cutting metal shears) and start snipping off the edges of the wheel. This is surprisingly easy and does not compromise the integrity of the wheel. Work your way around it until you are close (very close) to 3/4in. Spin it on a file or stone to prep and round the edge, then get to cutting. I started the cuts at the 12 oclock and gradually worked my way around. I burned through about 2 wheels per tube (8 total). The exhaust tip dropped loose and i was able to pull it out with needle nose. During the wheel cutting, i again hit the can's with the shop vac and compressed air, trying to keep as much material from building up and interfering with the cutting and i also want a clean can when its over. While vacuuming i would alternate blocking the airflow through the opposite can or the secondary whole to shift airflow in the can and grab more shavings. I then ran a magnet in there to pick up any stray pieces.

I then took a fresh cutoff wheel and inserted back into the cans to clean up the cuts on the ends of the pipes. polished out nice.

I used the Dremel 1/2 in Sanding Drum to clean up any errent cutting marks in the outlet pipes. This gave a very nice cleaned up appearance on the interior diameter of the outlet pipes.

Finally, I used the 511E EZ Lock Finishing Abrasive Buffs - 180 & 280 grit (2 Pack) to polish out the outlet pipes. These are a perfect fit into the pipe and leave a nice brilliant shine on the ID of this pipes.

Overall, i'm very happy.

haven't road tested yet, but looking forward to a warm day off work...

At low and high idle, sound amazing.

Give it a shot, i'll try to post pics when i'm not at work (which is almost never) and PM me if you have any questions.

Good luck!!!!!!!!

#21
Someguy

Took the plunge. Did a 'stage 2' exhaust mod. (this is the four pipe cut, not the full gut/stage 3) I left the pipes mounted, and about 4 hours of work (i have a long learning curve apparently), sweet sweet music!

I learned a lot and now, could probably do it in about 2 hrs....

Thought i'd share some wisdom, perhaps it will save others some money and some time:

This is essentially the same method posted above, except the pipes stayed on the bike and the chrome end pieces remained in place. I also did not remove the endcaps, only cut the internal mufflers approx. 1.5-2 inches inside the can.

Tools I used:

1. Patience. First and formost. perhaps you will doubt yourself as you begin the first cuts, but take your time, the hard work and patience is worth it. Also if you prep your hole saw bits (see below) this helps.

2. Safety glasses. There's going to tons of metel bits everywhere...

3. Bike Cover. See #2.

4. powerful drill. you need one with some balls, a plug in Dewalt or similar works great.

5. 25 mm or 1 inch hole saws. I used two Rigid brand, (Home Depot). (Sears brand has straighter teeth, but the ID (inside diameter) is too tight) One of the most important things i learned regarding hole saws. As mentioned by other posters, the teeth are offset and alternating In/Out. This will chew the Shite out of your endcaps and cause a significant amount of seizing/grabbing. I used a Dremel tool 1/2 in. Sanding drum #407 to take the offset off the tips/realign on both the inside and the outside of the hole saw...just enough to reduce the seizing effect. I did this prep grind after the first cut and noted significant improvement in the smoothness of the cut and decreased seizing. I also used slow steady off/on pressure and the second i got smoke, i pulled out and went to the next hole, allowing the hot one to cool (no need to further harden that weld). I also used plenty of cutting oil. Before i went 'around' again, i hit each hole with the shop vac and compressed air to clear the metel shaving. Overall, this worked very well and went very smoothly. Another thing is to be sure to push all the way through the weld, essentially cleaning off the outside diameter of the exhaust pipe so it can be easily removed. this is very important. Ideally, one would use a 1 inch hole saw with Carbide grind tips, not teeth, but i was unable to find a carbide tipped one smaller than 2 inches.

6. Dremel Tool. I have the flex extension. love it but it's not critical. After a lot of experimentation with mutiple cutting discs (spendy) i have finallized on this. Don't waste your money on the Dremel EZ lock. They cut fine but once you get them down to the 3/4 inches you need to get into the exhaust pipe, you have only a few seconds before you are burned down to the locking mechanism. I used the Reinforeced Cutoff Wheels #456 or #423. One could go through about 30-40 of the heavy duty ceramic wheels and it's a PIA. Or you can grind down the reinforced wheels to the correct diameter.

HERE's the TRICK: It take a hell of a lot of grinding to get them down to 3/4 even on a tool steel file or stone ( burned through a hardened 10 inch file just getting two down to size. don't waste your time. Grab your Shears (I used the Wiss straight cutting metal shears) and start snipping off the edges of the wheel. This is surprisingly easy and does not compromise the integrity of the wheel. Work your way around it until you are close (very close) to 3/4in. Spin it on a file or stone to prep and round the edge, then get to cutting. I started the cuts at the 12 oclock and gradually worked my way around. I burned through about 2 wheels per tube (8 total). The exhaust tip dropped loose and i was able to pull it out with needle nose. During the wheel cutting, i again hit the can's with the shop vac and compressed air, trying to keep as much material from building up and interfering with the cutting and i also want a clean can when its over. While vacuuming i would alternate blocking the airflow through the opposite can or the secondary whole to shift airflow in the can and grab more shavings. I then ran a magnet in there to pick up any stray pieces.

I then took a fresh cutoff wheel and inserted back into the cans to clean up the cuts on the ends of the pipes. polished out nice.

I used the Dremel 1/2 in Sanding Drum to clean up any errent cutting marks in the outlet pipes. This gave a very nice cleaned up appearance on the interior diameter of the outlet pipes.

Finally, I used the 511E EZ Lock Finishing Abrasive Buffs - 180 & 280 grit (2 Pack) to polish out the outlet pipes. These are a perfect fit into the pipe and leave a nice brilliant shine on the ID of this pipes.

Overall, i'm very happy.

haven't road tested yet, but looking forward to a warm day off work...

At low and high idle, sound amazing.

Give it a shot, i'll try to post pics when i'm not at work (which is almost never) and PM me if you have any questions.

Good luck!!!!!!!!

Thanks for the extra details!

#22

Not to poo-poo someone's well documented hard work, and I can totally understand wanting to get a little more sound out of these bikes, but I've started to wonder just what effect this sort of mod has on backpressure through increased outlet turbulence. Easy test would be dyno runs before and after. Maybe nothing of any consequence. Or maybe not. Something to think about at least.

#23
FotoMoto
AuspañolAny follow up on this? Any comments on the difficulties these last few posters have had?? Sound clips??

Just now seeing this thread.

I hate to rain on VFRoj's parade but IIRC this method is the original one from the 2002-03 era. I did my first vtec this way. It sounded great and is one of the best "free" mods around but I eventually got greedy and sawed off the end caps, removed the remaining baffles, and had a welder reattached the end caps for about $40. Big, deep noises that rivaled any exhaust; however, I grew tired of the stock look, weight, and especially the heat of the stainless cans and went with a carbon fiber solution and have used ever since:

[image: gallery_611_303_71630.jpg]

Custom D&D pipes

gallery_611_303_57199.jpg

termi's Ducati Termignoni exhaust on an 02 VTEC.

gallery_611_303_13005.jpg

Custom Termignoni's

gallery_611_2314_46851.jpg

Leo Vince

I sure wish I had your talent.

#24
pres589

Not to poo-poo someone's well documented hard work

Seat of the pants dynos show no difference. smile.gif

#25
EmeraldVFR

I sure wish I had your talent.

Thanks Steve! :ph34r: But if I can do it, anyone can. :biggrin:

#26

BTW, this thread should be the poster child for a "trimming your reply" campaign. This coming from a recent iphone purchaser.

#27
FotoMoto
pres589

Not to poo-poo someone's well documented hard work

Seat of the pants dynos show no difference. smile.gif

Well of course not, but even the best pipes free up, what, 10 hp on their own? What I'm suggesting is there may actually be a regression with these sorts of mods.

I might use some free time today to search around, I would like to think some magazine has tested some aftermarket cans on a flow bench to see which actually blow better than others. From there, make a custom midpipe with effort going into having the smoothest bends and most even flow out of both sides to really keep things moving, and call it a day. Of course it will cost cubic dollars compared to gutting the factory cans and I know a lot of people aren't reaching for that nth degree, but really the more I think about the stock exhaust on the 6th gen especially the less impressed I am with it. Sounds decent though, for sure.

#28
pres589

Not to poo-poo someone's well documented hard work, and I can totally understand wanting to get a little more sound out of these bikes, but I've started to wonder just what effect this sort of mod has on backpressure through increased outlet turbulence. Easy test would be dyno runs before and after. Maybe nothing of any consequence. Or maybe not. Something to think about at least.

Sorry, but I don't think "squid" and "dyno" really mix... :laugh:

Ciao,

#29
JZH

Sorry, but I don't think "squid" and "dyno" really mix... :laugh:

Ciao,

What? I'm not sure what you're trying to say here.

#30
pres589
JZH

Sorry, but I don't think "squid" and "dyno" really mix... :laugh:

Ciao,

What? I'm not sure what you're trying to say here.

My guess is he's calling someone that modifies their exhaust a squid. whatever.

#31
jderou
pres589
JZH

Sorry, but I don't think "squid" and "dyno" really mix... :fing02:

Ciao,

What? I'm not sure what you're trying to say here.

My guess is he's calling someone that modifies their exhaust a squid. whatever.

Good guess! Seriously, you don't really think modding the exhaust to increase noise is a performance modification, do you? Releasing the VFR howl is an admirable goal in its own right, which I do support to a certain extent, but not because it will result in more power, because it won't.

Ciao,

#32
JZH
jderou
pres589
JZH

Sorry, but I don't think "squid" and "dyno" really mix... :fing02:

Ciao,

What? I'm not sure what you're trying to say here.

My guess is he's calling someone that modifies their exhaust a squid. whatever.

Good guess! Seriously, you don't really think modding the exhaust to increase noise is a performance modification, do you? Releasing the VFR howl is an admirable goal in its own right, which I do support to a certain extent, but not because it will result in more power, because it won't.

Ciao,

I don't think anyone here thinks they are going to gain any performance from modding their exhaust. It is purely to try and achieve a more rewarding tone out of the exhaust without spending a grand. Even with an aftermarket exhaust, gains would be negligible. I wouldn't call that squidly.

#33

I don't think anyone here thinks they are going to gain any performance from modding their exhaust. It is purely to try and achieve a more rewarding tone out of the exhaust without spending a grand. Even with an aftermarket exhaust, gains would be negligible. I wouldn't call that squidly.

I think it's just the natural progression of achieving the coveted VFR growl.

I lol at someone thinking it's going to make it gain HP... I ride with 180HP bikes on a regular basis... they all love being behind ME because the bike gets them pumped AND I can actually lead them through the corners... er hum *cough cough* not to toot mah own horn wink.gif lol great post guys :fing02:

Edited December 27, 2009 by taglicious
#34

Well, I did this mod today, the stage one version that is, and I am impressed, and I have my question answered about the other modification topic I posted in. Sounds big and deep, a lot like my buddy's R1 with Akrapovic's, just not "arrest me" loud, and a lot smoother sounding.

Awaiting spring, and the opportunity to throw up some video clips!

Mike

#35
Auspañol

Any follow up on this? Any comments on the difficulties these last few posters have had?? Sound clips??

I actually did it this way. Just kind of varied the instructions from the original thread on here. 3/4 went pretty smooth, and 1 of them was just a huge PITA! Also, it takes FOREVER, and a ton of cutting discs... But not terrible, better than $800 on an aftermarket exhaust.

#36

How much louder is the "stage 2" mod than just the upper 2? I'm pretty happy with the upper 2, but time, and riding will tell. I actually didn't have a big problem with the cutting discs, I went through around 10. The hole saw I screwed up on though. I murdered my first one cause I didn't pull it out enough! It got really hot...

#37
VFRoj

Here's some pics of what you'll need to do this mod, along with a sequence and details. I'll post a sound clip once I finish up with "Stage 2" tomorrow.

[image: gallery_13183_3825_142384.jpg]

Here's what "Stage 1" looks like, with only the top opening of each muffler modified. You can see the exhaust tip still in the opening, with the inner pipe removed to a depth of about 1.25".

[image: gallery_13183_3825_507377.jpg]

Close up looking down the exhaust tip...outer exhaust tip still in place.

[image: gallery_13183_3825_465257.jpg]

Full rear shot of bike. Looks virtually stock. More mods to come, though!

[image: gallery_13183_3825_291390.jpg]

All the tools and items you'll need to do this mod: Be sure and get two 1" bimetal hole saws, as you'll most likely ruin the first when starting the cut between the two pipes. Once started, use the good remaining bit.

[image: gallery_13183_3825_55043.jpg]

Close up of the hole saw and the dremel cutting wheels.

[image: gallery_13183_3825_578683.jpg]

Shows the 1" bimetal hole saw going over the inside pipe and inside the outer exhaust tip. You'll have to use lots of cutting oil, low rpms on the drill, and be patient. Remove the bit and use a flat screwdriver to wipe out the metal shavings at regular intervals, as the shavings have no where to go, and will destroy the bit if not removed. You will be removing some of the inside pipe, which makes more shavings. Be sure to drill far enough in to cut through the shoulder of the inside pipe that is formed where it's welded to the end of the muffler. Do this before you use the dremel to cut the inside pipe out, or it'll be very hard to do later with the pipe loose (don't ask how I know this). The shoulder needs to be gone to remove the cut off pipe through the outer exhaust tip.

[image: gallery_13183_3825_180836.jpg]

Dremel position when cutting around inner circumference of inside pipe. No need for the flexible extension, as it really doesn't get you any further into pipe. You can remove about 1.25" of the inside pipe with the dremel alone.

[image: gallery_13183_3825_444541.jpg]

Victory! Just do this 3 more times and ride.

Enjoy!

Just did this myself, stage 1 only on the top two holes. Worked well, pretty easy but here are a few more tips I learned. I used the exact Rigid 1" hole saw in the picture. I put it in my milwakee drill in low speed, and used the clutch instead of drill so it wouldn't grab anything to bad. I also held my air nozzle next to the saw to blow through the two holes on the side of the saw. The bit never got warm and I never had to worry about stopping to blow shavings out. No cutting oil necessary.

When it came to the cutting discs. I used the cheapo Dremel 420's. Tip I learned is to cut them BEFORE you mount them on the dremel. I used side cutters to cut them in a square, and then nip the corners off to make it look like a stopsignagon. I cut slowly and used a small right angle pick inbetween cutting discs to feel in there for which spots were cut all the way through. This alleviated the pita it is to keep putting discs on to cut things that are already cut.

Only used one pack of 20 cutting discs. Also, make sure you put the dremel shank in the chuck far enough. On my last disc I pulled the dremel out and the shank was missing, must have flown out. Can't hear it anywhere though...

#38

Well I bought a dremel, (2) porter cable hole saws 1", and went to work. Drilled the first one out till the pipe was free. Went to work on it with the dremel then looked closely and realized that it was not going to fit out when I'm done cutting. Went back to the hole saw and had already cut too far with the dremel. It broke off and fell in the muffler. SOB!!! ok, no way to get it out because I didn't drill long enough. Move to the next one. The inner teeth of the hole saw stick in so far it makes the outer portion of the pipe paper thin and mangles it. By the time I drilled far enough for the pipe to separate I am drenched. 100% humidity and 96F. So I use needle nose pliers to brake off the mangled part of the pipe and used a screw driver to pry the inner pipe to the side. I did this to three different holes. Bike sounds awesome. Wish I had never bought the dremel. You can see the edge of the inner pipe when you look at the end but honestly I don't care. Sounds good though. Just wanted to post my experience for people that want to spend $10 on a couple hole saws and don't want to have to get a dremel.

#39
Someguy

Took the plunge. Did a 'stage 2' exhaust mod. (this is the four pipe cut, not the full gut/stage 3) I left the pipes mounted, and about 4 hours of work (i have a long learning curve apparently), sweet sweet music!

I learned a lot and now, could probably do it in about 2 hrs....

Thought i'd share some wisdom, perhaps it will save others some money and some time:

This is essentially the same method posted above, except the pipes stayed on the bike and the chrome end pieces remained in place. I also did not remove the endcaps, only cut the internal mufflers approx. 1.5-2 inches inside the can.

Tools I used:

1. Patience. First and formost. perhaps you will doubt yourself as you begin the first cuts, but take your time, the hard work and patience is worth it. Also if you prep your hole saw bits (see below) this helps.

2. Safety glasses. There's going to tons of metel bits everywhere...

3. Bike Cover. See #2.

4. powerful drill. you need one with some balls, a plug in Dewalt or similar works great.

5. 25 mm or 1 inch hole saws. I used two Rigid brand, (Home Depot). (Sears brand has straighter teeth, but the ID (inside diameter) is too tight) One of the most important things i learned regarding hole saws. As mentioned by other posters, the teeth are offset and alternating In/Out. This will chew the Shite out of your endcaps and cause a significant amount of seizing/grabbing. I used a Dremel tool 1/2 in. Sanding drum #407 to take the offset off the tips/realign on both the inside and the outside of the hole saw...just enough to reduce the seizing effect. I did this prep grind after the first cut and noted significant improvement in the smoothness of the cut and decreased seizing. I also used slow steady off/on pressure and the second i got smoke, i pulled out and went to the next hole, allowing the hot one to cool (no need to further harden that weld). I also used plenty of cutting oil. Before i went 'around' again, i hit each hole with the shop vac and compressed air to clear the metel shaving. Overall, this worked very well and went very smoothly. Another thing is to be sure to push all the way through the weld, essentially cleaning off the outside diameter of the exhaust pipe so it can be easily removed. this is very important. Ideally, one would use a 1 inch hole saw with Carbide grind tips, not teeth, but i was unable to find a carbide tipped one smaller than 2 inches.

6. Dremel Tool. I have the flex extension. love it but it's not critical. After a lot of experimentation with mutiple cutting discs (spendy) i have finallized on this. Don't waste your money on the Dremel EZ lock. They cut fine but once you get them down to the 3/4 inches you need to get into the exhaust pipe, you have only a few seconds before you are burned down to the locking mechanism. I used the Reinforeced Cutoff Wheels #456 or #423. One could go through about 30-40 of the heavy duty ceramic wheels and it's a PIA. Or you can grind down the reinforced wheels to the correct diameter.

HERE's the TRICK: It take a hell of a lot of grinding to get them down to 3/4 even on a tool steel file or stone ( burned through a hardened 10 inch file just getting two down to size. don't waste your time. Grab your Shears (I used the Wiss straight cutting metal shears) and start snipping off the edges of the wheel. This is surprisingly easy and does not compromise the integrity of the wheel. Work your way around it until you are close (very close) to 3/4in. Spin it on a file or stone to prep and round the edge, then get to cutting. I started the cuts at the 12 oclock and gradually worked my way around. I burned through about 2 wheels per tube (8 total). The exhaust tip dropped loose and i was able to pull it out with needle nose. During the wheel cutting, i again hit the can's with the shop vac and compressed air, trying to keep as much material from building up and interfering with the cutting and i also want a clean can when its over. While vacuuming i would alternate blocking the airflow through the opposite can or the secondary whole to shift airflow in the can and grab more shavings. I then ran a magnet in there to pick up any stray pieces.

I then took a fresh cutoff wheel and inserted back into the cans to clean up the cuts on the ends of the pipes. polished out nice.

I used the Dremel 1/2 in Sanding Drum to clean up any errent cutting marks in the outlet pipes. This gave a very nice cleaned up appearance on the interior diameter of the outlet pipes.

Finally, I used the 511E EZ Lock Finishing Abrasive Buffs - 180 & 280 grit (2 Pack) to polish out the outlet pipes. These are a perfect fit into the pipe and leave a nice brilliant shine on the ID of this pipes.

Overall, i'm very happy.

haven't road tested yet, but looking forward to a warm day off work...

At low and high idle, sound amazing.

Give it a shot, i'll try to post pics when i'm not at work (which is almost never) and PM me if you have any questions.

Good luck!!!!!!!!

I used your method today to open up the top two ports. The bike sounds great! Not annoying loud, but just enough IMHO. I used a Milwakee brand hole saw to do mine. I had to straighten out the teeth like others stated, before it would fit snugly around the pipe. During the dremel cutting I made the mistake and bought the Heavy Duty discs and went through about 15 before going back to the store and getting the reinforced type discs. I used about 5 of the reinforced discs total. During the dremel cutting I fashioned a paper clip to determine where the pipe had cut through and where I needed to still work on. After they were out, I sanded the pipe that was left inside then sprayed a few shots of some Black engine enamle paint inside so that it looks stock while looking into the exhaust.

Thanks for the detailed instructions!

https://www.dropbox.com/s/l5q9a1v80v3x7k7/2014-05-13%2016.48.14.jpg

Edited May 13, 2014 by txfishing
#40

It'll sound a lot like a bike with no mufflers and the exhaust gasses & sound resonating off the walls of an metal can... exactly what it is. Better to just buy a set of cheap used exhausts if on a tight budget., will sound better and probably give a little more power than gutting silencers...

#41
TheStig

It'll sound a lot like a bike with no mufflers and the exhaust gasses & sound resonating off the walls of an metal can... exactly what it is. Better to just buy a set of cheap used exhausts if on a tight budget., will sound better and probably give a little more power than gutting silencers...

I disagree. I have always said the some of the best sounding bikes ever are 6th gens with gutted stock cans. I prolly shouldnt say "gutted", because this here method leaves a goodly portion of the internals in place and are not gutted or empty. The volume seemed to me to go up only slightly, but the tone got much better and deeper.

#42

I did this today to my 06 and could not be happier. I did all four outlets. Be aware you will need a decent drill for this. My DeWalt got plenty hot. I tried to drill in stages to keep the drill motor and saw as cool as possible. By the last cut the saw is pretty well toast so having two isn't a bad idea. I got mine at Home Depot for about $10. Make sure to use a bimetal saw. A standard wood cutter cant do this.

As for sound, it is exactly what I was after. A little throaty growl but not obnoxious. Nowhere near as loud as my RC51. I also like leaving the tips stock looking as well. I did get out for a short ride and it seemed a little smoother at the VTech transition. I am very curious if that impression will hold. Likely I was just riding a little different to "test" the sound. Otherwise, I did not notice anything negative. No loss of power, but no gain judging from the seat but that was not my goal. I just wanted to be able to hear it a little. Even my wife agreed that it sounds a lot better. Before, I could come back in to the garage and she would not know I was home on the VFR. Now she says it sounds mean.. :491:

Edited August 11, 2014 by TNRC51
#43

I did this type of mod and I love the sound. It's reminiscent of a v8 though flowmasters, since its chambered after all. It also drones a little and sounds better at certain rpms...like flows. I seriously think it sounds better than my 4th gen with the tb header!

I would just like to offer up a much faster method on how I did it. I used 2 holesaws, one 1" and 1 3/8", and cut outer diameter hole first, then snuck n between the outlets with the smaller one, thus removing the outer tip and giving the desired results in about 15 minutes start to finish. Takes longer to remove heat shields than to drill. Def a one beer job

#44
GadiantonRob

I did this type of mod and I love the sound. It's reminiscent of a v8 though flowmasters, since its chambered after all. It also drones a little and sounds better at certain rpms...like flows. I seriously think it sounds better than my 4th gen with the tb header!

I would just like to offer up a much faster method on how I did it. I used 2 holesaws, one 1" and 1 3/8", and cut outer diameter hole first, then snuck n between the outlets with the smaller one, thus removing the outer tip and giving the desired results in about 15 minutes start to finish. Takes longer to remove heat shields than to drill. Def a one beer job

Hey GadiantonRob

Do mind elaborating, I am trying to picture where you used the 1 3/8 holesaw? DId you do that cut first? Sorry I am newer to the vfr and probably need a better diagram of the internals of the muffler to picture the connection.

Thanks!

#45

Loosen and lower/remove exhaust. Remove heat shields. Put larger holesaw around outer tips and drill circle around them. Take smaller holesaw and fit it between the two tips. Drill until outer tip is removeable. Install mufflers and enjoy.

[image: post-23830-14188362375623.jpg]

#46

Just done the outer holesaw followed by the inner dremel trick. It's let the loud out. Kick ass!

#47

I bought the holesaws but they don't fit... must be slight differences between metric and imperial options... metric over here in Spain.... or maybe from one Brand to another.

#48

It was a tight fit (giggity), I had to force the inner one in. Try different brands. Just know when you find one that fits, your about 5 mins from glory. Giggity.

#49
Auspanglish

I bought the holesaws but they don't fit... must be slight differences between metric and imperial options... metric over here in Spain.... or maybe from one Brand to another.

I had that problem too. I just used a larger holesaw and had no problems.

#50

Well I ended up opting for the following instead...

[image: c2282aa6fa6c52c1d0fef4a529d42544.jpg]

#51

I like it too

#52
GadiantonRob

Loosen and lower/remove exhaust. Remove heat shields. Put larger holesaw around outer tips and drill circle around them. Take smaller holesaw and fit it between the two tips. Drill until outer tip is removeable. Install mufflers and enjoy.

I know this is a long overdue reply, but I just picked up a spare set of OEM cans to try this on. So the difference between your method and the threadstarter is that you are cutting off the exhaust tips, and his method is retaining them, correct?

Yours i byfar easier. Do you have a pic not so close up of how it looks without the tips?

#53

Any tips to get through the shoulder? I have broken the weld using the 1 inch holesaw but havent made it through the shoulder. Even though its loose once I dremel I dont think I will be able to get that "shoulder" through the exhaust tip opening.

I have been going at it with the holesaw for way too long.

Edited January 1, 2016 by estcstm3
#54

Very nice guide!

#55
estcstm3

Any tips to get through the shoulder? I have broken the weld using the 1 inch holesaw but havent made it through the shoulder. Even though its loose once I dremel I dont think I will be able to get that "shoulder" through the exhaust tip opening.

I have been going at it with the holesaw for way too long.

Post some pic's .

#57

OK Doug, how do you bypass the engine? :unsure:

#59

Dude, why yes i do have a spare 5th gen motor. :cool:

The oil is like new, as it's still in the bottles! :491:

#60

You'll gain so much power once you do away with the losses of having to pump all that heavy viscous fluid, you'll need a set of these as well:

[image: BrassBalls.jpg]

Sold in sets of three, because you're worth it.

#61
RC36Rider

You'll gain so much power once you do away with the losses of having to pump all that heavy viscous fluid, you'll need a set of these as well:

[image: BrassBalls.jpg]

Sold in sets of three, because you're worth it.

Right up until the piston stops .

#62

Im considering doing this while i have pms (parked motorcycle syndrome). But why do you need a drill? Wont the dremel alone be able to cut the pipes?

#63
VFR2k4

Im considering doing this while i have pms (parked motorcycle syndrome). But why do you need a drill? Wont the dremel alone be able to cut the pipes?

Once you take the rear cap off, you have to use a holesaw bit on a power drill to drill around the base of the pipes. Then you're supposed to cut them off. That's how I did mine at least.

#64

Cant you just shove the dremel cutter further in the get out the "bottleneck" that you are using a holesaw bit on? I dont got a big drill, just a decent dremel.

#65

It's not really a bottleneck you're trying to get past. It's actually separating the pipes from the back of the can so that they can be removed after you cut them with the dremel.

#66

I modified my 2012 VFR with just the dremel.  I wanted to keep the rear look of the bike as standard so I made an extension for the dremel tool so that I could reach deeper into the exhaust pipe to make the first cut.  As with the previous methods described in this forum, I clipped the grinding discs to the opening size of the pipe by using a washer of the exact same inside diameter as a template.  Once I had made the initial deep cut through the pipe I then used the standard dremel tool to make the second cut to the pipe just on the inside of the can.  Once cut through, the inch or so of internal pipe fell away inside the can.  I did this on all four pipes.  The effect is a deeper, throatier growl that the bike did not have previously but not so loud as to be unlawful or ridiculously loud.  The bike looks stock standard from the rear but sounds great.  Any cops checking it out would have no clue of the modification and there are none of the water ingress problems of some of the other modifications.  The cut-off sections of the pipe don't rattle or create any issues at all - wouldn't even know they are there. Power, responsiveness and economy of the bike is unchanged.  So, for a bargain basement price of about $30 (use the reinforced dremel grinding discs!) I now have a great sounding bike.  Sure beats the $1000's for aftermarket pipes!

#67

People,

what size of Dremel discs have you used for this mods?

i have bought a stock exhaust for this modification so if i dont like i still have my original standard exhaust.

reading all the comments, i think i will like it and that is what i am after.

i could only fine 1.5" diameter discs here in bunnings store. may be i am not looking right.

appreciate your guidence.

ride safe

Vish

End of thread · 67 posts recovered Wayback Machine snapshot 6 Jul 2017