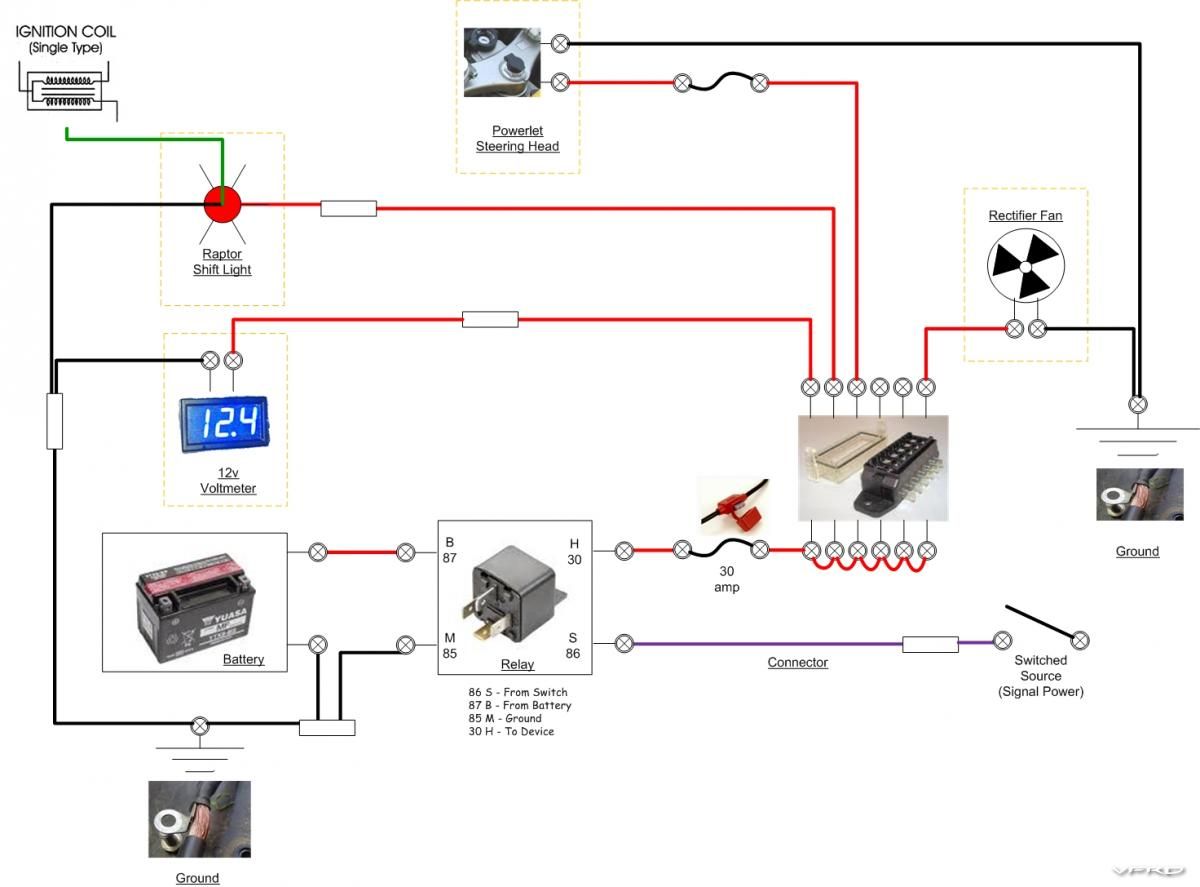
I originally purchased the FZ1 Fuseblock back in May 2010 and it was originally destined for my FZ6 but I never got around to installing it (lucky for me). Fuzeblocks.com has designed a fuse block that is easy to install and fits into a small space. The on board relay offers the choice for any device to be switched on or off automatically with the vehicle or to be powered constantly.
[image: fuseblock.png]
[image: fz1-install-fs.png]
[image: P4230043.JPG]
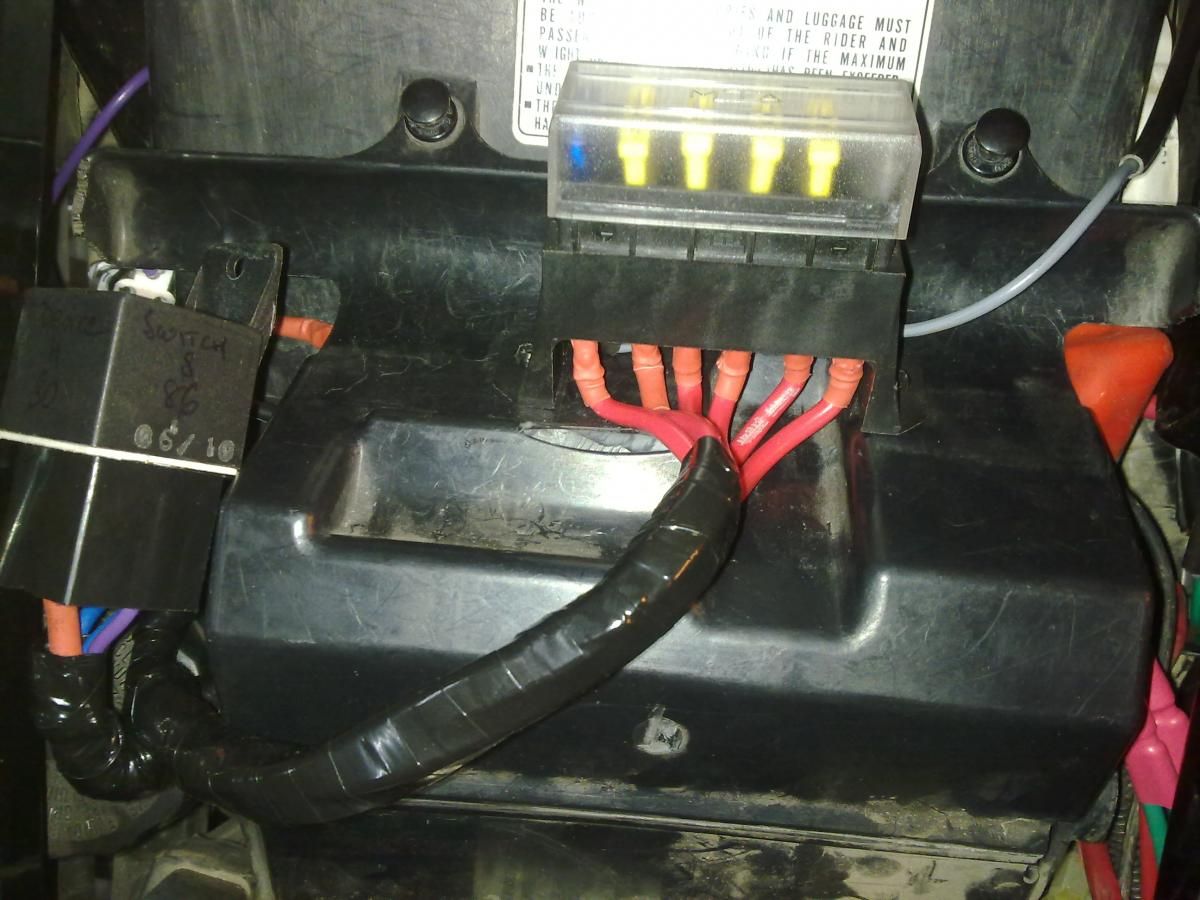
I found a decent place for it under the seat on the right hand side near the rear brake reservoir. I removed some of the plastic body work in order to make room for it.
[image: P4230047.JPG]
I found a decent place for it under the seat on the right hand side near the rear brake reservoir. I removed some of the plastic body work in order to make room for it.
I wired it as follows:
+12VDC - Direct from battery terminal, with an inline fuse (7.5 AMP) that also goes to my SAE plug for charging my battery (Battery Tender).
Ground - Spliced into an existing ground wire that I had run to my SAE connector.
+12VDC Switched - I tapped in to the the tail light wire so there is only power when the key is in the ON position (Brown/Blue wire).
[image: P4230044.JPG]
This will sure make it easy to add in additional electronics such as 12VDC outlet, heated grips & clothing, GPS, USB charger, etc.
Boneman - I'm wondering why you didn't run the negitive wire to the battery terminal like you did the positive?
Also, when you spliced into the rear tail light, did you need to determine which wire was for the tail light & which was for the brake light? If so, how did you do that?
Boneman - I'm wondering why you didn't run the negitive wire to the battery terminal like you did the positive?
Also, when you spliced into the rear tail light, did you need to determine which wire was for the tail light & which was for the brake light? If so, how did you do that?
I too wondered that., but still a nice install :fing02:
Boneman - I'm wondering why you didn't run the negitive wire to the battery terminal like you did the positive?
Also, when you spliced into the rear tail light, did you need to determine which wire was for the tail light & which was for the brake light? If so, how did you do that
The ground is connected to the negative battery terminal - it's spliced into the negative wire already attached to the negative terminal for my SAE plug.
I looked for a close switched power source to my fuseblock and the tail area was the closest and easy to check because fo the conenctor right there. I simply unplugged the connector and used a mutlimeter and checked the wires for 12VDC when the ignition was ON and no voltage when the ignition was OFF. I stripped and soldered on the wire for a solid connection.
I understand now how you connected to the neg.battery post but(unless I'm comfused) you connected directly to the positive post. I'm just kinda curious, why the difference?
Also, with using the tail light as your switched source, does it matter any that it also functions as the brake light which of coarse isn't always on?
Well, I fitted an FZ1 FuzeBlock to my 2002 today! I've gone from FOUR additional negative wires on my battery down to one (the fuzeblock itself). I already had a relay fitted for a few years since I hooked up a Signal Dynamics voltage monitor, but this puppy is wayyy better than my crappy unfused relay.
Personally I mounted my Fuzeblock opposite the battery, on the back of the battery holder. My bike does not have ABS, so there's no piping or valves in there to get in the way. Something else I did was put a fuse inline between the battery and the Fuzeblock, because I was a bit concerned how close the positive and negative poles are to each other on the Fuzeblock case. Without a fuse on that line, if the positive wire came loose out of the fuzeblock and started arcing on the frame it would not be pretty!
P.S. For anyone curious, the three devices on the negative terminal of the battery were my Powercommander V, my Powercommander Autotune, and my Cameleon Oiler. The PCV does not have a positive wire (it takes power from the TPS feed I believe), so I fitted its negative wire into the same pole as the negative wire for the Autotune.
For you ABS riders out there the Fuzeblock fits quite nicely behind the front right turn signal under the fairings there.
@Chuck2: The brake light has 3 wires. One negative (used for both filaments in the bulb) and one postive for the running light portion (which turns on when you turn the bike on) and the 2nd positive is to activate the 2nd filament in the bulb for the brake lights. Tapping into the running light portion means his relay turns on only when the bike is on. You don't want to tap into the "brake" light wire or you relay will only turn on when you hit the brakes. :fing02:
And I simply ran my negative wire to chassis for the ground. You don't have to wire the Fuzeblock negative to the battery negative in order for it to work.