[image: Posted Image]
After 12 years and 76,000 kilometers, I decided it was time to have a look at my clutch which has never seen the light of day since it left the Honda factory.
The clutch seemed to be working OK, it engaged and disengaged fine, didn't make any funny noises, and did not slip, near as I could tell.
However, I found a set of Ferodo clutch friction plates, and a set of EBC clutch springs on Ebay for cheap, so I looked at it as a preventative sort of thing.
The '98-'99 clutches are slightly different than the '00-'01s, so refer to the FSM for any changes.
[image: Posted Image]
photo
[image: Posted Image]
spring Is In The Air
The manual says to drain the engine oil, but my oil is fresh, and I wanted to save a step, so I left the bike on the sidestand, and put a jack under the headers and raised the bike up about an inch to get more lean to the left. Worked great, only lost a couple teaspoons of oil.
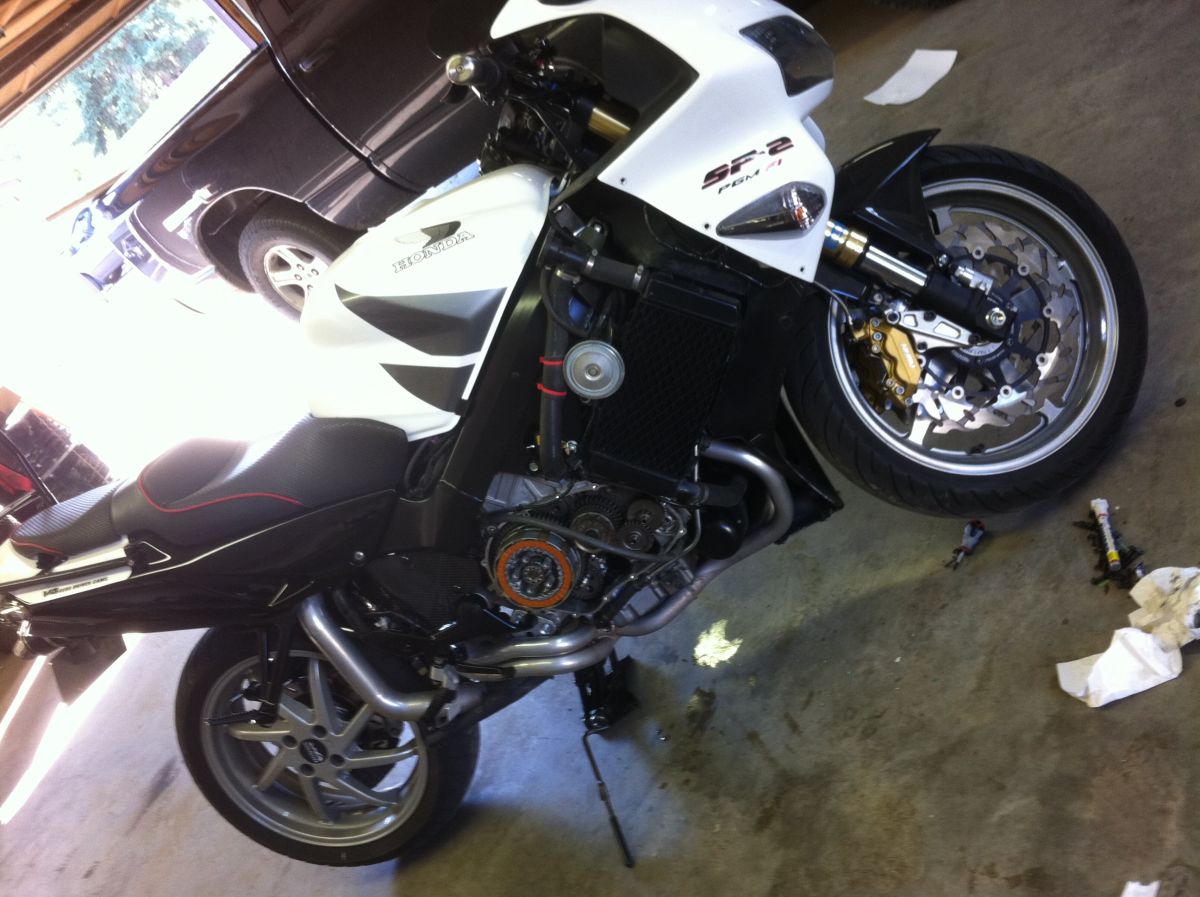
IMG 0232
Once I unearthed the clutch cover from the bodywork, it was a simple matter to clean all around the cover so that no FOD would migrate into the engine, then spin off all the retaining bolts:
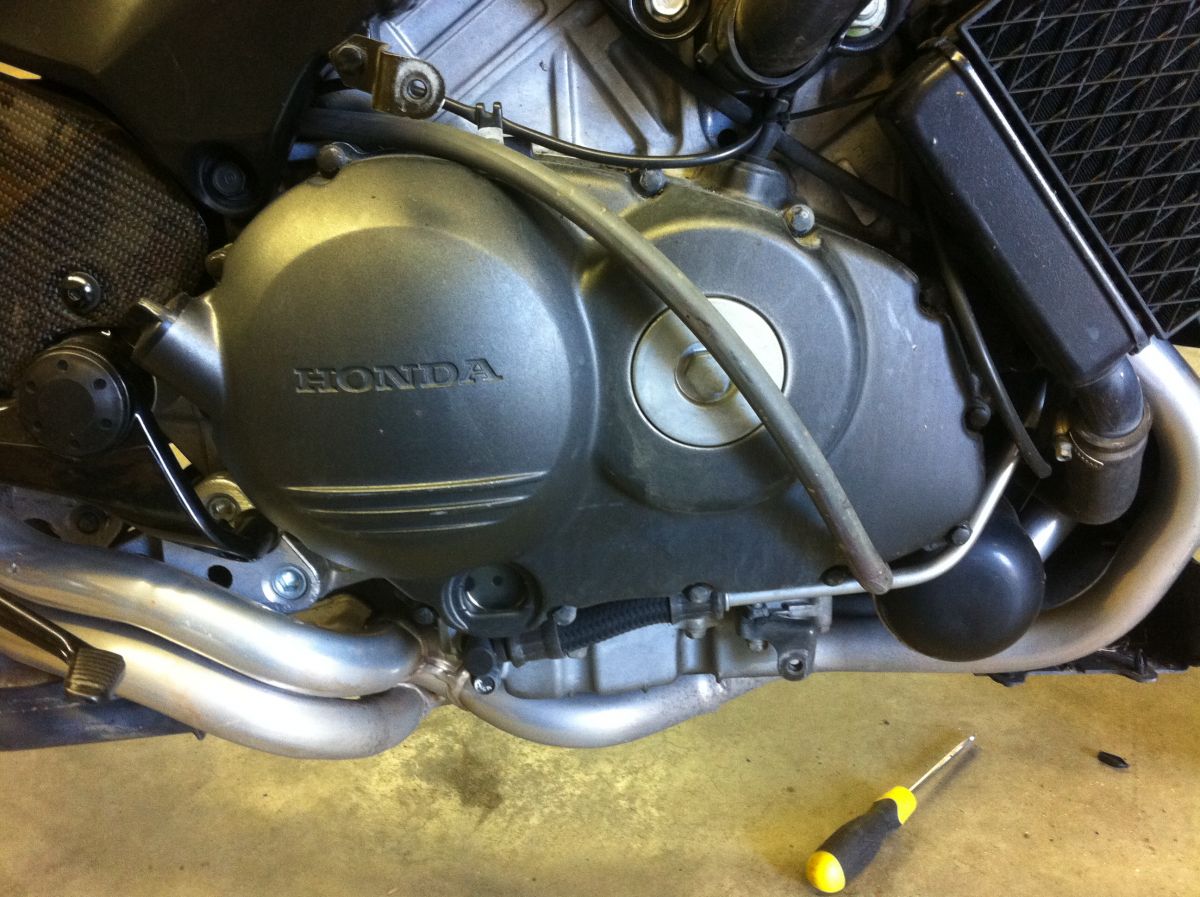
After that, carefully pry the cover off, paying attention to the crankshaft pulse generator wires routing through the cases. I found a handy tab on the top of the cover, and a 3/8" ratchet fits right behind it, so that levering the ratchet upwards against the upper cylinder block easily dislodges the cover:
[image: Posted Image]
IMG 0221
You will either need to disconnect the pulse generator from the wiring harness, or like I did, unbolt it from the inside of cover and leave it attached to the bike.
That leaves you staring at the clutch in all it's naked glory:
[image: Posted Image]
IMG 0222
The starter drive intermediate gear decided to stay with the cover, so I had to remove the gear and it's shaft and replace them between the starter primary gear and the starter clutch.
[image: Posted Image]
IMG 0223
Before replacing the errant gear, I spun the starter clutch fore and aft by hand and it's quiet and solid with no play, so it seems healthy.
Undo the 5 clutch spring bolts and lay out the parts in the order they were removed for easy reference.
I swathed the important bits in paper towels and gently scraped the gasket remains off the block. Thankfully it came off real easy.
[image: Posted Image]
IMG 0225
Here you see the old and new clutch plates compared. I had soaked the new clutch plates in motor oil for an hour prior to installation.
[image: Posted Image]
IMG 0229
I gently cleaned up all my metal plates using a nylon wheel brush chucked up in a drill. Worked great for freshening up the surface, and is not aggressive on the plates like an abrasive wheel would be.
[image: Posted Image]
I found that my clutch basket had some characteristic notching due to normal wear.
[image: Posted Image]
IMG 0224
I used a small fine file and wrapped the clutch basket in paper towels so as to not get any contaminants in the oil pan, and carefully filed the basket tangs until most of the notching was gone. Didn't want to remove too much material:
[image: Posted Image]
IMG 0226
Much better. Very tedious and time consuming. If one had the proper tools to remove the basket from the bike, it would be far easier to do on the bench.
A trigger spray bottle with some varsol and more paper towels made cleaning up the clutch basket afterwards a breeze.
After removing all the friction and drive plates, there are two washers at the back of the clutch pack. One is a thrust washer and the other is a spring washer. Take note of their positions and replace as found after removal, cleaning and inspection.
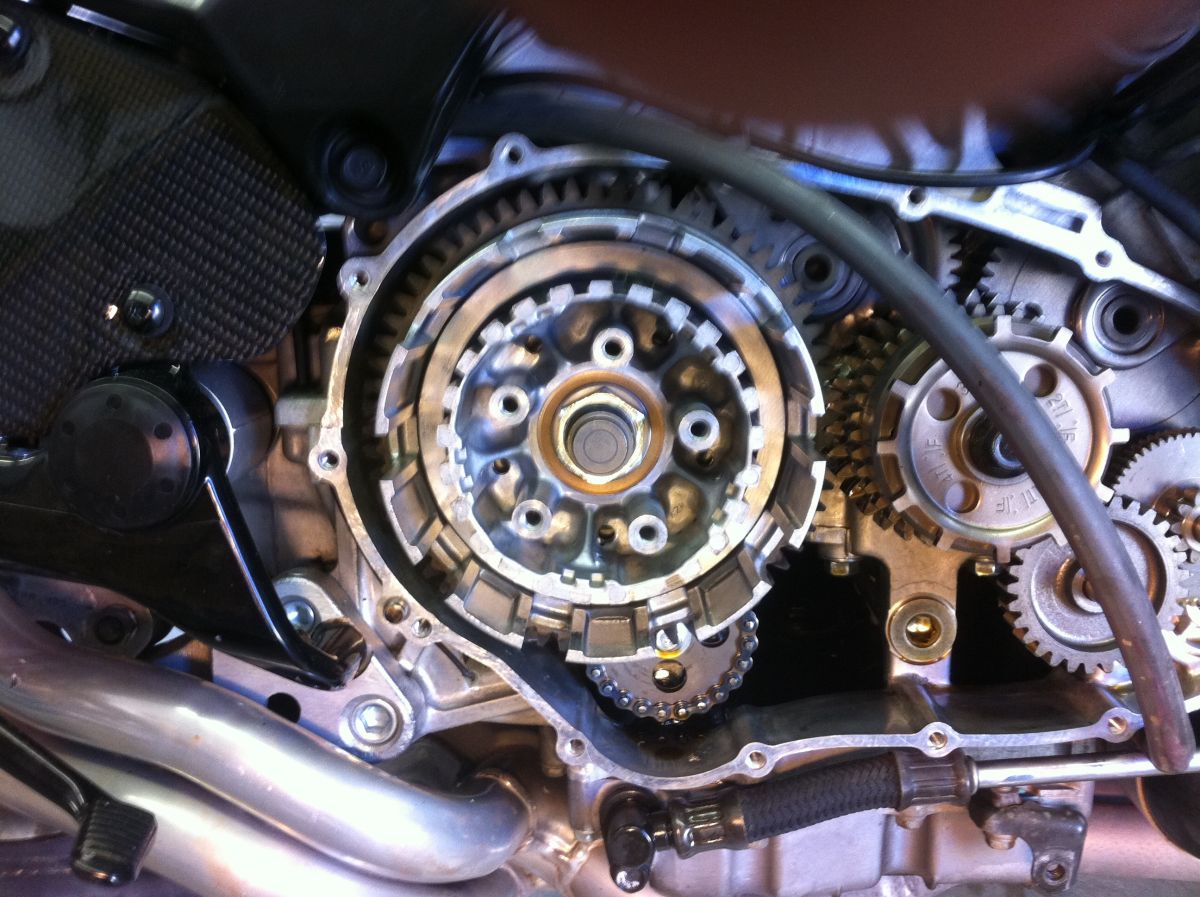
IMG 0227
All the metal plates for the clutch are stampings, so they have a rounded side and a sharp side, which is readily identifiable by feel and sight. Note the way the plates were oriented and replace them in the same manner.
First to go in is the "odd man out". There is one plate, seen below, that has a larger ID to make room for the thrust washer and the spring washer.
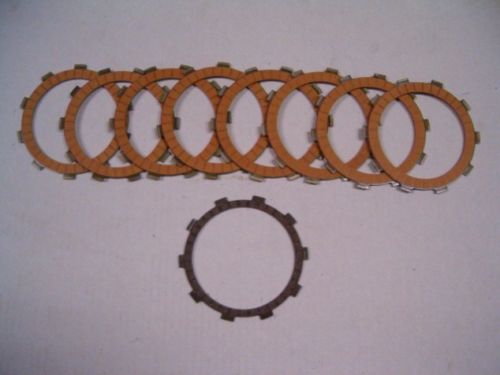
!C!yrnH!Bmk~$(KGrHqR,!ioE0GqDSD8rBNEjKF6jO!~~0 12
This one loads in first, followed by a steel plate:
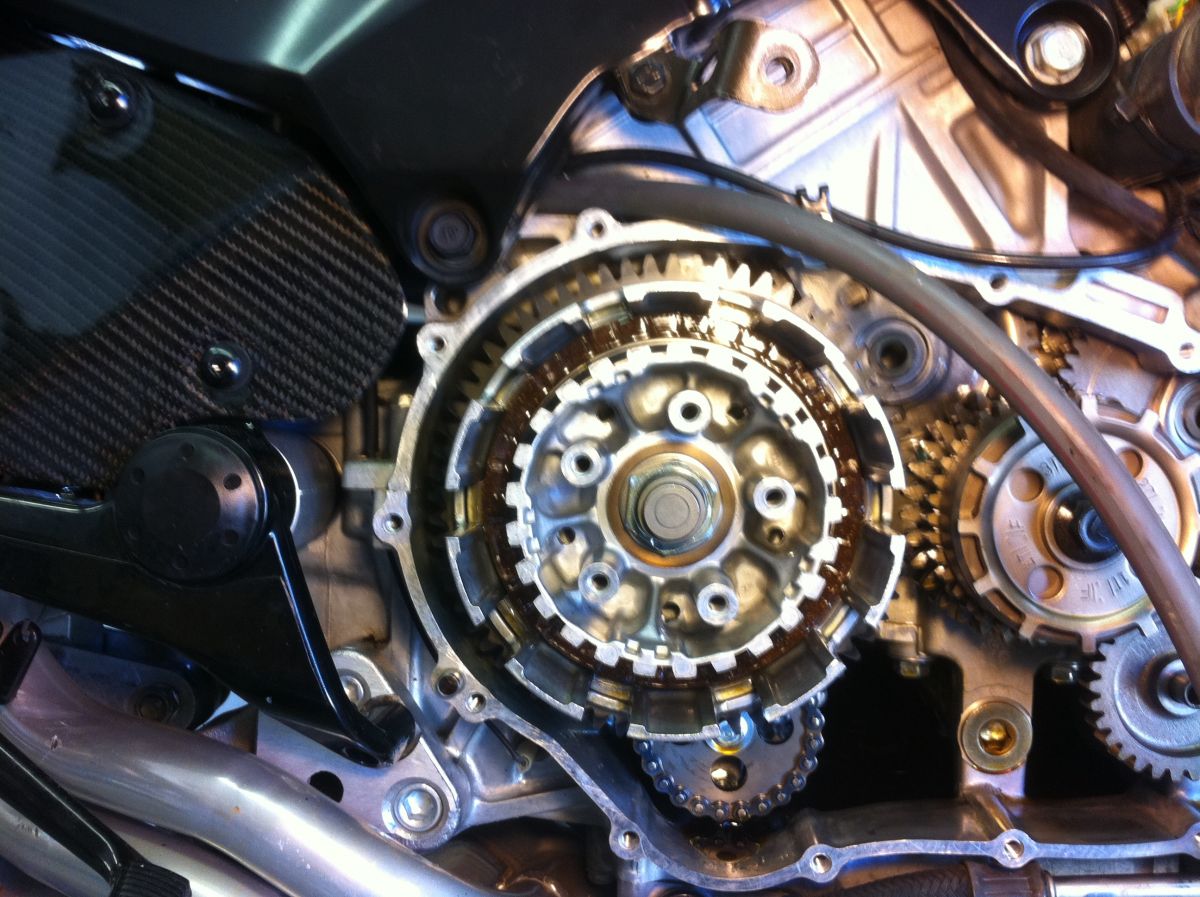
IMG 0228
Continue to load frictions and steels into the clutch basket, keeping the steels all facing the same way.
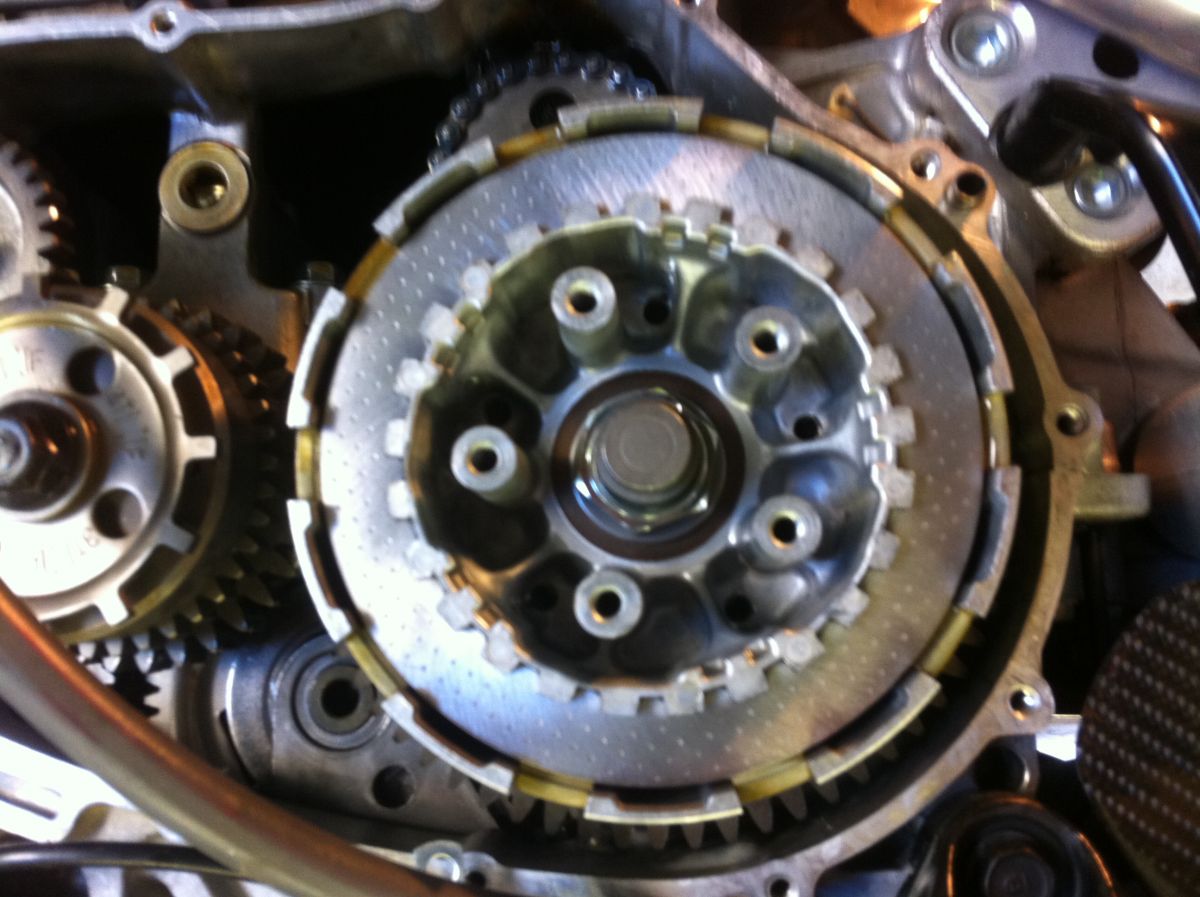
IMG 0230
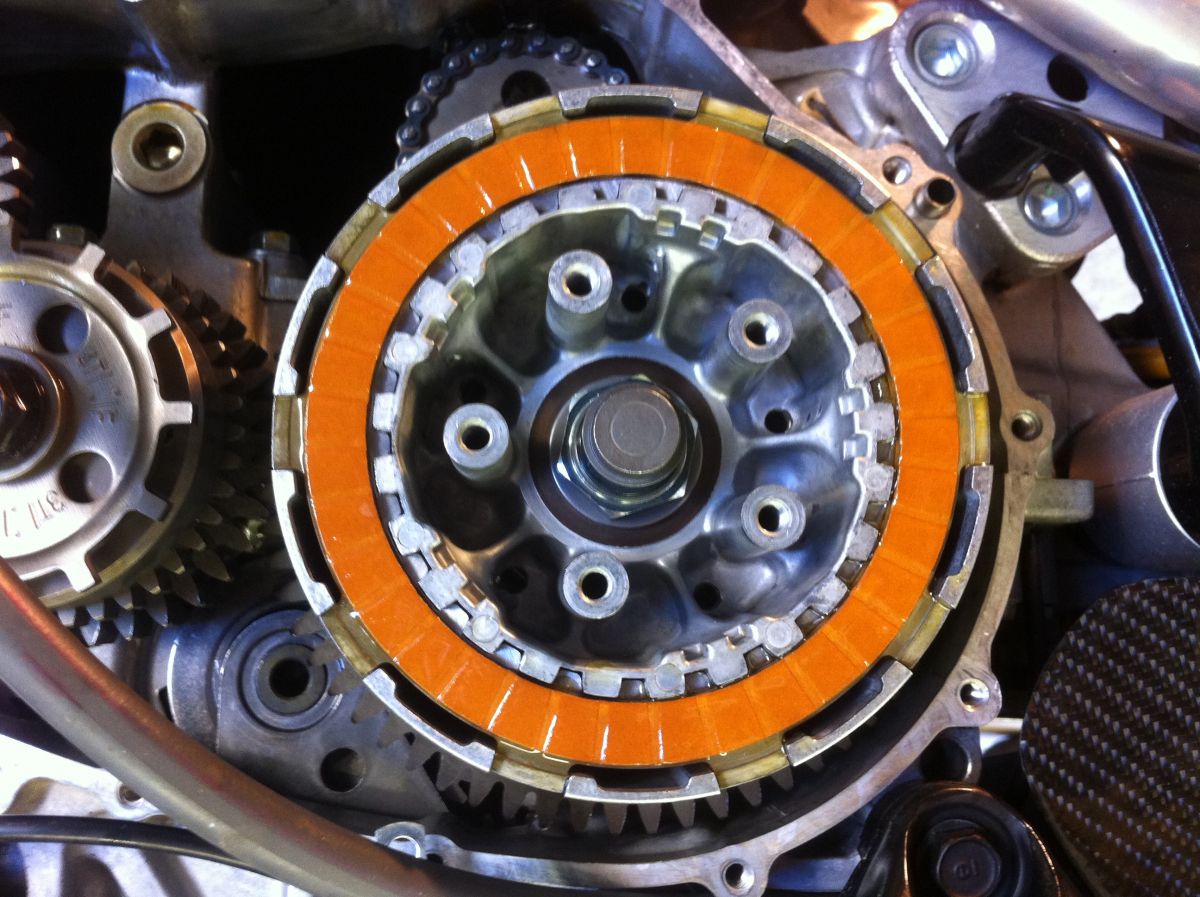
And this is where I stopped for the night. Will finish tomorrow and update with more pics.
IMG 0232
After 12 years and 76,000 kilometers, I decided it was time to have a look at my clutch which has never seen the light of day since it left the Honda factory.
The clutch seemed to be working OK, it engaged and disengaged fine, didn't make any funny noises, and did not slip, near as I could tell.
However, I found a set of Ferodo clutch friction plates, and a set of EBC clutch springs on Ebay for cheap, so I looked at it as a preventative sort of thing.
The '98-'99 clutches are slightly different than the '00-'01s, so refer to the FSM for any changes.
[image: Posted Image]
photo
[image: Posted Image]
spring Is In The Air
The manual says to drain the engine oil, but my oil is fresh, and I wanted to save a step, so I left the bike on the sidestand, and put a jack under the headers and raised the bike up about an inch to get more lean to the left. Worked great, only lost a couple teaspoons of oil.
IMG 0232
Once I unearthed the clutch cover from the bodywork, it was a simple matter to clean all around the cover so that no FOD would migrate into the engine, then spin off all the retaining bolts:
After that, carefully pry the cover off, paying attention to the crankshaft pulse generator wires routing through the cases. I found a handy tab on the top of the cover, and a 3/8" ratchet fits right behind it, so that levering the ratchet upwards against the upper cylinder block easily dislodges the cover:
[image: Posted Image]
IMG 0221
You will either need to disconnect the pulse generator from the wiring harness, or like I did, unbolt it from the inside of cover and leave it attached to the bike.
That leaves you staring at the clutch in all it's naked glory:
[image: Posted Image]
IMG 0222
The starter drive intermediate gear decided to stay with the cover, so I had to remove the gear and it's shaft and replace them between the starter primary gear and the starter clutch.
[image: Posted Image]
IMG 0223
Before replacing the errant gear, I spun the starter clutch fore and aft by hand and it's quiet and solid with no play, so it seems healthy.
Undo the 5 clutch spring bolts and lay out the parts in the order they were removed for easy reference.
I swathed the important bits in paper towels and gently scraped the gasket remains off the block. Thankfully it came off real easy.
[image: Posted Image]
IMG 0225
Here you see the old and new clutch plates compared. I had soaked the new clutch plates in motor oil for an hour prior to installation.
[image: Posted Image]
IMG 0229
I gently cleaned up all my metal plates using a nylon wheel brush chucked up in a drill. Worked great for freshening up the surface, and is not aggressive on the plates like an abrasive wheel would be.
[image: Posted Image]
I found that my clutch basket had some characteristic notching due to normal wear.
[image: Posted Image]
IMG 0224
I used a small fine file and wrapped the clutch basket in paper towels so as to not get any contaminants in the oil pan, and carefully filed the basket tangs until most of the notching was gone. Didn't want to remove too much material:
[image: Posted Image]
IMG 0226
Much better. Very tedious and time consuming. If one had the proper tools to remove the basket from the bike, it would be far easier to do on the bench.
A trigger spray bottle with some varsol and more paper towels made cleaning up the clutch basket afterwards a breeze.
After removing all the friction and drive plates, there are two washers at the back of the clutch pack. One is a thrust washer and the other is a spring washer. Take note of their positions and replace as found after removal, cleaning and inspection.
IMG 0227
All the metal plates for the clutch are stampings, so they have a rounded side and a sharp side, which is readily identifiable by feel and sight. Note the way the plates were oriented and replace them in the same manner.
First to go in is the "odd man out". There is one plate, seen below, that has a larger ID to make room for the thrust washer and the spring washer.
!C!yrnH!Bmk~$(KGrHqR,!ioE0GqDSD8rBNEjKF6jO!~~0 12
This one loads in first, followed by a steel plate:
IMG 0228
Continue to load frictions and steels into the clutch basket, keeping the steels all facing the same way.
IMG 0230
And this is where I stopped for the night. Will finish tomorrow and update with more pics.
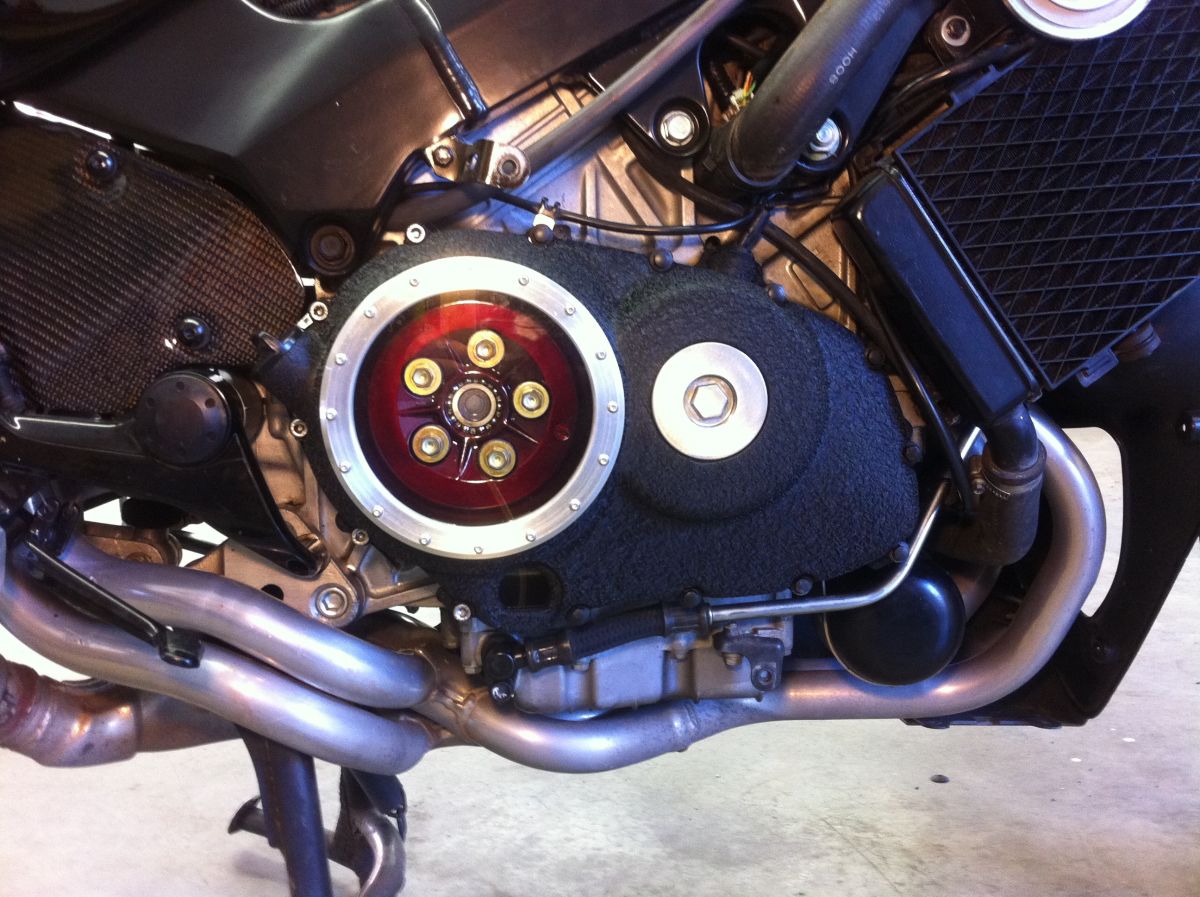
IMG 0232
![[image: Posted Image]](http://image.made-in-china.com/2f0j00qBSEmtQrvTlP/Abrasive-Nylon-Wheel-Brush-48155-.jpg)
![[image: Posted Image]](http://i13.photobucket.com/albums/a280/veefer800canuck/th_IMG_0235-1.jpg)
![[image: Posted Image]](http://i8.photobucket.com/albums/a49/SEBSPEED2003/Weld%20Projects/6-17-11006.jpg)