I need some advise to guide dialing in the front suspension on subject bike.
I swapped out the front suspension on the Nighthawk S (39mm stanchions) to go with a 1999 VTR 1000 fork lower/4 pot fixed calipers, 1996 VFR 750 cartridge, and custom length 41mm stanchions.
- I had to go with custom length stanchions because they are almost 3" longer than the VTR's so I can keep the NH-S head geometry close to stock.
- I used the stock VFR cartridge because I had it, the control rods were straight, and because the weight of the NH-S and VFR are close.
I am looking for how much fork oil to put in. I have the stock VTR measurement, but believe I have to compensate for the additional air volume due to the longer stanchions. I could look for a solid spacer at the top and keep the oil level the same or increase the oil level a bit more. My previous measurements indicate a 80% oil/20% air is the right ratio and was planning on using that to determine correct height - unless someone else has worked through this before.
I realize this is a VFR web site, but I am using a VFR cartridge and the bike is close in weight, so I thoughtt the group might have some sage advise to guid the decision.
Good eye, I did swap to KYB shocks from a Kawasaki ZRX, that bike is close to the weight of the NH-S so I think it will work out.
I had the triple clamps bored out 2mm. It made the swap easier.
Did you notice the wheels? I swapped out to 2010 NT700V wheels so I could get 17" wheels on the bike to hold some modern radials; stock wheels are 16" with limited tire options. These were the only wheels that could match up with the shaft drive. Who knew 2010 Honda wheels could just bolt up to a 1984 Honda. BTW, that change made me have to find a rear disc brake setup. I have Honda Blackbird 256mm rear disc (it fits the bolt pattern) and a Triumph Trophy rear caliper and axle bracket (designed for a 255mm disc) for an under axle mount. Believe it or not, it all bolts together like it was designed to....
If I understand it right (which I probably don't), I would keep the fluid level the same. don't go with the 4:1 ratio. Keep the same volume of air from before.
Thanks for the reply. Since I have a longer stanchion, the volume of air is greater than a stock VTR air volume. If you keep the fluid level the same, then I cannot keep the same volume or ratio.
I think I have 3 options.
1. Same fluid level = different oil/air ratio
2. Same oil/air ratio = different oil level
3. somewhere between the two = different oil and ratio's
I think I can play with the spacer so it is a solid spacer. This would eliminate the new extra volume, in which case I could stay with a stock VFR [not VTR] oil level.
I would start with 14 oz of fork oil in each side and see how you like the feel. The 3rd gen calls for 13.5-13.8 oz depending on country of origin...and the 4th gen calls for 14.5 oz of fluid.
If you already have some fluid in and are playing with the air spring feel you could start at 130mm down from the top of the tube and work on feel as you gradually raise the fork oil to 120mm from the top.
Bike looks great, when I bought my 83 VF in Japan a shipmate purchased a Red/Black Nighthawk S...like the bike. Often considered modernizing one for commuting with the hydraulic lifters and shaft drive, hard to beat with modern wheels, rubber, brakes, and suspension.
btw I have SH forks on my sons 5th gen and am looking for another bent set to upgrade my other sons 3rd gen.
I have no good advise but I sure am envious!! I kinda miss my Nighthawk even though she was a flexy flier in the corners, you'rs outta rail when you get it sorted :fing02:
i Love it when manufacures keep stuff standard. I recently threw wide 17 inch wheels on a 1980 GS850, because Suzuki was nice enough to keep the splines the same. I used the back wheel and entire fron end from a VX800. The steering head bearings were the same part number as well, so it only took the machining of a 1mm lip off the new stem to make it work. So now I have a GS850 with VX800 wheels and VTR clip-ons. Franken.
I am sure the tires will make the biggest difference in handeling followed by the suspension changes (if I can get it sorted out). Chasis stiffness will be a factor but not too much I can do about that. I will probably play with sliding up the forks a bit in the triptree as the head geametry was pretty conservative - see pics1-4.
nedhills
Because you asked, here is a pic of the PC; it is not finished. I did have the VFR cartridges in her, but have swapped her over to a CBR600 F4 front end/brakes. The wheels are from the NT650V (17" so I can get radials on the PC). The PC will get finished after the NH, I think.
i Love it when manufacures keep stuff standard. I recently threw wide 17 inch wheels on a 1980 GS850, because Suzuki was nice enough to keep the splines the same. I used the back wheel and entire fron end from a VX800. The steering head bearings were the same part number as well, so it only took the machining of a 1mm lip off the new stem to make it work. So now I have a GS850 with VX800 wheels and VTR clip-ons. Franken.
Cool, I love the experimentation. Its possible if you try and stay after it.
New brake lines (http://www.coremoto.com/Default.asp - they give a military discount) and fork springs are in! I think I can get the forks back together this weekend.
Dr. Jekyll is the complete PC800 with a ST1100 front end swap. That got me larger ST discs too (276mm to 316mm)
Mr. Hyde is my other PC800. It was in a crash (before I bought it) and lost all of it's skin. I bought it for a parts bike, then transfered Dr. Jekyll's front end to it so I could roll it around. Getting an itch to wrench on a bike, I started down a path to make Mr Hyde into a more interesting ride. I started with the plan to shoehorn in a bigger engine. Stock is 800cc, I got a VT1100 engine and managed to get it in the frame and centered up to the swing arm to align the drive shaft. With the upgraded engine, I felt I needed better handling (suspension and tires) and brakes. Thats when I pulled together a CBR600 F4 front suspension and and dual 4 pot fixed calipers up front. That got me 43mm stanchions (up from 41mm) and better brake calipers. I then sourced the 17" NT650V wheels from the UK to allow me to mount modern radial tires. I also got a rear disc brake setup with this swap. Unfortunately, I never finished this project. I decided to scaleback and transfer some of these mods to Dr. Jekyll (front suspension and wheels/tires) to improve the handling and braking. Although I didn't transfer the bigger engine, I decided to modify the single quite stock exhaust to at least provide a better sound. For that, I am using the VT800 dual exhaust. To fit the tighter dual mufflers, I had to swap out the swingarm and final drive from a later VT700 into Dr. Jekyll. When done with the NH and Dr Jekyll, I will take the spare PC800 engine and split it open and transfer the VT700 5 speed + O/D transmission so I can get 6 forward gears in Dr Jekyll.
You have to love Honda standard engineering and inexpensive used bikes.
Nice lines. I thought about going with blue for the NH like you did red for yours. In the end, I stayed with the plan to keep it as a retro lookign bike so it would look stock.
The VT1100 engine was a buggar to get it there and centered up. I actually never got all of the engine mounts done; just enough to hold the engine in there. I would have had to cut the body panels to accomidate the bigger clutch and stator and in the end, didn't want to do this. I think if done well, it would have looked cool. There would be no mistaking the dual exhaust and bigger engine sounds. If I could have pulled it off, I would have had custom decals like the original but stated it as a PC1100. That said, the bigger engine was only 20 lbs heavier. I think that would be a great trade, gain 20 lbs in weight but big gains in torque and modest HP. Perhaps after I retire, I will come back to finish this possibility.
Saturday; I get a full day to work to put the fork together. But, before I dive into the trial and error stage, I have to put some time in the classroom to get the starting point as close to the desired finish point. This means measuring and collecting a lot of data before I cut the spacer and add fork oil and go riding....
Determining oil level: I plan on measuring the total volume of the fork with all components in it. Then, measure the oil level with a set amount of oil in it. I decided to use CornerCarver's suggestion of 14oz as the initial oil level; the initial amount isn't totally critical as I plan on mapping out the data to determine initial oil fill. [pics 1-2] To figure out the total volume, I assembled a fork with all components, and then filled it with water. Yes, water. Water weighs 1,000 kg/m3 so I just had to fill up the fork, empty it out in a container to weigh it, and then convert back to volume. The total water was 21.15oz. Converting that back to volume yields 599.592 ml (mm3), so I rounded off to 600mm3 Then I put in 14 oz of water to measure the height to the top of the stanchion (no spring, spacer, or end cap). 14oz of water = 397mm3 by volume. The measurement was 6.0". Then I measured the inside diameter of the stanchion (35.7mm) so I could calculate the volume change for a unit length. [pic 3-4] In pic 4, you see the yellow box (122mm) is the fill level (427 mm3) of oil that I will use as the initial fill. But how did I know this? I had to figure out the working distance of the fork.
Figuring out the spring rate, working distance, and initial spacer size: I use my gym equipment to test out an assembled fork leg [pic 5-6]. To determine the working range of the fork, you just load her up with 45lb weight plates one at a time taking length measurements as you go till she bottoms. Pic 7 shows the it took eight 45 lb plates (360 lbs) to bottom out the fork. Then you graph the data [pic 8] to compare the stock vs. new fork with Race Tech springs. Here are the key observables: A: Max working range of stock NH-S fork; 4.969” B: Max working range of new fork; 4.625” C: Initial sag, 25% of stock NH fork = 1.242” D: Initial sag, 25% of stock new fork = 1.156” E: Not much preload on stock setup, maybe 0.5”; test data indicates Y = 0 at X = ~ 20lbs. F: A little more preload on new setup, maybe 0.85”; test data indicates Y = 0 at X = ~ 55lbs G: From earlier work, initial sag weight of bike and rider is 105 lb / fork. So you can see, I did not have enough preload on stock setup and will need to shorten the spacer on the new setup. H: Current preload for new fork is 125 lb (uses up 25% of working range) but it is too long, I will have to shorten the spacer a bit to shift the green line to the left. I: The weight on the stock spring where it transitions to a stiffer rate (at 168 lbs) J: The stock max weight based on current set up = 235 lbs. So, the max weight is 470 lbs before the front forks completely compress. Not that the bike could do a wheelie, but if it could, it would bottom out the fork long before rider and bike (215 + 492) was all on the front suspension. K: The working range of the new fork is much greater = 354 lbs. So the total is 708 lbs before bottoming out. Once I cut back the spacer, it will drop the 708 lb total a bit. Still cannot do a wheelie without bottoming out, but I don’t think I will bottom out in a panic stop. I would easily bottom out in the stock setup. L: New fork max working range at max weight M: Stock fork max working range at max weight
Pic 9 has the spring rates and spacer size needed. Note that I bought a 1.0 kg/mm spring rate, but the data clearly shows the new spring rate is much higher at 1.17 kg/mm (1/0.0152). Depending on how the forks feel, I may have to complain and get a less stiff spring. The spacer should be 5.9”-0.3125” = 5.59”.
Plugging the working range of the new fork back into the earlier measurements, I can see in pic 4 (one with the yellow square), there is only a small air gap left (4.93mm) with an oil fill down 122mm from the top. Once compressed, the air pressure is over 500 lbs/sqin! This tells me, long before the fork can fully compress, the decreasing air chamber size (increasing air pressure) will prevent the fork from bottoming out as long as my seals are good.
Class is over; I will assemble the forks Sunday night. Sat is for college football and I have to help my daughter on Sunday afternoon.
I would start with 14 oz of fork oil in each side and see how you like the feel. The 3rd gen calls for 13.5-13.8 oz depending on country of origin...and the 4th gen calls for 14.5 oz of fluid.
If you already have some fluid in and are playing with the air spring feel you could start at 130mm down from the top of the tube and work on feel as you gradually raise the fork oil to 120mm from the top.
Bike looks great, when I bought my 83 VF in Japan a shipmate purchased a Red/Black Nighthawk S...like the bike. Often considered modernizing one for commuting with the hydraulic lifters and shaft drive, hard to beat with modern wheels, rubber, brakes, and suspension.
btw I have SH forks on my sons 5th gen and am looking for another bent set to upgrade my other sons 3rd gen.
Actualy I'm a dishwasher at Denny's Veefer800Canuck.
Anyway, I had less time to get the forks done than I hoped. They are put back together but are not on the bike.
Cut the spacers, popped them in and checked the preload on the gym equipment - it is right on, see zip tie in pic 1.
Then had to load the correct amount of oil. How do you get 427ml of oil in. I believe most do it by measuring from the top and checking the height. Having stayed in the Holiday Inn last night, I did it by weight since I had a good scale. I just figured out the weight of the oil. Measuring 3 full containers, the average weight is 33.65 oz - weight of an empty container at 3.25 oz. So 30.25 oz / 1,000 ml x 427 = 12.98 oz. Pour some oil in a container, then pour it out, then set the container on the scale and pour oil until you get to 12.98 oz. Then transfer it to the fork. Then do the other fork.... [pic 2].
They go on the bike tomorrow night if i don't have a late night at work.
Forks are on tonight, slipped right in the modified triple tree.
I put a set of the new caliper spacers in to check the alignment of the caliper to disc. It is spot on. So, I'll clean up the calipers and install the brake lines. Trying to get first ride in this weekend if it doesn't rain.
While I had a few minutes, I relooked at a couple of mods I'm considering slipping in to get mechanically right before the cosmetic epic that seems to be looming next year.
1. Project 1 is bigger discs up front. I have 296mm mounted now, the set up for consideration are 316mm. To get them to fit, I need adapters. The VTR site has a place that sources adapters that mount to the VTR fork lowers that enable the use of 320mm (I think they are 316mm) discs. They are not too expensive, so I may make this commitment.
2. Second is the addition of a chin spoiler. It was something that was offered back in the day, but they are nearly impossible to find; even aftermarket ones are hard to find as the UJM has faded long ago along with the aftermarket supply. While there are some chin spoilers out there, they don't look like the original. Then a 1983 Kawasaki GPZ750 chin spoiler popped up on ebay for a low price so I snipped it. I think with some adjustments, it will look like the original.
I'll sort these through the weekend to layout the approach to get them on the bike.
Pic 1 = current bike condition
Pic 2 = what a chin spoiler looks like on the CB700SC; reminds me a bit of the 1st gen VFR
I have a 1st gen chin spoiler but I'm saving that for the PC800. The 1st gen VFR doesn't look enough like the original chin spoiler and is made of plastic. The one for the CB700SC or GPZ750 was fiberglass, so it is much stronger by itself.
Local riding, less than 45 MPH, and the low speed turn-ins are the only thing that pops up negatively. I ended up raising the forks up in the triple tree, first 5mm, then 9.5mm. Each change helped eliminate the slow speed turn in abruptness.
I'll work on this until I get this sorted out, then on to the damping adjustments. So far, I'm pleased how she has turned out but there is still much to do.
Well you're spot on the nail regarding the tire sizes. :beer:
The handling with the radials should be so much better. I remember swapping rims and tires on my 1986 VFR750, and the new radials felt like someone had gone and hidden a power steering pump on the bike somewhere. It was effortless compared to the bias ply tires.
So many people slap "whatever" on a vehicle and expect it to work. It needs a little more thought than that.
As a good example, I upgraded the wheels and tires on my Ranger from 14" to 16", staggered fitment front/rear and my speedo is within 3% of original.
Also importantly, the new staggered size tires are within 0.2% of each other front/rear. It's only a 2wd, so not as big a deal, but still, brake bias and all that jazz.
I'll keep posting updates now and then so you guys can see how it turns out.
Based on the info from the VTR superhawk forum, I scored a set of caliper bracket extenders so I can use larger 316mm front discs from the ST1100. The brakes are functional but not cosmetically done (I will eventuall powder coat the disc (except the outter edge) black, the new bracket, caliper, fork lower, and wheel). I think when it is all done it will look more like the stock configuration to include proportionally like the original wheel from a disc to wheel gap perspective.
The bigger discs and VFR calipers are noticable upgrades but I keep reading the VTR guys are big on the CBR600 F4 fixed calipers. I think the piston changes are the biggest reason for the hype, so I think the right MC change should produce a similar change. That said, EVERYONE recomends top make brake pads. So I'm looking.
I may swap my CBR600 F4 calipers over to see how they feel, but will still need a set of good pads.
I have been working a number of cosmetic things, so I have not posted in a while. When I get them all sorted out, I'll include a pic of the parts all on the bike. Biggest things where a chin spoiler and factory side bags from a CBX (same bags used on the NH-S).
On something you guys might care about, I have fabricated a simple mount for the stanchion so I can measure the rake and trail of the bike with the fork in different positions in the triple tree. I plan to take the measurements tomorrow, today was the fabrication and sort out day. I think what I got done should work as intended. The plan will be to position the forks in the triple tree in 3 different positions. The measurements taken for each position should allow me to calculate and plot the data to see the linear relationship of rake and trail to fork position in the triple tree. From that, I can determine the precise amount to slip the fork for the desired rake and trail. I will make a simple PVC spacer for that amount and slide the fork till it is flush with the spacer. Sounds easy enough...
Pics of the clear red 30 degree triangle (from my school days), shows the rake is close to 30 degrees (stock setting). But the bike is on the centerstand, so that is hiking up the rear end.. I should have it sorted out tomorrow.
Got the bike set up to take measurements tonight, and checked alignments, etc. More adjustments needed, before I can record the data. but for now, the bike is sitting upright via 4 tiedown straps.
Reworked the test jig using aluminum and tying onto both stanchions so I can remove any variability in the design to get the best measurements.
After doing all this, a quick measurement using the 30 degree triangle confirms with the forks flush in the triple tree, shows the rake is greater than 30 degrees - the rear shocks are just too short. I think I can drop the front at least an inch, but that may only get me back to stock rake of 30 degrees. I was hoping to get down to 26 or 25 degrees.
I will trade out my rear shocks, then recheck what gains can be had for the front.
The Iphone has a free Carpenters APP that would determine rake in less then a second. Hold phone to fork and it reads degrees. It would be easier and perhaps more accurate.
My daughter comes home in a week, she has the app, so I will use it to double check the measurements. I am old school, so I have to do it my way to get rake and trail or it doesn't get done. If I finish early, I will look for the app - I didn't realize it was free. Thanks for the free info VFRAustin.
This is a quick post so you can see my path I'm exploring. Mind you, I still have to collect the data before I commit more funds, but the moving of the lower shock points forward might not be too difficult if I get a little lucky. The key will be what happens on the final drive side. I am posting final drive 2 pics; one from an 84 CB700SC and an 86 VT700. You can see the mounting stud for the VT700 is forward about 2.5". Looking at the gearing, they both share the same final gear set (41310-MB0-305), so there would be no change in gearing to use the VT700 final drive. The only question is the pinion joint (part that the drive shaft interfaces to). The part numbers are different. This is where I need a little luck. Either the NH-S drive shaft needs to line up with the VT final drive as is OR I can swap out the pinion joint. Since I already have a VT700 final drive (its on my PC800), I can check this without buying anything more. If it works, I'll buy a good condition black VT final drive for $50. The other side is easy to tack weld a new mounting point.
If you go back to my earliest thread on the wheel swap, you might remember I swapped the VT swing arm into the NH to see what happened to the wheelbase (there is a pic of this set up). I could not attach the rear shock because the attachment point was moved forward + the swing arm was shorter. The VT700 final drive was attached to the VT swing arm so I could pass the axle through to hold the wheel. Sometimes its good to be lucky and standardized Honda engineering helps...
A couple words on what moving the mount forward ~2.5" does:
As the bike sits now, the rake is 32.51 degrees with the forks flush with triple tree. When I measure the rear shock mounting points from the ground (25.531" & 13.969"), separation width of the mounting points (8.563"), length of the KYB shock (14.188"), and the length of the stock shock (14.750"); I can determine the affect of moving the mounting point forward 2.5". Assuming the longer stock shock nets a rake of 30 degrees, then the 0.563" shorter shock is dropping the rear 0.480". So assuming the 0.480" drop in the rear is increasing the rake by 2.51 degrees, I can determine what happens to the rake when I raise the rear by moving the mounting point forward 2.5". Working the math out, the rear will be raised by 1.380". So the ratio of 5.23 degrees/inch (2.51/0.480) x 1.380" = 7.22 degrees. Therefore, the projected rake would be 32.51 - 7.22 = 25.29 degrees. This is right where I want to be - close to where the current crop of standard/sport bikes are; so the math says keep moving forward with the remount option for now...
I will be gathering more data this week to see if the empirical measurements hold up.
EDIT: I should note moving the lower shock forward a bit will make the rear spring feel "stiffer" because the leverage arm is shorter than before. I'll have to measure the rear spring (to determine K) to know how stiff it will be compired to the stock spring.
FrankenOwner: If this works out, I will hold on to the shocks. While this will cost a little and take some time, going for another aftermarket shock will require me to drop $800-1,000... So I will try a bit to make this work.
My daughter comes home in a week, she has the app, so I will use it to double check the measurements. I am old school, so I have to do it my way to get rake and trail or it doesn't get done. If I finish early, I will look for the app - I didn't realize it was free. Thanks for the free info VFRAustin.
Jerry
No problem. I am a carpenter and install custom banisters. It has become handy to determine pitch/rake of rails. :smile: The bike reminds me of a Nighthawk I rode from NM to NY a couple times. Nice work!!
.....just foolin. I havent pick the beauty up yet, so I have no photos. It is black and red and will not be facing the shame of the rattle can. (the damn bike is mostly black from the factory anyway)
Sorry to revive an ancient thread, but this has new interest for me because a Nighthawk S just followed me home. And to have the CB700sc mad scientist in my area is too cool. Mind if I a
pm a ton of questions, spacetiger?
Hey guys,
I was looking for something and came back on the site - it has been a while. I still have the NH and it has been a joy to ride. The changes have worked together quite nicely. Its still about a year away from a cosmetic do over in RWB.
I like the flat black look of the NH; very clean looking. What changes are you planning? Let me know if you need any details on what I did (PM or email).
I have a 2012 Cam Spyder. I needed to be more visible in N.Va/DC traffic, so I went with 3 wheels. This riding group are not yet motorcyclists as they have a different mindset for bike mods. I kind of ran into a deadend on making changes. I made simple brake pad (ebc semi-metalic) changes and added preload spacers to help make the springs be just adequate to keep from bottoming out - yet, there was noone interested in doing these kinds of mods. They are happy to buy $1,700 front shocks with rebounding adjustability. But, they only need stiffere spring to keep from bottoming out... I sort of gave up.
So, I moved on to a CX650I and will be modifying the syspension and brakes on this back up touring bike. I was looking for a CX650 turbo bike, but they are a bit out of my price range for now. What I learn should have some level of transfer to a turbo bike one day. Its coming slow as I am slowly closing on integrating a 91 FJ1200 rear shock in the prolink swing arm. It was the cheapest rebound adjustable shock I could find that had the right end fittings, spring rate, and length. Wheel options are really limted (spoke, or modified Comstar). I need to sort out the wheels out before I settle on which fork and brakes I'll go with.
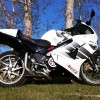
![[image: IMG_0596_zps1afc8715.jpg]](http://i299.photobucket.com/albums/mm313/timmythecop/IMG_0596_zps1afc8715.jpg)
![[image: 20050212_0002b.jpg]](http://i36.photobucket.com/albums/e22/GREA5E/ZX7Rider/20050212_0002b.jpg)

![[image: dutchypaint_zps8ce03698.jpg]](http://i164.photobucket.com/albums/u30/gll429/vfrd%20stuff/dutchypaint_zps8ce03698.jpg)

![[image: automan_zps352cfdb0.jpg]](http://i164.photobucket.com/albums/u30/gll429/vfrd%20stuff/automan_zps352cfdb0.jpg)