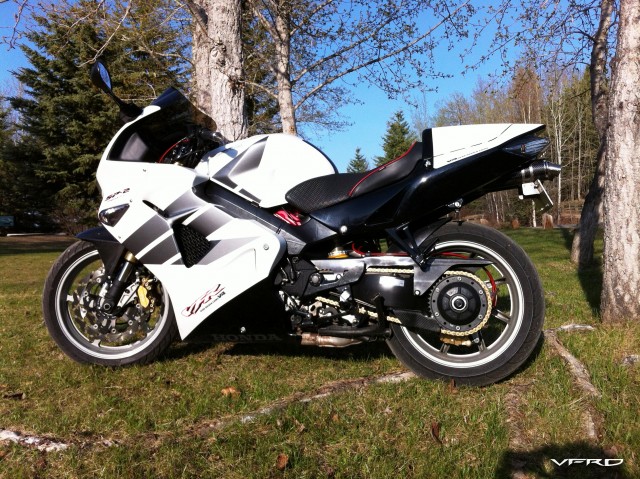
My vandalized '91 VFR has been patiently waiting in the garage for some sort of activity for nearly 2 years. In that time, I was able to scrounge up all the missing plastic the (rat-bastard) intruder stole from me.
I recently tested the waters on selling it but could only muster up interest to the tune of half a month's rent, including all the plastic. That said, I decided on a rebuild v2 project and keep the bike indefinitely as a weekend runabout, part-time commuter and loaner for my out of town guests. There is too much value and nostalgia in this bike to give it away so cheap. And I still love riding it.
Unfortunately, I moved to a location where I cannot work on the bike in the garage. Fortunately, there is a shop nearby that offers storage and unlimited use of full service mechanical bays, including tools and machine shop (and mechanics by the hour!). I rode the bike there a couple days ago and am now planning the build. The good thing about bringing the bike to the shop is the monthly fee is a good motivator to make timely progress.
The first phase of the project is to take care of some mechanical maintenance, straighten the mounting brackets damaged by the thief and size up the new body pieces. Phase 2 is all about cosmetics. I am not yet sure if I'll stick to the factory paint scheme or do something custom. Resale value is no longer an issue so custom is looking a bit more enticing.
The maintenance items are steering head bearings (already have all balls tapered on the way), fork seals (and maybe F3 internals if I can find some donor forks soon), and clutch plates (slipping when hot only under heavy load in low gears, second, third near redline). I may replace the clutch basket. I was told the "orbital" springs on the backside of the clutch basket are warn, causing a "broken connecting-rod like" knock sound at idle. No other symptoms. The knock sound goes away when the clutch lever is pulled-in at idle. These springs apparently keep the clutch basket stabilized at idle and when warn, allow the basket to bounce back and forth. Cause of the warn springs: abusive burn-outs by some dumb-dumb previous owner.
I'll post what I can about the progress. I know there is already some good info here about the maintenance I need to do so I'll try to add value. And Pix.
It's always hard to tell from photos, but it looks like a really nice original example except for the missing plastic. There aren't many clean, unmolested examples around now . . . I would sure like to find a clean original 3rd gen - haven't seen one in a long time.
I've been slowly stripping my 91 apart as I get time to go to the shop. Next comes dropping the engine from the frame. I think I am going to start by cleaning everything well, then do the clutch, shock and fork work. When that's done, I'll get the body back together and consider paint options. My brother-in-law has offered to powder coat bits and pieces for me. The side cases will get (as close to) the magnesium color on the 1986 and the lower forks will be black or silver unless he gets creative.
The inner cases, heads and cam covers are covered with either oxidation or something else. Does anyone know how I can get them cleaned up, and then keep them protected?
Had some time to work on the bike over the weekend. I am overjoyed having access to a lift and proper tools. It makes the work a lot more fun.
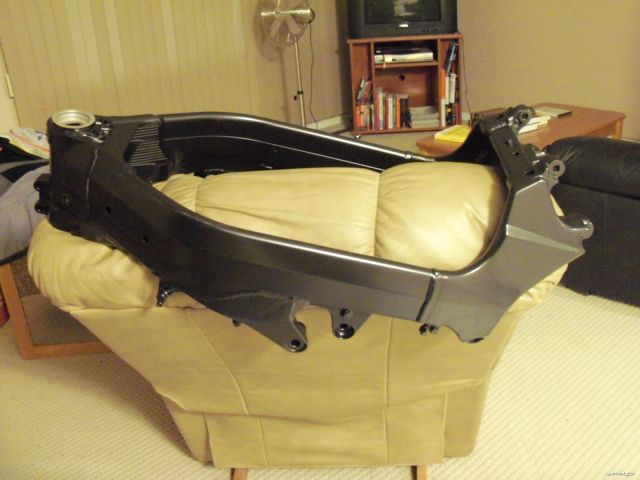
Looking like I will powder coat the frame and swingarm. Not sure yet what color. Side cases and cam covers will get some sort of gold like the 1986. Long way to go!
I looked for swingarm bearings on Bikebandit.com but they were not available. Found them on Partzilla.com. 2 roller bearings, 1 needle bearing and 2 dust seals. Roughly $47 delivered. First time using Partzilla. If I have problems, I'll update the post.
I also did a dumb dumb mistake removing the lower rear engine mount. I removed the lock washer and tried to back out the "hollow bolt" by turning the main bolt with an allen wrench. It ruined the hollow bolt and I had to use an easy-out to remove it. Supposed to just loosen the lock washer and leave it on. Bought a new one at Partzilla for $11. Doh!
The swingarm has two ball bearings side by side on the right side. There is a single needle bearing on the left. I read a little about why this bearing arrangement is the way it is. It was all beeps and whistles mumbo jumbo to me, but it seems to boil down to the directional forces being applied to the swingarm pivot. The Needle bearing is good for up and down forces (axial?) and can spread the force out across a wider surface. The ball bearing can handle a bending force (radial?) put on it from the lack of a right side arm on the swingarm. Something like that.
I was able to pound the ball bearings out with a simple frictional bearing remover. Sorry, I don't have a picture. I rented a puller and slide hammer from O'Rielly Auto Parts (which is free when returned in 48 hours) to use on the needle bearing. I needed something to get behind the needle bearing as there is a collar on the inside of the swingarm that prevents pounding on the bearing from the opposite side.
Several attempts were made to remove the bearing. The first attempt ripped out the inner cage and needles. The next couple attempts did nothing but rip chucks of the rear collar off. Heat was applied but to the same result (penetrating oil was used from the onset).
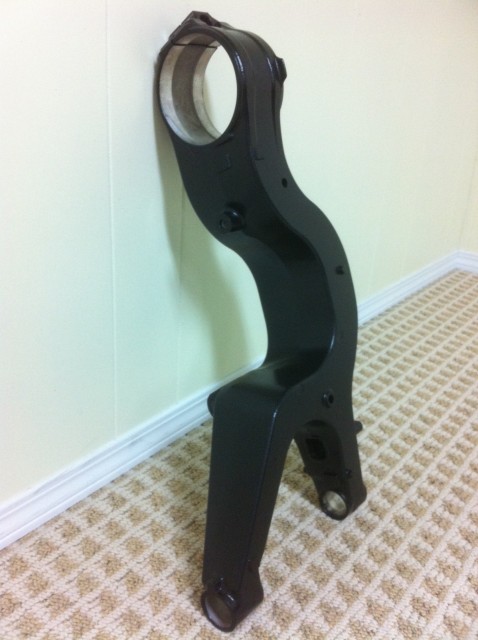
I went and bought a tungsten carbide cutting bit for the dremmel and started cutting. That did the trick. However, I left a small cut mark in the aluminum inside the swingarm. I was told this would not be an issue. I tried not to cut into the aluminum but I had to hold the tool at a steeper angle than I wanted due to the short length of the bit. You can see the cut mark in the picture.
At first I was on the fence about powder coating and this step was completed in order to do powder coat. This was a relatively small speed bump but had I known, I probably would have opted not to powder coat. And the beat goes on...
The swingarm has two ball bearings side by side on the right side. There is a single needle bearing on the left. I read a little about why this bearing arrangement is the way it is. It was all beeps and whistles mumbo jumbo to me, but it seems to boil down to the directional forces being applied to the swingarm pivot. The Needle bearing is good for up and down forces (axial?) and can spread the force out across a wider surface. The ball bearing can handle a bending force (radial?) put on it from the lack of a right side arm on the swingarm. Something like that.
I was able to pound the ball bearings out with a simple frictional bearing remover. Sorry, I don't have a picture. I rented a puller and slide hammer from O'Rielly Auto Parts (which is free when returned in 48 hours) to use on the needle bearing. I needed something to get behind the needle bearing as there is a collar on the inside of the swingarm that prevents pounding on the bearing from the opposite side.
Several attempts were made to remove the bearing. The first attempt ripped out the inner cage and needles. The next couple attempts did nothing but rip chucks of the rear collar off. Heat was applied but to the same result (penetrating oil was used from the onset).
I went and bought a tungsten carbide cutting bit for the dremmel and started cutting. That did the trick. However, I left a small cut mark in the aluminum inside the swingarm. I was told this would not be an issue. I tried not to cut into the aluminum but I had to hold the tool at a steeper angle than I wanted due to the short length of the bit. You can see the cut mark in the picture.
At first I was on the fence about powder coating and this step was completed in order to do powder coat. This was a relatively small speed bump but had I known, I probably would have opted not to powder coat. And the beat goes on...
I know what you went through. I helped Rogue_Biker remove a rear wheel bearing on his Buel after it "disintegrated" on him. The one on brake disc side was intact and extractable with a blind bearing puller but we had to use a Dremel with a cutting wheel and like in your case kind of cut into the wheel due to the angle and size of the cutting wheel. I actually bought a blind bearing puller kit from Harbor Freight and have used it numerous times already, I figured I would use it maybe one or two times and for what I paid figured it was worth it, but after having used it more than I expected, I think it has become a good ROI.
Had the bike in buckets for a long time while I waited for my brother-in-law to powder coat all the bits and pieces. Guess it took me a while to get the colors I wanted too. Powders ordered from Prismatic Powders. Frame and swingarm in Alien Silver (sort of glittery), Triple clamp, bars, engine cases and footpegs in Roman Bronze. Fork lowers and assorted bracketry in matte black.
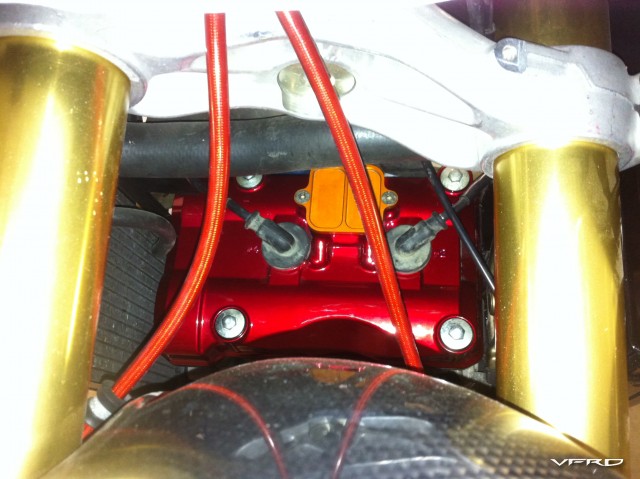
Cleaning things as I go along. All the bearings slid into place with a bit of violence applied. Couple things to note: I added tapered steering head bearings. While prepping the steering stem, I noticed the top of the stem was slightly bent! I think the bike had a minor accident which explains the damage on the upper fairing. Ordered a stem off ebay for a good price and it was nearly new. Second, I drilled a hole in the swingarm to run a steel braided brake line through.
Finally got a rolling chassis. Not much to do to the engine. Install new (used) clutch basket and plates. Then start putting it all back together. My biggest challenge is going to be finding a place I can paint the bodywork. Should only take another year?
I love riding Naked bikes but as you pass 100 mph in the sticks you really start to get tossed around, under that is fine. I have an Aprilia Fighter for that kind of stuff. The VFR had great wind protection but the design of the fairing kind of plowed the wind. Having converted a CBR 600 F2 to newer fairings I and felt the difference of plowing vs cutting though the air, that was my motivation to convert my VFR to modern CBR 600rr fairings.
It's always hard to tell from photos, but it looks like a really nice original example except for the missing plastic. There aren't many clean, unmolested examples around now . . . I would sure like to find a clean original 3rd gen - haven't seen one in a long time.
I happen to have a fairly clean and unmolested '91 in my stable right now. I'd love to upload a pic of it but holy crap what a headache.
End of thread · 23 posts recoveredWayback Machine snapshot 14 Apr 2016