[image: Posted Image]
3M Headlight Restoration Kit
My 1998 VFR has its share of dings and defects from riding over 100,000 miles since 2001 when I bought it. It has always had some sort of strange scaling on the headlight like a protective film that was coving it and then half arsed removed. Its been cooked on and it would not come off. Anyway it was getting dingy looking and the light just wasn't penetrating the dark too well anymore so I looked into replacing it (cost prohibitive) then I looked at sanding it off and polishing with the tools I already have and then I decided to do some research and found a restoration kit offered by 3M for around $14-$40 dollars depending on the number of restorations you need to do.
[image: Posted Image]
Package includes Sanding disks, foam pad, polish, drill adapter, wet sanding disk and instructions.
http://www.tooloutfi...ion-system.html
You begin the restoration by cleaning off the lamp and then taping off the sections you do not want to get damaged, they suggest using 3M tape of course but I used some packing tape I had lying around since I could not find a roll of masking tape at 3:00 am in the morning - I made due with what I had.
[image: Posted Image]
Headlamp before restoration you cant see the reflector, the light is diffused and it blocks the light beam
[image: Posted Image]
Before restoration you can see the scaling plastic as it has peeled off over the years, the rock chips and the overall dull finish.
[image: Posted Image]
3m drill adapter with a 500 grit pad attached
[image: Posted Image]
sanding 500 grit completed look for any clear areas, or other defects, use light pressure to sand with the power drill, clean off the powdered plastic and repeat if necessary
[image: Posted Image]
wet sanding with the 1300 grit wet disk after removing any defects with the 500 grit, removing sanding swirls with the 800 grit - you clean the lamp and then begin wet sanding
[image: Posted Image]
using a dime size dab of polish begin polishing the lamp
[image: Posted Image]
turn on the light to view any remaining defects repeat 800 grit sanding if you see swirl marks, wet sand and re-polish if necessary
I turned on the light and found some swirl marks so I went back and repeated the process starting at 800 grit and working up to polishing until I was satisfied with the results, then I sprayed on some plexis as well to fill in any remaining swirl marks. The results were dramatic compared to what I was used to it is like brand new condition now - virtually speaking. I am very happy best $30 bucks I have spent on my bikes this year!
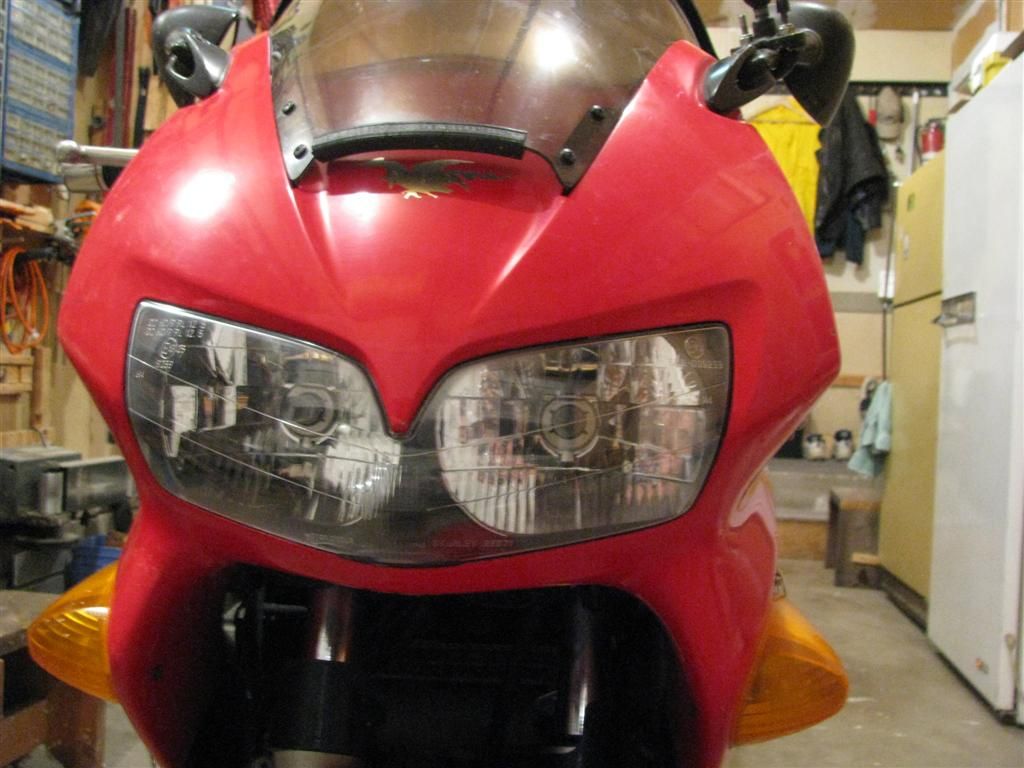
Headlamp Restoration Complete
View this video for more details - :media: VIEW VIDEO HERE
3M Headlight Restoration Kit
My 1998 VFR has its share of dings and defects from riding over 100,000 miles since 2001 when I bought it. It has always had some sort of strange scaling on the headlight like a protective film that was coving it and then half arsed removed. Its been cooked on and it would not come off. Anyway it was getting dingy looking and the light just wasn't penetrating the dark too well anymore so I looked into replacing it (cost prohibitive) then I looked at sanding it off and polishing with the tools I already have and then I decided to do some research and found a restoration kit offered by 3M for around $14-$40 dollars depending on the number of restorations you need to do.
[image: Posted Image]
Package includes Sanding disks, foam pad, polish, drill adapter, wet sanding disk and instructions.
http://www.tooloutfi...ion-system.html
You begin the restoration by cleaning off the lamp and then taping off the sections you do not want to get damaged, they suggest using 3M tape of course but I used some packing tape I had lying around since I could not find a roll of masking tape at 3:00 am in the morning - I made due with what I had.
[image: Posted Image]
Headlamp before restoration you cant see the reflector, the light is diffused and it blocks the light beam
[image: Posted Image]
Before restoration you can see the scaling plastic as it has peeled off over the years, the rock chips and the overall dull finish.
[image: Posted Image]
3m drill adapter with a 500 grit pad attached
[image: Posted Image]
sanding 500 grit completed look for any clear areas, or other defects, use light pressure to sand with the power drill, clean off the powdered plastic and repeat if necessary
[image: Posted Image]
wet sanding with the 1300 grit wet disk after removing any defects with the 500 grit, removing sanding swirls with the 800 grit - you clean the lamp and then begin wet sanding
[image: Posted Image]
using a dime size dab of polish begin polishing the lamp
[image: Posted Image]
turn on the light to view any remaining defects repeat 800 grit sanding if you see swirl marks, wet sand and re-polish if necessary
I turned on the light and found some swirl marks so I went back and repeated the process starting at 800 grit and working up to polishing until I was satisfied with the results, then I sprayed on some plexis as well to fill in any remaining swirl marks. The results were dramatic compared to what I was used to it is like brand new condition now - virtually speaking. I am very happy best $30 bucks I have spent on my bikes this year!
Headlamp Restoration Complete
View this video for more details - :media: VIEW VIDEO HERE
![[image: Posted Image]](http://i11.photobucket.com/albums/a180/hobie1dog/Suburban/P1030249.jpg)