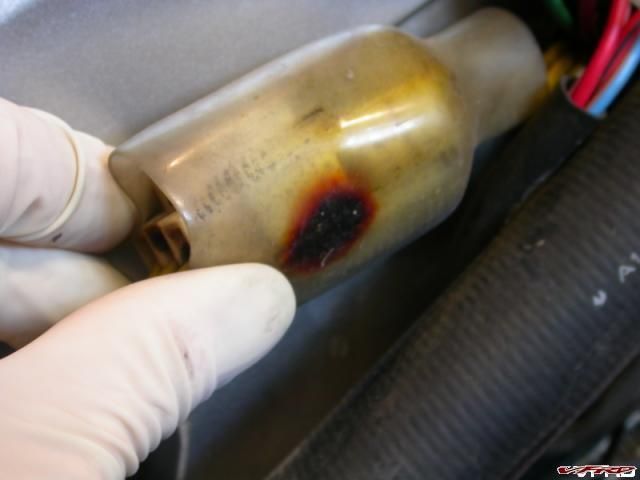
Might have a problem.
Before we use any power tools, let's take a moment to talk about shop safety. Be sure to read, understand, and follow all the safety rules that come with your power tools. Knowing how to use your power tools properly will greatly reduce the risk of personal injury. And remember this: there is no more important safety rule than to wear these — safety glasses.
Always wanted to say that! (credit Norm Abram)
Below are some pictures of the stator to regulator/rectifier 3P connector located on the right had side of the bike under the fairing. This is what lead me to a stator replacement (besides the not-so-cool smell of burning plastic and flat batteries)...
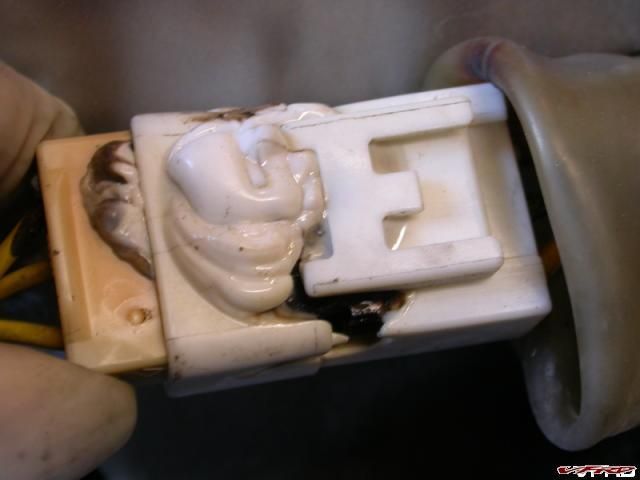
Totally melted white connector block.
References:
- Honda Service Manual (Chapter 17 for Year '02) - Found in Forum Downloads
- 2002 VFR800 Stator Recall Letter - Found in Sixth Generation VFR's
-
VFR Discussion HOW-TO Stator Replacement
Besides your regular tools you will need:
- Torque wrench capable of 12 N-m or 9 lbf-ft
- Torque wrench capable of 103 N-m or 76 lbf-ft
- Specified Honda Flywheel Puller or a Flywheel Puller with small arms
- Specified Honda Flywheel Holder or a strap wrench
- Gasket scraper
- Gasket sealant
As far as level of difficulty goes this job rates just slightly harder than changing your oil - and only because a couple more tools are required.
First, remove both left and right side panels then remove the radiator overflow bottle and hang it out of the way (no need to empty it).
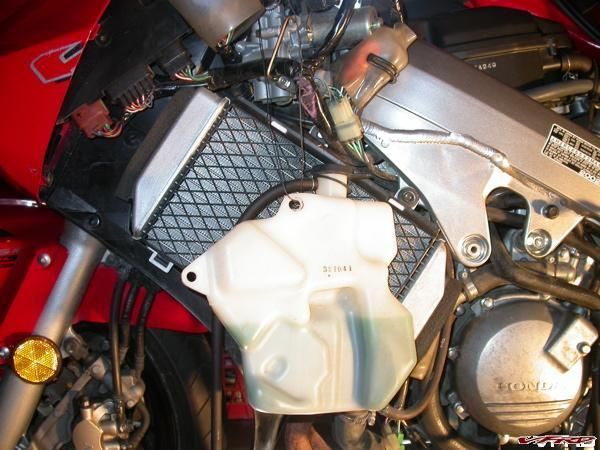
Radiator overflow - wired out of the way
Next, undo the electrical connectors. I had a heck of a time trying to figure out how to get the sealed type connectors opened. There is only ONE tab (despite what I thought) and they can be a little troublesome to pull apart since the seals create a bit of suction.
Here is the one tab you need to lift up on (arrow)...
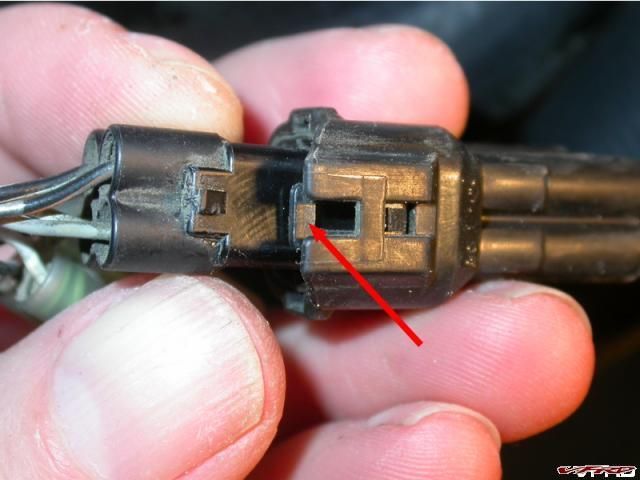
Sealed Connectors
TRICK - You will also need to disconnect the stator to regulator/rectifier 3P connector on the right hand side. Once it is disconnect tape a string or wire securely to the end. This way when you pull the stator off the left side to the bike the string/wire will follow --- this will help you to pull the new stator wire back through the engine "V" later.
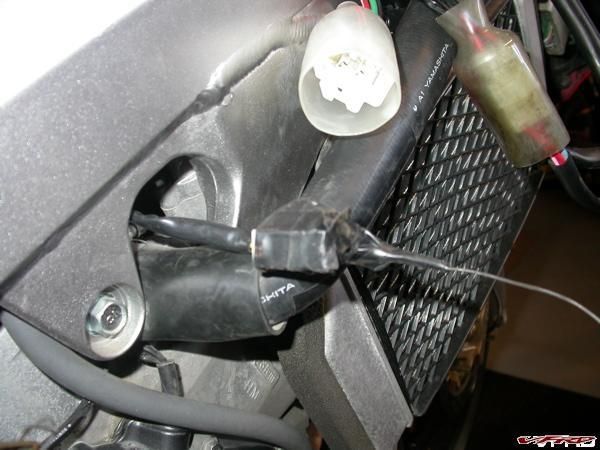
Stator plug taped to wire - prior to pulling
With all the connector undone you can get to work on the left side case cover. You'll want to put a rag down to catch any oil that spills out - I only lost about 1/4 cup and my engine oil level was still good at the end to this repair. With the bolts removed carefully pry the left side cover off. The magnets in the flywheel want to hold the cover on as does the gasket. I managed to find a couple of tabs that I could get the screwdriver behind and pry on - just go slowly and work the cover evenly off the aligning dowels. You shouldn't have any problems.
With the cover removed my stator looked like this...
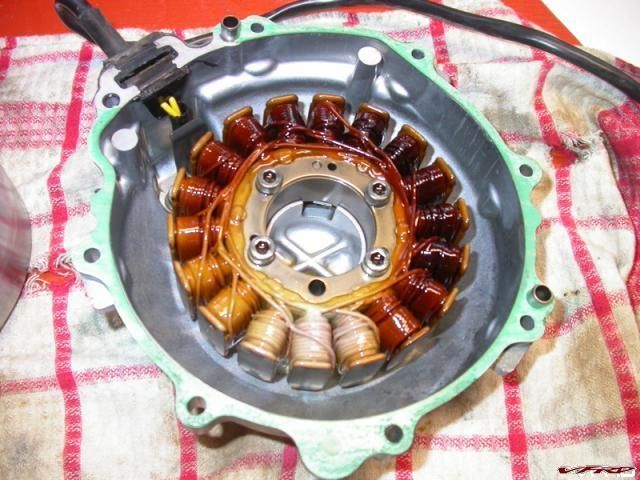
Toasty stator
In comparison the new stator looks like this...
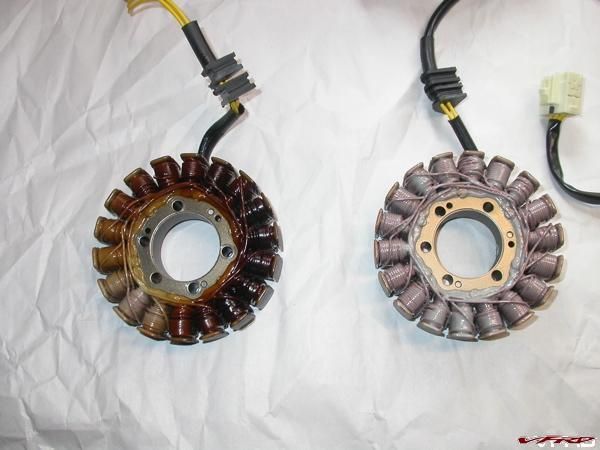
Old stator (left) and new stator
Remove the old stator, clean the old gasket material off the cover, replace the stator and torque to specs.
TIP - Placing the rubber wire grommet into the cover was a bit of a stretch no matter how I tried. For a while I thought that the grommet was in the wrong place and too close to the stator. In the end I just worked the grommet into place as I tightened down the wire keeper and then tightend down the stator.
If you are replacing the flywheel - read on.
Remove the single bolt holding the flywheel in place. To do this you will need something to stop the flywheel from turning (engine compression won't do it). I used a cheap strap wrench.
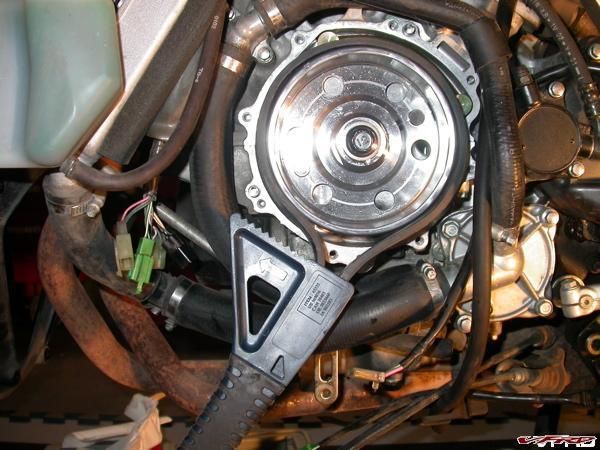
Cheap flywheel wrench
Next, Honda specifies a flywheel puller in the Service Manual. It is nothing more than a correctly threaded bolt with arms that can be hammered on. The "bolt" threads into the end of the flywheel and presses against the end of the tapered shaft that the flywheel sits on. Hammering on the "bolt's arms" caused the bolt to push against the shaft and force the flywheel off the shaft.
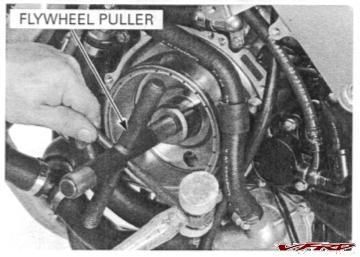
Flywheel Puller
TIP - Bring your new flywheel into a machine shop and have your own "puller" built.
TRICK - Service Honda lists the tool as a "PULLER DYNAMO" and sells it for $16.46 USD. My rental puller cost me $10 so it's probably worth the extra $6.50 to have the correct tool for the job - you can alway rent it out to your VFR buddies for a case of beer and you'll end up way ahead!!
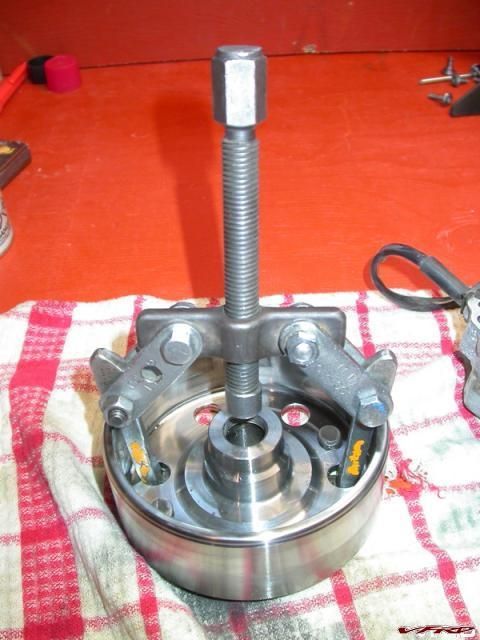
Flywheel with rented puller.jpg
Here is a close-up. If you do use this method you will need a puller that can fit through the center of the flywheel and push against the end of the tapered shaft. The end on this puller was about 5/8" and fit through nicely without going inside the tapered shaft or damaging the threads on the flywheel (my flywheel will be replaced with the kit anyway but no sense doing a bunch of damage). Those holes in the flywheel are also quite small so you'll want very small arms on the puller. I had to place each arm into their respective holes and then reattach them to the body of the puller.
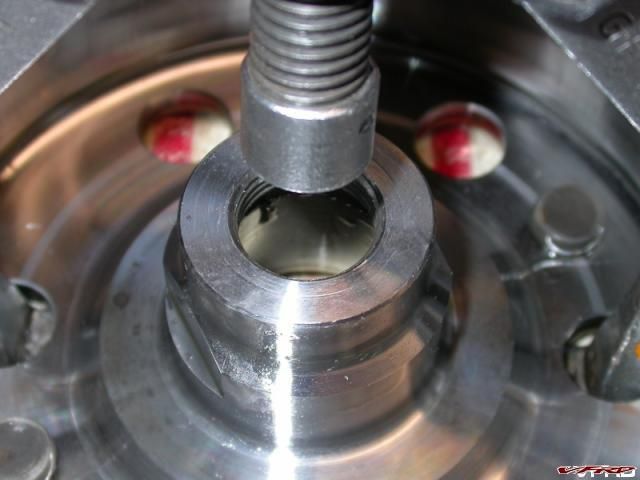
Flywheel with rented puller close-up.jpg
When you have the flywheel removed clean off any stuck on gasket being careful not to let any get into the engine. It should look like this...
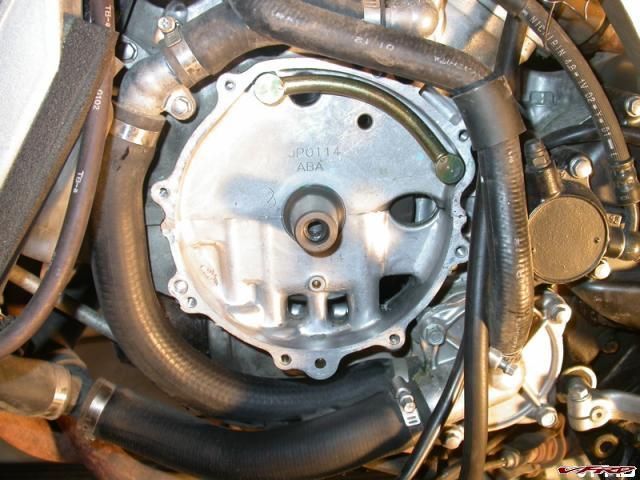
Leftside crankcase empty.jpg
Apply a thin film of oil to the tapered shaft then slide the new flywheel on and torque it into place using the flywheel wrench to keep it from spinning. There is no shear pin or key - it's just a friction fit.
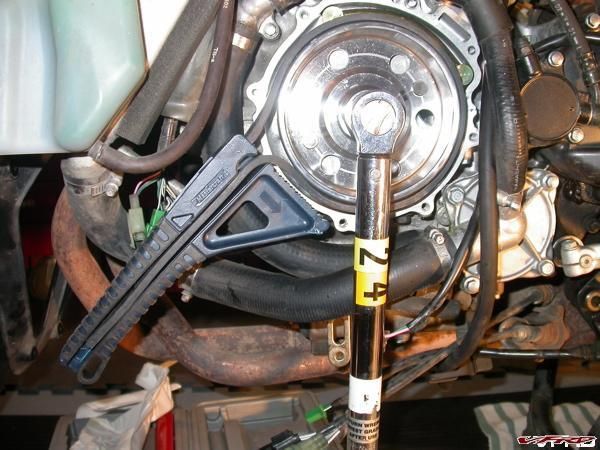
Cheap flywheel wrench
Now apply sealant to the specified locations (I gave a thin coat all the way around), place the gasket on the dowel pins, more sealant, then replace the cover with the new stator installed and torque to specs - tightening in a criss cross pattern.
TIP - In this case the specs on the bolts aren't published in Chapter 17 of the Honda Service Manual. Instead look in Chapter 1 - General Information page 1-12 to find the "Standard Torque Values".
TRICK - I read that someone cracked their cover by using the bolts to pull it into place. This is because the magnets in the flywheel want to pull everything out of alignment and the cover was not properly seated on the dowel pins. I used some rod to help align the stator cover. An even better solution would be to buy a couple of bolts about 2-4 inches longer than the cover bolts. Take those extra long bolts and cut the heads off and you'll have some aligning studs. Thread the studs in, place the cover on the studs and then slide the cover into place. Remove the aligning studs a "Bobs your Uncle".
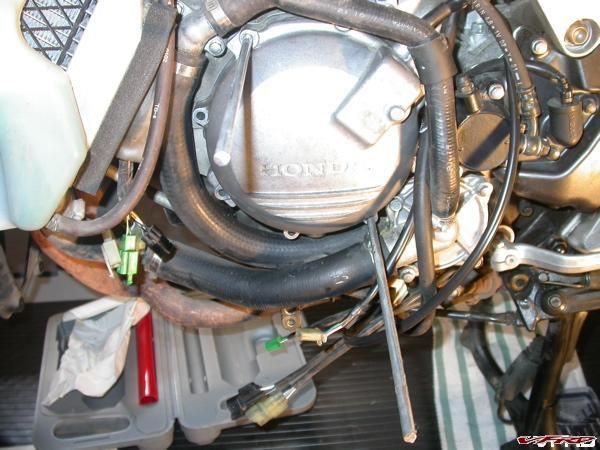
Rods to help guide case cover while installing
Once everything is torqued in place, pull your new stator wire back through the engine "V" using your string/wire (you may need to fiddle a bit with it). Then reconnect all the electrical plugs - might as well add some dielectric grease to them while your at it.
Replace the radiator overflow bottle and reattach your fairings. Check your oil and start her up.
To get the full benefit of your the new alternator you should really upgrade the remainder of the charging system --- check out Electrical Upgrade - How To With Pics.
The last thing I added was a voltmeter to monitor the situation. You can see it here at Lascar Voltmeter Install Pics.
NOTE - most of the tips and tricks came from this website in various posts and references. Thanks for all your help.
Edited February 20, 2012 by HispanicSlammer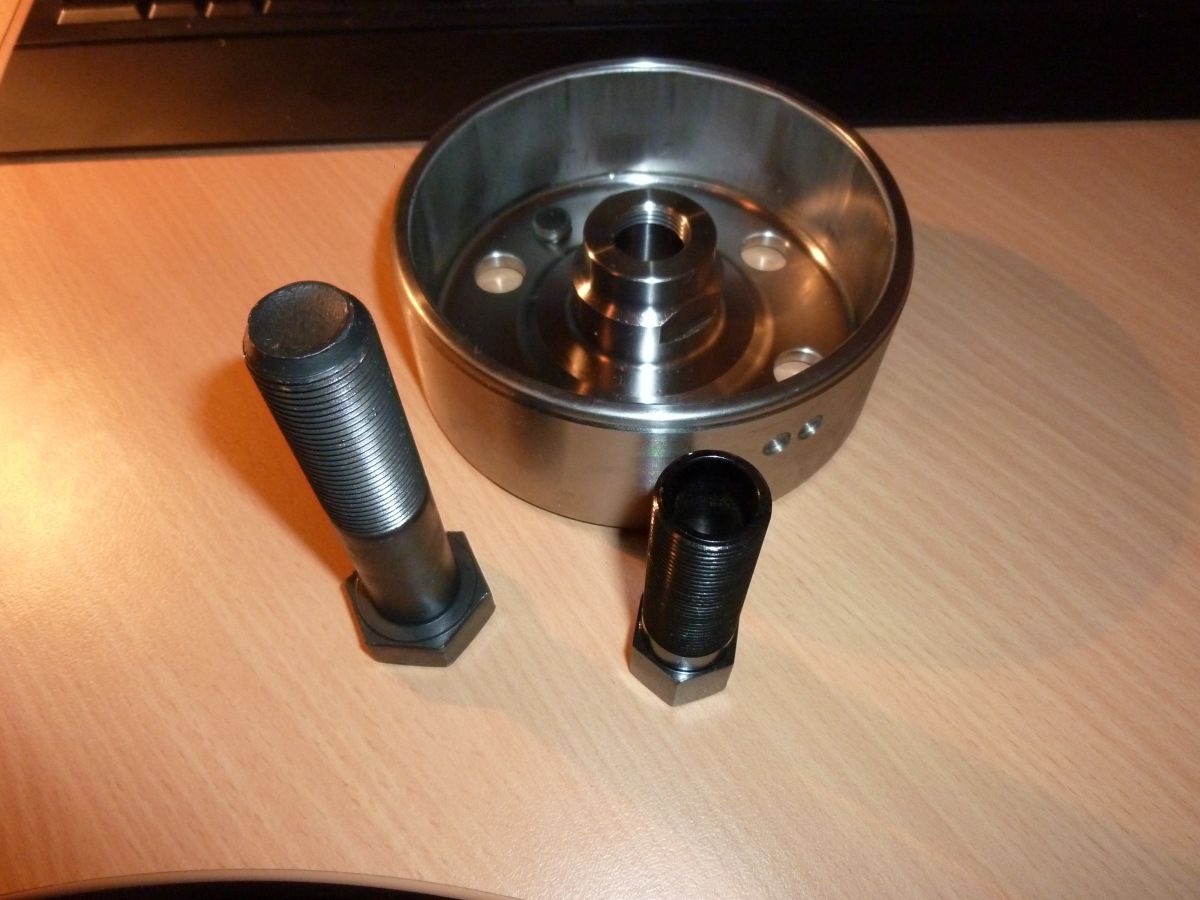
![[image: StatorPins.jpg]](http://i631.photobucket.com/albums/uu37/ohioriver/StatorPins.jpg)