VFRDiscussion ARCHIVE / READ-ONLYREAD-ONLY

1999 Vfr800 Resurrection

138 posts Started 6 Jan 2015 Last recovered post 20 Jan 2016 Wayback Machine snapshot 24 Aug 2017

#1

New guy here! My name is Ryan and I am the proud new owner of a 99 VFR800. I currently own two 1984 Honda Nighthawk 700S's and love them, but wanted something a bit different. Ask Marriedman, I've been interested in VFRs for a little while now.

I wasn't seriously searching when I came across the Craigslist ad. The price caught my eye, $1600. I figured at that price, it had to have been laid down, or crazy high miles, or a combination of both. Called the number, talked with the guy, he said that he took it in on a group buy from an elderly man with some flat tracker bikes he wanted. His son (16) wanted the bike, and he didn't want his son on "no dad-blamed crotch rocket."

A friend and I drove up to Tennessee from my place in South Carolina. The bike was solid, bone stock, 13,000 miles, but with less than 2,000 miles in the last 11 years. Fairings were all original with no cracks or scratches, just faded Florida paint. Tires are 13 years old and hard as a rock. Battery was dead, and I couldn't hear it run. Somehow, the ignition key didn't match the fuel filler cap, and the fuel cap key had been lost. The seller knocked $100 off because of this, so I drove away with the VFR for $1500.

A nice view on the way home:

[image: IMG_20141220_115108_zpsbiwfycbm.jpg]

And unloaded:

[image: IMG_20141220_223121_zps4wu1re6x.jpg]

-----------------------------------------------------------------------------------------------

First off: Diagnose the no start.

Drilled fuel cap lock cylinder, poured in gas.

Fuel pump runs, still no start

Compression check was good.

Had strong spark.

42 psi fuel pressure

[image: 20141222_193529_zpsp46qbjsj.jpg]

Houston, we have injector pulse.

There's only about one thing left: gummed up fuel injectors.

[image: 2014-12-22_21.06.46_zpsq6n6loyt.jpg]

Yep, there's the problem! Let's look in the tank...

[image: 20141222_215033_zpsttd4fe7d.jpg]

Yep, just what I thought.

Remove rust from tank - added to the To Do list.

Here's where I'm at now:

Needs:

Battery (ordering Motobatt)

Chain and sprockets (ordering DID Xring and JT sprockets)

Oil Change

Clutch and Brake fluid flushed

Coolant change

Ordered:

Tires - Michelin Pilot Road 3's

Deals:

Yoshimura RS3 stainless slip on

Givi top rack

Givi E35 top box

^ Package Deal - $335 shipped

OE seat cowl in 9/10 shape - $25 shipped

Done:

Installed TPO Parts PAIR delete kit

New NGK spark plugs

Cleaned fuel injector inlet screens

Most importantly, she needed a name. Gentlemen, I introduce to you, Vanessa.

I've got a decent bit of work ahead, but that's the fun part. Can't wait for riding season! Stay tuned for updates...

RD
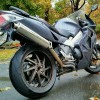
#2

Alright! Love to see some 5th gen resurrection going on.

Welcome to the asylum.

Why not go for the PR4's? Price?

#3
Veefer800Canuck

Alright! Love to see some 5th gen resurrection going on.

Welcome to the asylum.

Why not go for the PR4's? Price?

Price was a minor factor, and I read a few reviews that the purchaser had tried PR3s and PR4s back to back and liked the PR3s better. I'm just happy to have radial tires as an option!

#4

Nice find. I'm glad an interested owner bought it rather than a salvager that would break it up for parts.

I ran a set of PR3's and went back to PR2's. I didn't need the extra siping as I typically do not ride in the rain and the PR3's scalloped and flat spotted more than the PR2's did (before or since). Nothing wrong with the 3's - I just didn't have as good an experience with them as the 2's. Still may try a set of PR4's - not sure yet.

#6

Another VFR resurrection...I love it !

Very clean bike. I envy you for the nice clean, undamaged fairings...i still need to repair and paint mine. :wacko:

Good luck with the project... :beer:

#7

Nice find!! Jealous!!

Looks like you've covered everything for a full recovery... except you haven't mentioned the air filter have you checked it out? We have had reports and eye-witnessed cases of mouse nest infestation of the aribox on some long neglected VFRs.

Enjoy!!

#9

Jesus!! Another must buy addition to my parts list. Mousetraps!!!!

#10

I found evidence of mice in the swingarm and steering head as well.

Not to steer your post off track although I haveconsidered covering the rubber intake port with 1/2" x 1/2" square steel mesh. Has anyone done this or something similar to keep the mice out?

#11

Congrats on the find. Best gen and fastest color! And welcome to our asylum. As close as you are, I'd recommend attending the annual TexasMac Memorial Ride in May to fully experience the joy of VFR riding and the fabulous family of VFRD members.

#12

Welcome dude! Welcome to the 5th gen club!

:cool:

#13

If you have time, you might consider replacing the fork oil...11 years is a long time to sit...at least do the bounce test...at some point the rear shock may need a refresh sooner than you think as well.

Oh, change blinker fluid too...

Matt

#14

Knowing scguy personally zup, I am pretty sure this is one of the jobs that was just assumed. But since you brought it up!.. I'd get the stuff from Jamie Daugherty and upgrade the forks while your at it scguy!

#15

Nice find. Good luck with the restoration.

Welcome! :beer:

#16

Alright, scored a K&N air filter, am working derusting the tank, and waiting on parts.

I hate the stock grips. With a little bit of modification, I installed a set of Randakk's Amazing Grips. Not very sporty looking, but excellent tack and great vibration dampening. I love them on my Nighthawk.

[image: 20150109_171230_zpsjxbfygy2.jpg]

#17

Have you considered replacing the levers? I had ones just like these:

[image: $_12.JPG]

http://www.ebay.com/itm/Silver-Folding-Brake-Clutch-Levers-For-Honda-VFR800-1998-01-ST1300-ST1300A-03-08-/181494394989?pt=Motorcycles_Parts_Accessories&hash=item2a41e8b06d&vxp=mtr

I don't know the seller, couldn't tell you if he is the same I used. But I liked them so well on the 5th gen I bought them again for the 6th. As much as I like them, I don't know if they would look right on the 7th gen.

#18

I do want to replace the levers, in time.

My roadmap to Viffervana (the bike 100% perfect in my mind) goes as follows...

Mechanical - fluids, get it on the road, be at a solid Stage 0

Ride

Electrical

Ride

Suspension

Ride

Comfort items ( if needed, ie, Helibars, etc)

Ride

Finally, Aesthetics.

#19
Rovari

I found evidence of mice in the swingarm and steering head as well.

Not to steer your post off track although I haveconsidered covering the rubber intake port with 1/2" x 1/2" square steel mesh. Has anyone done this or something similar to keep the mice out?

On my 4th gen I have steel mesh, much finer (probably at least 1/4" by 1/4" if not finer) that I riveted onto the front of the airbox after removing my snorkel.

#20
Short update.

New Michelin Pilot Road 3's mounted, balanced and installed.
New Motobatt battery
Fixed front brakes from hanging, brake pads were froze in the clips. Lubricated caliper slides and cleaned brake pad clips.
DID 530VX Gold Chain and JT steel sprockets
[image: 20150128_130234_zpsv5ayw9ch.jpg]
You can see here that the chain was greatly needed and it may have never been degreased. I've got my work cut out for me.

Discovered the clutch slave cylinder is leaking just a bit, so I'm going to have to rebuild that. Next to tackle besides the tank is to flush the brake/clutch fluid.

RD
#21

Don't be so hasty. I heard in Maryland that chain passes for nicely broken in...

#22

Prolly gonna have to change all sorts of rubber seals that will have dried out and lost their rubber properties. The coolant pump may leak shortly after getting it running again... Clutch slave cylinder mayor need revamping and the push rod polishing and lubing... Etc etc but well worth it!!

#23
Anther few late nights of working on the ol girl. [image: 2015-02-02_22.20.26_zpslsm0qpei.jpg] A lot of Purple Power and elbow grease went into this before and after shot. Waiting on my chain tool to arrive, but the rear brake received the same treatment as the front, polished pad pin and slide lubing. Throttle body assembly and airbox with K&N filter are installed. Took the opportunity to get rid of the airbox flapper solenoid and associated plumbing. New, non-locking gas cap to replace the OE style that came without a key.
[image: 20150102_180739-1_zpsukphyj9r.jpg] It's a nonlocking quarter turn cap, with a seal, unlike most eBay caps. The bolts they sent with the cap were far too short to use, even with the seal removed, so I hit up Boltdepot.com and found some 4mm stainless bolts with countersink hex heads. I ordered 5 different lengths, 3 bolts each, for a total of $1.30 or so. I really like the looks of the cap, don't like fumbling with a key in the cap either. It turned out to be 4mmx0.7mmx30mm. The included bolts were less than 20 mm long and didn't even reach the threads in the tank

Still waiting to deal with the rust in the tank, have a POR15 tank sealer kit ordered. I also ordered some HK adjustable shorty levers.

RD

#24

Nice job, looks good! :fing02:

#25
I got some work done. :pbjtsmilie: Last week I flushed and bled the brakes front and rear. Between when I got off work Friday evening and last night, I put about 14 hours into working on the VFR. :asleep:

Friday evening was tank evening. I spent from 5:30 to 11:00 using the POR15 kit to prep and line the tank. After 2 hours of the Metal Etch treatment, a good bit of rust remained, so I poured in the gallon of phosphoric acid I had purchased earlier. Result? Rust free.

The liner went in without much hassle, but the cure time is 96 hours, or basically Wednesday.
Saturday, first up was the chain. I was able to free up the link, get the chain riveted, adjust the free play and install the chain guard. Polished the clutch rod, installed freshly rebuilt clutch slave cylinder.

Opened the clutch master cylinder to find this:
[image: IMAG0037_zps2ufriewv.jpg]
:sick: :sick: :sick:

Cleaned the master cylinder as well as I could. There's a tiny bit of gunk I couldn't get out, so I might have to deal with that down the road a bit. The Phillips head screws are about stripped in mine (thanks PO). I'm thinking about getting some stainless allen replacement screws, like I did for my gas cap. Got new fluid in the clutch lines now, and got them bled out. K&N air filter cleaned, washed, and drying, ready for oiling. Fresh oil change with Wix oil filter and Mobil 1 4T 10W40 oil. Coolant all drained and replaced with Engine Ice coolant. Rear wheel installed. Yoshi slipon exhaust installed (waiting on new rubber insulator for the muffler clamp).

Most importantly, installed blingin' new gold oil filler cap from ProBolt
[image: IMAG0023_zpstkzo4re9.jpg]

All that's left: Oil and install K&N air filter
Refit fuel pump into tank, connect lines, install tank, fill with fuel
Start engine, burp coolant
Install seat and fairings.
DMV Paperwork


RD
#26

I though the coffee colored fluid in my '01 was bad! Yikes, that gunk looks pretty gnarly!

[image: post-23057-0-59587900-1424045740.jpg]

#28

Guys, I need some help. The bike is almost starting. Just almost.

VFR800 not starting: http://youtu.be/gQG7UlR1y3k" onclick="window.open(this.href);return false;

What do you reckon? I've obviously got spark, fuel pump runs and has good pressure. I'm thinking injector spray pattern again.

#29

Does it help any to give it a bit of throttle during cranking? Also, the low fuel light is flashing - is there enough for the fuel pump to pick it up?

#30

It does help to give it throttle while cranking. I'm giving it throttle during the video. The fuel level sender has a dead spot, I just put in a little over 2 gallons.

#31
SCguy

I got some work done. :pbjtsmilie: Last week I flushed and bled the brakes front and rear. Between when I got off work Friday evening and last night, I put about 14 hours into working on the VFR. :asleep:

Friday evening was tank evening. I spent from 5:30 to 11:00 using the POR15 kit to prep and line the tank. After 2 hours of the Metal Etch treatment, a good bit of rust remained, so I poured in the gallon of phosphoric acid I had purchased earlier. Result? Rust free.

The liner went in without much hassle, but the cure time is 96 hours, or basically Wednesday.

Saturday, first up was the chain. I was able to free up the link, get the chain riveted, adjust the free play and install the chain guard. Polished the clutch rod, installed freshly rebuilt clutch slave cylinder.

Opened the clutch master cylinder to find this:

[image: IMAG0037_zps2ufriewv.jpg]

:sick: :sick: :sick:

Cleaned the master cylinder as well as I could. There's a tiny bit of gunk I couldn't get out, so I might have to deal with that down the road a bit. The Phillips head screws are about stripped in mine (thanks PO). I'm thinking about getting some stainless allen replacement screws, like I did for my gas cap. Got new fluid in the clutch lines now, and got them bled out. K&N air filter cleaned, washed, and drying, ready for oiling. Fresh oil change with Wix oil filter and Mobil 1 4T 10W40 oil. Coolant all drained and replaced with Engine Ice coolant. Rear wheel installed. Yoshi slipon exhaust installed (waiting on new rubber insulator for the muffler clamp).

Most importantly, installed blingin' new gold oil filler cap from ProBolt

[image: IMAG0023_zpstkzo4re9.jpg]

All that's left: Oil and install K&N air filter

Refit fuel pump into tank, connect lines, install tank, fill with fuel

Start engine, burp coolant

Install seat and fairings.

DMV Paperwork

RD

Looking great and keep up the great work. The ProBolt filler cap looks good and I can hardly wait to get mine. I ordered a red one to go with the bike color and to complement the Sebspeed Clear clutch window that now allows me to really see into the soul of the bike. LOL. Clear clutch cover window might look really good good with the new filler cap................. Check it out if you're interested. Never really thought I would get one the first time I saw it here on VFRD but now that I have one installed, man, it really adds to the look of the bike IMHO.

http://www.vfrdiscussion.com/forum/index.php/topic/79536-clutch-window-promo-special-vfrd-only/?hl=%2Bclear+%2Bclutch+%2Bcover

#32
SCguy

Guys, I need some help. The bike is almost starting. Just almost.

VFR800 not starting: http://youtu.be/gQG7UlR1y3k" onclick="window.open(this.href);return false;

What do you reckon? I've obviously got spark, fuel pump runs and has good pressure. I'm thinking injector spray pattern again.

Might be a starter valve sync issue. That's a pre-hotwax unit model so requires choke but I believe it still has starter valves. Probably something simple as it sounds like it is trying real hard.

#33
vfrurknee

Might be a starter valve sync issue. That's a pre-hotwax unit model so requires choke but I believe it still has starter valves. Probably something simple as it sounds like it is trying real hard.

Is cranking vacuum steady enough to actually sync the starter valves? When I had the TB assembly out, I took great care not to mess with the starter valves. The PO said he had it running the day before I bought it, but ran it out of gas in a rusty gas tank. It sucked up some gunk, and had the injector screens plugged.

#34

Sometimes you just need to hook it up to a charger and keep cranking. I've had to do it on my '99 as well as my previous RC51 when they sat for a while. Similar era fuel injected Hondas.

#35

This is pretty basic, but are you positive neither pair of spark plug wires may not be reversed on a bank of cylinders? To me It sounds like the motor may only be firing on one, or two cylinders when you're cranking...

Also, a shot of starter fluid in the intake could help with firing her up if some of the starter valves could be clogged or out of adjustment.

I've found that leaving the "choke" off and giving a little throttle while cranking my '98 seems to work best when it's cold outside and it hasn't been started for several weeks.

Edited February 19, 2015 by smoothsailin
#36

Ok, did a little digging over lunch. Only one fuel injector is spraying. I get nothing out of the others. I'll probably work late tonight and verify that I have voltage and injector pulse signal at the 3 nonfunctioning injectors.

#37

Okay, I picked up a throttle body assembly, spare front calipers (all the better to paint) , and a VFR800 engine last night.

The engine has supposedly been freshly rebuilt, and was ready to swap into the VFR, but the guy laid it over before he did any swapping. This guy bought it and was parting it out on eBay. I didn't really need the engine, but for the price, I couldn't pass it up. I got the engine, calipers, and throttle body assembly for $150.

The engine was $100, but that's about what the clutch cover alone goes for on eBay. I'm keeping the clutch cover though. I want to get Sebspeed to do a clutch cover window down the road a bit, and part the engine out to pay for it. I doubt I'll get any work done on the bike tonight, I'm doing the front crank seal, timing and balance shaft belts on my cousin's car.

[image: IMAG0046_zpskul9bhk6.jpg]

New addition to the cluttered home workspace

#41

Got home from doing a balance shaft seal and timing belt on a friend's car to find a couple packages waiting for me, including my new levers!

[image: IMAG0058_zpsfpaz2sq8.jpg]

Just some HK shorty levers, but they seem to be built pretty well for how cheap they are. Other package was from Partzilla with a few miscellaneous bits

#42

I decided to step back and look at the big picture. I bought a used throttle body assembly with injectors, but then the seller told me the bike had been sitting for three years. As much as I just wanted to slap them in there and hear the bike run, I don't want to have to tear down anything that I don't have to down the road.

With that in mind, I called Injector RX and talked with them about cleaning my original injectors. They said that if the injectors ohm out fine, which they do, they have a 99% success rate with being able to clean threm and restore them to perfect order. I shipped them out today for cleaning and bench flow testing. They'll also check for leaks and proper spray pattern. It runs about $20 an injector, but will give me some peace of mind when reinstalling everything. I'm taking the fuel rails to be ultrasonically cleaned as well.

I'm itching to ride this beast, but I'd rather take my time doing it right now than have downtime in good riding weather.

#43

Nice project!

Is there some way to clean the plumbing going from the tank to the injectors? For obvious reasons.

#44

Jim, I had the fuel rails ultrasonically cleaned, and will be taking the fuel lines for the same procedure. The rails looked perfectly clean, but my friend who cleaned them said that he got out a ton of deposits. My new fuel filter and fuel level sending unit arrived today. InjectorRX emailed me and sent a return tracking number. I checked it and they left Houston and went promptly to San Jose, CA. Hey USPS, that's kind of the wrong end of the country. My 8 spoke wheel should be on its way across the ocean this week as well. It seems that there are quite a few more 90-93 VFR750s being parted out in Europe than in the US. Mine's coming from Germany.

RD

#45

Don't forget to save up some money to have the wheels blasted and powder coated the same color. Don't do black though, you lose all detail on the 8 spoke. Personal bias, Honda silver or bronze looks the best IMO.

#47
MaxSwell
SCguy

Ahh, forgot the air filter picture. Here's a whiles worth of rat and wasp population...

[image: 20141220_194135_zpsuglfdqe9.jpg]

That has happened to me twice. Almost a given for poll-barn-stored fifth gens.

Where have I seen this before .

#48

Oh my god, thats crazy.

#49

Those filters must be hella comfortable~

#50

Got a thing or two done. I was having contact problems in the high/ low bream beam switch, but a shot of CRC Electronic Cleaner took care of that. The turn signal switch was rather stiff, but after a quick shot of white lithium, everything is well in left control land.

I have not gotten my injectors back yet. Tracking finally updated saying that the package delivery was delayed, and that it was in Atlanta last night, so I expect them tomorrow.

I also got a DHL tracking number for my 8 spoke making its way across the ocean from Germany.

Spoke with my buddy who does powdercoating about doing my wheels. He quoted me $20-30 per wheel. Sounds pretty cheap. I'll be on the lookout for a front wheel, so I can ride while I'm waiting to ship the wheels to him. Any idea what it would cost to ship two wheels from SC to AR and back?

#51

I come home to a box. My injectors!

Here are the cleaning results. Looks like I had better test my injector signal. Three should have been spraying, not just one.

[image: IMAG0082_1_zpsejn0yjnq.jpg]

#54

Coolant filled and bled. One holdup, I managed to break the fuel pump strainer. It's not available separate from the fuel pump at a cringe inducing price of $270. I see some aftermarket pumps on eBay. I might buy one and see if the strainer fits the OE pump. Anybody tried one?

#55

Buy an OEM used fuel pump off Ebay that has the part you need?

Put a WTB ad here in the classifieds?

#57

Nice work, sounds great!

#58

Hallelujah! I made a strainer work!

Removing the fuel pump to coat the tank, I broke the fuel pump strainer, which is only available from Honda as a pump subassembly at $270. My other options were to find a replacement strainer that fit or to buy an aftermarket, no name pump and hope it fit and would be reliable.

I found an automotive strainer that fits the pump. It's intended application is the 1995 Honda Accord F22B2, it's larger and at a slightly different angle, but it fits. At $19, it's less of a sting to the wallet.

Strainer comparison:

[image: IMAG0089_zps0vuo7my3.jpg]

It fit into the tank with a little persuasion and it's running fine again.

#60

It's purty. I like the decal less look..... :cool:

#61
SCguy

Hallelujah! I made a strainer work!

Removing the fuel pump to coat the tank, I broke the fuel pump strainer, which is only available from Honda as a pump subassembly at $270. My other options were to find a replacement strainer that fit or to buy an aftermarket, no name pump and hope it fit and would be reliable.

I found an automotive strainer that fits the pump. It's intended application is the 1995 Honda Accord F22B2, it's larger and at a slightly different angle, but it fits. At $19, it's less of a sting to the wallet.

Strainer comparison:

[image: IMAG0089_zps0vuo7my3.jpg]

It fit into the tank with a little persuasion and it's running fine again.

Great ingenuity on that. I really love that kind of solution to a problem. Nice work!

#64

Awesome work!

#65

What a great restoration! Great job! I love reading about people bringing bikes back to life.

#66

Nice job, looks like a new bike! :wheel:

#67

Well, I can pronounce the bike officially broke in. Even though my friend had it the majority of last week cleaning it, I've put a bit over 500 miles on with zero issues. Now to address the electrical system.

#68

:cheerleader: :wheel:

So I think it is time to change that avatar there buddy.

#69
marriedman

:cheerleader: :wheel:

So I think it is time to change that avatar there buddy.

Happy?
#70

Few new things: I've ordered Tech Spec tank knee grips, 00-01 Emgo mirrors, and an OE Honda ST1300 tank pad. I'm starting too put parts together to do the FH020AA RR swap.

#72

Nice color! :fing02:

Front wheel getting the same treatment?

#73

[image: post-8974-0-25977500-1426838990.jpg]

:unsure:

#74

I just got the wheel in from Germany. I'll be sending it and the front wheel our to be powdercoated once I decide on a color. Dutchy, somebody did a terrible job of painting the lip black, and the paint is bubbled a bit.

#75

Before I get the wheels powdercoated, I need to decide on what color I'm painting this bike.

I'm somewhat flexible but I keep coming back to 3 colors, white, grey and blue.

Disclaimer: these photos are not mine, I came across them on Google, so I can't name a source.

Blue - my favorite color in general. My first thought when repainting.

[image: 20110723-2244112-2001-Honda-VFR800_zpsya]. Factory blue

[image: tapatalk_1422813131575_zpsqqbyrsk8.jpeg]. I really like this darker blue. Makes the bike look very modern. Would go with silver wheels, though.

Grey

[image: FB_IMG_1423253289369_zpsw993baxv.jpg]

Probably my favorite at the moment.

I thought about going with a pearl grey, like this Lexus:

[image: 10-10-07-pearl-grey-lexus-lfa-front_zpsx]

Silver/white

[image: 001_zpsluo55jbj.jpg]

I've always loved pearl white

I found this color made by House of Kolor that has just grabbed my eyes and hasn't let go.

[image: HOK-PBC49-QT_zpsn6ll9bki.jpg]

It's called Silverwhite Pearl.

I know, ultimately it's my choice, but what do y'all think?

#76

I like the look of the charcoal grey..less the leather tank cover

#77

IMHO, what often lets down non-OEM paint jobs is the skimping on proper decals. Not putting any decals on just looks like you're a cheap bastard. Putting decals from a previous generation on a later bike just looks wrong. Or putting generic decals on any bike: just looks hideous.

OEM decals from the correct era in the exact OEM locations is the sign of a well-finished custom paintjob. (IMHO!)

Ciao,

#78

If you're looking for votes, count me in as a grey supporter! A fifth gen will look sharp in any of your colour choices, though.

#79
JZH

IMHO, what often lets down non-OEM paint jobs is the skimping on proper decals. Not putting any decals on just looks like you're a cheap bastard. Putting decals from a previous generation on a later bike just looks wrong. Or putting generic decals on any bike: just looks hideous.

OEM decals from the correct era in the exact OEM locations is the sign of a well-finished custom paintjob. (IMHO!)

Ciao,

I agree with you for the most part. When I get decals done, I will likely go back to how the bike is now, OE Honda on the tank, no VFR logo on the fairing. Call me crazy, but I just really don't like the VFR script. Looks too dated and Ricky Racer for me, but everyone's got their preferences.
#80

My vote is for the Cold-Beer-Here Blue. Esp. nice if you have blue eyes. :tongue:

#81

I don't care if it is wrong, but I love the Kawasaki Plasma Blue!

[image: colorcaseone.jpg]

#82

NO GRAY!

tn_gallery_913_7537_117894.jpg

Seriously though, I like the blue idea. Especially the later version. It's also a bit FJR1300-ish, but that's ok.

#83

Left to go several hours upstate on Saturday, made it 10 miles before my RR crapped out and I was stuck on the side of the road. Got the bike towed back, going to look at it tonight to assess the damage.

#85

And now You are an OFFICIAL VFR owner!

#88
SCguy

Well, reteardown has begun.

The work station:

[image: IMAG0187_zpsydby2rrc.jpg]

Here's the culprit, a fried Ricks RR.

[image: IMAG0185_zpsbjj69cmw.jpg]

Connectors looked fine, stator seems to be okay.

I got bored with no parts, so I plastidipped the inside of my stock windscreen.

Well, I guess I will not be holding off on my R/R replacement. Thanks for posting SCGuy...

#90

I was wondering how that ST pad was going to look. Turns out pretty good!

#91

I do really like the dark blue. Even though it's a Ford color, I think I really, really like Kona Blue. Dark, subtle, and classy in the shadows, catching eyes and showing out in the sun.

[image: 100_0043_zpsytb2t4rp.jpg]

#92

It's a pretty color no doubt, but I think it is too dark. Half of our troubles as riders comes from people not seeing us. I would go with a lighter tint than that.

#93
Parts are beginning to come in! The RR kit from Roadstercycle came in today. The volt meter will be the biggest hold up, but it's already in the US from Hong Kong, so it shouldn't be too long.

I figured that if I'm doing wiring, I'll do it proper the first time. I plan on adding a few farkles on down the road, so I'd better prepare electrically beforehand. I started looking at fuseboxes and became intrigued with the Rowe Electronics PDM60 power distribution module.
AltRider Explains PDM60 (Power Distribution Module): https://youtu.be/7zLCBjFkMxQ"onclick="window.open(this.href);return false;
Here's a video explaining what sets it apart from a simple fuse box. It has customizable amperage, self resetting, custom trigger settings, completely sealed, waterproof unit.

Less intriguing was the price, $199.99. I found one retailer selling for $168, and I had it added to the cart before I realized I hadn't checked eBay.

To my surprise, there was a used one on eBay! I'm all for buying new if there's not a great price difference, but for $75 shipped vs $200, I'll take used any day.
#94

Looks interesting! No need to worry about CANbus on our bikes though it still looks like a good system. Good catch at $75!

#95

Hella Horn Upgrade on 99 Honda VFR800: https://youtu.be/M2yLVW4Y2Q4

You can also see my new blue LED backlighting. It's not that splotchy in person, the camera makes it look worse than it is.

#96

R/R is installed. I went with the Shindengen FH020AA MOSFET R/R. For simplicity, I ordered from Jack at Roadstercycle.com I highly recommend him!

First up, the regulator mounting holes are 90 degrees different from OE, so I had to drill two holes to mount it.

[image: IMAG0274_zps94vektua.jpg]

All mounted up and looking spotless compared to the rest of the polleny bike.

The stock power connector was not used, so I shrinkwrapped it and tucked it out of the way. The stator connector is very much a weak link on these bikes, often overheating and melting. Mine was okay, but just okay doesn't cut it here.

[image: IMAG0285_zpseuld4whh.jpg]

Enter the Metripack 630 connector and 10 ga wiring. This connector is not going to overheat.

For the battery side, I ran 10 ga to ground, and a 10 ga Metripack 630 fuse holder from the positive to the R/R.

[image: IMAG0281_zpsnv3um9uk.jpg]

More electrical goodness to come as I receive parts.

Much thanks to MelloDude for his patience in explaining the charging system.

#97

Cool rebuild thread. My vote on the color front is orange for the bodywork, especially a metallic orange, and something dark for the wheels. Glossy black might be nice.

#98

EBay score of the day - used Givi V46 top case with LED brake light and backrest for $75.

#101

Don't get me wrong, Givi is a much better, more sturdy case. I'm still keeping my eyes out for a used set of E360s or E41s, but I feel the JCW are decent enough for the price, even if disposable.

#102

You are on a budget as well as a timetable. These will do until you come across a better set.

#103

Sorry to hear about the PDM60 issue.

Keep your eyes open for the Givi cases and then sell your bargain cases when you find them.

#104

Sometimes I wonder about myself. I'm installing Oxford heated grips on a 90+ degree day.

#105

Hallelujah! I made a strainer work!

'"emoving the fuel pump to coat the tank, I broke the fuel pump strainer, which is only available from Honda as a pump subassembly at $270. My other options were to find a replacement strainer that fit or to buy an aftermarket, no name pump and hope it fit and would be reliable.

I found an automotive strainer that fits the pump. It's intended application is the 1995 Honda Accord F22B2, it's larger and at a slightly different angle, but it fits. At $19, it's less of a sting to the wallet. "

VFRD needs to pin that .

Roll On ..

#106
Switchblade

I found an automotive strainer that fits the pump. It's intended application is the 1995 Honda Accord F22B2, it's larger and at a slightly different angle, but it fits. At $19, it's less of a sting to the wallet. "

VFRD needs to pin that .

Roll On ..

Got a pic and a link??? I wish to know if it will fit an RC45...

#107
BusyLittleShop
Switchblade

I found an automotive strainer that fits the pump. It's intended application is the 1995 Honda Accord F22B2, it's larger and at a slightly different angle, but it fits. At $19, it's less of a sting to the wallet. "

VFRD needs to pin that .

Roll On ..

Got a pic and a link??? I wish to know if it will fit an RC45...

It was quote from SCguy I think Larry. That why I ask to pin it .

Here a pic of the Accord .

Roll On VFRD ..

This is the stock setup for 99 .

Sent SCguy a email Larry .

#109

Ever since I've installed the Kappa side racks, I've noticed that I have bar wobble when slowing down from 45 off throttle. I never had this before. It's not a weight issue, it'll do it with me sitting on the tank. It'll do it with or without top box and side bags mounted. I checked the steering head bearing and everything seemed fine. Any ideas?

#110

45 on or just 45 to 30 ?

SCguy

Ever since I've installed the Kappa side racks, I've noticed that I have bar wobble when slowing down from 45 off throttle. I never had this before. It's not a weight issue, it'll do it with me sitting on the tank. It'll do it with or without top box and side bags mounted. I checked the steering head bearing and everything seemed fine. Any ideas?

#111

It starts between 45-30 but if I don't grip the bars and stop it, it will continue below 30.

#112

Check your tire pressures first, and tire wear. I had this problem with the Bridgestones I used to run, haven't had the issue with Michelin PP/PR until they get very close to end of life, and then only with a couple sets, generally the PP never wobble. New steering bearings may help too but it always seemed to be the tire for me.

#113

What strikes me as odd is the fact that it does this without the cases on. The Kappa racks are identical to the Givi ones, and they never gave me a lick of trouble. Also check your rear subframe for straighness. If it was ever dropped on one side, it may have tweaked it.

#114
vfrcapn

Check your tire pressures first, and tire wear. I had this problem with the Bridgestones I used to run, haven't had the issue with Michelin PP/PR until they get very close to end of life, and then only with a couple sets, generally the PP never wobble. New steering bearings may help too but it always seemed to be the tire for me.

I'm with capn, usually this is a front tire wear thing first. Take a hard look at what is going on on the front.

#116

Michelin PR3s with less than 2k on them. Had them balanced at a dealer. No noticeable cupping, or abnormal wear.

#117

I think the weight transfer when you install the bags has changed something.

#118

Rode it 150 miles today without sidebags and it did it most of the time.

#119

You gotta look at steering head bearing,front wheel bearing but me the tire is the most likely suspect. I have seen tires balance out but not ride without vibration.

#120

I'd check my suspension settings, make sure sag is set with the new set up, and then replace or re-torque those steering bearings.

#121

Have you tried it with the racks removed?

#122

Is it possible that the mice that inhabited the airbox were reproducing so effectively that they tweaked the frame?

Are the bars/forks/triples aligned?

Do you have a center stand? If so put the bike on the center stand and weight the rear seat until the front tire is off the ground. Now S-L-O-W-L-Y rotate the bars back and forth and feel for a detent or notch in the center of the steering head bearings.

If no notch is apparent, while the front tire is still floating magically, rotate the front wheel and feel for any misalignment or abnormalities in the wheel bearings.

#123

I haven't taken the racks off to check. I'll see about checking the sag tomorrow.

I haven't touched the bars, forks or triples other than when I put the new front tire on

I've put it onto the center stand and done the side to side thing several times. Never felt any rough spots or notches.

I'll be taking my front wheel off soon to paint it (I'll powdercoat it later) so I'll just put in fresh wheel bearings while I'm there. I checked them when I put the tires on less than 2k ago and they were fine.

#124

Just for peace of mind, I ordered wheel bearings and steering head bearings. Waiting on my USB adapter and tablet mount. From the looks of things, I'll be getting my seat back from Laam next week.

#125

When you take off the wheel, stick your finger in the bearings and turn them. If they are smooth, leave them in and keep the new ones for back up. Too easy to mess up installing new ones if they aren't necessary. They can be installed to tightly or too loosely, or damaged driving them in without proper tools.

If the head bearings are OE, they are always the first suspect.

Where and what kind of bearing did you order? All Balls has fine head bearings (tapered) but not great wheel bearings. Honda has good wheel bearings, but ball bearings wear faster in the head stock.

#127
[image: IMAG0575_1_zpshvbebe1s.jpg]

Got my 90 degree valve stem installed on the rear, wiring rigged until I get my fuse box back. I've just got to replace the front brake switch and I'll be ready to roll.
#128

^^^ Wow - that looks really nice.  Great photo, too! 


#129

Congrats on the work you've been doing.  Very fine.  Also, I appreciate all the technical details as I am considering purchasing a 5th-Gen with the express purpose of a restoration.


#130

I hate to say it but the off throttle head shake was common even on new bikes in the 98-2001 era, it was minor and totally controllable. Usually it was about 30 mph or below and off throttle. It was especially noticeable when the rider took their hands off the bars. The tapered head bearings did a good job to eliminate the issue.

Edited August 24, 2015 by highsider989
#131
highsider989

I hate to say it but the off throttle head shake was common even on new bikes in the 98-2001 era, it was minor and totally controllable. Usually it was about 30 mph or below and off throttle. It was especially noticeable when the rider took their hands off the bars. The tapered head bearings did a good job to eliminate the issue.

The crazy thing is that I had the bike and rode it over 2k miles and it did not do it at all, but then started all of a sudden. It's back good now with the tapered bearings.
#132

Time to resurrect this thread.

The bike has been great, no problems except my Motobatt battery failed.

The main reason I'm updating this is to show off my new score, a full Erion exhaust system.

The end can has been down, so I plan on cutting the can down to get rid of the damage. How loud it will be is anybody's clue. There's not many videos or sound clips of Erion systems out there.

[image: IMAG1000_zps44hz8elf.jpg]

#134

What is it, like an 18" can anyhow?

Hacking 2" off of it won't be a big deal, sound-wise.

#135

I don't know the measurement, but it is quite long. I still have the one that came with my Erion system (now replaced by Laser underseats). It, too, had been rashed like his (perhaps not quite as much). Shortening the end can by a couple of inches would be an elegant solution.

Ciao,

#136

The can is just over 20" which is ridiculously long. I might shorten the other end which has a few dings, and bring it down to ~15".

#137

I think my 5th gen Delkevic was 15" and it sounded fine IMO.

#138

I shortened the FMF apex cans I bought for my 6th by 4", sounded no louder. I think you have plenty of room to work here, your good.

End of thread · 138 posts recovered Wayback Machine snapshot 24 Aug 2017