Hey there guys. Bought this bike 4 years ago from a guy on the east side of Los Angeles. He garaged it every day and had the luxury of being able to work on it in a nice dry and spacious place. Needless to say the bike didn't fall victim to salty air or neglect. I've been living, since that time in apartment complexes, without garages, right by the ocean. I work there too so that's no help to the bike cause. Needless to say, the salty air EATS these things apart. I've been doing the maintenance such as oil changes, coolant flushes, brakes, rotors, chain, valve adjustment, new fork seals and etc but it's time to do the smaller cosmetic things. Some goodies the OP put in were a Corbin seat with stow away compartment, Ohlins rear shock, Wolf undertail exhaust, raised handlebars and a voltmeter that decides to work time to time. I've put a lithium battery in myself and it's been a total game changer.
PLAN: Make this look from rags to at least upper middle class. I have all the main maintenance done and now it's minor maintenance and the bigger cosmetics.
CHALLENGE: My biggest challenge is to do a lot of this without proper tools and space. Most of you will say use a die grinder for this, use that vice with that and etc but these are just some things I don't have or can't use. My HOA is REALLY strict on noise violations and my old room mates left the state with a lot of my nice matco gear. I might be moving to another country soon so I wan't to make her my gem while I have her and make her sell able when I leave.
WHAT HAS BEEN DONE: All my fairings have are at the painters. Getting the Honda VFR go fast red with a dabble of pearl. I've sent the handle bars and rear step for powder coating. Have already painted my severely rusted radiator fan shroud with some rustoleum rust preventative primer and black acrylic enamel. Did the same to the motor for good measure.
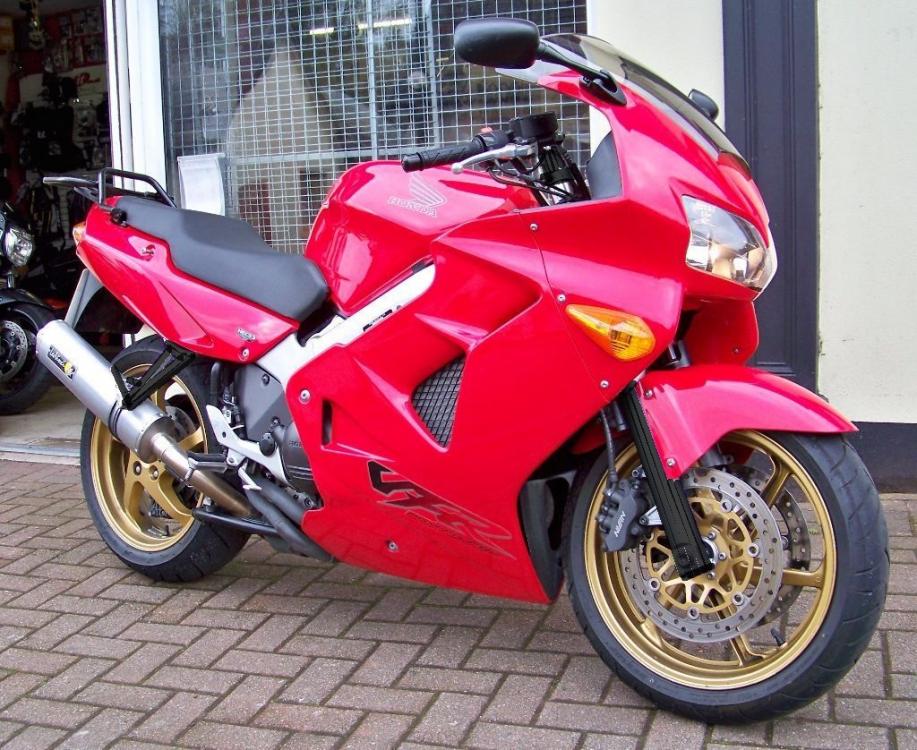
Here is how she was.
[image: 16ly97b.jpg]
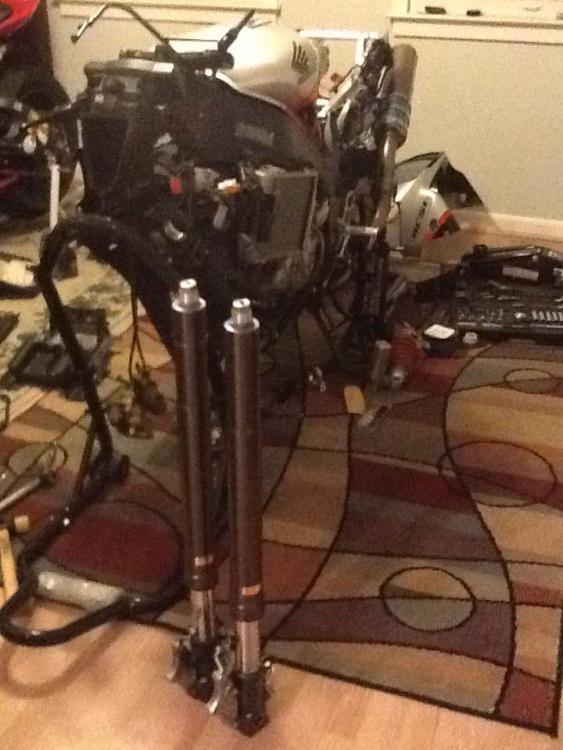
Here she is how she is now.
[image: 30j5yfc.jpg]
Here are some pictures of the rust I'm talking about.
[image: oh20i0.jpg]
(rust spots on the frame)
[image: 2irb4uu.jpg]
[image: o714p4.jpg]
[image: 2hwohgm.jpg]
WHAT NEEDS TO BE DONE: Fix the rust on the exhaust tray, fix the rust on the frame, make the front forks look new, powder coat the step and wheels. Definitely will PC the wheels a shade of gold. Think about a honda + ducati flavor to this thing. HONCATI or DUCONDA. Will also want to polish off/clean the decades worth of road grime off of my underbelly and side of the bike. Make the black parts look black and the silver parts look silver. Definitely want to fix the last mechanical issues when they bring their ugly heads around the corner. Bearings, other seals, rusted bolts and so forth.
Since this thing might be a very easy restore, it might be boring compared to some of the work you've guys have done. Hey, I'll most likely be the one asking the questions for the how to's. Please enjoy this blog though.
1st question. I've been reading up on the issue and it seems like many people say just to powder coat the front forks. Mine are suffering from a lot of corrosion. Is it possible to etch primer, paint on some good acrylic enamel or so and then put on a see through adhesive film to protect it in the most exposed areas?
San Diego 98 vfr800 restoration
140 posts Started 8 Jan 2017 Last recovered post 9 May 2017 Wayback Machine snapshot 20 Nov 2017
![[image: 16ly97b.jpg]](http://i64.tinypic.com/16ly97b.jpg)
![[image: 30j5yfc.jpg]](http://i68.tinypic.com/30j5yfc.jpg)
![[image: oh20i0.jpg]](http://i63.tinypic.com/oh20i0.jpg)
![[image: 2irb4uu.jpg]](http://i68.tinypic.com/2irb4uu.jpg)
![[image: o714p4.jpg]](http://i66.tinypic.com/o714p4.jpg)
![[image: 2hwohgm.jpg]](http://i67.tinypic.com/2hwohgm.jpg)
Wow - that's a nicely farkled machine - nearly impossible to get some of those bits now. Not sure about your paint question, but I do have the 3M clear material on my fork lowers. Seems to be holding up ok.
With all that salt air seeping in to things, it might be worth it to go through all the electrical connectors / grounds looking for corrosion. The part time voltmeter might be indicative of brewing issues. I have used Oxgard with good success. Clean connectors if necessary and apply. Seems to keep the electrics in good shape and prevents corrosion.
![[image: pACE2-1127168reg.jpg]](http://ace.imageg.net/graphics/product_images/pACE2-1127168reg.jpg)
Thanks for the doom and gloom ;) Can you fill me in a bit on the parts made partly of unubtanium? Some of the line connectors seem a bit corroded but I'm wondering if I start working on them that I'm not taking off some extra layer of protection that I shouldn't.
Will look in to Oxguard and 3M film so thanks!! Need to add in some proper protection around some of my wires and cleaning the connections were definitely a given It seems like everyone is talking about the paint chipping but no one is talking about such an obvious fix to that. . Really appreciate the feedback. Might Take the ol' rear sub frame off and say hello to the rust bits
May be a slightly more expensive option, but; Maybe get the frame, bars, yoke, forks and swingarm blasted and coated black? The black would go REALLY Well with the red panels.
2 hours ago, dozyproductionsThanks for the doom and gloom ;) Can you fill me in a bit on the parts made partly of unubtanium? Some of the line connectors seem a bit corroded but I'm wondering if I start working on them that I'm not taking off some extra layer of protection that I shouldn't.
Will look in to Oxguard and 3M film so thanks!! Need to add in some proper protection around some of my wires and cleaning the connections were definitely a given It seems like everyone is talking about the paint chipping but no one is talking about such an obvious fix to that. . Really appreciate the feedback. Might Take the ol' rear sub frame off and say hello to the rust bits
Was thinking mostly of the Wolf exhaust and the Corbin Smuggler seat (with the compartment) - both no longer in production. Once in a while they'll come up here for sale or on ebay, and if reasonably priced go quickly. The rest is for the most part still commercially available or trades 2nd hand semi-regularly.
For the 3M film, an Amazon or ebay search for "3M Scotchgard film" will turn up numerous sellers that offer it in various bulk roll sizes. IIRC there's also a heavy duty variant. I trimmed it to fit on the fork lowers, then peeled off the backing and applied. You'll want a spray bottle with a mix of about 1/3 rubbing alcohol and 2/3 water (that can vary). Spray liberally on the surface, apply the film - the liquid will allow it to be positioned, then from the center squeegee the liquid out. Don't worry about adhesion - it will stick fine. Once in place it's difficult to see.
As for the connectors, there's nothing on them to protect them from the factory, so if there is obvious corrosion, you have only upside to cleaning and treating them. Oxgard is conductive so helps the electrical flow in addition to preventing further corrosion. Some people like to use di-electric grease, which is fine for sealing connectors, but being silicone, is an insulator so it's not good for the metal pins themselves. I've been using Oxgard for a long time on both my bikes and cars and have had zero electrical issues. In this case being near sea air, IMO is an ideal candidate for Oxgard.
3M has a spray on version of the clear protectant. I've no experience with it, just seen commercials.
Holy mother...that is one rusty VFR.
I would be seriously inclined to remove as much of the metal work from the bike, including yoke and rear subframe, and have it blasted/powdercoated - the bars etc are a good start, but this rust suggests more is to be expected in the near future - it would a shame not maximise this opportunity.
If you need some ideas, take a look here:
and here:
Taking your considerations seriously with this black. Don't how it's going to tango with the gold wheels and definitely want to keep the swing arm silver. I don't know how I'm going to solve the rust with the rear subframe without taking it out. By that point, smarter money says to take it to the shop for pb + pc along with the front forks. Yoke, we'll see as it doesn't look half bad.
A neighbor who use to ride let me use his garage for this crazy stuff. I can't thank him enough and if he ever sees this link, thanks Bob! I tackled the exhaust tray's rust with paint stripper, naval jelly, sanding and rust preventative primer + acrylic enamel on top. There are a several runs because the can shot out streaks for a moment here and there but light sanding and respray will do. Did the same for the horn.
[image: 4rp9na.jpg]
[image: mh7v42.jpg]
[image: 11t4i0y.jpg]
[image: 14c71xs.jpg]
Hopefully by the end of the day I'll have a wheel prop and will be able to send the wheels and the front steps out to the powder coaters as well. This will be good since my plastics painter has been waiting FOREVER to paint clear over the tank stickers. Partzilla is an amazing site but 3 weeks for stickers is a bit slacking...
[image: 2m4bb.jpg]
Thanks you guys.
![[image: 4rp9na.jpg]](http://i66.tinypic.com/4rp9na.jpg)
![[image: mh7v42.jpg]](http://i68.tinypic.com/mh7v42.jpg)
![[image: 11t4i0y.jpg]](http://i68.tinypic.com/11t4i0y.jpg)
![[image: 14c71xs.jpg]](http://i64.tinypic.com/14c71xs.jpg)
![[image: 2m4bb.jpg]](http://i66.tinypic.com/2m4bb.jpg)
Had to travel across San Diego to pick up a prop and then come back with it on the bus. Definitely a great ice breaker. I'm young enough to still get numbers but old enough to remember when the Padres made it last to the world series!! Maybe I should bring the stand with me on the bus more often!
[image: 295xph0.jpg]
Started really surveying the corrosion with the wheels being off.
[image: m9rp90.jpg]
[image: 2060ft2.jpg]
[image: 6qdyza.jpg]
Prognosis: She's dirty. Living the high life has it's consequences and teenagers don't learn about them until they get older when their bodies can't heal as quick. Will be sending the sub frame to powder coating. Took a look at the lower lower tree and its rusted too. Possible client for Mr. Powder Coater. My lower forks look like they've been to Mouline Rouge and back, but if I have to take them all apart... they might get a paint + film treatment. The exhaust mannies have surface rust with a bit deeper around the connections. We'll see if there's a more local solution to resurfacing and finnishing them. Now my engine + brake calipers + other parts have that white shnee all over it. Either it's something specific that you guys know about or it's just dirt and salt. Seriously, it looks like something seagulls swim with... post feeding time. Next step is to figure out a not overly abrasive way to clean all of this stuff and then protect it with something that isn't flammable. Will be contacting 3M and other boat supply places in the next couple of days.
I can't stress this enough though. My HUGE restriction is space. I have no space in my apartment to store things and my most consistent work area is a glorified parking spot. Need to lower my profanity singing voice. Once I take off the yokes and tubes... I have to jerry rig a way to keep my bike from falling... outdoors... in a parking spot. My HOA will not like a monstrosity either. Literally have been googling solutions such as "DIY motorcycle stands" and "redneck motorcycle stands" and etc.
Off note: Does anyone happen to know what these wires on the right rear side of the bike are for? My rear brake light doesn't work anymore but want to ask you gurus.
[image: opzs4z.jpg]
Definitely a green thumb when it comes to all of this and I appreciate all of your advice so far. In posting this I hope you guys can shoot me questions down the road too. Perhaps I can give some tips on how to do things without the proper means to do them ;)
![[image: 295xph0.jpg]](http://i65.tinypic.com/295xph0.jpg)
![[image: m9rp90.jpg]](http://i64.tinypic.com/m9rp90.jpg)
![[image: 2060ft2.jpg]](http://i67.tinypic.com/2060ft2.jpg)
![[image: 6qdyza.jpg]](http://i68.tinypic.com/6qdyza.jpg)
![[image: opzs4z.jpg]](http://i63.tinypic.com/opzs4z.jpg)
AFAIK the relay is the fuel cut relay which is intended to start/stop the fuel pump running. The links below will take you to my Dropbox files with a high res wiring diagram and also the VFR800Fi service manual. Page 5-4 in the manual shows the component locations. The FCR should have two brown wires, and two black-white wires.
https://www.dropbox.com/s/6q8eu4drmci6fl1/VFR Wiring Layers hires full (2).png?dl=0

https://www.dropbox.com/s/wgmgfcbhi4emc4n/VFR800Fi 98-01.pdf?dl=0
Yeah, you guessed it already! There is a wire that comes from the brake pedal with two bullet connectors that should plug into those two open wires to activate the brake light. One bullet connector is gone on the green wire.
Maybe your HOA wouldn't be concerned with an ongoing project under a bike cover when you aren't around?
LOTS or props to you Dozy for jumping in on this deal That is the best way to learn stuff. That is how I've learned most everything I know about bikes and cars. Keep up the good work sir!
Thanks for the drop boxes. That wiring diagram will come in handy, especially after learning how to read it properly haha.
If it is indeed the brake light then that will have to be fixed down the road. Thanks for the heads up.
I got in touch with another friend to figure out the corrosion issue. He, just like I use to, owns and works on 70's and 80's BMWs which were prone to rusting in certain areas (2002's didn't have any sort of reliable coating/treatment what so ever). He gave me the last of what he swears by. Fluid Film
[image: 4g5j82.jpg]
Called them up and they said that as long as whatever you're spraying doesn't go over 230 degrees ish then it shouldn't start melting away. Isn't flammable once applied, can technically be used as a dielectric grease and even as a chain lubricant *scoff*. The customer rep I was talking to rode as well and he uses it on his bike.
Another hurdle I want to tackle is the rusty exhaust headers. It seems like they'll need a wire brush and naval jelly treatment before even getting off the bike. We'll see. Might of found a cheap treatment solution that will look upper middle class. Options are $300 for new stainless delkevics, $200 for ceramic coating or a $15 DIY option. Been looking at some random chevy restoration forums and a couple guys are raving about slip plate. Just called them up and a couple of them said they've been using them, on autos and motos alike, with great results that last for years. High temp, rust preventative and blah blah blah perfect.
[image: 2191m6v.png]
Can't do anything at the moment while it's raining in San Diego of all places. Just wanted to post to say thanks.
![[image: 4g5j82.jpg]](http://i66.tinypic.com/4g5j82.jpg)
![[image: 2191m6v.png]](http://i65.tinypic.com/2191m6v.png)
Yeah, '98-'99 had mild steel headers... :mellow:
Didn't switch to stainless until '00, probably for the extra heat generated by the cat.
Really? I hope it wasn't just because a 'they had to'! Beyond some electrical joojoo doesn't seem like honda skimped much on the 5th gens.
Well, bought the 'dry lube' is bought along with 60' of wire harness tape, for maybe 3 ft of harness (max), stainless steel hose clamps, double bubble windshield, chain guard plastic, fork axle tightening blots, and axle.
2 questions. Do y'all think the rear steps being gold would match with gold rear wheel (and front)? Everything else remaining stock colors. Also, whats y'all favorite bearing grease? Been eyeing some lucas oil Xtra duty for that steering bearing job in the future.
Btw, couldn't help myself when the rain backed off for an hour. Off to the powder coater!
[image: 2d0jl12.jpg]
Chair is properly propping up the exhaust now and all the wires, plugs and such are tucked away and kept dry. ;)
![[image: 2d0jl12.jpg]](http://i68.tinypic.com/2d0jl12.jpg)
What's the load rating on that chair? :wink:
I think you're doing the right thing by taking it apart as much as you have - keep up the good work :smile:
I just used good ol' multipurpose lithium grease for my head bearings. There are others who would advise using a waterproof grade if grease, but if the seals do their job properly, the regular stuff shouldn't be an issue. The steering bearings are actually remakbly easy, and no special tools are required at all. There is a good video of some Aussies replacing the head bearings on YouTube - whilst it's not on a Viffer, the steps are the same.
Not sure in the gold heelsets myself - it may detract from the wheels. They would be unique though...
Awesome job so far. As far as the headers go, my vote is for having them ceramic coated. Any competent shop should sandblast them (or another comparable method) down to bare metal before coating them. I would also advise you to buy new oem hardware (exhaust manifold studs, gaskets and clamps) so the reinstall goes smoothly. I am sure you studs are in bad shape. Here is my before:
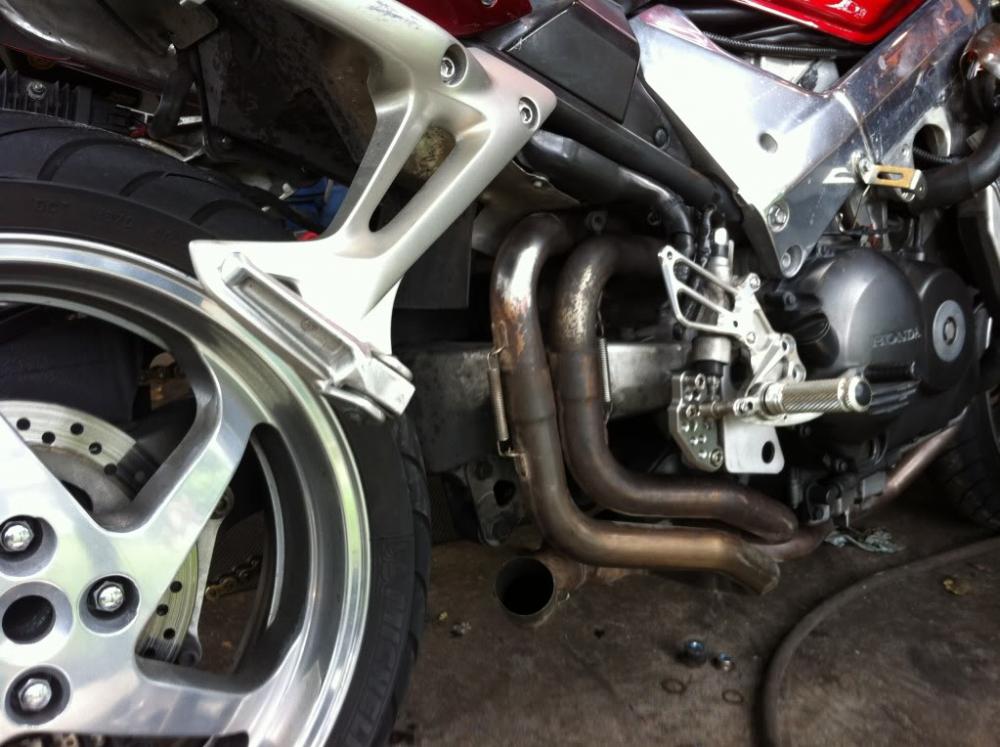
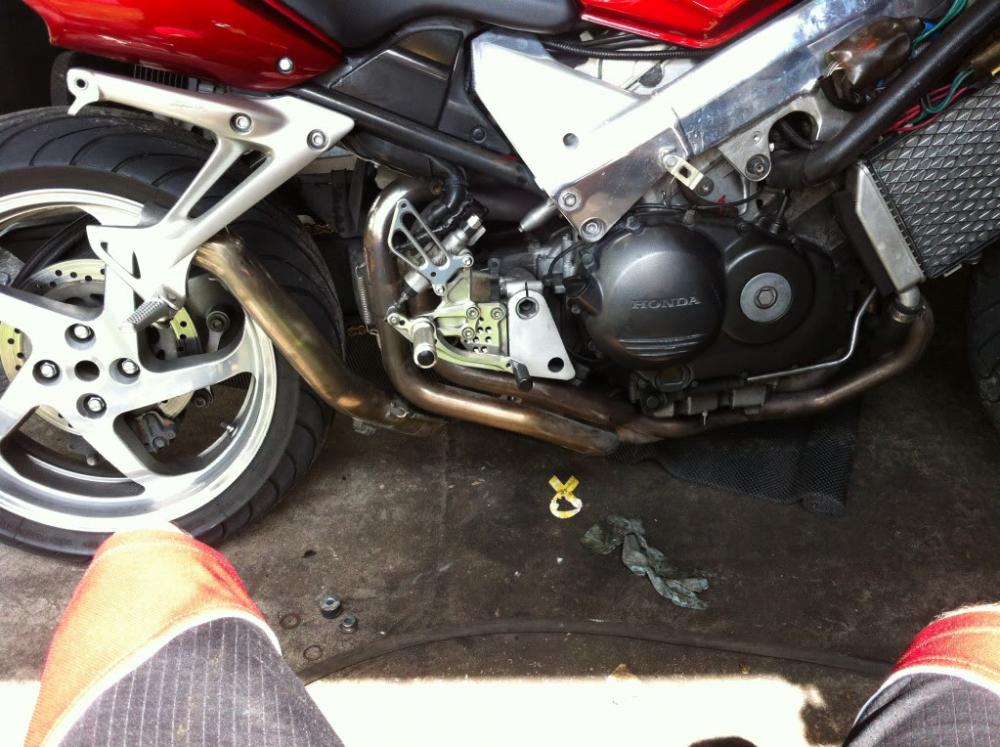
And my after ceramic coating:
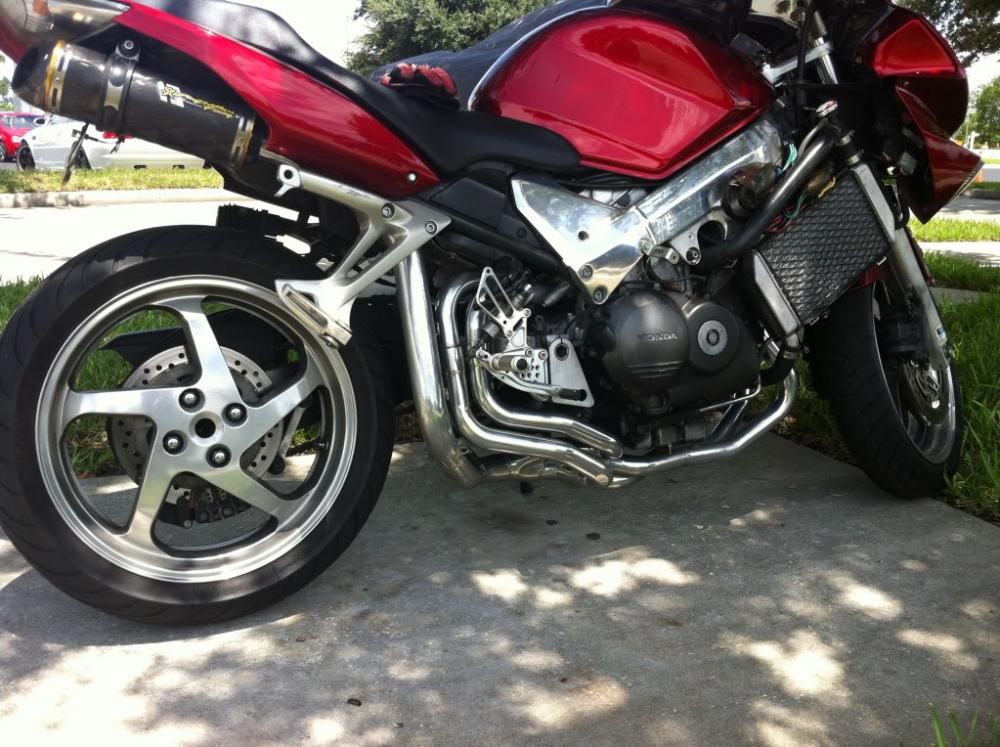
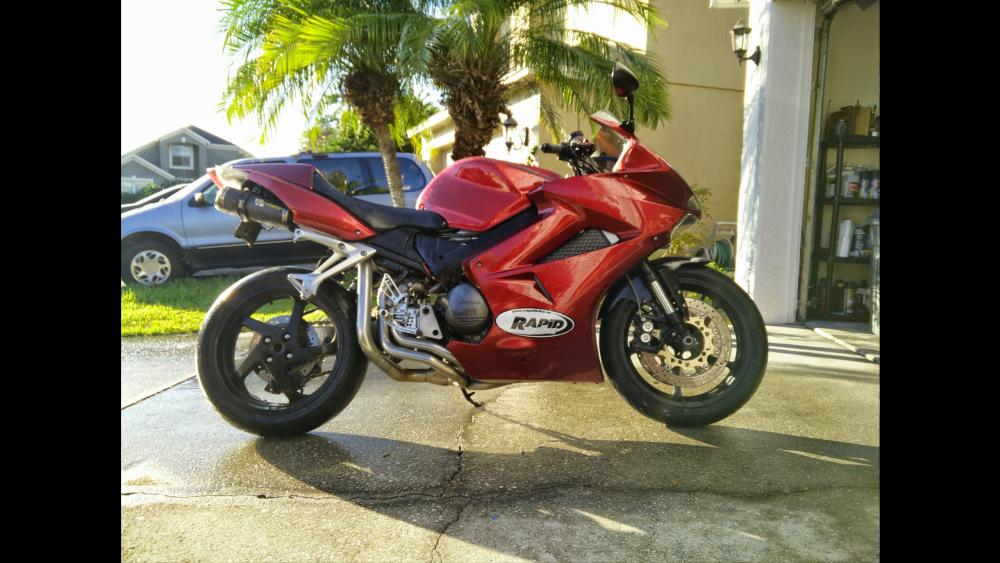
Ohh dem is some purdy pipes
18 hours ago, dozyproductionsThanks for the drop boxes. That wiring diagram will come in handy, especially after learning how to read it properly haha.
If it is indeed the brake light then that will have to be fixed down the road. Thanks for the heads up.
I got in touch with another friend to figure out the corrosion issue. He, just like I use to, owns and works on 70's and 80's BMWs which were prone to rusting in certain areas (2002's didn't have any sort of reliable coating/treatment what so ever). He gave me the last of what he swears by. Fluid Film
[image: 4g5j82.jpg]
Called them up and they said that as long as whatever you're spraying doesn't go over 230 degrees ish then it shouldn't start melting away. Isn't flammable once applied, can technically be used as a dielectric grease and even as a chain lubricant *scoff*. The customer rep I was talking to rode as well and he uses it on his bike.
Another hurdle I want to tackle is the rusty exhaust headers. It seems like they'll need a wire brush and naval jelly treatment before even getting off the bike. We'll see. Might of found a cheap treatment solution that will look upper middle class. Options are $300 for new stainless delkevics, $200 for ceramic coating or a $15 DIY option. Been looking at some random chevy restoration forums and a couple guys are raving about slip plate. Just called them up and a couple of them said they've been using them, on autos and motos alike, with great results that last for years. High temp, rust preventative and blah blah blah perfect.
[image: 2191m6v.png]
Can't do anything at the moment while it's raining in San Diego of all places. Just wanted to post to say thanks.
An easy, simple, and cheap formula for getting rusted/corroded hardware off is a 50/50 mix of acetone & ATF. Just make sure you don't get it on paint/plastic, and wear nitrile gloves.
10 hours ago, LoftustWhat's the load rating on that chair? :wink:
I think you're doing the right thing by taking it apart as much as you have - keep up the good work :smile:
I just used good ol' multipurpose lithium grease for my head bearings. There are others who would advise using a waterproof grade if grease, but if the seals do their job properly, the regular stuff shouldn't be an issue. The steering bearings are actually remakbly easy, and no special tools are required at all. There is a good video of some Aussies replacing the head bearings on YouTube - whilst it's not on a Viffer, the steps are the same.
Not sure in the gold heelsets myself - it may detract from the wheels. They would be unique though...
It's a late 70's chair so you know it's capable of heavy reinforcement capabilities ;D . I think I watched that same AWKWARD and very informative video by those aussies. Seems like the VFR just needs a spanner or two to make up the difference. Interesting on your grease input. I already have the lithium grease so that's great news but if anyone else has something to say, lmk.
CandyRedR46: Damn man, you got some purty looking pipes and definitely not making my decision any easier. Media blasting is a definite. Is there another way of getting around of going on partzilla and ordering the oem bolts and gaskets? Those alone adds up to around $50 :(
This is how my rear swing arm pivot bolt looks like. A bit of rust surround 45% of it. Once I remove the rust what do you think I should be doing? I can't think that primer and paint will hold up to where it's going to go... even with grease all around it. If that's the case, is this grounds to buy a new one? Same thing with my front axle. There is some rust on left side of it but it's decent everywhere else. I can't see the paint weathering more than a couple screw driver props through that hole.
[image: 2aad3ia.jpg]
Here is the pivot bolt.
Thanks MBrane for the rust remover heads up. My naval jelly supply is running low but got plenty of that other stuff :)
What I recently did: Sent rear subframe, wheels, steps to powder coater. Rust treated and painted the rest of the little things that I could do. ( license bracket, wet sanded and repainted ECU painted tray, rust treated and painted battery tray, lower radiator bracket, and some other bracket...)
The rust stuff is wearing me down but It's almost all taken care of. Once all the PC stuff and fairings will be taken care of, I'll be lower - middle middle class presentable. Once the exhaust is taken care, parts of the wiring harness is rerecovered, fixing some of the wiring connections; I'll definitely be middle class. Once that deep clean and new plastics have been replaced and refinished, protective layers have been laid down everywhere; I'll be in upper middle class arena. We'll see if I ceramic coat the exhaust and actually do the steering bearings. Thanks for peaking at the insignificant and slow progress updates in this thread. Really appreciate the help.
![[image: 2aad3ia.jpg]](http://i63.tinypic.com/2aad3ia.jpg)
I think the pivot bolt and front axle bolt don't do a lot. So if you get the rust off and coat with grease you should be ok. Front axle bolt should be cleaned and regreased at every tire change. At the same time clean the spacers and add more grease to the dust seals.
For rust removal on smaller parts you can soak overnight in vinegar.
Rain is gone. 1.5" you guys! We aren't in world ending drought anymore! Anyways, who needs beaches when you have a vfr project? Took the exhaust off today. Committed and bought the Slip Plate spray and new gaskets and rings. Will find clamps somewhere in this city.
There's rust in less places than expected. Off to sand blasting this week. Pretty easy removal. The two inner nuts, under the seat where the only pains with minimal cursing involved. A 5" (ish) extension did the trick and playing around from underneath and center. The nuts aren't held on too tight.
[image: za001.jpg]
Seems like a wire brush treatment will be needed for this. Once these are cleaned I'm thinking about spraying them with some of that Slip Plate stuff. I'm sure that once the headers are going to go back in, the nuts will stay in place with some blue anti seize. Will have to call them up for that.
[image: 2cr5xdt.jpg]
Coke and tinfoil and then some polish for the rest of this wolf exhaust
[image: 28wot36.jpg]
Interesting thing I found on the web about the wolf exhaust. Supposedly the American Wolf exhaust company was operating independently from the English Wolf exhaust company. Using similar designs and perhaps even claiming to be affiliated with across the pond when it wasn't the case. Anyone who, Wolf (England) is a division of Trident (triumph exhausts) and they were perplexed by this whole American Wolf thing.
![[image: za001.jpg]](http://i66.tinypic.com/za001.jpg)
![[image: 2cr5xdt.jpg]](http://i64.tinypic.com/2cr5xdt.jpg)
![[image: 28wot36.jpg]](http://i65.tinypic.com/28wot36.jpg)
Er... I've never heard of an American "Wolf" exhaust company making those exhausts. I thought they were all imported from the UK. Anyway, they're collector's items now.
Ciao,
QuoteWolf Exhausts - wolf-exhausts.com are or were a US company Exotic Sportbike who without permission from Wolf Racing UK told everyone they were sole distributor of Wolf products and ripped off and upset a lot of people. We have been warning people here about them for years and they are nothing to do with Wolf UK.
I stopped dealing with them a couple of years ago when I took over and their dealings came to light - and now without my permission I notice they have trident products on their website which is just a joke because we've never given anyone permission to sell our stuff.
Trident is me, my company and I make and run everything - as you will see if you do a few searches on this forum pretty much everyone has nothing but good to say about us - sure we make the odd cock up like everyone else but we always put it right as you will also see
If you do decide to buy some pipes from us they get shipped DHL which takes 2-3 days and is fully insured - we almost never have damaged goods but if it does happen we ship replacements immediately and DHL insurance covers all our costs - the customer is never out of pocket.
If you take a glance at the Sprint forum (which is very active with Trident sales right now) and read the comments there you should have bags of confidence...
http://www.triumphrat.net/daytona-deliberations/102613-are-trident-exhausts-wolf-exhausts.html
Ah. The usual "rogue foreign distributor" thing. There wasn't really a "Wolf USA", it was Wolf's US distributor that went rogue on 'em, screwing up their sterling(cough) reputation in the process. Not that it matters much anymore, but Peter Sorrell (of Wolf UK fame) had his own set of "baggage" back in the days of Wolf UK. I don't remember all of the details anymore, but I know I wasn't in a hurry to buy an underseat exhaust (before they stopped making them)...
Ciao,
I don't think lock tight on the exhaust stud nuts is a good idea. That sounds like the first ingredient in a pulling exhaust studs out of the head recipe. I think anti seize on the nuts and lock tight on the stud/head side's threads (if and when the studs back out of the head) is a much better idea.
CandyRedRC46, 1/17/2017 at 6:57 AMI don't think lock tight on the exhaust stud nuts is a good idea. That sounds like the first ingredient in a pulling exhaust studs out of the head recipe. I think anti seize on the nuts and lock tight on the stud/head side's threads (if and when the studs back out of the head) is a much better idea.
Thanks for the heads up brother!
JZH, 1/16/2017 at 11:52 AMAh. The usual "rogue foreign distributor" thing. There wasn't really a "Wolf USA", it was Wolf's US distributor that went rogue on 'em, screwing up their sterling(cough) reputation in the process. Not that it matters much anymore, but Peter Sorrell (of Wolf UK fame) had his own set of "baggage" back in the days of Wolf UK. I don't remember all of the details anymore, but I know I wasn't in a hurry to buy an underseat exhaust (before they stopped making them)...
Ciao,
A bit interested now. What was their own "baggage"?
Still need to find a sand blaster for my headers and battery tray. Unfortunately, work has come to a halt since I've been working 10 hour days and it's been raining! 3" of rain, in SAN DIEGO, in the next 3 days! Came up with some ideas about taking off the front while this is all still out in the parking lot lol. With work and the rain, I'll only be able to work one job at a time with slow progress. Figured the first thing to do is make a stable perch out of some 2x8's for the oil pan to help out that 'center' stand. First job will be to work on the front forks. Thinking about using wooden rods to emulate the removed forks in order to still be able to use the front wheel stand and keep the little extra stability. Once the oil is drained, forks are dismantled and taken off to the powder coater, my next job will be the removal of the upper and lower trees. Will try to expand upon the 2x8 oil pan base to make a front stand that rests on the frame.
Will provide pictures of the upcoming progress and will post up pictures of the fairings and all the powder coated goodness that should be coming in the next day or two! Cheers
Sorry, don't recall the details. Must have been customer service issues shared on the Big List at the time. I just remember his name.
Ciao,
Keep it up - I look forward to seeing more photos of your handiwork - don't forget to keep the inner race from the old lower bearing - it's the perfect tool for driving on the new bearing.
Thanks for the encouragement mate. Rain continues to be a 100% hindrance. Smaller item updates will continue. My painter said he's STILL working on the fairings, but whatever insures a good job. Pretty cool thing he did, without tell me, was putting rhino liner like stuff on the under side of the fairings to strengthen them a little bit. If you can find fault in that, well too late!
Here is a little something though :)
[image: 2prwem9.jpg]
Question:
[image: 11vjlw5.jpg]
Are such exhaust gaskets supposed to be semi brittle? Bought this as part of a pack that came from across the pond. Might just have to go to Napa and buy the material in order to make a custom gasket.
Now I have some very seriously faded chain guard/dash/speedo. Been looking up what to do and what's more "permanent". Looks like a little SEM prep, promoter, (either) colorcoat or bumper paint along with sealer should do the trick. Going to call their tech support tomorrow. we're talking about $15 a can for a one time use for all these things :( Might as well start buying new plastics at that point... but where's the fun in that?
![[image: 2prwem9.jpg]](http://i64.tinypic.com/2prwem9.jpg)
![[image: 11vjlw5.jpg]](http://i67.tinypic.com/11vjlw5.jpg)
Those are the same ones as on my RC51. They suck!!!! I didn't have any fall apart like that but if you are too rough with them the will disintegrate.
The Wheels look fantastic!!!
dozyproductions, 1/24/2017 at 5:56 PMThanks for the encouragement mate. Rain continues to be a 100% hindrance. Smaller item updates will continue. My painter said he's STILL working on the fairings, but whatever insures a good job. Pretty cool thing he did, without tell me, was putting rhino liner like stuff on the under side of the fairings to strengthen them a little bit. If you can find fault in that, well too late!
Here is a little something though :)
[image: 2prwem9.jpg]
Question:
[image: 11vjlw5.jpg]
Are such exhaust gaskets supposed to be semi brittle? Bought this as part of a pack that came from across the pond. Might just have to go to Napa and buy the material in order to make a custom gasket.
Now I have some very seriously faded chain guard/dash/speedo. Been looking up what to do and what's more "permanent". Looks like a little SEM prep, promoter, (either) colorcoat or bumper paint along with sealer should do the trick. Going to call their tech support tomorrow. we're talking about $15 a can for a one time use for all these things :( Might as well start buying new plastics at that point... but where's the fun in that?
I have buffed up sun-faded black plastic with the same cut and polish compound that I used on the paint. It worked really well especially on the chain guard.
For sun-faded switch pods on the handlebar, Vaseline does a surprisingly good job at bringing back some shiny black.
A little update. The rain finally stopped and work has finally given me some time off.
So the wheels turned out great. Satin gold which we can work with for the moment. All the other bits that I wanted coated silver/aluminum came out awful. I told him as close to OEM as possible but, of course he doesn't have anything close to it and powder coats on something that barely resembles mud gray. Would look good, if the frame and top tree didn't look SHINY in comparison. My "guy" is a good guy but this was too anti climatic after the long wait to pick up the parts. I'm starting to lose faith in him, since he still hasn't finished my fairings yet. It's been almost two months now.
QUESTION: With the frame and rear swing arm still "silver", do you think that powder coating the rear and side pegs and handle bars black would be worth it? It's already going to try to refinish these pieces. At this point, the front forks can be either silver or black. The top triple could look good in black as well. A lot of black bits with some silver/SS accents might work. Plus gold wheels and gold chain? hmmmmm
PROGRESS FOR TODAY: LOL
[image: 21j3xp2.jpg]
I swear it holds. Took 4 1/4 pieces from home depot and glued all the pieces together. It's close to 39-41mm.
[image: k3ng60.jpg]
Hate that general look and feel of 'crustyness'. Took off a couple of more parts (that hold hoses) I'm going scruff up and beautify. The lower tree and front frame are rusted. What a pita those two will be to take out, resurface and put back in... not to mention to replace the bearings.
[image: k0r5zo.jpg]
A tab and a half are broken off for the dash. This bike was laid down before. I tried plastic welding this before but I didn't mix the ingredients properly. Will do it better this time and will document.
![[image: 21j3xp2.jpg]](http://i67.tinypic.com/21j3xp2.jpg)
![[image: k3ng60.jpg]](http://i66.tinypic.com/k3ng60.jpg)
![[image: k0r5zo.jpg]](http://i64.tinypic.com/k0r5zo.jpg)
QuoteI have buffed up sun-faded black plastic with the same cut and polish compound that I used on the paint. It worked really well especially on the chain guard.
For sun-faded switch pods on the handlebar, Vaseline does a surprisingly good job at bringing back some shiny black.
Vaseline eh? (add that to the mental note book) Some other options I have listed are Rustoleum paint for plastic, wd40 and polishing them with Flitz metal/plastic/fiberglass polish. We'll see.
PLANS: Well this next week I'll be brooding on getting those (ALREADY) finished parts refinished and getting the exhaust sand blasted. Most likely will resort to bringing cardboard and spraying the Slip Plate onto the exhaust immediately after picking it up. Might just go behind a tree.
Next is using some of this Rustoleum along side some SATIN clear coat for the dash shroud and dash. Can use my old high school math compass to create some circles to cover the gauges. The satin clear coat should help keep the sun out of the eyes. To keep it uniform, will paint the chain guard as well.
[image: xdigwy.jpg]
![[image: xdigwy.jpg]](http://i63.tinypic.com/xdigwy.jpg)
1 hour ago, dozyproductions
Hate that general look and feel of 'crustyness'. Took off a couple of more parts (that hold hoses) I'm going scruff up and beautify. The lower tree and front frame are rusted. What a pita those two will be to take out, resurface and put back in... not to mention to replace the bearings.
I agree that getting the triples and bearings out is a pain. I can recommend the use of a dremel and cutoff wheel to cut through the lower bearing inner race, makes removal a much less painful exercise. An 18" pry bar and hammer will also make removal of the outer races fairly easy.
If you keep the old races and put a saw cut through them, they can be used to protect the new bearing races while you are pounding them home (if like me you don't have the right tools).
For grungy looking fairing stays, I have just scrubbed them down and then brush-painted them in satin black enamel. This looks absolutely fine unless you are really fussy about such things, and saves on a lot of disassembly.
Thanks Terry. Just barely have a dremel and maybe just barely have the tools so will definitely use the tips. So essentially you'd use the old bearings to apply even down pressure for the new bearings? That sounds like the job of a $100+ tool ;)
Unfortunately my old BMW days won't allow me to be at peace if I scuffed and brushed while the stay was on the bike. Satin would be a nice touch in that type of area though. Thanks for the input and the help mate. Got a link to some pictures of your bike by any chance?
Someone tell Rustoleum that plastic doesn't rust. :tongue:
Is it me or are there a lot of 5th gen projects lately?
Good luck Dozy.
21 hours ago, dozyproductionsThanks Terry. Just barely have a dremel and maybe just barely have the tools so will definitely use the tips. So essentially you'd use the old bearings to apply even down pressure for the new bearings? That sounds like the job of a $100+ tool ;)
Unfortunately my old BMW days won't allow me to be at peace if I scuffed and brushed while the stay was on the bike. Satin would be a nice touch in that type of area though. Thanks for the input and the help mate. Got a link to some pictures of your bike by any chance?
Always happy to help Dozy. Here's a link to my gallery:
http://www.vfrdiscussion.com/index.php?/gallery/album/6595-terry39s-v4s/
I've had my 99 5th gen since 2014, and it is now up to 97000km. As bought it was in bone stock and unmolested condition, and replaced a 1995 Suzuki RF900 that I had owned from new. I have messed around a lot with the suspension and brakes and now have a CBR600F4i fork and brakes up front, and a DMR CBR929 shock in back. Apart from that the bike is basically stock, I occasionally add a Delkevic muffler for some naughty sound, and I have changed all the major lights to LED, and fitted 00 mirrors in place of the condoms.
My VFR also shares my garage with a 1997 VTR1000F and 1990 ST1100. Both of these needed a lot of cleaning and some parts re-painting (forks, head covers) and I have re-covered the seats on both, and upgraded the suspension and brakes as well. It is a luxury and comfort to have three bikes, and it takes away any hesitation over pulling something apart that might take some time to reassemble. Best of all, my entire 3 bike fleet cost me about 40% of the price of a new VFR800!
Someone tell Rustoleum that plastic doesn't rust. :tongue:
Is it me or are there a lot of 5th gen projects lately?
Good luck Dozy.
lol and Thanks! People might be finally realizing that 5th gens gets you the ladies! I'v
4 hours ago, TerryAlways happy to help Dozy. Here's a link to my gallery:
http://www.vfrdiscussion.com/index.php?/gallery/album/6595-terry39s-v4s/
I've had my 99 5th gen since 2014, and it is now up to 97000km. As bought it was in bone stock and unmolested condition, and replaced a 1995 Suzuki RF900 that I had owned from new. I have messed around a lot with the suspension and brakes and now have a CBR600F4i fork and brakes up front, and a DMR CBR929 shock in back. Apart from that the bike is basically stock, I occasionally add a Delkevic muffler for some naughty sound, and I have changed all the major lights to LED, and fitted 00 mirrors in place of the condoms.
My VFR also shares my garage with a 1997 VTR1000F and 1990 ST1100. Both of these needed a lot of cleaning and some parts re-painting (forks, head covers) and I have re-covered the seats on both, and upgraded the suspension and brakes as well. It is a luxury and comfort to have three bikes, and it takes away any hesitation over pulling something apart that might take some time to reassemble. Best of all, my entire 3 bike fleet cost me about 40% of the price of a new VFR800!
Looks like some good looking bikes and good looking memories! Either you got all your bikes at a steal or Honda is stealing from us now. Have to ask, are you using LED head lights? Saw these LEDS: https://www.amazon.com/dp/B00WVJR0D8/ref=wl_it_dp_o_pC_nS_ttl?_encoding=UTF8&colid=2KV5LJQOJAPBG&coliid=IWCGEZ04QBSE7&psc=1 . Plug n Play @ 45w for way more light output. Interesting.
[image: 63zyb6.jpg]
TODAY: Got the front stay off. PARTIAL RUST FOR ONCE. Almost got the triple trees off. Was defeated by not having torq wrenches of all things.
Seeing as my powder coated parts came back UGLY, have been rethinking the color scheme. Bouncing some ideas. Of all the powder coated parts: Black forks, black handle bars, black top yoke and black rear pegs. Then will get the OEM silver for the side step. The picture below isn't my bike but, with the color of it's wheels, is the closest I could get to what it will be like. Now is it going to be gloss black or satin black. The choices.
![[image: 63zyb6.jpg]](http://i66.tinypic.com/63zyb6.jpg)
Looks like we were both in the same boat this weekend.
Bearings? Loving the 'garage'. ;)
13 hours ago, TerryAlways happy to help Dozy. Here's a link to my gallery:
http://www.vfrdiscussion.com/index.php?/gallery/album/6595-terry39s-v4s/
I've had my 99 5th gen since 2014, and it is now up to 97000km. As bought it was in bone stock and unmolested condition, and replaced a 1995 Suzuki RF900 that I had owned from new. I have messed around a lot with the suspension and brakes and now have a CBR600F4i fork and brakes up front, and a DMR CBR929 shock in back. Apart from that the bike is basically stock, I occasionally add a Delkevic muffler for some naughty sound, and I have changed all the major lights to LED, and fitted 00 mirrors in place of the condoms.
My VFR also shares my garage with a 1997 VTR1000F and 1990 ST1100. Both of these needed a lot of cleaning and some parts re-painting (forks, head covers) and I have re-covered the seats on both, and upgraded the suspension and brakes as well. It is a luxury and comfort to have three bikes, and it takes away any hesitation over pulling something apart that might take some time to reassemble. Best of all, my entire 3 bike fleet cost me about 40% of the price of a new VFR800!
On a 98/99 you dont need much to make it a great bike. You already have the great fueling of a non-emissions bike and your suspension/brake work is the icing on the cake. Just beef up the charging system and enjoy.
2 hours ago, CandyRedRC46On a 98/99 you dont need much to make it a great bike. You already have the great fueling of a non-emissions bike and your suspension/brake work is the icing on the cake. Just beef up the charging system and enjoy.
You are quite right CR. The VFR has a non-standard RR (parts code suggests from a Ducati) fitted by the PO, and I have hard soldered the RR-stator connector, plus fitted a voltmeter, and paid lots of attention to ground connectors. The bike now sits at a rock steady 14.2V all day every day. I also have a voltmeter on my ST1100, and a voltage indicating LED light on the VTR for the same reason.
4 hours ago, dozyproductionsBearings? Loving the 'garage'. ;)
Fork rebuild, new rear shock, brakes all around, and some beautification. My garage doubles as a dinning room :). No wonder I'm not married hahahaaha.
11 hours ago, dozyproductions
Looks like some good looking bikes and good looking memories! Either you got all your bikes at a steal or Honda is stealing from us now. Have to ask, are you using LED head lights? Saw these LEDS: https://www.amazon.com/dp/B00WVJR0D8/ref=wl_it_dp_o_pC_nS_ttl?_encoding=UTF8&colid=2KV5LJQOJAPBG&coliid=IWCGEZ04QBSE7&psc=1 . Plug n Play @ 45w for way more light output. Interesting.
No I don't think Honda is stealing from us, more that used bikes drop far more in dollars than in their true value. I was certainly guilty of thinking that once a bike had more than 30,000km, it was past it's best. I now believe that if you are prepared (as I see you are) to put some effort into "bringing back the new" with a bit of paint, suspension, chassis and brake work, there nothing wrong with a cheap, higher mileage bike provided it hasn't been terminally mistreated. It is extremely satisfying to ride and enjoy my 3 bikes knowing that they are running and riding as good as they can be. I only paid US$900 for my ST1100, and US$2000 for the VTR!
Regarding the headlights, yes I have LEDs in all 3, a Cyclops 3800 Lumen in the VTR, and unbranded but identical bulbs in the ST. These both use a separate driver module which I have attached to the headlight shell with double-sided tape, and have a cooling fan in the back of the "bulb", but are otherwise plug and play.
The bulbs in the VFR are a little different with finned heat-sinks and no fan, and built-in driver.
The bulbs behave slightly differently, the fan-cooled units run both low and high emitters on high beam, the finned unit operates the emitters separately.
The light output of an LED is 3-4 times that of a halogen bulb, for slightly lower power consumption. The later LED's have small shrouds in front of and above the front low beam emitter which mimics the shroud in a halogen H4, some of the older LED's don't have that (my older Cyclops for example, and the bulbs that you linked to) and so upward light spill is worse. In any case with 3-4 times more light output, you definitely get noticed a lot more.
Steal on that VTR! As always with older bikes, and cars, I wish the parts availability would be there for VFR's, or even older CB's. Would pay a monthly subscription just to know that the parts will be there in the future. I remember working on a 72' bmw 2002 in which they had a special, specific screw for the rear body panel. We needed 4 of them, for 2 cars, and the shop had 5 of them. My butter fingers lost 2 of them when one of the shop cats got hungry and all of a sudden 'NLA' got serious... tiny body panel screws that every 2002 freaking needed but NLA... why?!?! haha.
Searching on ebay/amazon for those bulbs (with shrouds) and they're all so bloody cheap. Might as well pull the trigger and start the slow process of attaining a solid 14.2V like you have. VFR lights are just so atrocious and useless against San Diego's ever deepening potholes. How are you liking the 'soft' white?
10 hours ago, Epyon007Fork rebuild, new rear shock, brakes all around, and some beautification. My garage doubles as a dinning room :). No wonder I'm not married hahahaaha.
Good luck! She's going to feel like new! Definitely cheaper than ! ;D
Will trickle updates. Next week it should really start vamping up. What you all think on the color scheme? If I'd go black, satin or gloss? Definitely not back.
The wheels look superb - good choice!
The exhaust gasket is semi-flexible and can break easily if something moderately weighty is placed upon it, which it looks like yours has. Is it the rear downpipe gasket that you need? I've got a spare that I could mail over to you, although your dealer should be able to supply one as well.
I'd say the pegs and heelsets etc will look good powdercoated, even if it's not the OEM finish. I've had my yoke coated in a satin black - there's a couple of photos in my thread on the 6th gen page if you want to see what it looks like. There's a good RWB thread in the 6th gen section too that shows what a crackled black finish looks like.
if you want to see what a wrinkle/ sandpaper like texture looks like on a RWB. not sure if this is the thread loftust was talking about.
http://www.vfrdiscussion.com/index.php?/forums/topic/84826-my-07rwb-projectbuild/
was going to link to my 02 that I did a couple of years ago for some red on mirror gloss black action too but pictures are gone from that thread. see 02 refresh. if you interested in seeing what that looks like let me know I will post some pictures here when I get home and have my computer
dozyproductions, 1/31/2017 at 7:48 PMHow are you liking the 'soft' white?
Once you've used LED's, the standard halogen lights look very orange and feeble. I love LED.
14 hours ago, LoftustThe wheels look superb - good choice!
The exhaust gasket is semi-flexible and can break easily if something moderately weighty is placed upon it, which it looks like yours has. Is it the rear downpipe gasket that you need? I've got a spare that I could mail over to you, although your dealer should be able to supply one as well.
I'd say the pegs and heelsets etc will look good powdercoated, even if it's not the OEM finish. I've had my yoke coated in a satin black - there's a couple of photos in my thread on the 6th gen page if you want to see what it looks like. There's a good RWB thread in the 6th gen section too that shows what a crackled black finish looks like.
I bought an ebay kit which most likely explains why it was so "brittle". Thanks for the offer but my new gasket came in and it's another step up in quality thankfully. Really appreciate the helping hand there! Saw your pictures. Satin is a nice finish.
10 hours ago, TerryOnce you've used LED's, the standard halogen lights look very orange and feeble. I love LED.
Seems like it's settled. :D
3dcycle!!! that's some gorgeous work! Was wondering what that textured finish was called. Didn't know that it was a powder coat. Your work looks amazing and bike is stunning! Thank you and Loft, I think I have an idea what color scheme I want (with what I'm able to play with) . Will really try to get something going this weekend and definitely will get some real work start this week. I contract for work and I have a week off and my neighbor said I have his garage to use while he's gone. Good guy! I just got a drill bit buffing kit in the mail so I'm going to either sand and buff or sand and clear all the lights and signals in the next couple days. Cheers for the help and encouragement!
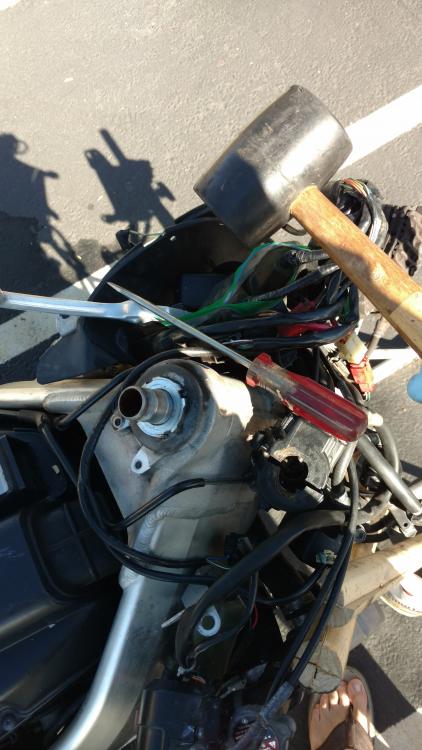
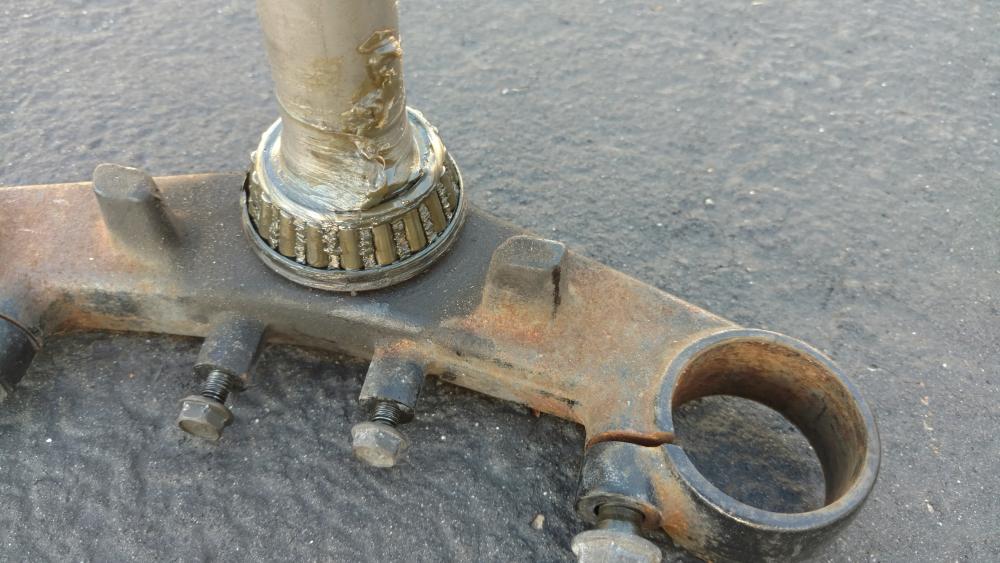
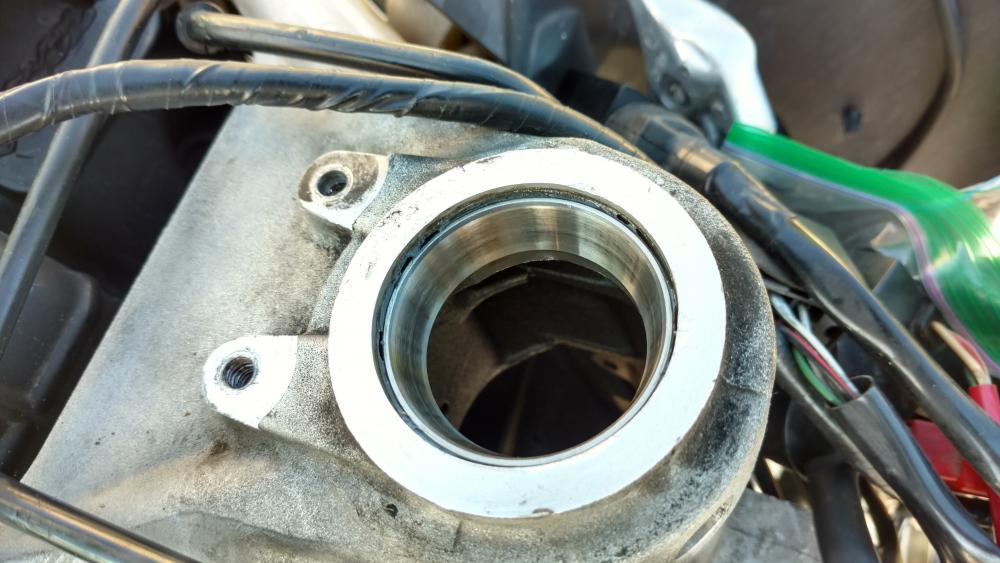
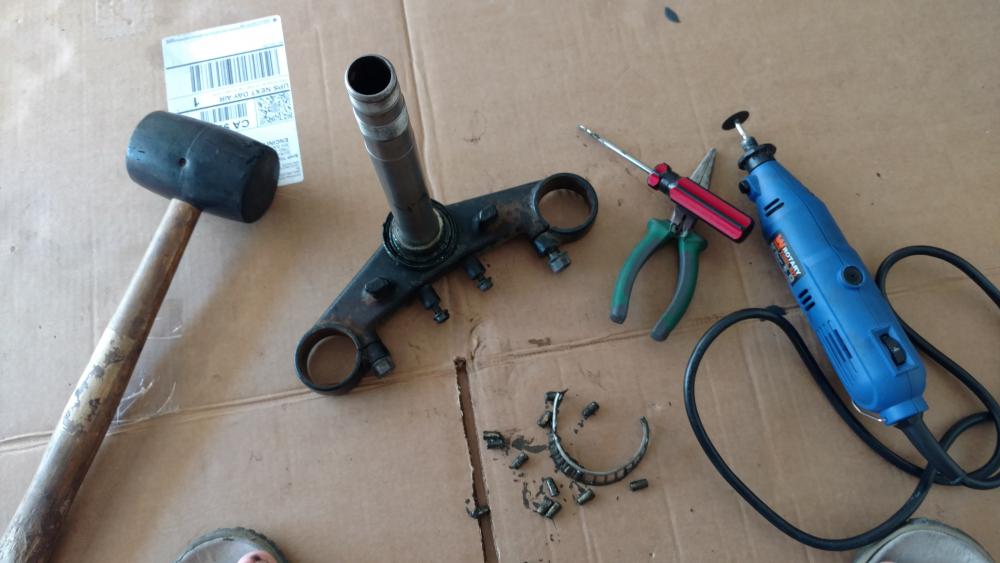
Hey guys. So with a combination of some rain and an ongoing couple weeks worth of the stomach flu, finally got the last pieces off the bike. Use a dead blow and screw driver to shimmy out the top nut to get the lower triple tree out. No scoring of any kind so that's good news. Took a dremel and some more chiseling to get the bearing out. Rust...... rust on the tree, rust on the stay and rust on the battery box are the ones I have to work on.
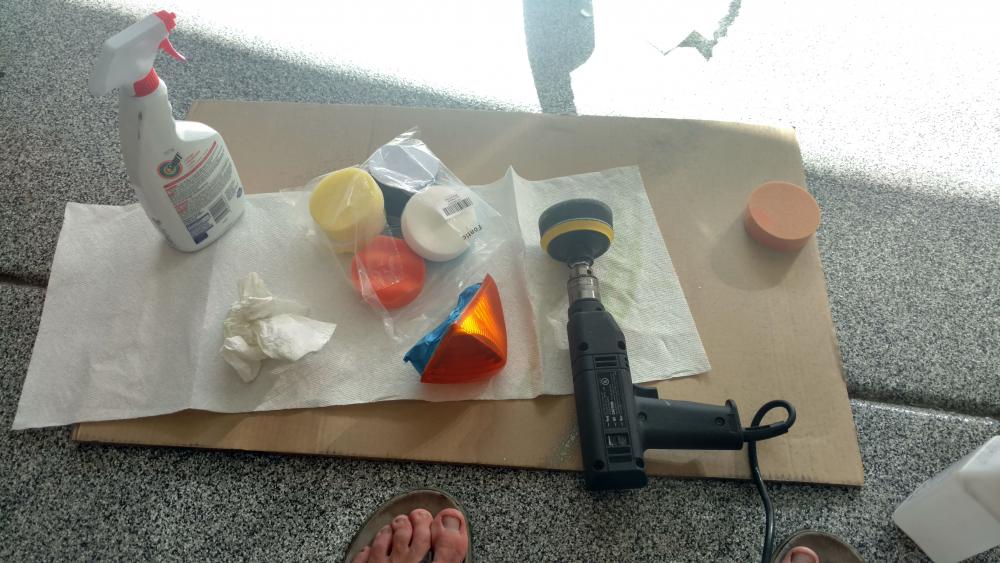
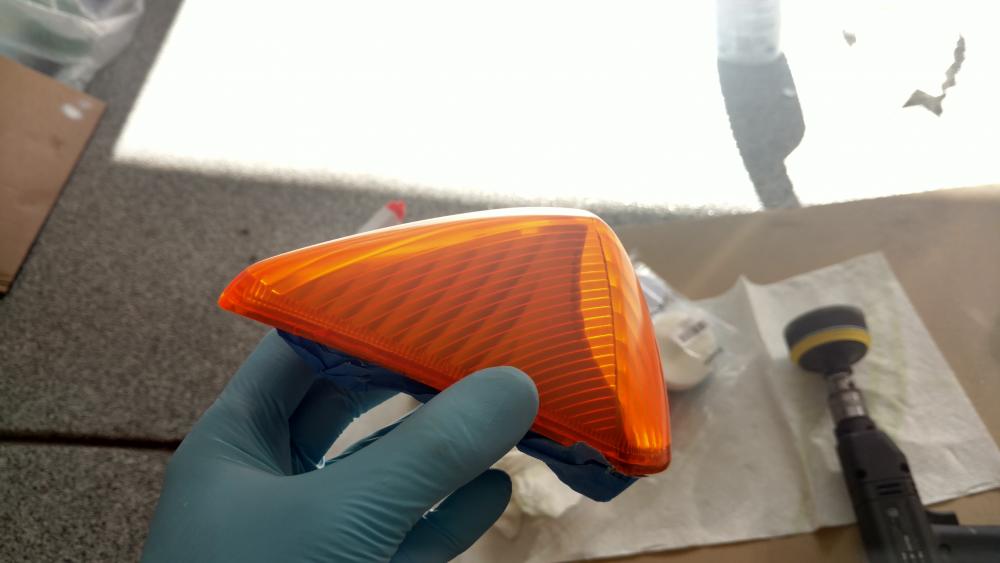
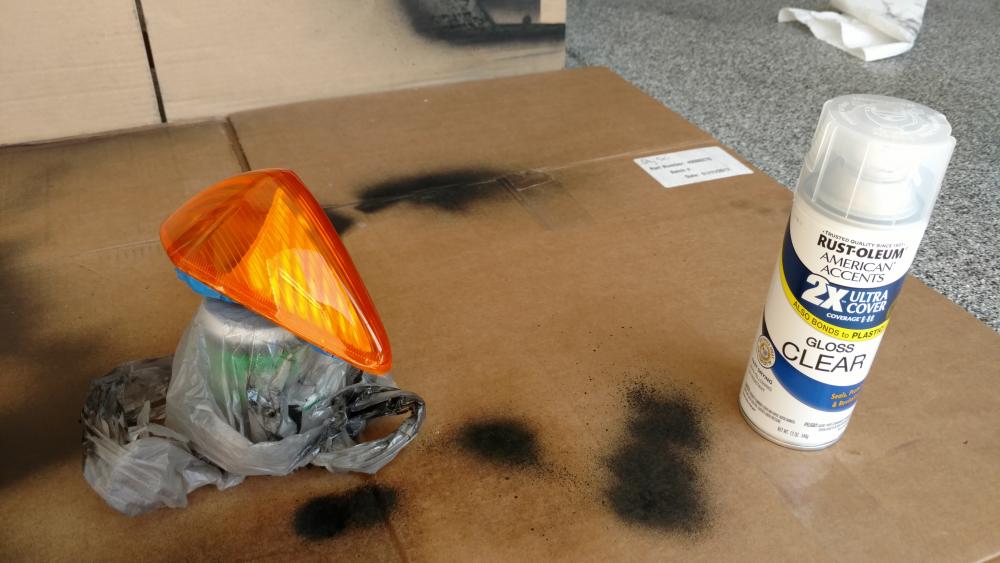
Side project time was to see how the buffing and clearing would go with the side markers. I don't have pictures but this one was landed upon so there some good scratches. Hit it with some 400 grit, then 800, then 1200 and finally some 2000. Buffed it with meguires rubbing compound, a la a kit I bought for 9 bucks on amazon, and got a decent shine. Next was some dupli color adhesion promoter and rustoleum plastic clear gloss. Turned out great!
[image: b3khkx.jpg]
Thought about sand blasting these guys but said screw it. Costs are going up too much. Citri Stripped these guys, 3 hours a piece 2 times before the paint/powder coat lifted. Jellied these suckers for a minute as well.
[image: 11sngw2.jpg]
[image: 35cijw7.jpg]
[image: hukhmr.jpg]
Etch primed all the rusted parts. Sanded, buffed and cleared the head lights. Waiting till I can wet sand and buff. Also painted the side view mirror stocks. It's a little detail but these things were so rough. Was using real low grit to get them smooth again. Such much better.
[image: zwxrac.jpg]
The other turn signal I cleared got a little screwy. Started seeing spider webs in the clear so waited for it to dry. See those grooves? Those guys started showing up right before I started trying to strip the clear with citri strip. The strip didn't work so I had to wheel grind through to confirm if they were still clear coat or on the actual plastic. Seems like the surface melted or had a reaction with the Rustoleum clear coat. Called their tech support and the clear is plastic safe and they're just as puzzled. They offered to start a claim so great service on their end.
![[image: b3khkx.jpg]](http://i64.tinypic.com/b3khkx.jpg)
![[image: 11sngw2.jpg]](http://i66.tinypic.com/11sngw2.jpg)
![[image: 35cijw7.jpg]](http://i66.tinypic.com/35cijw7.jpg)
![[image: hukhmr.jpg]](http://i64.tinypic.com/hukhmr.jpg)
![[image: zwxrac.jpg]](http://i64.tinypic.com/zwxrac.jpg)
I'm really enjoying this thread of yours, and looking forward to seeing the end result. It's a shame that much of our hard work is covered up though!
Thanks man and same here! Honestly, as long as all that works stays fresh in the mind haha.
TODAY/TOMORROW/NEXT WEEK: Got the stay and lower tree painted black. Rustoleum pro black looks sooooooo good. Called their tech support asking when is a good time to buff the headlight and their other enamel paints. The tech said to wait SEVEN days. Caution: When using Rustoleum, make sure you have weeks for it to dry and harden. Any who, will work on the extra side view mirror pieces, fix and re paint the dash and paint the battery box tomorrow. It's going to rain again so waiting a week for all these parts to dry wont be an issue. Next week, I'll try to re attach the rear subframe and exhaust pan. Attention can go back to working on the bike itself again. A big worry is re wrapping the wire harness. Don't know how much needs attention but at least a good couple of feet worth.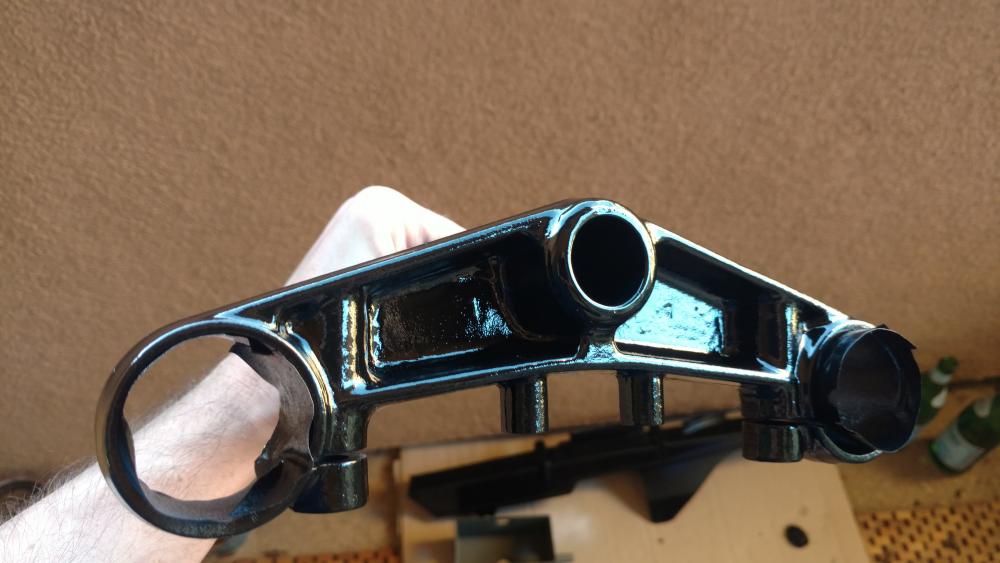
[image: 2nbbl3d.jpg]
TONIGHT: Going to talk to 'my guy' tonight about where the hell my fairings are and what the hell is going on about my powder coat pieces. He's telling me that all the pieces he fibbed on (all of them), color wise, he's going to have to charge me again on, plus the only silver he has isn't going to match 100%. He's one of those guys that are so nice it's hard to know what's genuine or not and he's so vague about everything that I still don't know the status of my exhaust. Well, I'm not throwing out my innards anymore so this is going to have to stop. Regardless of who does the job, thinking about using two colors to PC. The front foot rests/front pegs/front foot levers will be frame silver. So the attention from the frame matches straight down.The forks, upper tree, handle bars and rear foot rests and pegs will be satin black (or gloss, I don't know yet) to make the gold wheels pop.... . Either way, not excited for this talk.
[image: 63y6i9.jpg]
Here is a rough idea of the scheme I'm talking about. Laugh away at the Microsoft paint work if you want haha. If this is your bike, it looks great!
FORESEEABLE FUTURE: Once those forks are back from PC, put them back on so I can scoot the bike back close enough to a power outlet. Have new oem value front/rear sprockets and chain. Don't have a chain breaker of any kind but do have a dremel and a will to find a way. Still need to find how and when the deep cleaning of the bike is going to commence. I have a dremel and drills for polishing and buffing tools but no hose or room for the deep cleaning step I need to do.
![[image: 2nbbl3d.jpg]](http://i67.tinypic.com/2nbbl3d.jpg)
![[image: 63y6i9.jpg]](http://i65.tinypic.com/63y6i9.jpg)
If your foot pegs are off, you won't need to break the chain at all. Just move the eccentric adjuster all the way loose and it will come off. Or remove the front sprocket first and it will be even easier. I don't remember if you said they are off for powder coating. If not, and if you have big enough sockets to take the right side nut off the swing arm pivot bolt, you can move the left foot peg bracket out enough to pass the chain out.
You can get a local shop to rivet link the chain together and then you can install it that way.
Thanks for that. Never did the chain before but do have the tool for it. Almost everything is off for powder coating so that's how it'll be done. Secretly, I'm thinking aloud to you guys just for something like this. ;)
Talked to 'my guy' last night. Things are going to get done. I don't know why my fairings have taken 2 months but have been told that the rhino liner (for the back) will be finished in a week or two. Was trying to make sure he wasn't screwing me on the PC pricing so came in the conversation having quotes from 3 other shops. His was still cheapest by far. Good
I had painted my 07 919 a custom gunmetal with painted sinful cinnamon (pearl red) Honda wing and racing strip down the center, and it got damaged I could not stomach repainting myself so I had a guy do it for me, the strip was crooked and he put the wings on backwards. I got to pay for him to fix it again, hot hues paint is not cheap either. I hate painters around here. they would rather do insurance jobs on cars where nobody looks close at shit. orange peel to just shotty work. that's why I do all my own finishes, if it sucks its cuz I suck. lol
3dcycle, 2/17/2017 at 9:50 AMI had painted my 07 919 a custom gunmetal with painted sinful cinnamon (pearl red) Honda wing and racing strip down the center, and it got damaged I could not stomach repainting myself so I had a guy do it for me, the strip was crooked and he put the wings on backwards. I got to pay for him to fix it again, hot hues paint is not cheap either. I hate painters around here. they would rather do insurance jobs on cars where nobody looks close at shit. orange peel to just shotty work. that's why I do all my own finishes, if it sucks its cuz I suck. lol
See that aint right. If they screw up, it's on them! Call it an occupational hazard. Speaking of that, my paint guy is giving me my parts on sunday... but he hasn't shot the clear till this week. WEAK! I finally got my exhaust sand blasted and will be getting that on monday. Will be interesting to see how it looks with the dry lube. Picture like a darker and smoother exhaust wrap. Tres chic
So pardon with the delay. Right when I was about to work on the bike, my work told me to get on a plane to Nacogdoches TX again! Have been there for the past week and a half? I dunno because time goes by so quick on the road. I ended up receiving my powder coated parts. They 'over sprayed' the sand material on the inside of the forks and left it pretty rough. Dropped them off to my shop to so smoothen both forks out along side with pressing the lower steering head bearing for good measure. Well, the shop ended up finishing up the forks and putting in seals without letting me know. Well, thats some more $$ but after all this stress coming from my interactions with the paint guy, all is well.
What I Did TODAY: Attached the rear subframe back on. Put the upper head bearing and out races in and put the lower and upper yokes in. Thanks for all of you guys providing some much info on this board. Put the outer races in the freezer and it was just the trick. Afterwards, the shocks and forks went in. I had two first shove the shocks, upside down, from the top so the powder coat would give way. They finally dropped in. If any of you are getting your stuff PC'd, make sure those guys are given the heads up on the little details like that. Had initial problems getting some bolts in as well. Then I took the chain off by taking off the front sprocket. OMG there was so much dirt and muck that definitely looked like something I've seen in the bottom, or near, a toilet. After getting bad looks from the neighbors, I took just as much time cleaning the asphalt with degreaser as I did cleaning the bike.
Powder Coated Parts:
[image: 2rhy6hw.jpg]
[image: 352ozme.jpg]
[image: illkdl.jpg]
[image: o0uwzs.jpg]
Is that gap suppose to be there?
[image: wvpqtz.jpg]
A little of that work today:
[image: 6f1htd.jpg]
[image: 4vqx52.jpg]
[image: rm1p46.jpg]
Shiny subframe. Don't worry, calipers and all the other stuff isn't hanging anymore. What I didn't get a picture of was the shocks installed. Did a little wd-40 cleaning and tooth brush. This stuff works. Make sure you clean with a degreaser and then with some water afterwards. I had to use spray bottles that had needle spray patterns to really get any penetration ;)
Then:
[image: 24cbb0h.jpg]
[image: zmpzm.jpg]
This was after the first cleaning. Sprocket was kind of stuck. Tapped it, with my 25mm wrench, from behind with some love and it came out with no problem. Makes sense after all that crud.
[image: 10fs787.jpg]
This was the gunk of the initial scraping and first cleansing.
[image: 29as7z8.jpg]
[image: 2af0j2s.jpg]
No wonder when I'd clean my chain, it would never stay clean after the 1st ride. Will give all of this another go another day.
Short Term: My shop kept one of my spacers for my front wheel. I don't know why I gave it to them in the first place. If the shop doesn't have it, then it's lost and I'm ordering a new one. Once the wheels are back on I can start lugging the bike back and forth when I have the little garage time that is available.
Question: The cover over the front sprocket doesn't want to close all the way anymore. I see that there's a foot long pin that goes across the bike and it seems like it doesn't want to sit "flush" in its position. From the block of the frame to the cover, I have several mm gap at the moment. Any ideas?
![[image: 2rhy6hw.jpg]](http://i64.tinypic.com/2rhy6hw.jpg)
![[image: 352ozme.jpg]](http://i63.tinypic.com/352ozme.jpg)
![[image: illkdl.jpg]](http://i67.tinypic.com/illkdl.jpg)
![[image: o0uwzs.jpg]](http://i67.tinypic.com/o0uwzs.jpg)
![[image: wvpqtz.jpg]](http://i65.tinypic.com/wvpqtz.jpg)
![[image: 6f1htd.jpg]](http://i67.tinypic.com/6f1htd.jpg)
![[image: 4vqx52.jpg]](http://i65.tinypic.com/4vqx52.jpg)
![[image: rm1p46.jpg]](http://i68.tinypic.com/rm1p46.jpg)
![[image: 24cbb0h.jpg]](http://i67.tinypic.com/24cbb0h.jpg)
![[image: zmpzm.jpg]](http://i67.tinypic.com/zmpzm.jpg)
![[image: 10fs787.jpg]](http://i63.tinypic.com/10fs787.jpg)
![[image: 29as7z8.jpg]](http://i63.tinypic.com/29as7z8.jpg)
![[image: 2af0j2s.jpg]](http://i63.tinypic.com/2af0j2s.jpg)
35 minutes ago, dozyproductions
See that aint right. If they screw up, it's on them! Call it an occupational hazard. Speaking of that, my paint guy is giving me my parts on sunday... but he hasn't shot the clear till this week. WEAK! I finally got my exhaust sand blasted and will be getting that on monday. Will be interesting to see how it looks with the dry lube. Picture like a darker and smoother exhaust wrap. Tres chic
So pardon with the delay. Right when I was about to work on the bike, my work told me to get on a plane to Nacogdoches TX again! Have been there for the past week and a half? I dunno because time goes by so quick on the road. I ended up receiving my powder coated parts. They 'over sprayed' the sand material on the inside of the forks and left it pretty rough. Dropped them off to my shop to so smoothen both forks out along side with pressing the lower steering head bearing for good measure. Well, the shop ended up finishing up the forks and putting in seals without letting me know. Well, thats some more $$ but after all this stress coming from my interactions with the paint guy, all is well.
What I Did TODAY: Attached the rear subframe back on. Put the upper head bearing and out races in and put the lower and upper yokes in. Thanks for all of you guys providing some much info on this board. Put the outer races in the freezer and it was just the trick. Afterwards, the shocks and forks went in. I had two first shove the shocks, upside down, from the top so the powder coat would give way. They finally dropped in. If any of you are getting your stuff PC'd, make sure those guys are given the heads up on the little details like that. Had initial problems getting some bolts in as well. Then I took the chain off by taking off the front sprocket. OMG there was so much dirt and muck that definitely looked like something I've seen in the bottom, or near, a toilet. After getting bad looks from the neighbors, I took just as much time cleaning the asphalt with degreaser as I did cleaning the bike.
Powder Coated Parts:
[image: 2rhy6hw.jpg]
[image: 352ozme.jpg]
[image: illkdl.jpg]
[image: o0uwzs.jpg]
Is that gap suppose to be there?
[image: wvpqtz.jpg]
A little of that work today:
[image: 6f1htd.jpg]
[image: 4vqx52.jpg]
[image: rm1p46.jpg]
Shiny subframe. Don't worry, calipers and all the other stuff isn't hanging anymore. What I didn't get a picture of was the shocks installed. Did a little wd-40 cleaning and tooth brush. This stuff works. Make sure you clean with a degreaser and then with some water afterwards. I had to use spray bottles that had needle spray patterns to really get any penetration ;)
Then:
[image: 24cbb0h.jpg]
[image: zmpzm.jpg]
This was after the first cleaning. Sprocket was kind of stuck. Tapped it, with my 25mm wrench, from behind with some love and it came out with no problem. Makes sense after all that crud.
[image: 10fs787.jpg]
This was the gunk of the initial scraping and first cleansing.
[image: 29as7z8.jpg]
[image: 2af0j2s.jpg]
No wonder when I'd clean my chain, it would never stay clean after the 1st ride. Will give all of this another go another day.
Short Term: My shop kept one of my spacers for my front wheel. I don't know why I gave it to them in the first place. If the shop doesn't have it, then it's lost and I'm ordering a new one. Once the wheels are back on I can start lugging the bike back and forth when I have the little garage time that is available.
Question: The cover over the front sprocket doesn't want to close all the way anymore. I see that there's a foot long pin that goes across the bike and it seems like it doesn't want to sit "flush" in its position. From the block of the frame to the cover, I have several mm gap at the moment. Any ideas?
I think you will find that your clutch slave cylinder has extended a little while the sprocket cover was dismounted. Suggest you polish up the clutch pushrod, apply some grease and push it gently home, then fit the countershaft cover and sneak it into place by gently tightening the bolts evenly. That will push the slave piston back into its bore, same as you'd do with brake pistons.
make sure the speed sensor lines up with the bolt holding the sprocket on. maybe rotate the wheel slightly
Perfect, thanks you guys
3d makes a very wise suggestion here. If you don't line that sensor coupling up with the sprocket nut, the coupling gets damaged and your speedo will stop working eventually.
5 hours ago, Terry3d makes a very wise suggestion here. If you don't line that sensor coupling up with the sprocket nut, the coupling gets damaged and your speedo will stop working eventually.
And get a new one the next time you order any Honda parts. It's plastic and does wear out:
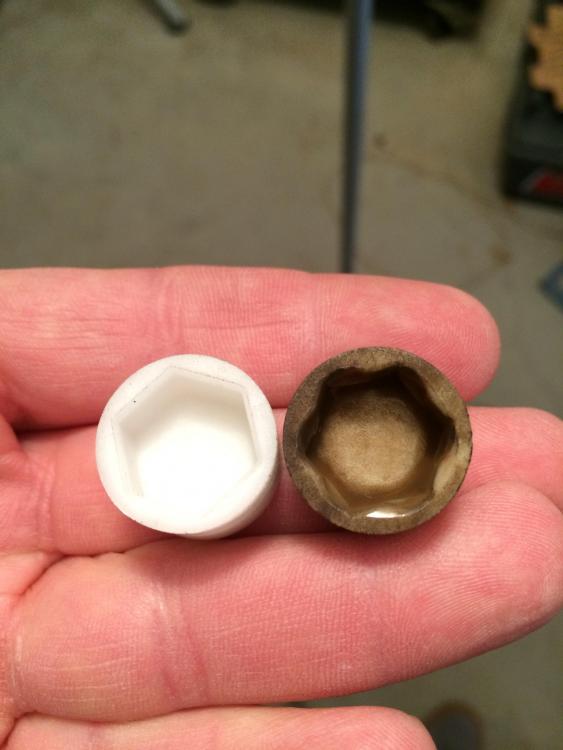
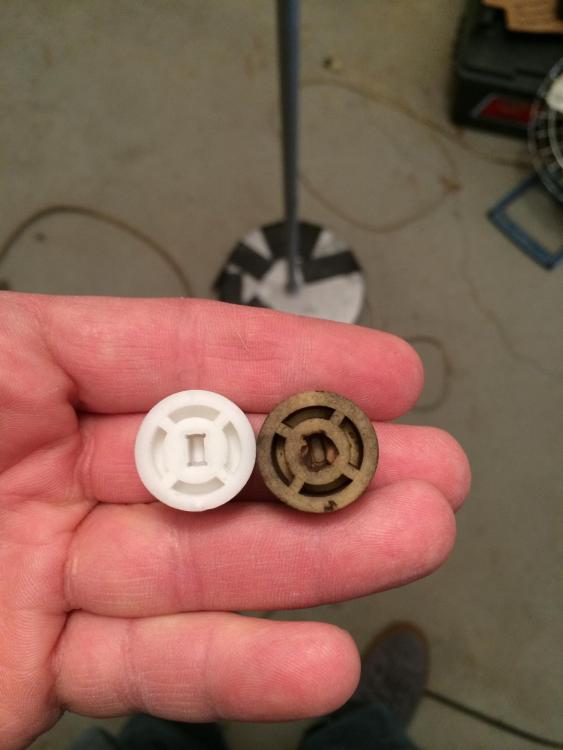
Mine is pretty worn. During assembly there are bound to be extra parts that I'll need to order so this will be on that list. Thank god it's <$6 and not >$40! Don't know if you guys have this problem or not but San Diego only has 3rd party dealerships and no actual honda moto dealerships. Honda auto dealers/shops don't even let you order moto parts from them. Is this just an SD thing? Shipping is faster then partzilla, at the 3rd party, but the mark up is always way more.
Ran in to a hitch. Seems my worthless painter is mostly done. Actually it looks pretty good beyond my fuel tank. I unknowingly bought two right side tank stickers thinking it was a L & R side because in the fine print, the left side sticker no longer exists. Can anyone attest to buying the amazon/ebay stickers ( 3m vinyl rated at "7 years")? As long as the clear coat is doing the UV protecting, should it be okay??....
TODAY: Got a wire brush and tried to clean the front and rear brake calipers, rear swing arm and as much of the engine block as I could. Steps were 1) WD-40 and let sit for a second. 2) wire brush with enthusiasm. 3) spray with diluted Shout cleaner. 4) scrub some more. 5) spray with water bottle. 6) Have a bucket catching all the bike spit. 7) Repeat. Really awkward when you're cursing this hard in a community parking lot. Also put on the yoke and both tires. I figured that the shocks are going to sit at about 46mm from top tree to top of the cap.
Changed all the hose clamps with SS ones.
[image: 2s7ewid.jpg]
[image: 2wgue0p.jpg]
[image: 34xgz2s.jpg]
Does anyone know a great way to deep matte polish the stator cover? I used the wire brush and then metal polish on it for a little while and this is how it looks now... which is a lot better than what it looked before.
[image: 2a95n43.jpg]
Calipers look like 28 year olds comparing to their 70 year old former selves. These are chinese rotors and actually had to sand some of the rust off in the inner portion. They seem entincing guys but unless you like grinding rust, spend the extra money. Just showing a little bit of how it was done getting the wheel on.
[image: 6gwtbq.jpg]
Here's out it sits now
[image: 2v9errb.jpg]
[image: 2h6ydug.jpg]
For Tomorrow: Will start putting on some of those powder coated parts back on and finally start using that wireloom tape. Will continue to clean.
Question: Just to repeat. Where can I get some tank stickers that will hold up and which ones would you prefer? How would you beautify that stator cover a little better?
![[image: 2s7ewid.jpg]](http://i63.tinypic.com/2s7ewid.jpg)
![[image: 2wgue0p.jpg]](http://i65.tinypic.com/2wgue0p.jpg)
![[image: 34xgz2s.jpg]](http://i67.tinypic.com/34xgz2s.jpg)
![[image: 2a95n43.jpg]](http://i67.tinypic.com/2a95n43.jpg)
![[image: 6gwtbq.jpg]](http://i63.tinypic.com/6gwtbq.jpg)
![[image: 2v9errb.jpg]](http://i63.tinypic.com/2v9errb.jpg)
![[image: 2h6ydug.jpg]](http://i66.tinypic.com/2h6ydug.jpg)
It's definitely looking more like a bike! I really like the fork legs and the wheels - it's a good combination.
I bought a full set of decals/stickers off eBay - I have no reason to believe they'll be any less resilient than the ones Honda provide, especially if they're lacquered.
I powdercoated my stater cover, but suggest you probably don't want to be doing the same given that you're in the reassembly phase. Unless you've got a machine polisher, you're probably not going to be able to get it look any better; you could spray in situ, although I perhaps wouldn't.
maaaaan... you're making me want to get my wheels coated gold...
Loftust, 3/16/2017 at 6:34 AMIt's definitely looking more like a bike! I really like the fork legs and the wheels - it's a good combination.
I bought a full set of decals/stickers off eBay - I have no reason to believe they'll be any less resilient than the ones Honda provide, especially if they're lacquered.
I powdercoated my stater cover, but suggest you probably don't want to be doing the same given that you're in the reassembly phase. Unless you've got a machine polisher, you're probably not going to be able to get it look any better; you could spray in situ, although I perhaps wouldn't.
I'm kind of got my theme from my friend's ducati, and extra points from the ladies saying it looked like one already haha. So your stator cover must look great! I have wire wheels... know of anything a bit softer? lol
hellindustries, 3/16/2017 at 11:04 AMmaaaaan... you're making me want to get my wheels coated gold...
Do it!
Today: Put the finishing touches on the exhaust by spraying the last of the dry lube on the tubes and then polishing a bit of the cans. Walked all the stuff over to the bike, 50 yards from the house, to realize that I threw away the old cruddy exhaust nuts without buying replacements. Also put in the pivot "bolt" and battery box. Lastly, scrubbed down the last of what I want from the front block and repaired some of the wiring harness.
Here's that exhaust. It's sprayed with dry lubricant that's also used by mopar guys. $12 a can (after shipping) and its rust/heat resistant and will definitely last years if you're good to it. The down side is, it's really easy to be bad to it. Unless I haven't given it enough time to dry properly, it's very easy to scratch. Very easy to reapply though.
Before:
[image: fe1j43.jpg]
After!:
[image: 296jjms.jpg]
Here's a little bit of that wire harness work. Some parts must of been exposed closer to heat because the tape was crispy and the glue was runny. There were some other spots where either I didn't put any wrap around new wires or the old wires just had minimal wrapping. Seemed like the old stuff is electrical tape. The new stuff is wire harness wrap. The difference is that the new stuff doesn't have any adhesive but is still able to stick to itself.
Before:
[image: mm7b0y.jpg]
[image: 2nurais.jpg]
After!:
[image: 9r3gy9.jpg]
[image: 2090odi.jpg]
Tomorrow: Got to buy nuts for the exhaust. If I can get those fracking 8 nuts, the exhaust is going in. Also, will start either plastic welding or epoxy gluing one mounting point of the back of the instrument panel. I was shown that a soldering iron and a zip tie can go a long way, depending on the plastic.
Afterword: The closer I'm getting to completing this, the more I'm realizing that I should of taken more and better pictures and labeled my nuts/bolts baggies a bit better as well. It feels like constructing a really vague 3d puzzle. Example: completely forgot how to re assemble the right side foot stay and heat shield alongside the rear exhaust area. There's bits and pieces from my pictures and the manual kind of fills in some gaps but the point still holds.
Hellindustries: Gold Wheels :)
[image: 2d0ny1u.jpg]
![[image: fe1j43.jpg]](http://i63.tinypic.com/fe1j43.jpg)
![[image: 296jjms.jpg]](http://i68.tinypic.com/296jjms.jpg)
![[image: mm7b0y.jpg]](http://i68.tinypic.com/mm7b0y.jpg)
![[image: 2nurais.jpg]](http://i65.tinypic.com/2nurais.jpg)
![[image: 9r3gy9.jpg]](http://i68.tinypic.com/9r3gy9.jpg)
![[image: 2090odi.jpg]](http://i65.tinypic.com/2090odi.jpg)
![[image: 2d0ny1u.jpg]](http://i66.tinypic.com/2d0ny1u.jpg)
That exhaust looks fantastic - definitely one of the best painted finishes I've seen.
My stator cover does look good :wink: I don't have a photo of it at the moment however.
You can get soft wire wheels, or semi-abrasive pads, which may help if you want to improve the finish, although it will be hidden behind the fairing.
You're in the same boat that I was with bolts - I had separated them into different parts of the bike, but then gave them all to someone for vapour blasting. The illustrated parts catalogs online (lings etc) are a godsend, and really helped me to identify which bolts go where. Understanding the different types of bolt heads helps too.
Good job on the wrapping btw - very neat :smile:
Fiiiiiiiiiine.... Is there a paint code or something?
Re-coating time is getting near.
Loftust, 3/18/2017 at 7:41 AMThat exhaust looks fantastic - definitely one of the best painted finishes I've seen.
My stator cover does look good :wink: I don't have a photo of it at the moment however.
You can get soft wire wheels, or semi-abrasive pads, which may help if you want to improve the finish, although it will be hidden behind the fairing.
You're in the same boat that I was with bolts - I had separated them into different parts of the bike, but then gave them all to someone for vapour blasting. The illustrated parts catalogs online (lings etc) are a godsend, and really helped me to identify which bolts go where. Understanding the different types of bolt heads helps too.
Good job on the wrapping btw - very neat :smile:
If you have a picture of your stator cover I'd love to see it!... Lings eh? Stateside I'm using partzilla and cyclemax. Thanks for reminding me about those part diagram sites to use as reference. Was starting to get too many steps ahead of myself.
hellindustries, 3/18/2017 at 10:20 AMFiiiiiiiiiine.... Is there a paint code or something?
Re-coating time is getting near.
I asked my guy to get as close to ducati or sti gold as he could get. I think most of the PC shops should have something that'll fit the bill to your liking! You could honestly probably go with a tight lighter and less satiny finish than mine haha. I won't be enjoying wiping the dust off of these wheels before every ride :(
Today: Ended up buying used exhaust nuts from a low mileage vfr. $6 shipped for good condition exhaust nuts! My favorite nuts right after almonds!
Question: So I'm starting to learn that a box that had some of my parts was moved and "lost" by a room mate. I no longer have my handlebar bolts (any my heatshield stay and etc) and it seems like going to the hardware to find new ones is harder than it seems atm. I looked up 98 vfr800 heli bars on their site and it seems like their current offering only has a single tightening contact instead of dual. Can anyone confirm that I do indeed have heli bars? Cheers.
[image: xp8nza.jpg]
![[image: xp8nza.jpg]](http://i68.tinypic.com/xp8nza.jpg)
dozyproductions
I looked up 98 vfr800 heli bars on their site and they don't look like mine. Can anyone confirm that I do indeed have heli bars?
[image: xp8nza.jpg]
Looks like Helibars to me. My right bar had Helibar stamped around base clamp, but that might not be so with older Helibar product. Should be easy to order up bolts or match them locally.
Sent from my iPhone using Tapatalk
Thanks mate. These are blank, which might be due to the PC job. All four holes aren't accepting anything consistently, which could also be due to the PC job. Before screwing anything up, that might require tapping the threads, just want some sort of extra confirmation. Trust me, we opened up a lot of bags at home depot. ;D Sent Heli an email all the same.
Tap all the threads that have been coated - you risk knackering the threads/snapping the bolts otherwise.
Replacement bolts for a you're missing can be had off ebay etc - just look up what sizes you need via the IPCs - perhaps this is an opportunity to get stainless ones too? :wink:
They should be M6. I don't think Heli ever did something retarded like fit SAE bolts on a part for a Japanese bike.
Ciao,
Yup, they're old school heli bars so I got me some M6 SS bolts! Shiny on black is so legit. Thanks y'all. Got a check from rustoleum for the turn signal their clear coat kind of fubard. Good customer service for even doing that! But another fail either on their advise or my luck. DONT spray rustoleum satin can clear coat on top of gloss clear coat! It only kind of works haha.
Today: Put the exhaust, exhaust tray and battery box in. Frustrating as hell though because even though I could of sworn I did the measurements right from the oem clamps, my new ones were way too big. With a little measuring tape is telling me that the smaller tubes' clamps are roughly 1.8" and the big clamp is resting at 2.40" ish. Since I'm not that great at this, what would that mean with what I need to buy?
[image: 2zhnq6h.jpg]
Just in case you all would like to see how the Wolf exhaust tray looks like.
[image: jghzbm.jpg]
[image: 2i0dlbd.jpg]
Later: Dropping off my new tanks stickers to the painter. Will work on the dash welding at one point. My current solder gun isn't strong enough to make a difference.
![[image: 2zhnq6h.jpg]](http://i67.tinypic.com/2zhnq6h.jpg)
![[image: jghzbm.jpg]](http://i68.tinypic.com/jghzbm.jpg)
![[image: 2i0dlbd.jpg]](http://i66.tinypic.com/2i0dlbd.jpg)
Hey guys. My worked called me again to travel abroad and I just got back this weekend. Did some small work and I FINALLY........ FINALLY FINALLY FINALLY found some universal exhaust clamps. Unless I'm the biggest idiot in the world, I wasn't able to find shnee for ages. All the the clamps that 'should of worked' from online sources didn't. Public transportation in San Diego is horrible so going to one store can sometimes mean an entire day trip.
Okay, I'll have more pictures up but here is what I have in the mean time. I don't know if you guys know who delboy is on youtube but he's an aussie DIY over all good dude. He's actually answered some of my questions. I had some tabs broken on the back of the dash and the plastic epoxy, after a month of drying, didn't hold up what so ever. Well I decided to do a little unflattering plastic welding a la Del over here:
Before:
[image: k0r5zo.jpg]
After!:
[image: qxp9jk.jpg]
[image: 23to7io.jpg]
Needless to say my welds aren't reinforced (yet) and they are much uglier but they are STRONGER substantially more than the epoxy. They don't even come close to giving way.
Question: I don't want to keep on spending money on a bike I NEED to sell quick now but what do you guys think about "universal" brake/clutch master cylinders? Mine look a bit buggered while everything else around them look great. what do you think?
https://www.aliexpress.com/item/Black-Right-7-8-22mm-Motorcycle-Front-Brake-Clutch-Master-Cylinder-For-Honda-CB400-1992-93/32267602819.html?spm=2114.13010208.99999999.264.0FIdYl
![[image: qxp9jk.jpg]](http://i68.tinypic.com/qxp9jk.jpg)
![[image: 23to7io.jpg]](http://i68.tinypic.com/23to7io.jpg)
1 hour ago, dozyproductionsHey guys. My worked called me again to travel abroad and I just got back this weekend. Did some small work and I FINALLY........ FINALLY FINALLY FINALLY found some universal exhaust clamps. Unless I'm the biggest idiot in the world, I wasn't able to find shnee for ages. All the the clamps that 'should of worked' from online sources didn't. Public transportation in San Diego is horrible so going to one store can sometimes mean an entire day trip.
[video: https://www.youtube.com/embed/61iyLarL258?feature=oembed]
Okay, I'll have more pictures up but here is what I have in the mean time. I don't know if you guys know who delboy is on youtube but he's an aussie DIY over all good dude. He's actually answered some of my questions. I had some tabs broken on the back of the dash and the plastic epoxy, after a month of drying, didn't hold up what so ever. Well I decided to do a little unflattering plastic welding a la Del over here:
Before:
[image: k0r5zo.jpg]
After!:
[image: qxp9jk.jpg]
[image: 23to7io.jpg]
Needless to say my welds aren't reinforced (yet) and they are much uglier but they are STRONGER substantially more than the epoxy. They don't even come close to giving way.
Question: I don't want to keep on spending money on a bike I NEED to sell quick now but what do you guys think about "universal" brake/clutch master cylinders? Mine look a bit buggered while everything else around them look great. what do you think?
https://www.aliexpress.com/item/Black-Right-7-8-22mm-Motorcycle-Front-Brake-Clutch-Master-Cylinder-For-Honda-CB400-1992-93/32267602819.html?spm=2114.13010208.99999999.264.0FIdYl
I found Delboy's garage a while ago and coincidentally it was for plastic welding! Although I think he's based in England but maybe he's Australian. He's been going for about 4 years and he's done some pretty good videos over the years. Great for the shade tree mechanic as he tries to use ordinary tools rather than the super high dollar specialty tools, which is great for those on a budget.
I figured australian because he sounds like my mate's dad... but as some cali yokel, all of them can sound like some form of australiana!
Selling?!?!?!?!?!?!?! :unsure:
You are doing a great job!
19 hours ago, Duc2V4I found Delboy's garage a while ago and coincidentally it was for plastic welding! Although I think he's based in England but maybe he's Australian. He's been going for about 4 years and he's done some pretty good videos over the years. Great for the shade tree mechanic as he tries to use ordinary tools rather than the super high dollar specialty tools, which is great for those on a budget.
Definitely English.
I've done a lot of plastic welding on fairings (wifey threw her bike at the tarmac on numerous occasions so I had a LOT to practice on.)
This is the top fairing on my Gen 6. where it slid along the tarmac it ground it away. As you can see it has built up quite nicely using an old soldering iron and cable ties. Cable ties are easiest to handle but I have used strips cut from an old fairing.
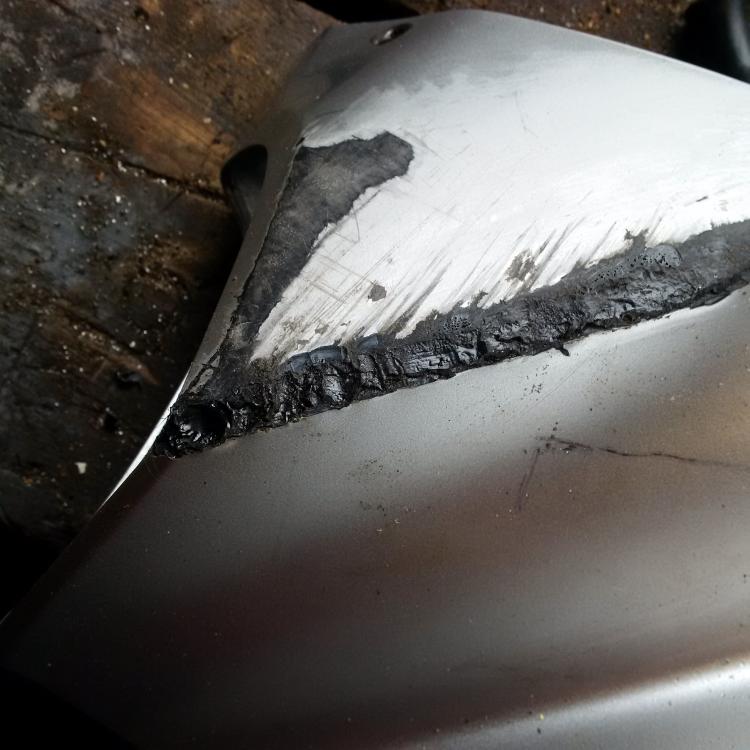
1 hour ago, WoodieDefinitely English.
I've done a lot of plastic welding on fairings (wifey threw her bike at the tarmac on numerous occasions so I had a LOT to practice on.)
This is the top fairing on my Gen 6. where it slid along the tarmac it ground it away. As you can see it has built up quite nicely using an old soldering iron and cable ties. Cable ties are easiest to handle but I have used strips cut from an old fairing.
I figured he was English too but I don't know enough about him to say he's not an Aussie transplant. :smile: I like his videos and he seems like a down to earth guy, even though he rides Harley :wink:
That's quite a bit of work there on that body panel. How many zip ties were used to make that mend?
1 hour ago, Duc2V4I figured he was English too but I don't know enough about him to say he's not an Aussie transplant. :smile: I like his videos and he seems like a down to earth guy, even though he rides Harley :wink:
That's quite a bit of work there on that body panel. How many zip ties were used to make that mend?
Just two but they were quite big Zip ties. . it's a close up of a section about 6" long.
With some "grinding" + sanding and voila! Strong bonds and almost just like new!
Any hooooooooooooooooooooooooooooooooooooooooooooooo
[image: 2mnehs3.jpg]
[image: 2lxch3l.jpg]
![[image: 2mnehs3.jpg]](http://i64.tinypic.com/2mnehs3.jpg)
![[image: 2lxch3l.jpg]](http://i64.tinypic.com/2lxch3l.jpg)
A couple of things I need to ask. Does anyone have the part number to the spring that attaches to the rear brake sensor? Also, I can't get my key out of the gas tank lock. I had it on when I took the cap off, and when I' installing it, I can't get the fucking thing off. Also, do you guys know which hose goes where to the gas tank? I just want to confirm which is which. Anyways, as soon as I can get some gas and coolant, I'm going to start this bitch!!!!!!!
Here's a screen shot of the parts fiche for the rear brake assembly as I'm not sure what you mean by "sensor". As far as your key, possibly some WD-40 or other lubricant might work. Check with a locksmith, they might have something more appropriate for this purpose.
Regarding the fuel lines, have you looked at the Honda Service Manual? I think the info is in there. Otherwise, the parts fiche might be helpful/ That's about as far as I can come up with, well, other than getting one of us to take photos of their 5 Gen lines.
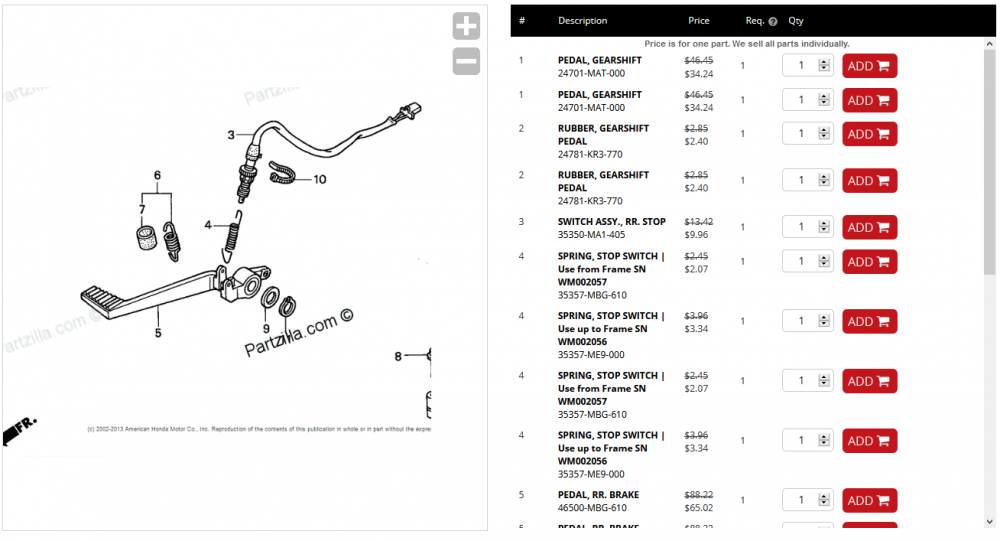
Thanks man. For whatever reason, I couldn't find the diagram. I got some graphite on the lock but the thing is still giving me a hard time. Will look in to that.
Put 1.5 gallons in to the tank. The bike wants to turn but not all the way. At first it gave me just one blip and sound from the fuel pump. Gave her a couple of seconds and nown I'm to the current problem. Tried turning the thing on till the lithium battery started to get drained to its last leg. No fuel is leaking, I'm pretty sure the hoses are connected in the right place and every electric connector, that needs connecting, is there... any input?
Perhaps to help with helping me? ;D
[image: epktxv.jpg]
[image: 95zz9e.jpg]
[image: mkvxnd.jpg]
This is how she sits:
[image: 315n8dh.jpg]
[image: abrote.jpg]
![[image: epktxv.jpg]](http://i66.tinypic.com/epktxv.jpg)
![[image: 95zz9e.jpg]](http://i66.tinypic.com/95zz9e.jpg)
![[image: mkvxnd.jpg]](http://i64.tinypic.com/mkvxnd.jpg)
![[image: 315n8dh.jpg]](http://i68.tinypic.com/315n8dh.jpg)
![[image: abrote.jpg]](http://i63.tinypic.com/abrote.jpg)
Second pic is the tip over sensor. There is an arrow molded into the plastic. Point it up! It should say on it which way and bolt onto the front of the fairing stay.
Plastic 3 wire white connectors are turn signals.
Black wire is air temp sensor.
Thanks man. Was trying to figure out if any of those was helping my bike from not starting. Perhaps from 4 months of inactivity it doesn't want to start up?
For sure the tip over switch will. But it won't allow your fuel pump to prime at startup if it's not properly oriented. If you get the pump priming and it cranks it could just be the lack of use. I've had that happen on mine. Usually have to just crank it until it finally fires.
I just took a closer look and that three wire black connector is headlight. Right bulb by the looks of things. Left and left signal look to he hanging down on the side.
With the key, try pushing the cap down to lock and lightly turning the key?
The lock is working a little better now. I put some graphite lubricant around the lock area and it's as good as new. I'm going to go and recharge the battery and then bolt up the tip over switch properly. Hopefully this will fix the situation. Really appreciate the help on that Kev.
In other news, I had it with my painter. That tank had some pretty noticeable blemishes. When I took it back to him I dented and scratched it up something good so he would be charging me $250. That's a fair price but for a job that took him over 3 months to do and with an incorrect and non stock color; I no longer have any faith in him to give me a decent product back. I'm picking up the rest of the fairings and tank tomorrow and bringing it to another shop (SBK paint) and they'll finish the entire thing, with OEM color paint, for $500 and a glass finish. The original painter is giving me shit about how I've put him in a bad spot and how I'm (sarcasm) a 'solid guy'. It's like a bad break up. I'm moving to Poland in a month and I thought I would have over 2 months of decent riding before selling this bike but, nope. I wont be able to ride the bike and will barely be able to sell the thing before leaving. The amount of stress this guy has given me is unreal. The new painter said he'll finish all of it within less than a half a week because he's a real biker and, after hearing my story, he said he'll do anything to help a brother out. I've seen his work and it's simply amazing with a usual short turn around time as it is.
Literally am smoking hookah, cigarettes, and the other stuff just to keep my anxiety down. Use my situation as a warning for anything you might plan in the future. Spend the extra 200-300 dollars on some one who isn't just 'some guy' that will do a good job and isn't made out of excuses. This blog wouldn't have taken so long if I didn't skimp out in the first place.
Got the new paint job done and it was done with the original oem color. wow, just loving the it. Any of you in the SD area, hit up David at SBK paint. He let me sit in the booth with him it was just really cool to see the process again.
Anyhoo, now that the battery has been charged, 1.5 gallons of gas has been put in, dielectric grease has been put in all the connections, fuses have been checked, everything has been put in, tip sensor upright; the bike doesn't start. Fuel pump doesn't prime and I'm not getting any clicking from any relays or nothing. I read some threads from this forum with this very issue and I've done most of the steps that I could do. Beyond replacing fuses and relays, it's been a mystery.
Checked the battery with the voltmeter. 8.67 reading. Going to cycle gear to get it charged. Hoping for the best, expecting the worse kind of thing.
here as she sits.
[image: 2h65ykg.jpg]
![[image: 2h65ykg.jpg]](http://i66.tinypic.com/2h65ykg.jpg)
The obvious things are the kill switch and the tip over sensor. Just double check they are on and upright. It's been known to happen, and the stupid tip over sensor had me stymied for a weekend recently.
The tank does look fantastic though! And the wheels and Wolf exhaust...
Definitely won't start with 8.6 V They're trouble at 12v. But looking good from here.
dozyproductions, 4/7/2017 at 4:07 PMThe lock is working a little better now. I put some graphite lubricant around the lock area and it's as good as new. I'm going to go and recharge the battery and then bolt up the tip over switch properly. Hopefully this will fix the situation. Really appreciate the help on that Kev.
In other news, I had it with my painter. That tank had some pretty noticeable blemishes. When I took it back to him I dented and scratched it up something good so he would be charging me $250. That's a fair price but for a job that took him over 3 months to do and with an incorrect and non stock color; I no longer have any faith in him to give me a decent product back. I'm picking up the rest of the fairings and tank tomorrow and bringing it to another shop (SBK paint) and they'll finish the entire thing, with OEM color paint, for $500 and a glass finish. The original painter is giving me shit about how I've put him in a bad spot and how I'm (sarcasm) a 'solid guy'. It's like a bad break up. I'm moving to Poland in a month and I thought I would have over 2 months of decent riding before selling this bike but, nope. I wont be able to ride the bike and will barely be able to sell the thing before leaving. The amount of stress this guy has given me is unreal. The new painter said he'll finish all of it within less than a half a week because he's a real biker and, after hearing my story, he said he'll do anything to help a brother out. I've seen his work and it's simply amazing with a usual short turn around time as it is.
Literally am smoking hookah, cigarettes, and the other stuff just to keep my anxiety down. Use my situation as a warning for anything you might plan in the future. Spend the extra 200-300 dollars on some one who isn't just 'some guy' that will do a good job and isn't made out of excuses. This blog wouldn't have taken so long if I didn't skimp out in the first place.
I went through the same crap with painters on my custom Triumph Thruxton 900. All I wanted was a white stripe down the front fender to match the tank and seat cowl. You would have thought I would have asked for the painter to paint the Cistene Chapel. After the first painter looked like he took a white out pen to do the pinstriping, I took it to a "professional". Six months went by and then after it was merely breathed on some paint flaked off.
Painters and engine builders. Beware. Find a good one and stick with them!
2 hours ago, RVFRDefinitely won't start with 8.6 V They're trouble at 12v. But looking good from here.
Oh yeah, didn't catch that first time around!
Should still run the fuel pump?
45 minutes ago, deltaboxiiI went through the same crap with painters on my custom Triumph Thruxton 900. All I wanted was a white stripe down the front fender to match the tank and seat cowl. You would have thought I would have asked for the painter to paint the Cistene Chapel. After the first painter looked like he took a white out pen to do the pinstriping, I took it to a "professional". Six months went by and then after it was merely breathed on some paint flaked off.
Painters and engine builders. Beware. Find a good one and stick with them!
Wow, now that's one mind numbing and angering story and sorry you had to go through it. It's a wonder how these guys still stay in business. What were the type of excuses he was giving you? My new painter finished within 3 days and told me that the original painter used low quality paint. It was still of a puddy like consistency and there were multiple runs that I didn't catch. I've learned there are some certain steps to do and look out for.
1. make sure he has a shop. than there's, presumably, some pressure to turn out good work to pay the rent.
2. look at the work he's working on or has drying/displayed at the shop
3.make sure he takes his work and YOU seriously
4. ask what type of brand and what quality of paint and clear are for the price you'll be paying.
5. check on yelp/google reviews and see any feedback on forums/facebook
6. dont pay in advance
3 hours ago, KevCarverThe obvious things are the kill switch and the tip over sensor. Just double check they are on and upright. It's been known to happen, and the stupid tip over sensor had me stymied for a weekend recently.
The tank does look fantastic though! And the wheels and Wolf exhaust...
2 hours ago, RVFRDefinitely won't start with 8.6 V They're trouble at 12v. But looking good from here.
Before cycle gear closes, I'll call them to see if the charge has actually held and increased to bump up that voltage. If it's a nein than it's time to a buy a new battery. Literally every other electric thing has been checked and every connection loved with some dielectric grease. The battery SHOULD be it... the bike kind of turned over for a second a couple of times sporadically. Once the battery is taken care of and the bike starting, the rear brake spring is received and installed than there isn't anything, atm, that I can tell that's really stopping me from putting on the plastics.
Another unknown problem that needs to be tackled is the throttle return function. Can still turn the throttle, it just doesn't come back on its own. Off the handle bar, it works.
Hypothesis: the powder coated handle bar has made it just thick enough to where the mechanism, on the handle bar, is getting stuck.
Check out the difference with the previous color and now. Not like you can really tell with the lighting difference but tada!
[image: abrote.jpg]
[image: 2h65ykg.jpg]
I just painted my 02 in 2 days ,paint match silver was a 2011 dodge ram colour mix. A little buffing looks like glass,it is all in prep and material used .
Yeah if there isn't anything to repair and the surface isn't too bad then you're fine. Good paint, decent gun and a clean enough area should do the trick. The paint process itself took 30 minutes max haha. A dirty area just means you have a lot of wetsanding and polishing to do. God, it'd be great to have a garage again and to gerry rig a booth. Post some pics if you can!
Update on battery. It's dead. The whole return process has already started so that's always a plus. In the meantime, anyone recommend a cheap battery? A friend is suggesting putting the tail between the legs and going to walmart. Supposedly o reily's, near my house, has moto batteries too. Will have to find a new one.
Any ideas on the accelerator? Sand down the pc? grease it up? curse loud enough?
SHADILAY MY FRIENDS.
[image: 2my1zjs.jpg]
[image: 14wrp0j.jpg]
[image: 2ij5cat.jpg]
[image: 2rfygqg.jpg]
What still needs to be done
-fix the sticking problem with the trottle. DOES ANYONE KNOW WHAT I CAN DO FOR THAT? The bike isn't rideable till that can be fixed. Really don't want to sand down nice PC parts but it seems that the new handle bar is just too thick for it too fit. (wish I heard that from my ladies)
![[image: 2my1zjs.jpg]](http://i68.tinypic.com/2my1zjs.jpg)
![[image: 14wrp0j.jpg]](http://i64.tinypic.com/14wrp0j.jpg)
![[image: 2ij5cat.jpg]](http://i64.tinypic.com/2ij5cat.jpg)
![[image: 2rfygqg.jpg]](http://i68.tinypic.com/2rfygqg.jpg)
-fix the rear lock that holds the rear part of the seat. It doesn't want to fully engage. Hearing a click but no cigar. Spring is bad? The wire is bad? It's installed wrong? We'll see but this comes to the next issue
-fix the left rear peg lock. It merely doesn't want to turn. Admittedly I haven't sprayed any wd-40 on it. I suspect that powder coating it might have affected it from the back side. Will see.
-get some nuts for the damn bolts for that damn tip position sensor in the front.
-get some screws for the voltmeter and the switch for it.
-polish the front headlight and the newly painted chain guard. The old painter was going to "fix"/ aka polish my last pretty good attempt to paint the guard and instead fracked it pretty well with crappy primer.
-install front fairing, rest of the dash and mirrors.
Really excited because this color POPS; way more in person than it ever can in the pictures. The Honcati level has been achieved. This is definitely upper middle class status ;)
Today was spent getting getting some of the last nuts and bolts that were needed. Most of the stuff will be done tomorrow with the aim of getting it running. The main thing holding me back is the battery. The shorai lithium battery all of a sudden became 'toast' and it doesn't make sense to return it for %50 off rebate at this date and time. I bought an oem 'replacement' for less than $30 (vs. $80 at o'reilys) and it should be coming tomorrow.
Today
-secured the tip sensor
-bought the m.00000000002 screws for the voltmeter ;)
-fix the rear lock that secures the backside of the seat
-fixed the stuck accelerator. It ended up being the powder coat. If anyone want some links for what it could of been then here are some:
http://www.vfrdiscussion.com/index.php?/forums/topic/70388-throttle-cables/
http://xlforum.net/vbportal/forums/archive/index.php/t-1145459.html
http://www.hondashadow.net/forum/72-technical-discussion/140976-aftermarket-bars-causing-throttle-issue-3.html
Tomorrow
-Install the front fairing.
-figure out if the voltmeter is working. The previous screws were rusted. The new ones should be a little bit more conductive.
-fix the rear helmet lock. (wd-40 it today. going to let it sit over night)
-properly install the front dash. The problem is that the rubber stops that provide shock resistance are missing for 2 of the 3 posts. Fortunately there's some old hoses. Going to cut some pieces at the right length and use those pieces instead.
-install the chain guard. Really want to wet sand it from 2000 - 2500 - 3000 and then buff (if I can... hence 3000 grit). It's way too shiny now and after a good sanding and buff, the piece should be less conspicuous.
- most importantly, get the damn thing running. when the battery was reading 8.67 volts, the bike would semi turn over even if the fuel pump wasn't exactly prepping. fingers crossed tomorrow.
Looking awesome! Its' so nearly there and is going to look superb once all in one piece.
I had the same problem with the PC on the handlebar, although it still sticks a little on the bar end as I fitted the grip a little too far to the right. I used a kitchen knife to scrape the powder off.
very nice Saddle
Got the new battery.
Got the front fairing in place.
Repainting and clearing the left side mirror stock base
But, the same problem is persisting. The fuel pump problem still persists. Battery reads at 12.24V. I can turn the key, all the lights go on, the bike kicks but doesn't turn over all the way. This time around I have the tip sensor installed properly, and everything seems to be in order. When I turn the key, I don't get any prime whine. Really don't want to pay $40 for a tow and $100 for a shop to tell me the pump is dead but I'm getting to that point where that option is getting more appealing. Will check again to see if the sensor is installed correctly and if power is actually getting to the pump etc.
Read this about the fuel pump...
http://www.vfrdiscussion.com/index.php?/topic/85475-Anyone-changed-a-Sixth-Gen-Fuel-Pump?
It's pretty easy to tilt the tank and check your voltage at your fuel pump. You should see battery voltage during prime and cranking. This'll narrow the problem to inside the tank or to the bike.
You can always jump 12 v and ground to the pump and hear it run.
I'd also load test the fuel pump wires with a headlight or something similar. That'll expose any pesky voltage drops.
Sent from my SAMSUNG-SM-G891A using Tapatalk
Thanks fellas. Going to get started
Edit: can you tell me a bit about jumping the pump and how I'd go about that? First, the blue connector.
At the ignition turned, I'm reading 4.98v at the connectors of the blue connection under the fuel tank. Dumb question but where does it need to be? Same as everywhere else and at 12.4 ish? There was a wiring diagram posted a couple pages back... Have to be honest, I'm going to have to google just to figure out how to read it. Can it be that if something benign is disconnected, the fuel pump could just not prime?
edit: Not going to lie, after watching some videos, I haven't properly checked the fuel pump relay nor can I (don't have the extra jumper cables).
I'm sure you should be seeing 12-odd volts at the fuel pump; the whole bike is designed to operate at that level. It would pay to check back through the connectors that feed to the pump and verify you get 12 at all of them, that should help isolate where the fault is. May be as simple as a dirty connector causing increased resistance/decreased voltage. You can also check the voltage (if any) between the green wire at the fuel pump and the battery negative, should be 0 or near offer, but higher would indicate a poor ground connection downstream from the pump e.g. at the earth connector to the frame or the battery negative to the frame.
As I read it backwards from the pump:
1. Fuel cut relay Black/white input, brown output
2. Engine stop relay Black/pink input, black/white output
3. Fuse B red/white input, black/pink output
You should have about 12v at each of the above points, with the negative meter lead clipped to the battery negative or chassis.
Hope that helps. I'm a bit of an electrical noob myself but had to educate myself to sort my ST1100 ignition system.
[image: VFR Wiring Layers hires full (2).png]
Okay, you are checking the brown and green wires, right? The one with blue wiring is the fuel tank sending unit.
Sent from my SAMSUNG-SM-G891A using Tapatalk
Thanks Terry
At the moment I know that the blue connector, I presume, that goes to the fuel pump is showing <5v. Connector looked clean enough to me. Unfortunately all I did was blow in to it and slab some of that dialectic grease in the connection.
And when we're talking about checking the wires are we talking about, when disconnecting the relay's and such, connecting the leads from the voltmeter to the leads to the connector?
My version of checking is to look for the voltage between the live connector and the ground. So in the case of your fuel pump connector, you have a brown wire which is live/positive, and the green wire which connects (or should connect) to the earth/chassis/battery negative.
If you only see 5V at the pump connector terminals this could be due to a poor connection on the positive side (upstream) or the negative/earth side (downstream). If you move the negative probe to the battery post/chassis ground and see 12v, then the fault is on the earth side; if it still shows 5v then the problem is on the positive side.
Then go back a step to the fuel cut relay and try there on black/white wire vs ground, if you see 12v there then the problem lies between the FCR and the fuel pump connector. If you still see 5V at the fuel cut relay then keep going back to the engine stop relay and repeat. No wire cutting is needed at this point.
Check that the earths haven't been compromised by powdercoating - I had no return path for the starter motor until I removed some of the powder from the frame.
That's a good methodology. Will go 'down stream today', especially in the better light, and check again. A shout out to SCguy in helping me out last night in trying to find the problem. We determined it wasn't the pump, but through my amateur hour ;) , couldn't determine which relay it was. The powder coating is definitely one of the constants that have been changed, ground wise, so will make sure that's a detail that isn't missed. Thanks fellas
FWIW since I have my tank off, went out and checked the voltage at the plug.. Yep, you should see 12v for sure...
Atm
Fuel pump plug: positive .1v / negative 0v
Blue plug next to fuel pump pluge: positive 0v/ negative 5v
Fuel cut relay: .1v all around the board
Engine cut relay:
red/orange - .38v, black/white opposite: battery voltage
purple(pink)/black - 0v, black/white opposite: .1v
Fuse B: battery voltage
While I was at it, I removed paint off of the ground on the fuel pump plug so that was good.
Where do I go next?
Okay, your black/pink at the engine stop relay should be a direct connection from fuse B. You should have battery voltage. Check both sides of Fuse B one more time
Sent from my SAMSUNG-SM-G891A using Tapatalk
Still the same
So you have voltage at the fuse, but not at the other end of the wire at the engine stop relay? Try to follow the wiring, look for connectors, corrosion, etc
Sent from my SAMSUNG-SM-G891A using Tapatalk
Question before I go out in the lot in the 90+ weather ;) . Is there any obvious ground spots on the rear subframe or battery box that I would of missed? Both of those surfaces were either painted or powder coated. I don't remember any. I've looked at corrosion, connectors and fuses just now and it all looked good. Will take another peak.
You mention dialectic stuff. That is a cleaner and is not electrically conductive. Oxgard is a conductor and should be put on every connection, esp. ones you suspect. It contains an abrasive to scratch the metal parts to assure a good connection. Hope this helps.
Good luck.
Sorry, I've been calling Oxgard dialectic grease this entire time. Got the bike from the shop (Ivan) and he got it running. Problems? The idle sits at 2,000k rpm, the cooling fan is hitting something, the step isn't properly aligned and I still need to properly work on routing the throttle/brake/choke cables.
Ivan is a tough Bulgarian SOB so he didn't tell me too much on what he did do to get the fuel pump to prime again beyond securing the connections on the CPU and replacing the fuses. Interesting because I KNOW i checked those problems but human error is a thing. Either way, to make sure it's all secure on the tray, he did some actually nice zip tie/platform magic so now the CPU is secure and is sitting on shock absorbent material. (was going to do it anyways but that's nice). If any of you are in San Diego, it's Ivan's Fastbikes. What they charged me, and with how busy they were, it might as well of been pro bono work. Shout out to Ivan's shop.
Should of done this waaaaaay earlier but I recently looked at how the manual suggests all the cables be routed. The current issue way back then, before too much was touched, and now is that the choke lever is really hard to move, which I'm guessing is the root of the high idle problem. It's also very hard to close that contraption up too. The throttle cable still doesn't retract quick enough so that's just more sanding to do. Some of you guys said that you just took a knife and this and that but how much powder coat did you actually take off? At this rate, I might be getting down to the original dimension of the handle bar... which seems right upon further reflection.
Edit: took a grinder to the handle bar and now that's fixed and so are all the other little things. No idea what to do about the cables until I can get a tickle trickle charger so start the bike. The mechanic suggested that the idle surged when he would turn the handle bars a certain to and fro.
The idle speed and choke are one and the same thing on these bikes. The choke cable pulls on the starter valve plate (which opens all the starter valves together), and the idle screw (in through the rubber bung/hole on the right frame spar) pushes on exactly the same plate. So if your choke lever is not moving freely then it will keep the idle speed high.
Let me know if you need any diagrams for throttle cable routing. You may just need to back off the slack adjuster under the bars to give enough freeplay so that the throttle doesn't open when at full lock. If you need more than that adjuster can provide then you need to access the other end of the cables on the side of the throttle bodies.
Glad to hear that the bike is up and running.
Thanks brother. So just to reiterate, adjusting the screw on the right side of the bike can possibly fix the choke lever stiffness issue. Even if this was something that was never an issue before? Perhaps playing around with the screw and lubing the cable will do the trick? Also when I was moving the lever around, with the choke contraption open, I see that with the lever all the way up, there is a little bit of slack. Also, the lever goes a lot further up and down from than it used to.
If you have any diagrams, beyond the repair manuals, than I would greatly appreciate it! I took a grinder to peel some powder coating and now I'm getting proper and quick return from the throttle.
Thanks again.
No the idle screw won't fix a stiff choke lever. A stiff choke lever that won't rotate properly closed will keep tension on the cable and keep the idle speed up. If you can move the choke lever fully off (anticlockwise looking along the bar) and the cable has some slack, that is good, and the high idle should be just due to the idle screw.
Thanks brother. Got the idle fixed to to 1200 plus fixed some massive exhaust leaks in the front ports. Very convenient method to adjust that idle. It went from sounding like a ticking lawn mower with a ticking time bomb to how it should. The neighbors definitely did not enjoy any of that! Forgot how that wolf exhaust sounded and how loud it is! Mean! Will have to get some proper sound bites/video of the bike when she's more in tip top shape. Do any of you want a ride by video? Let me know, it's the least I can do. Btw, I don't know how your exhaust laws are in NZ, or the rest of the world, but in CA (supposedly) the legal limit for bikes 86' - current is 80 decibels; aka nothing. Pretty dangerous when you think about it, even when taking the Doppler effect into consideration.
Tomorrow is lubing that lever cable and properly threading the wires to where they need to go. How it sits, none of the cables seems (operative word) to be having to bad of a time beyond that choke.
Good to hear (see what I did there?)!
Must be exhaust leak time, I found one of my front headers was leaking at the head, and has non-standard stud nuts so someone has been in there before me. I tightened them once I had the fairing off, then broke a mounting tab on my cheap Chinese right side fairing on reassembly, so I have some gluing to do now.
You've certainly had some similar problems to me.
The Service Manual is a godsend when it comes to cable routing - this, as well as sanding/knifing the bar sorted the sticking throttle tube, although it rubs slightly on the bar end too, which will need to be addressed.
Fingers crossed that this is the final hurdle for you!
It's been figured out. The choke cable was binding. I also had to tighten the center nut cap (not nut).
[image: 2dbsbiv.jpg]
[image: kd0kz9.jpg]
Will try to get you some sound bites. Now that it's all done and I've had my 1 week of enjoyment, anyone in the soCAL area want to buy a bike? :(
![[image: 2dbsbiv.jpg]](http://i67.tinypic.com/2dbsbiv.jpg)
![[image: kd0kz9.jpg]](http://i65.tinypic.com/kd0kz9.jpg)
That looks chuffing brilliant - it's a real shame that you won't be able to keep riding it and enjoying all your hard work.
Someone is going to be a very lucky new owner - yours has to be one of the best condition 5th gens out there - GLWTS.
Where was the cable binding btw? Was it down to the cable routing or incorrect cable tension?
Thanks brother! So the choke cable was routed in the front of the strut and not in the back so whenever I turned to the right, it was just being pulled to it's length's limit. Funny part was due to the powder coating it took me HOURS to get that top tree off to get that job done.
Went to a hookah lounge, with friends, and parked the bike in the front. My friend's friend saw the thing as he walked in and asked who's ducati was that and is it for sale? LOL. Either way, it's gone. It's been raining dogs and cats on and off here so I told him to get some sound bites and video eventually. These bikes really do look cool... when you get to see some one else riding them. Not shedding a tear, I swear.
Thank you Loftust and the rest of vfrdiscussion for helping me out with this. Couldn't of done it, and especially at this level, without you guys. Hopefully in Poland I can find another one and travel around with my cousin and his Vstrom! It'd be great to see some of you guys and try some of that hose water beer you guys have in UK! ;D
Just another
[image: hve4pf.jpg]
[image: f2wl4.jpg]
![[image: hve4pf.jpg]](http://i68.tinypic.com/hve4pf.jpg)
![[image: f2wl4.jpg]](http://i64.tinypic.com/f2wl4.jpg)
Beautiful! I am surprised you can let it go after all that hard work and how nice it came out.Hopefully you make a few bucks and it goes to a good home.
It was always going to shift quickly, but I'm surprised it went THAT quickly! I hope you got a decent price; the new owner is definitely one lucky SOB.
We drink beer made from river water, twigs and all, down here; let me know when we can teach you how to drink it! :wink:
Keep in touch - I'm sure we can arrange a meet :smile:
All that, and you SOLD IT????
Whisky Tango Foxtrot, over?
Well lads, I'm moving to Poland this morning and starting a new chapter! In 16 hours! These are in a very niche market since San Diego is a military and border town; so its R1, BMW 1100 and GXRS for days. I've seen one other 5th gen and just a handful of 6th gens. Had to sell her quick because it was coming down to the wire with who was going to buy the thing. Only wanted to sell it to some one I knew was going to love it and I think I found that guy. It was love at first sight for him. He's never heard of VFRs and now he's obsessed. Told him about the forum so maybe he'll join. He still owes us a video of that wolf exhaust in action! I don't even know what it sounds like lol.
All in all, probably got a good 400 miles out of her. New sprockets, new chain and de gunked drive system really did the trick on how smooth those miles were. I'd say if any of you are needing to clean the chain more anally retentive than you should than take that front sprocket cover off and give it a good clean. The newer electricals kept her revving like a charm and making sure the exhaust leaks were taken care of (vs. how it was before) really kept her humming great. The first painter really fracked me out of any long term enjoyment with this thing. Have half a mind to tell the local riders page about my experience but alas that drama is over with and enough people know by now. After all he's the "victim" supposedly. So, including with the great internals, I got to ride as new of a 5th gen VFR as I think I'll ever get and it was really a blast. Some great roads here and was able to give those KTM 390's and Duc monsters a run for their money in the twisties, if you can believe it. Can only imagine what you guys are doing with your bikes in what must be in or around some great roads. These bikes age like a fine wine and oh how sweet it is!
Thanks again y'all and I'll try to keep in touch. Supposedly planes trains and automobiles aren't too bad of a way to get from country to country. Will see how the situation is once I get there.
[image: 4skxtu.jpg]
![[image: 4skxtu.jpg]](http://i63.tinypic.com/4skxtu.jpg)
End of thread · 140 posts recovered Wayback Machine snapshot 20 Nov 2017