VFRDiscussion ARCHIVE / READ-ONLYREAD-ONLY

My 95 Vfr-Sf Project: The Process

117 posts Started 2 Jul 2013 Last recovered post 9 Nov 2017 Wayback Machine snapshot 18 Sep 2021

#1

It is finally time to reveal my project, show the process, and hopefully give back to this great community I have learned so much from! I have been riding on the street since I was 16 (I'm now 30) and have owned a few different bikes: 92 ex500, 97 CBR 600 F3, 2000 DRZ400, 1997 GSXR 750, 2002 VFR 800 and now a 95 VFR 750. Please bear with me as I give a little explanation of how this project came to be... there will be lots of pictures to come!

Over my time riding I have always liked the idea of owning a naked style bike like a triumph speed triple. Smooth windscreen-less air, fun sit up riding position, a tourqey engine, fairly comfortable, great on a tight backroad, cool looks... etc. And now that I live in a place with a lot of great backroads I decided it was a good time to pursue that idea. I really liked my VFR 800, it was smooth, refined and great for trips with my dad. However the idea of tearing it down for a streetfighter project didn't really make sense... too much complication and lots of things to hide. I thought about buying a naked bike but riding a brand new triumph speed triple showed me dreaming about a bike doesn't mean I'm going to love riding it. Besides... I was really on a tight budget with my wife finishing nursing school. So I sold the VFR 800 to a friend and decided to look for a bike to convert to a naked/streetfighter. I had enough money to buy a CBR1000RR or other similar bikes... but I wasn't sure I wanted that much power at my disposal and really loved the refinement and character the V4 VFR's provide. Really nothing I've ridden compares... The speed triple had character but lacked some of the refinement of the VFR. To me it was a no-brainer picking a 4th gen VFR. They have a good looking frame, a radiator in front, and are less complicated than 5th and 6th gen bikes.
So I found a 95 VFR with 34000km in quite good condition to start the transformation. I know many of you will not like that I tore into a VFR in quite good shape, but let me give you a bit of my reasoning. Anyone who has tackled a project bike will probably attest to the fact that starting with a good base will avoid a lot of extra head-aches down the road diagnosing issues, wondering about frame straightness, fixing and repairing all sorts of components along the way... etc. And a bike in good shape allowed me to sell parts along the way to raise money for the build. Besides, I know the look of the VFR is a huge part of it's identity, but really that's just a plastic shell and in the end and the V4 engine is the heart of the machine.

Anyway, my goal here was to have a bike that road like brand new in the end. To have a bike that I wish honda would build (though I probably wouldn't be able to afford it anyway...).
OEM+ was the idea. I would give a lot of thought along the way to making a bike that functioned, looked and rode for the most part like an OEM product or better.
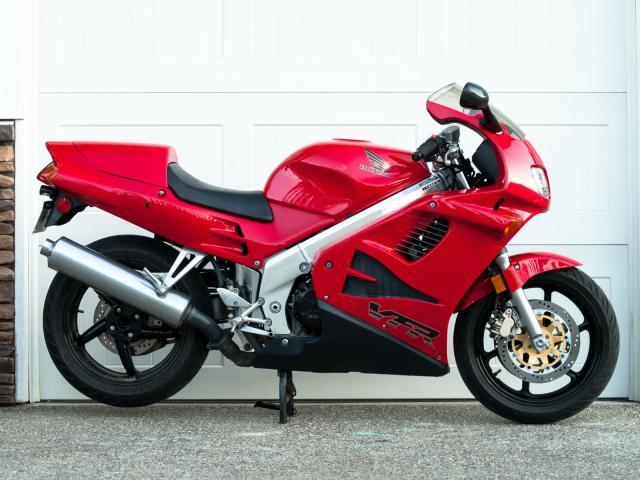
VFR-SF001.jpg
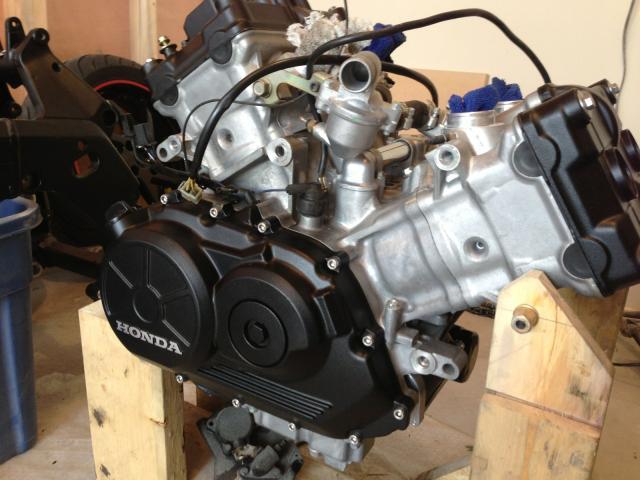
I rode this bike for a few months until my regulator/rectifier went up in smoke... suprise! Oh well... winter was around the corner so it was a good time to start tearing it down!
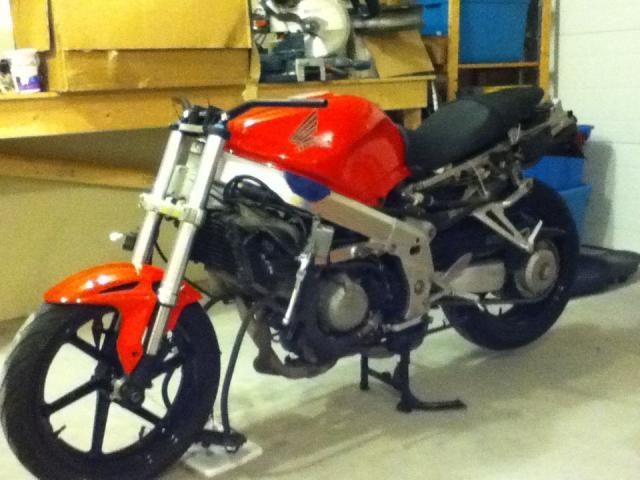
VFR-SF003.jpg
Along the way I had to source A LOT of parts and components (I'll make a bit of a list at the end). A big one at this point was the CBR929/954 front end swap. The forks and brakes were actually purchased from Bailyrock! And let me tell you... I think these forks are brand new :) VFR-SF004.jpg
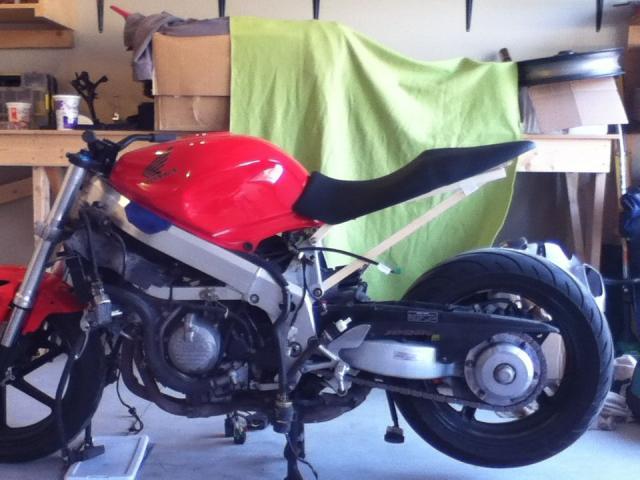
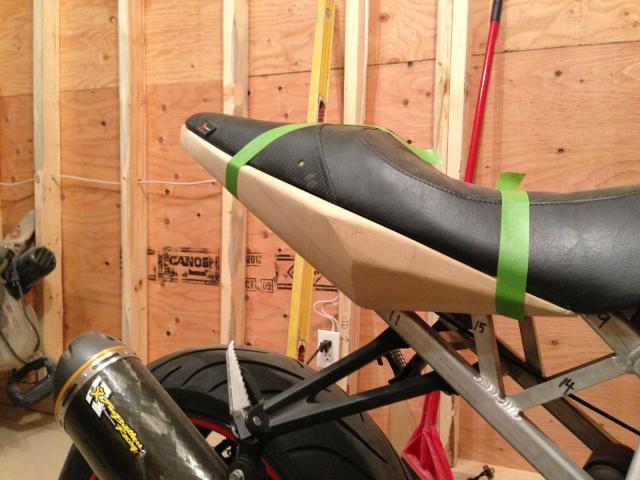
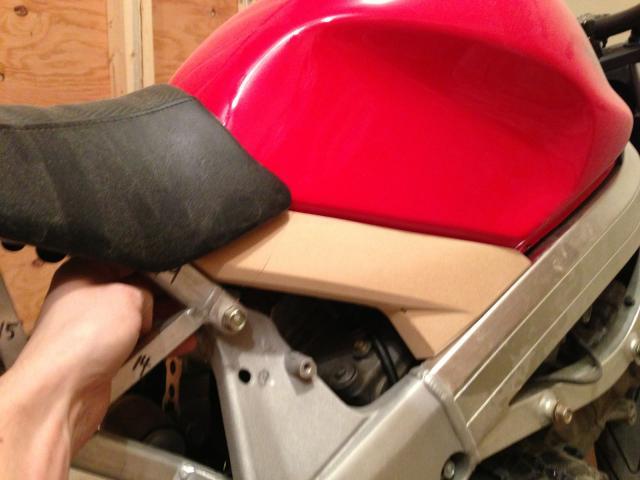
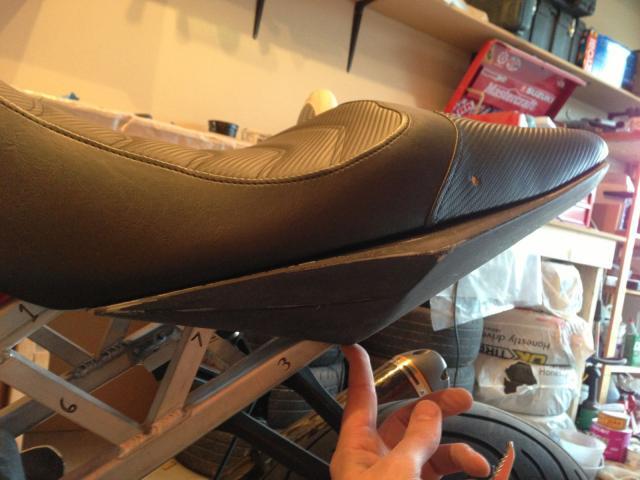
I did some photoshop work and decided I wanted to try and adapt a speed triple seat. It looked like it would fit around the tank and it would allow my wife to ride on the back. Then I set about mocking up the subframe in wood.
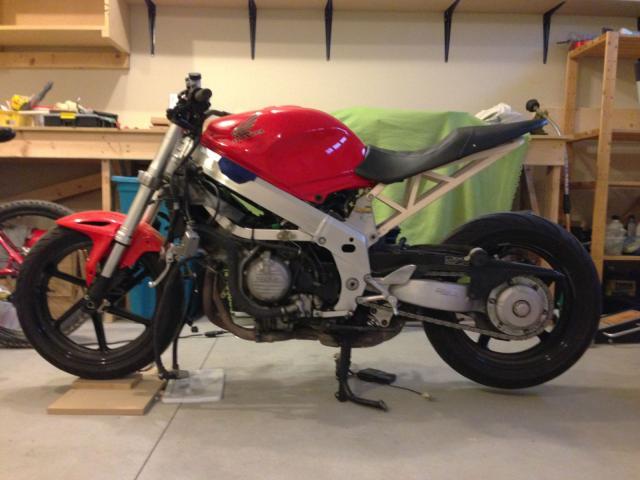
VFR-SF005.jpg
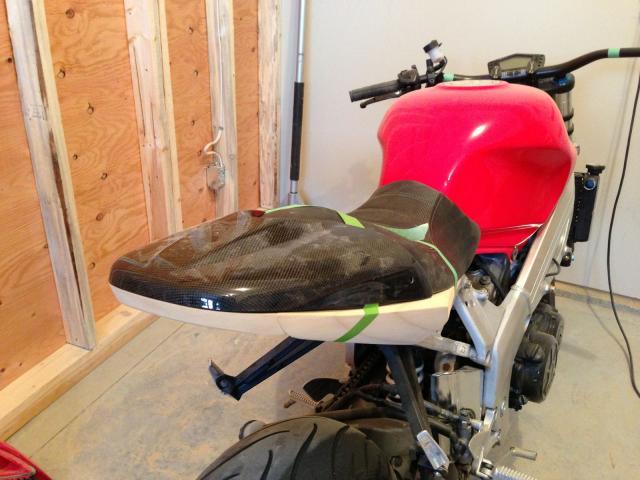
Then I recovered the speed triple seat with a luimoto cover
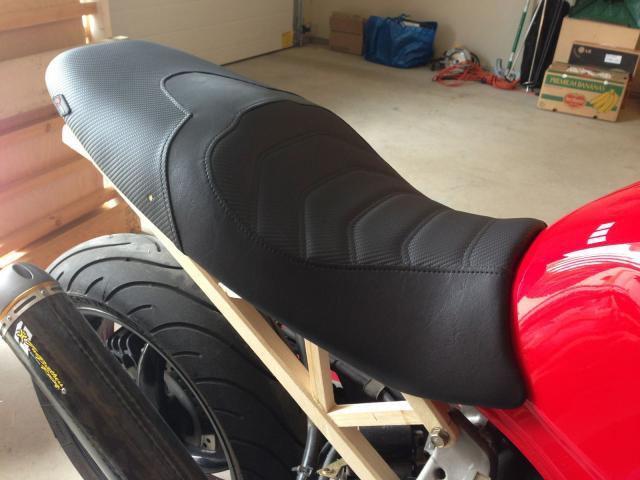
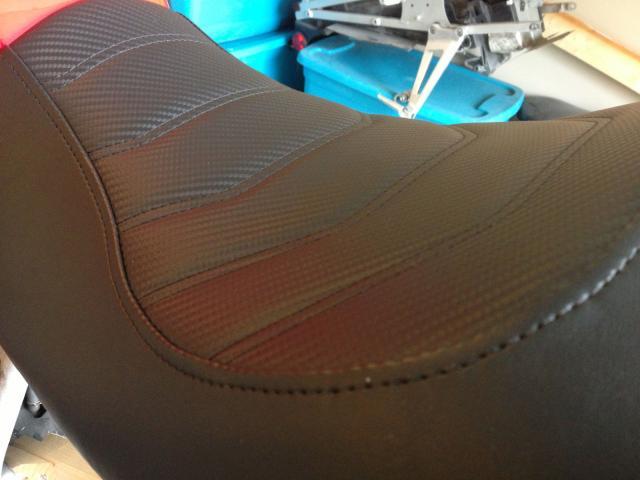
VFR-SF006.jpgVFR-SF007.jpg
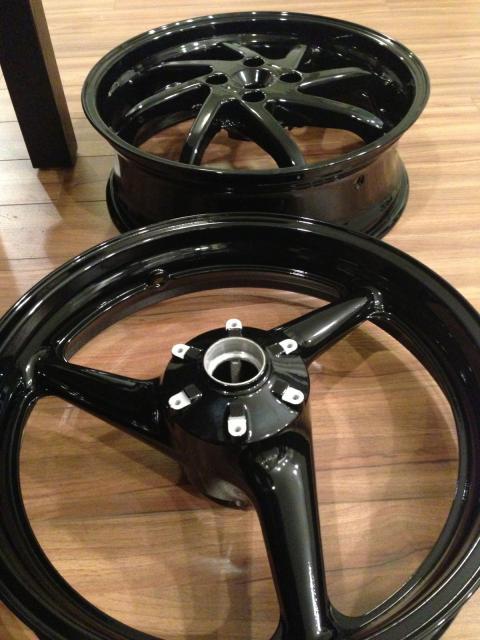
Got my wheels powder coated
VFR-SF008.jpg
Bought a Two brothers muffler used for a speed triple and had the V.A.L.E flange welded to a delkevic mid-pipe for the 4th gen bikes
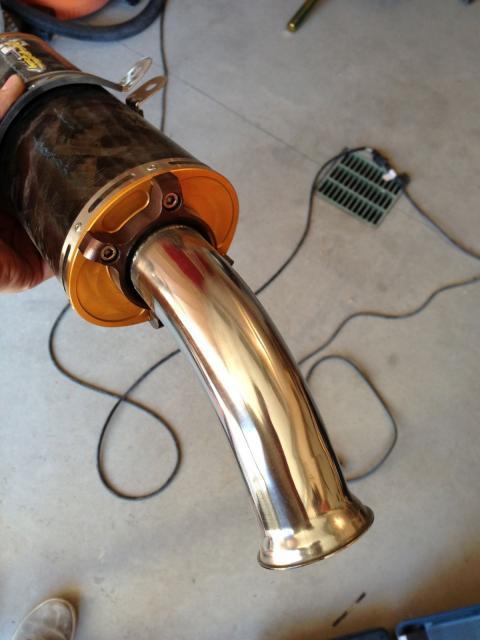
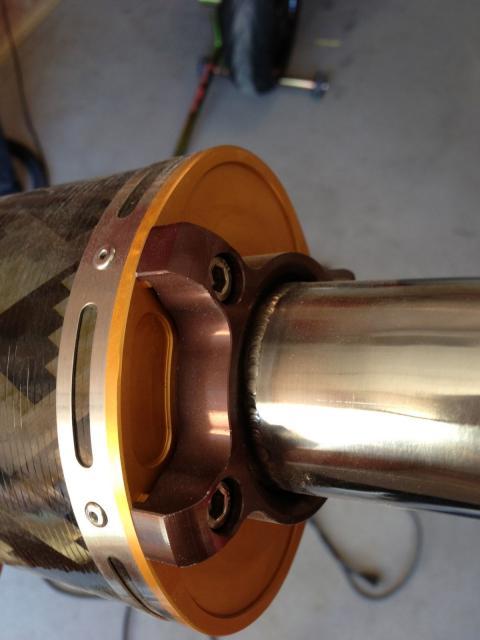
VFR-SF069.jpgVFR-SF070.jpg
Put the wheels on so I could keep building
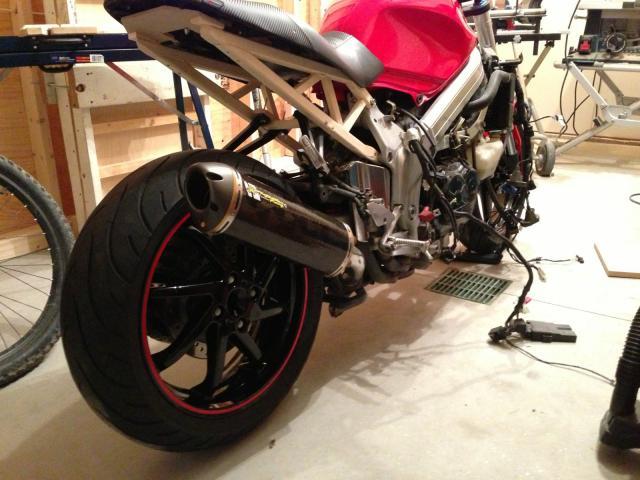
VFR-SF009.jpg
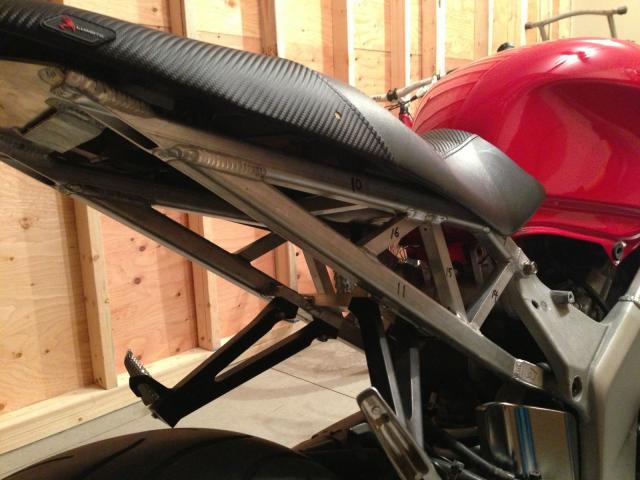
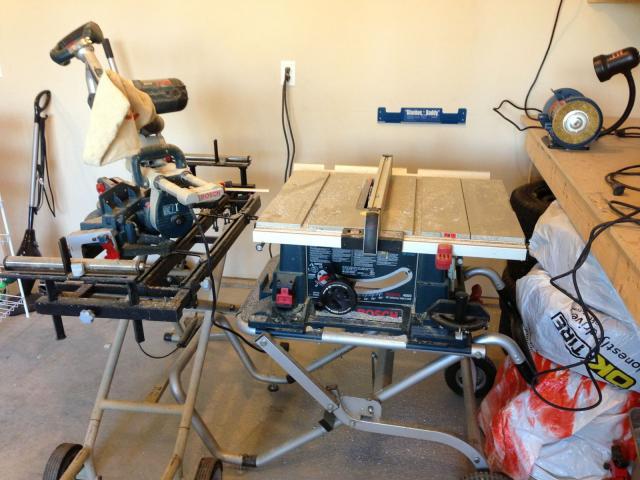
After I was happy with the subframe mockup (test fitting the placement of the passenger pegs for my wife was kind of interesting with a wood frame...) I set about using my carpentry tools to cut up some aluminum.
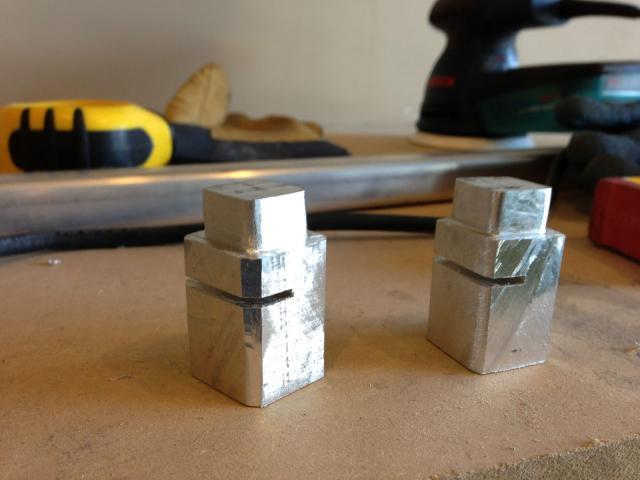
VFR-SF010.jpg
VFR-SF011.jpg
My dad gave me the tip of making a jig for the welder to hopefully keep his labor costs down...
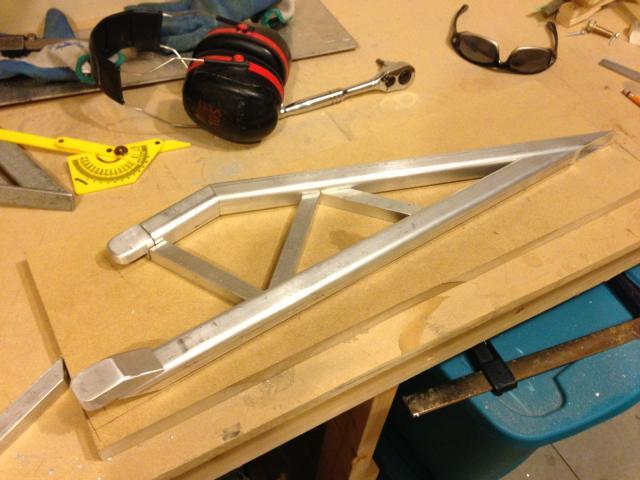
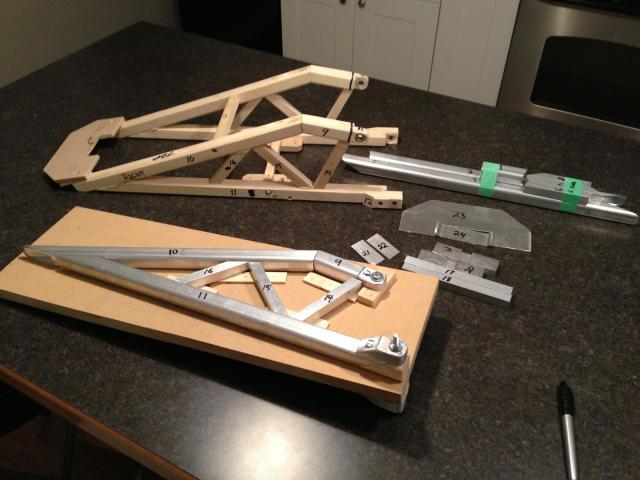
VFR-SF012.jpgVFR-SF013.jpg
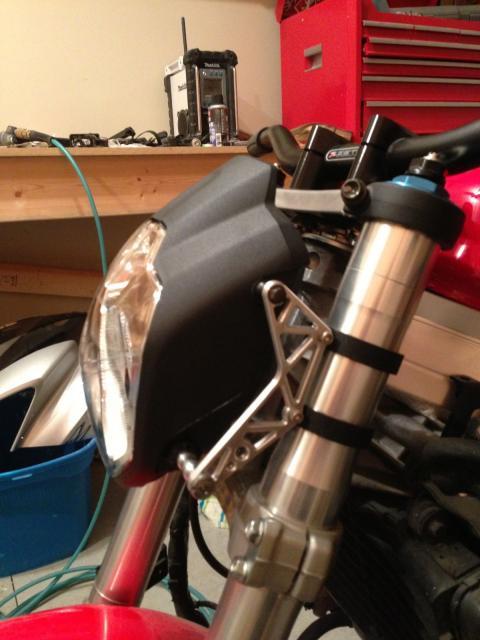
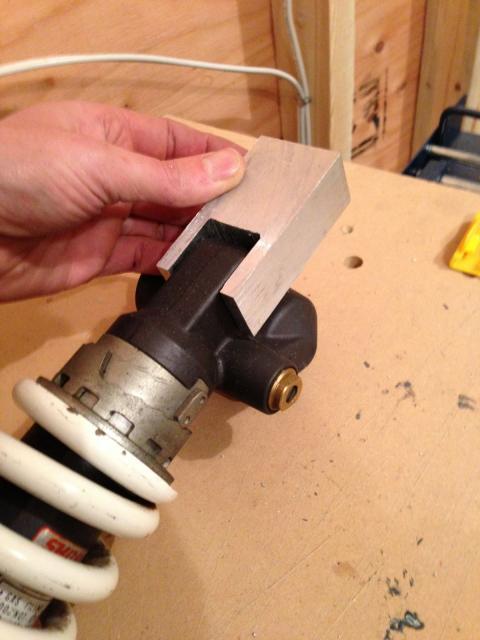
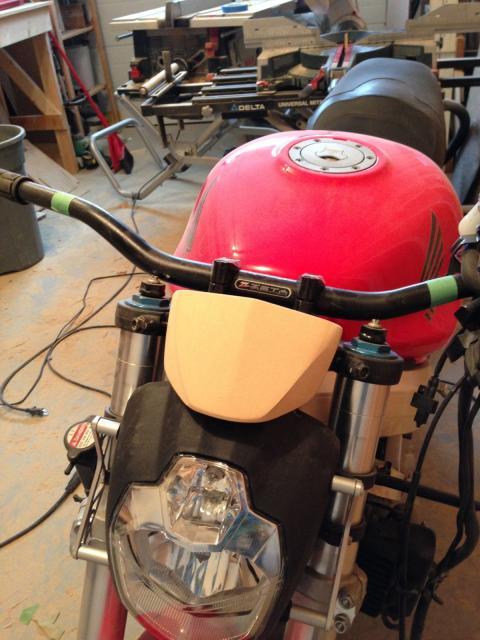
While the subframe was away for welding I cut off my front fairing subframe mounting tabs, fitted my front headlight (with mounts machined by a custom fighters.com member), and made a 929 shock adapter. It's starting to come together!
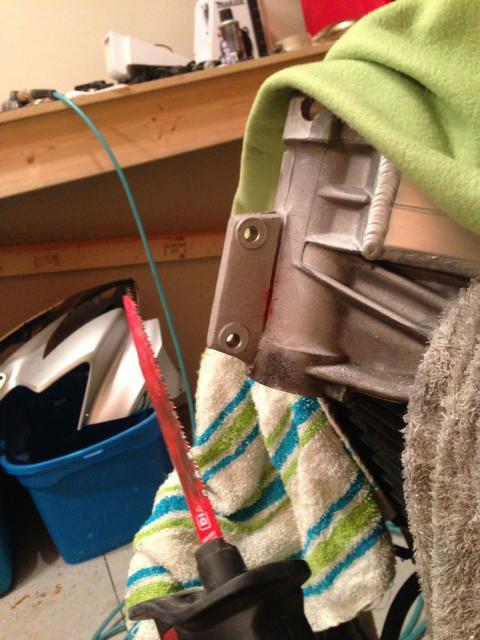
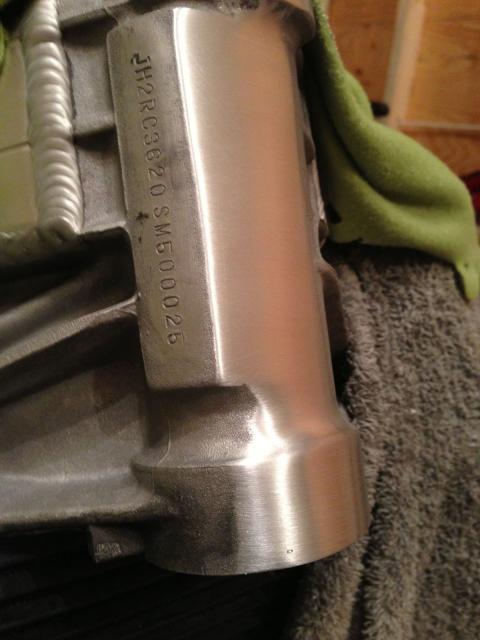
VFR-SF014.jpgVFR-SF015.jpgVFR-SF016.jpgVFR-SF020.jpgVFR-SF017.jpgVFR-SF018.jpgVFR-SF019.jpg
The subframe back from the welder! I'm very pleased with the result...
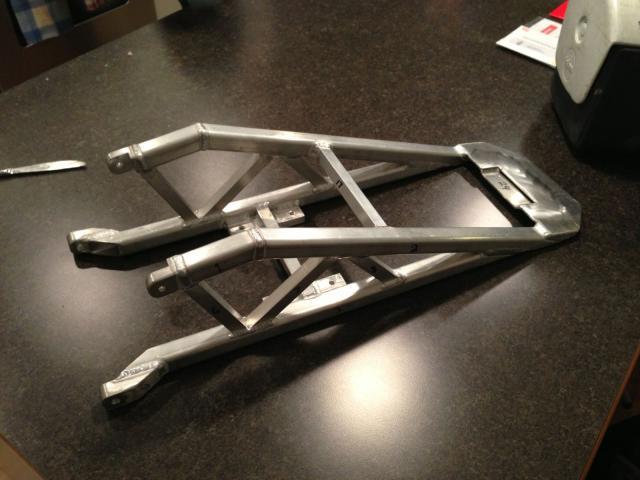
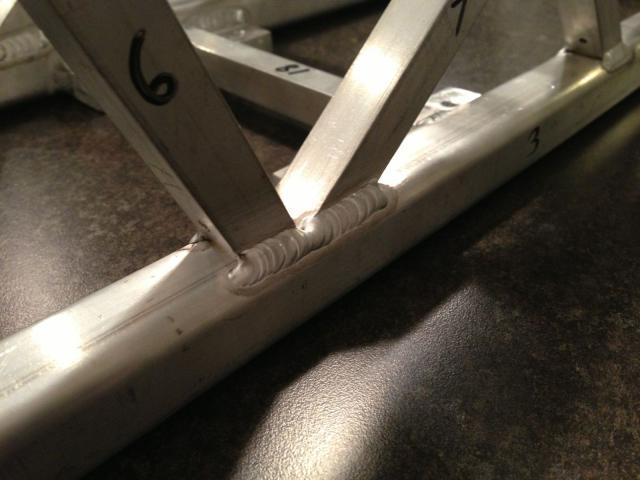
VFR-SF021.jpgVFR-SF022.jpgVFR-SF023.jpgVFR-SF024.jpg
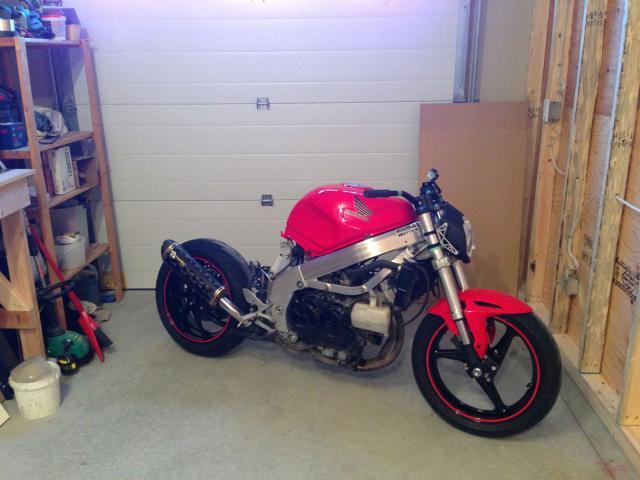
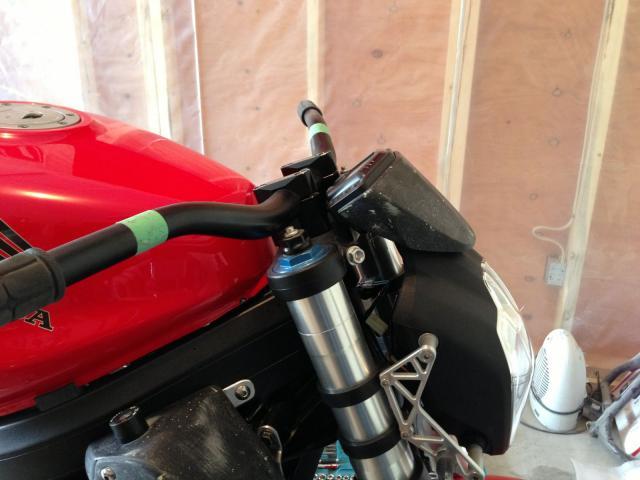
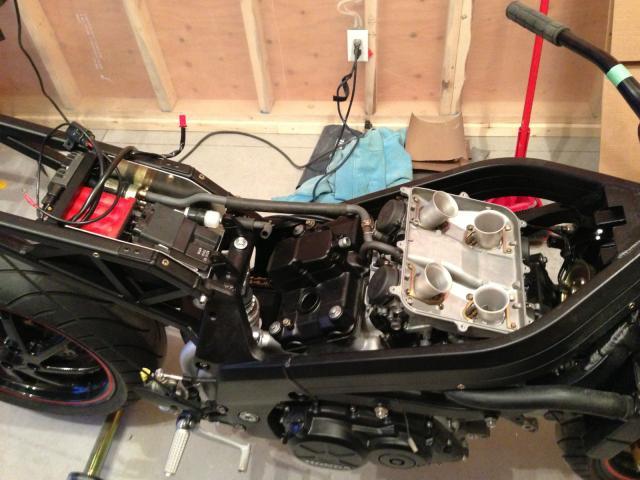
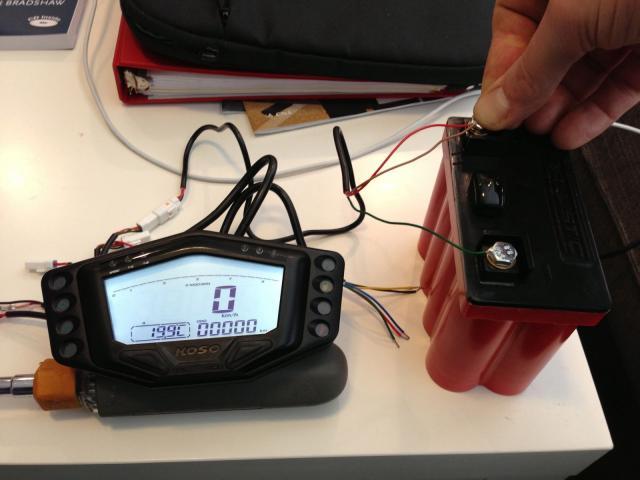
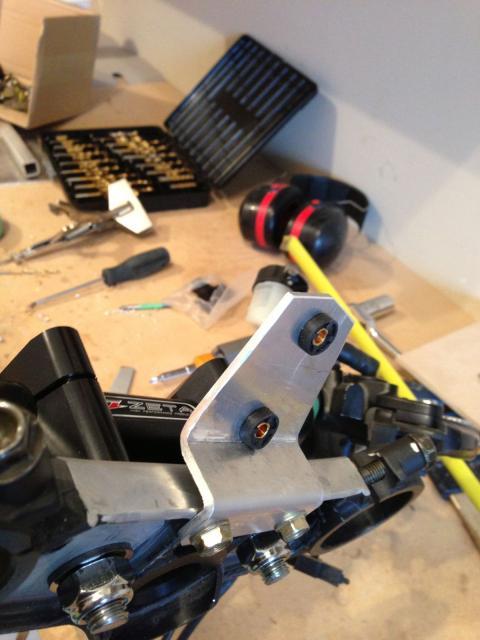
My ballistic battery and koso gauge came in. Made a gauge mount for the RC51 triple and let the bike out for a little air
VFR-SF025.jpg
VFR-SF026.jpgVFR-SF027.jpgVFR-SF028.jpg
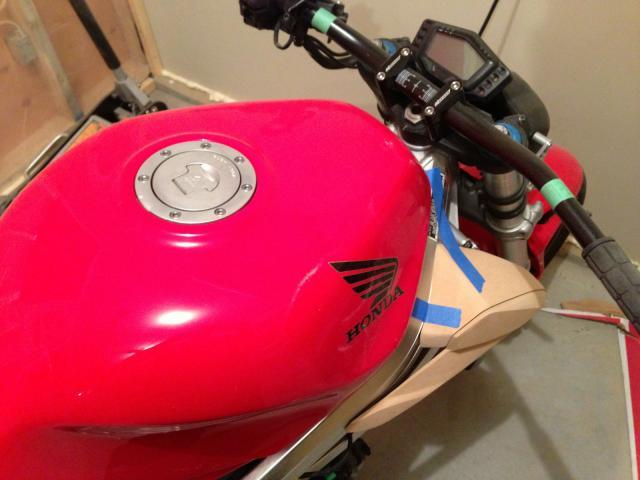
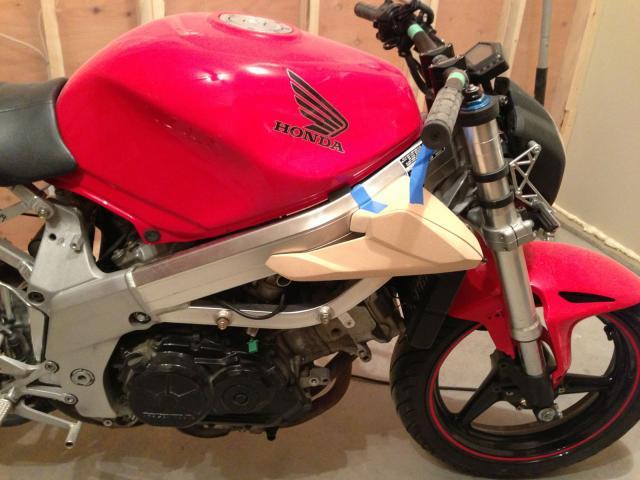
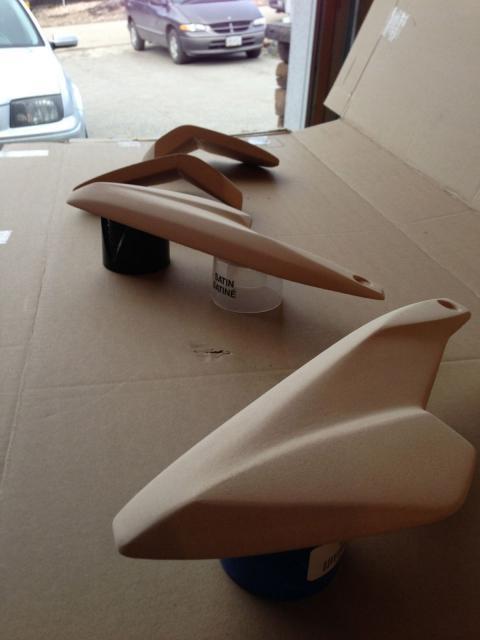
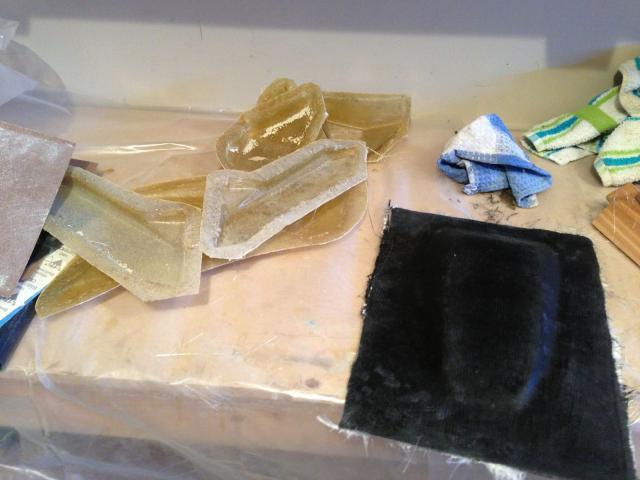
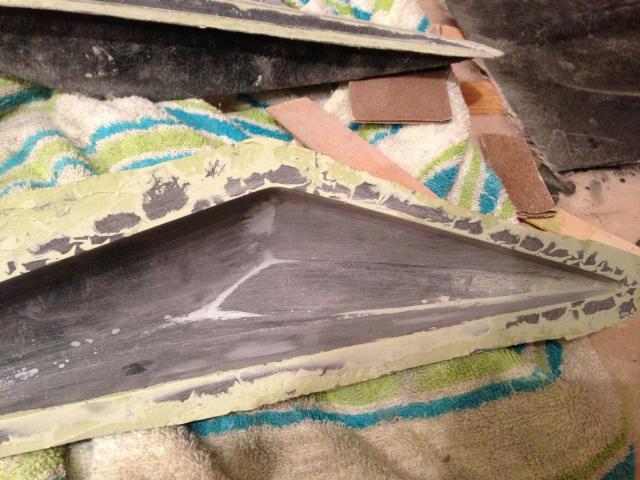
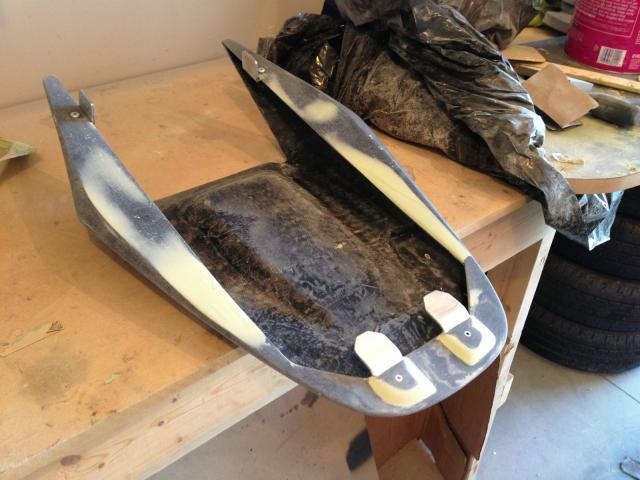
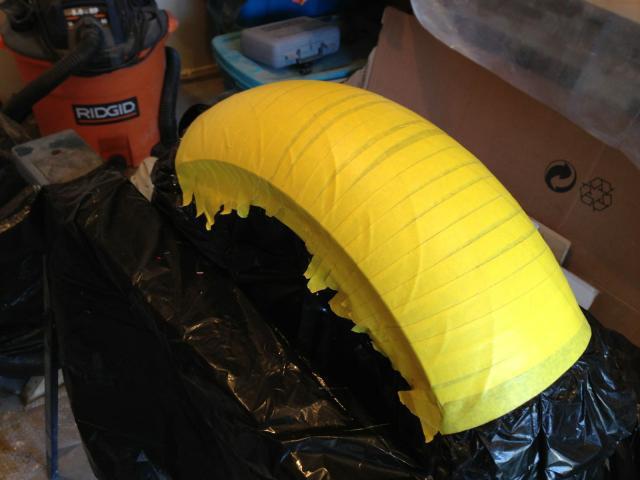
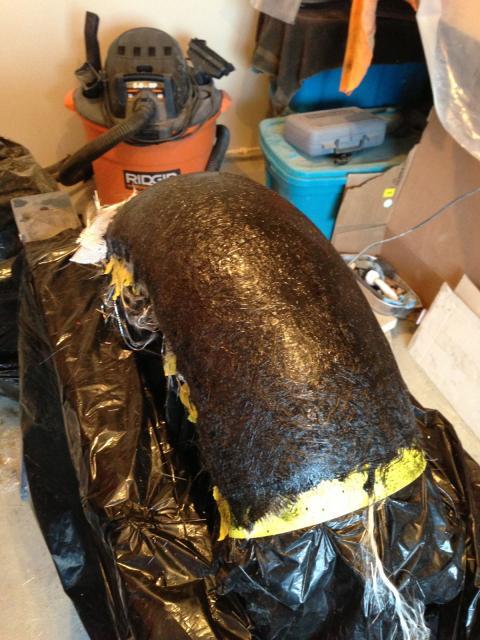
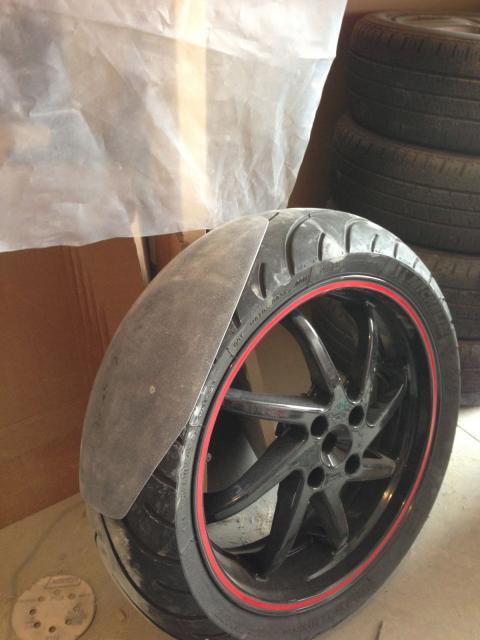
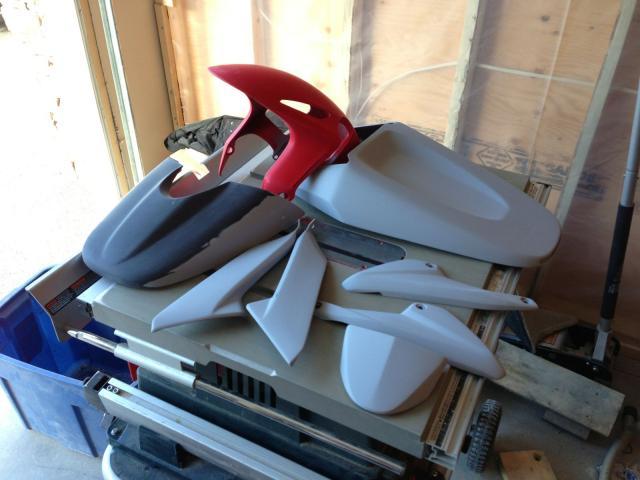
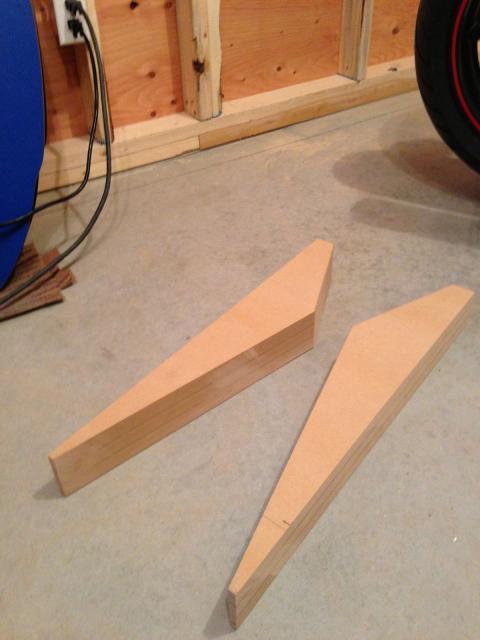
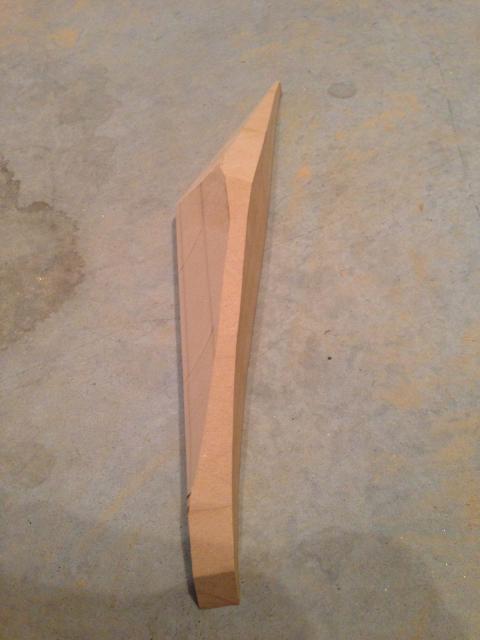
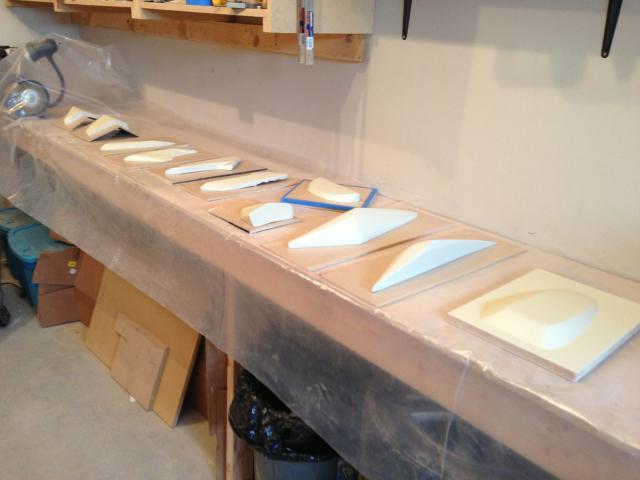
Now it was on to bodywork making time... This was a HUGE part of the project and I learned a lot along the way. I used 1" LDF glued together to shape the plugs for the parts. I'll let the pictures do the talking...
VFR-SF029.jpgVFR-SF030.jpgVFR-SF031.jpgVFR-SF032.jpgVFR-SF033.jpgVFR-SF034.jpgVFR-SF035.jpgVFR-SF036.jpgVFR-SF037.jpgVFR-SF038.jpgVFR-SF039.jpgVFR-SF040.jpg
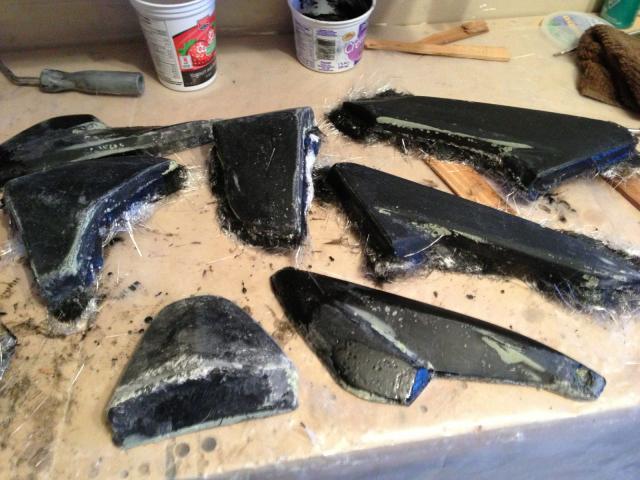
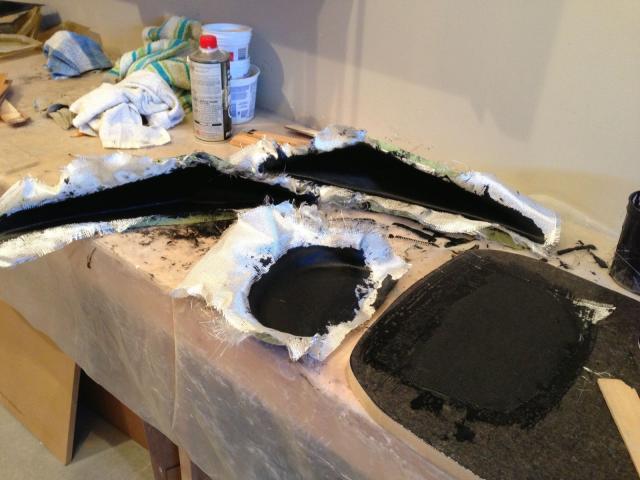
And here are the plugs ready for fiberglass... a lot of things didn't go as planned at this stage and my moulds needed a lot of work to make even rough parts.
VFR-SF041.jpgVFR-SF043.jpgVFR-SF044.jpg

VFR-SF042.jpg

VFR-SF051.jpgVFR-SF045.jpgVFR-SF050.jpg

VFR-SF052.jpgVFR-SF053.jpgVFR-SF054.jpg
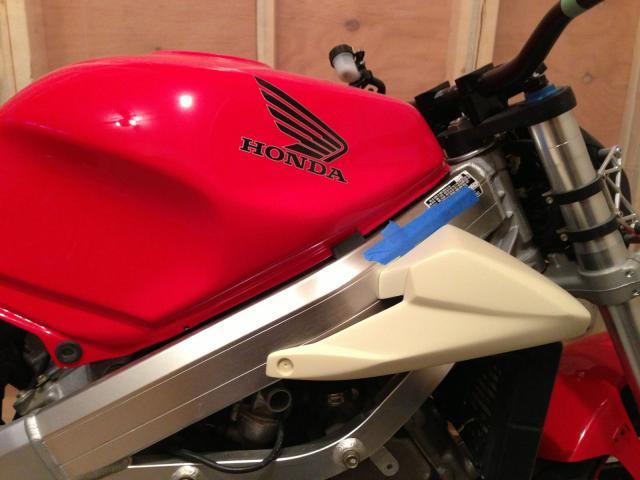
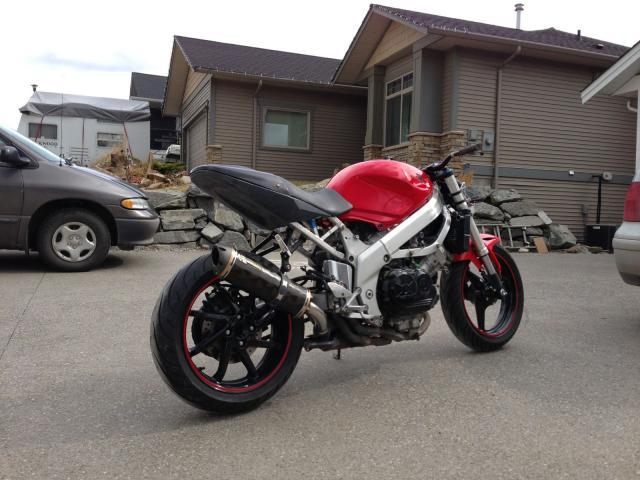
But in the end I was able to come up with one off fiberglass bodywork. I knew this would be a lot of work... but it ended up being even more. And then I still had to figure out all the mounting tabs... I thought it would never end. Eventually I was finally ready to tear the bike down for thorough cleaning and powder coating.
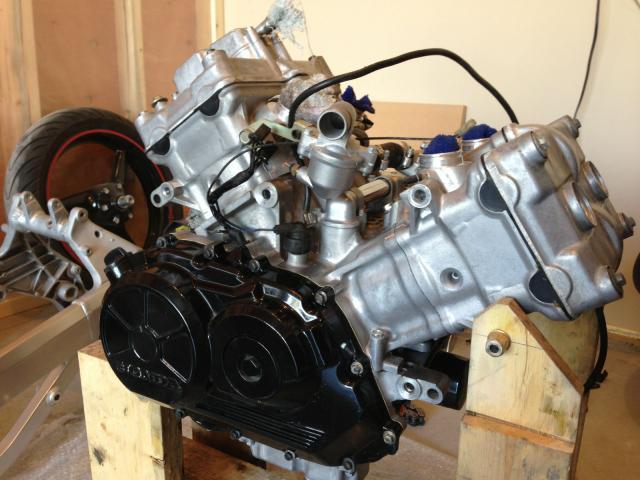
VFR-SF046.jpgVFR-SF047.jpg

VFR-SF048.jpgVFR-SF049.jpg
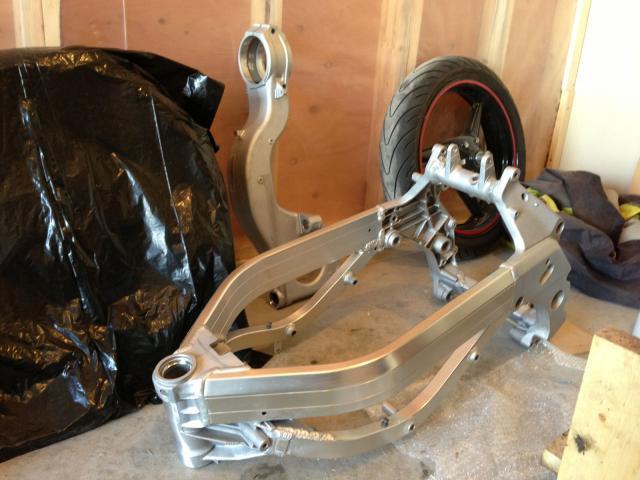
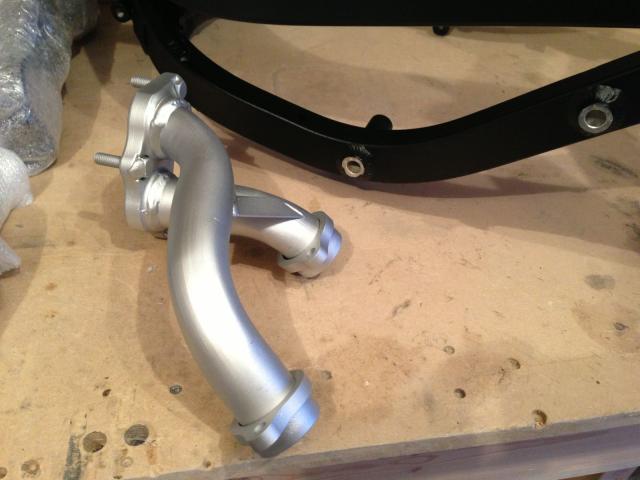
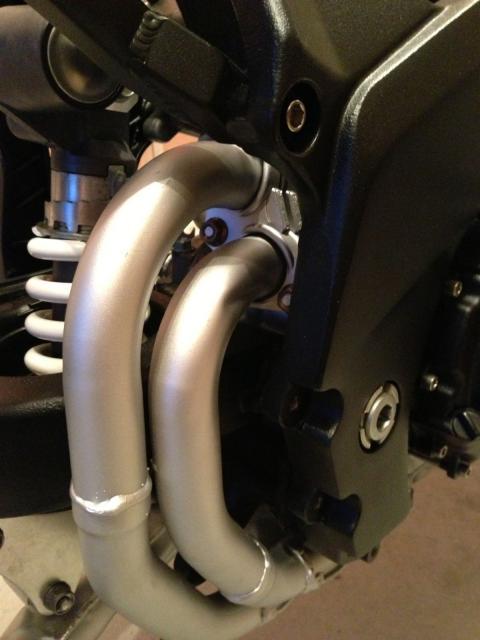
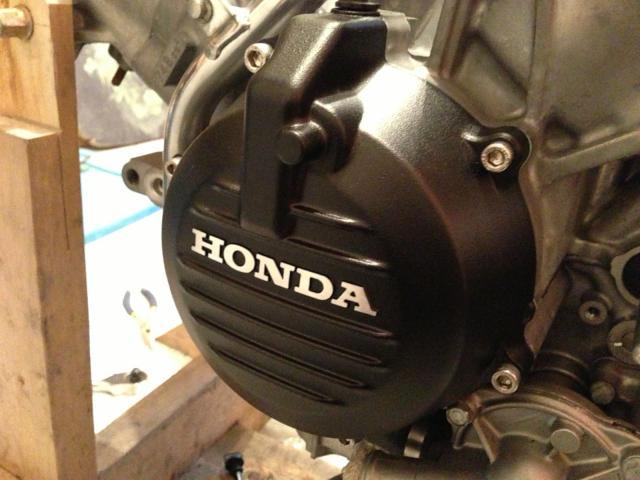
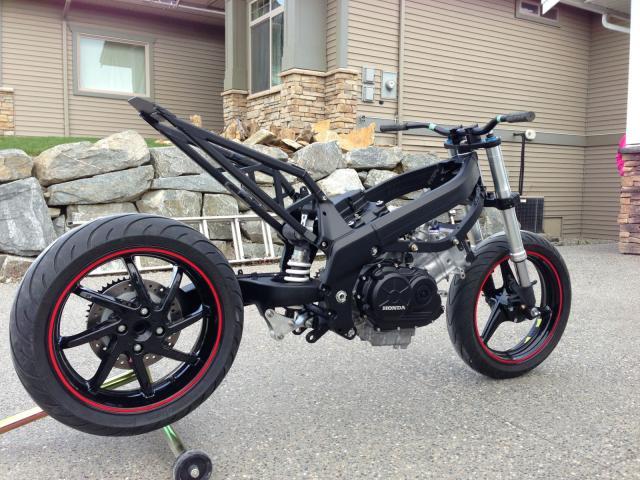
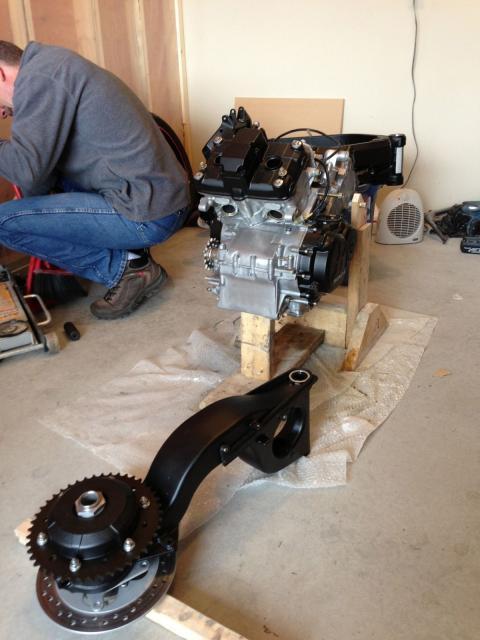
I had everything done in a fine texture black and the exhaust ceramic coated in a kind of matte aluminum color. It was like christmas unwrapping all the parts :)
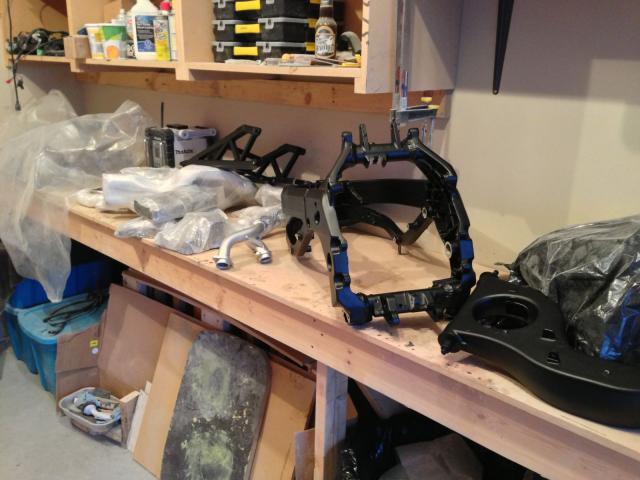
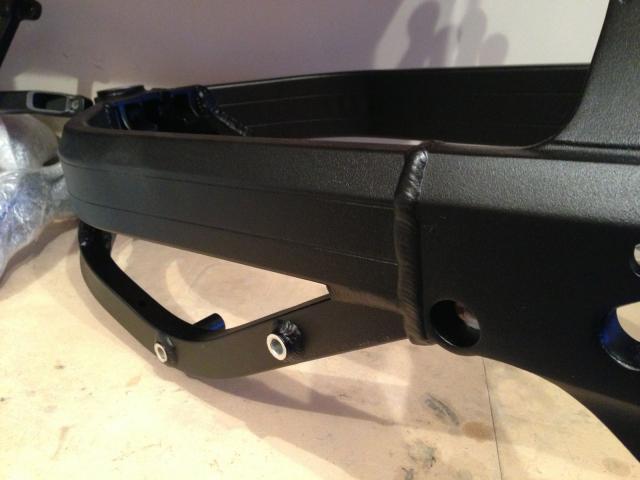
VFR-SF057.jpgVFR-SF055.jpgVFR-SF056.jpgVFR-SF064.jpgVFR-SF058.jpgVFR-SF059.jpg
Then it was reassembly time. My dad came and helped me out for a few days. It was great to have his help and skill for this part of the process. I love that we have a common interest in bikes!
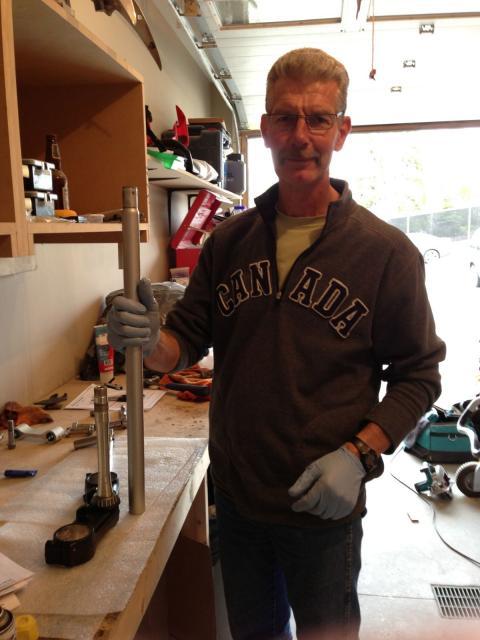
VFR-SF060.jpg

VFR-SF061.jpgVFR-SF062.jpgVFR-SF065.jpg
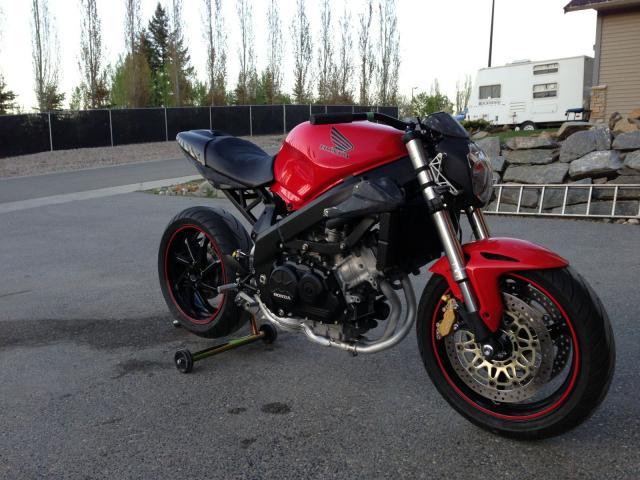
Had a good weekend and got the bike into a rolling chassis. I'm sure my Dad has had enough of repacking bearings for a while...
VFR-SF067.jpg
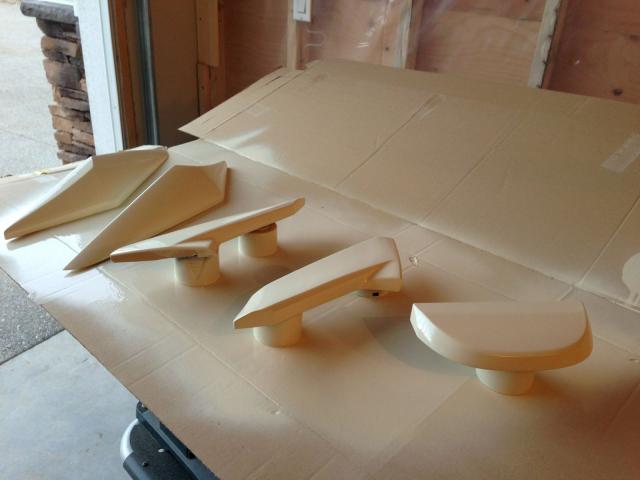
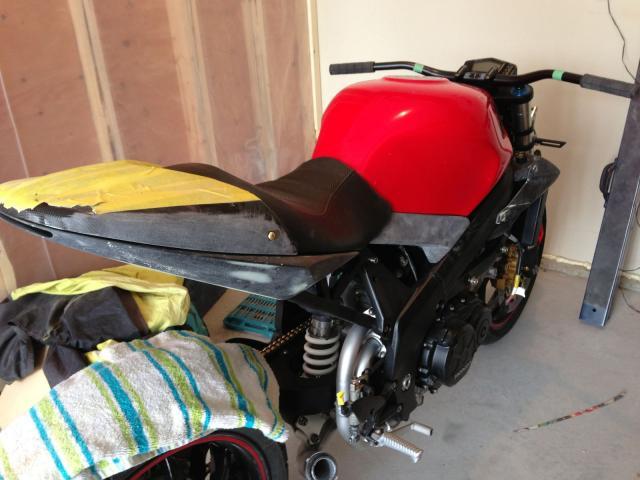
Then it was back to figuring out how to mount the bodywork and getting the parts ready for paint
VFR-SF073.jpgVFR-SF074.jpgVFR-SF071.jpg
VFR-SF068.jpgVFR-SF066.jpg
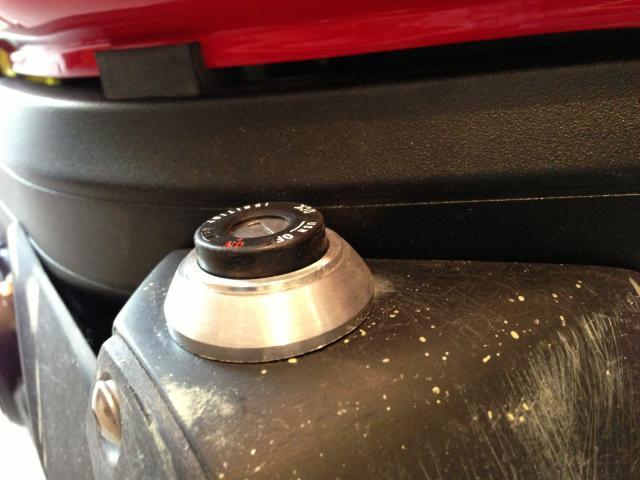
Found a nice spot to mount my ignition and made some aluminum bezels
VFR-SF072.jpg
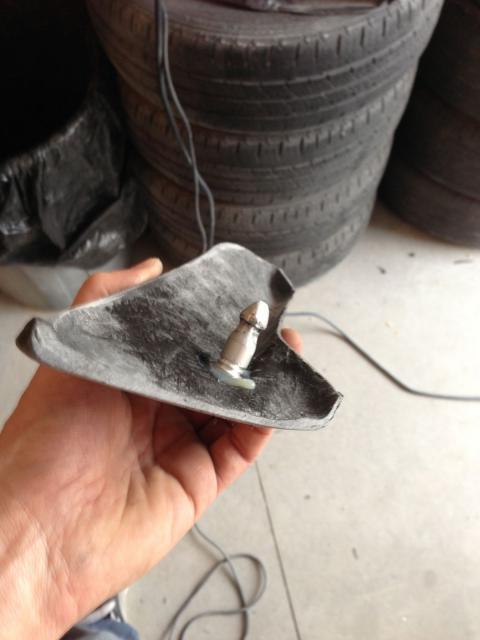
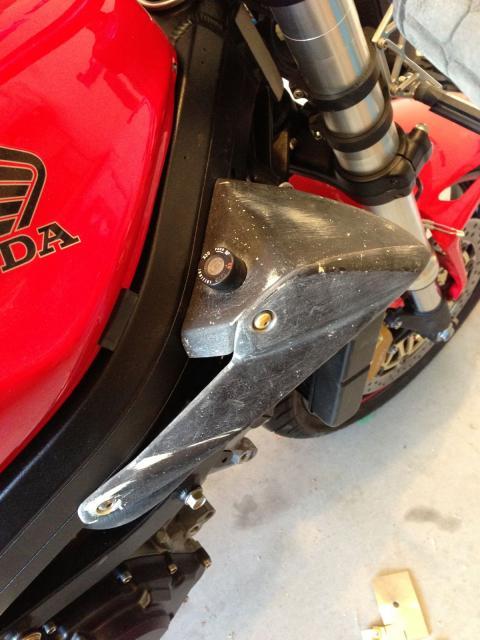
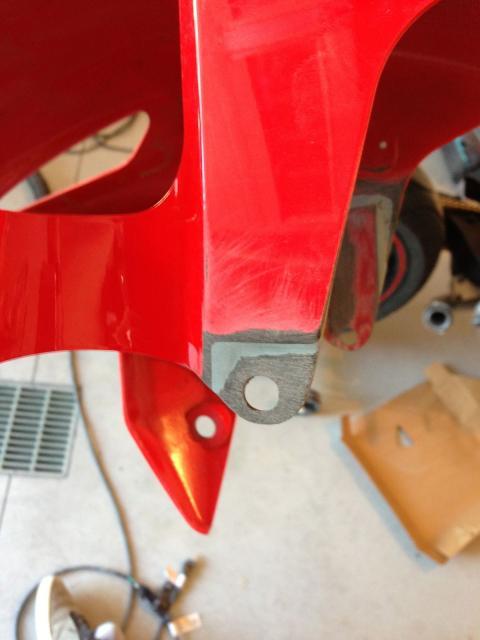
The CBR1000 front fender has some broken mounting tabs
VFR-SF075.jpg
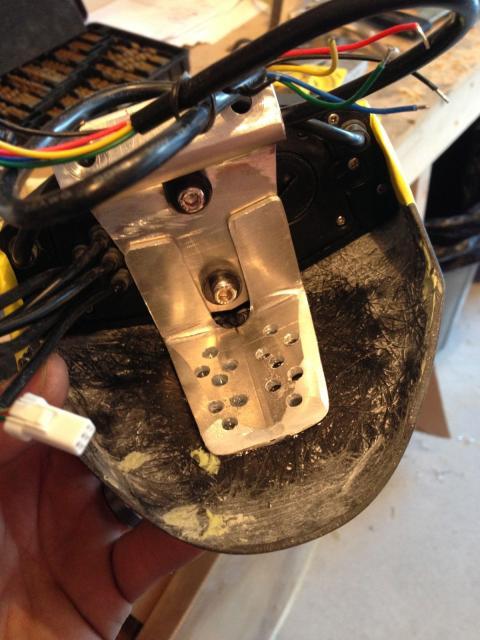
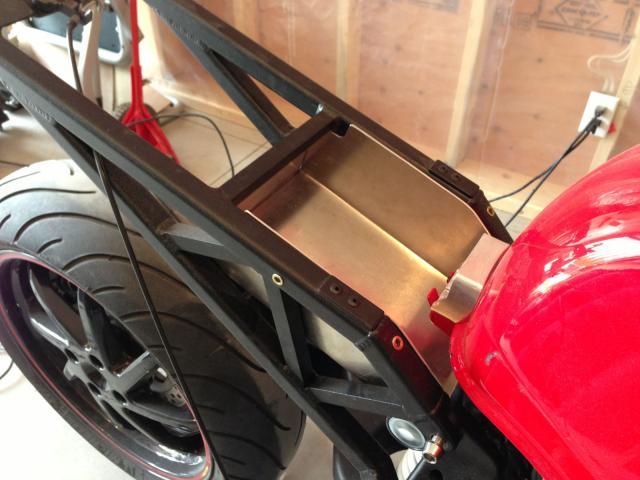
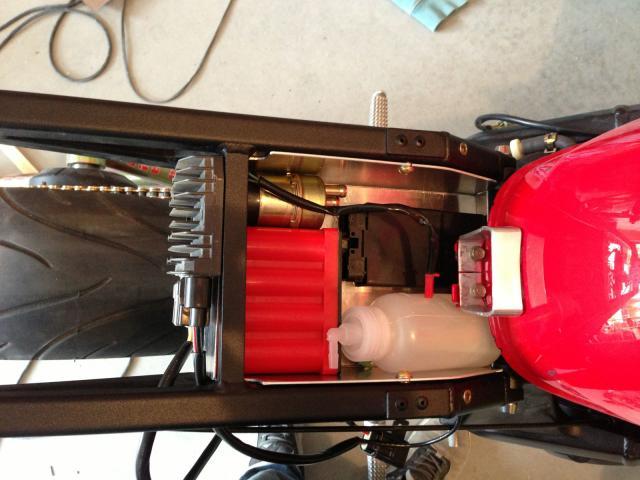
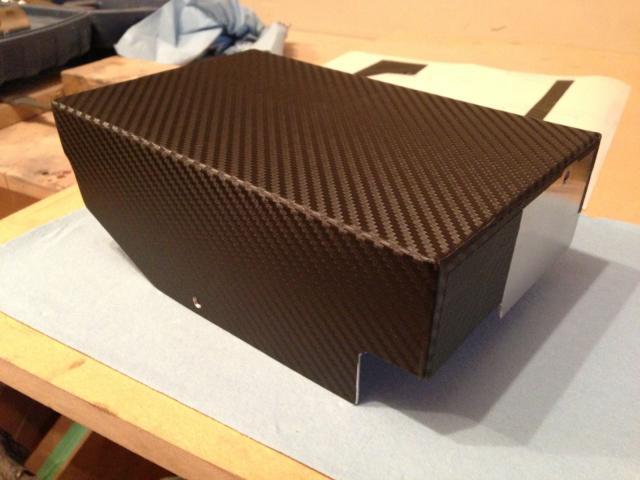
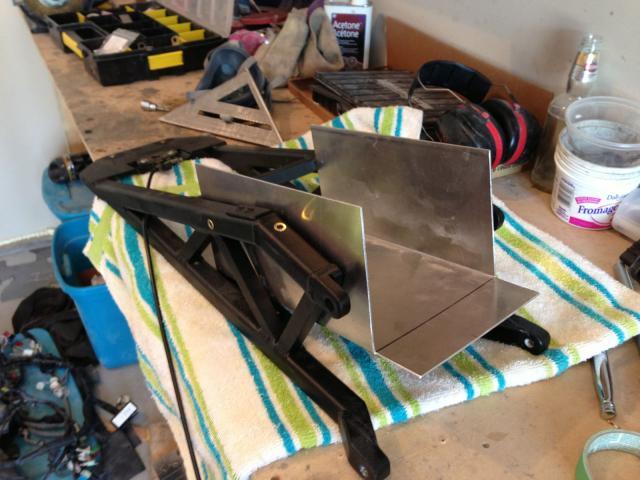
Made a battery/electronics box out of aluminum and covered it in 3m CF vinyl
VFR-SF076.jpg
VFR-SF077.jpgVFR-SF078.jpgVFR-SF079.jpg

VFR-SF081.jpg
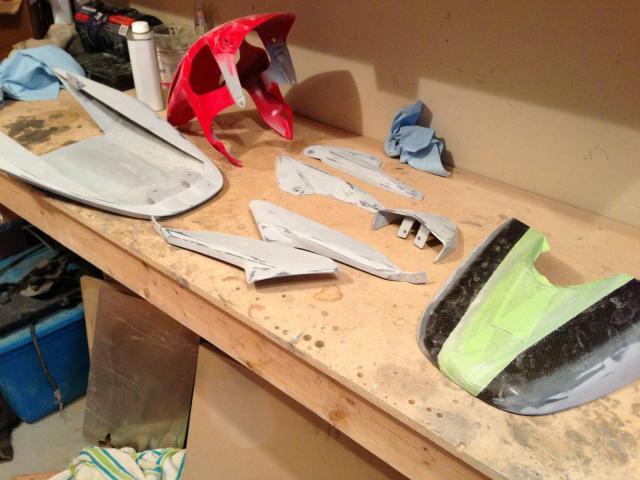
Found a local painter who let me help with the prep work to keep costs lower (he would spray the high build primer and I would do the wet sanding/spot filling)
VFR-SF080.jpgVFR-SF083.jpg

VFR-SF084.jpgVFR-SF082.jpg
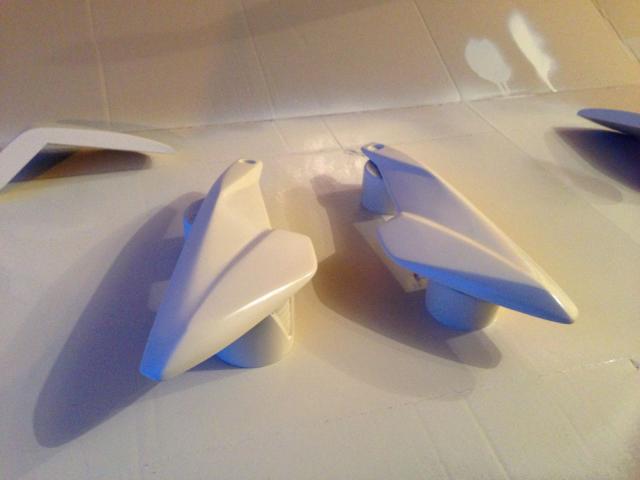
After a few rounds of primer and sanding the parts were all ready for paint.
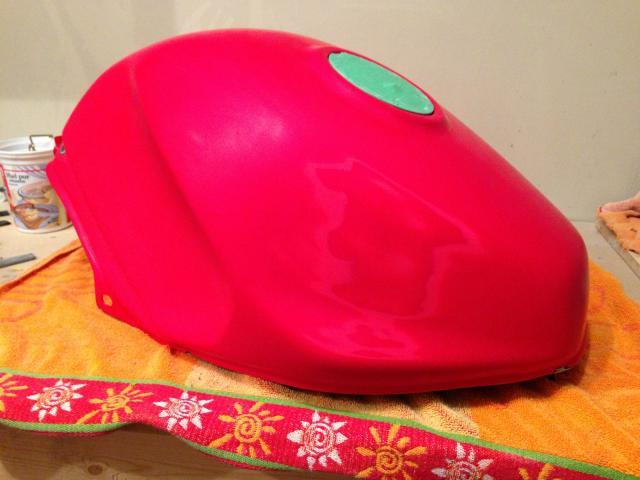
The plan all along was to match the stock pearl red on my tank and the painter didn't think this would be a problem with his ppg system... until he actually tried to enter the info into his computer. Apparently ppg doesn't have this color in their system. So... because the tank was getting painted anyway, I could choose whatever color I wanted! I knew red would look good... but I wanted something unique and fun, without being ridiculous. So I chose something else completely...
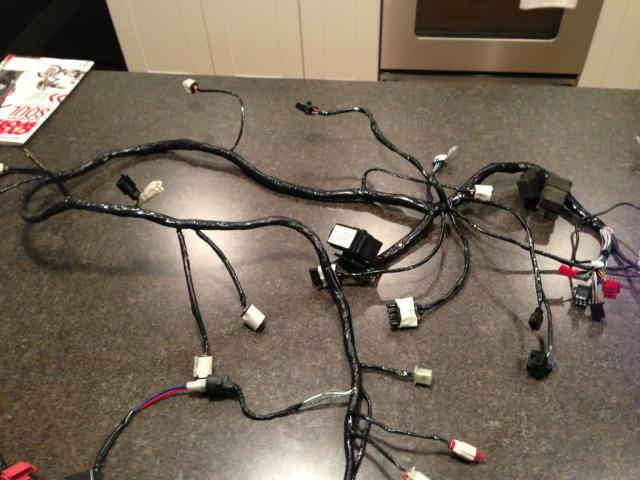
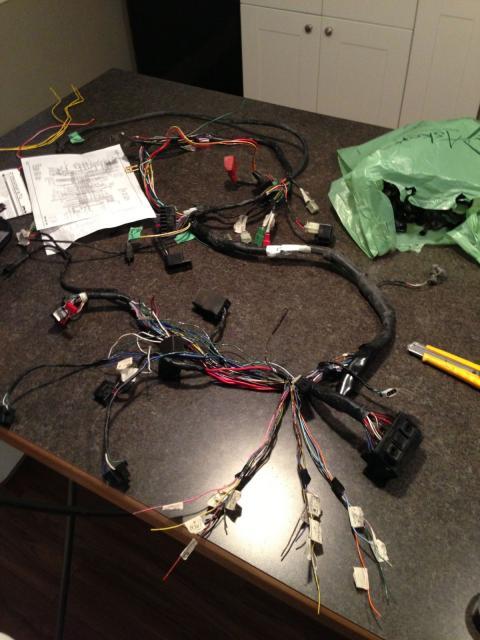
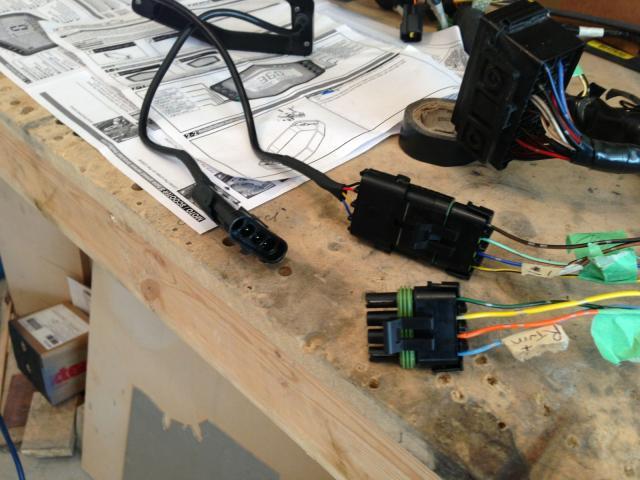
While I was waiting on paint, I tacked the electrics, fuel pump and wiring harness... which is a TON of work and something I would like to do a better job of eventually. All the connections are soldiered and heat shrinked, and I used good connectors where needed, but to really do a good job of routing the wiring and taking out excess will take more time.
VFR-SF085.jpg

VFR-SF086.jpgVFR-SF087.jpg
And then the parts came back from paint!
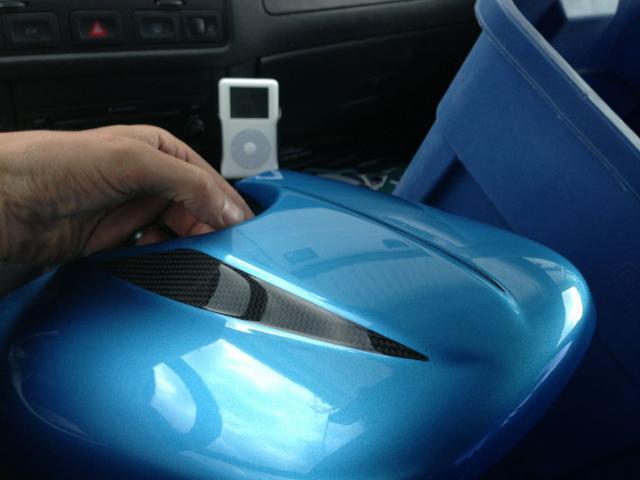
VFR-SF088.jpg
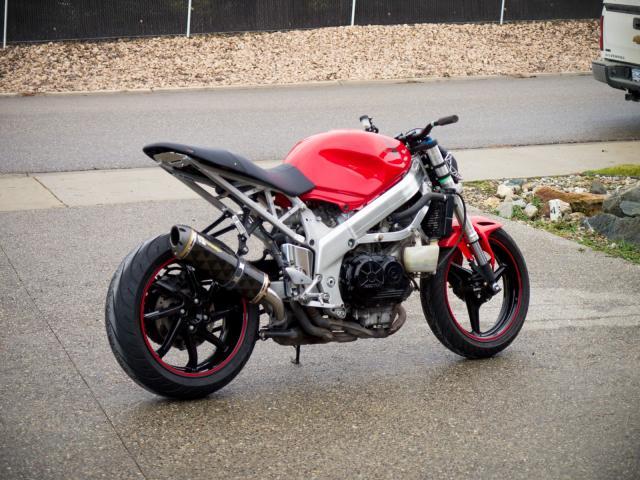
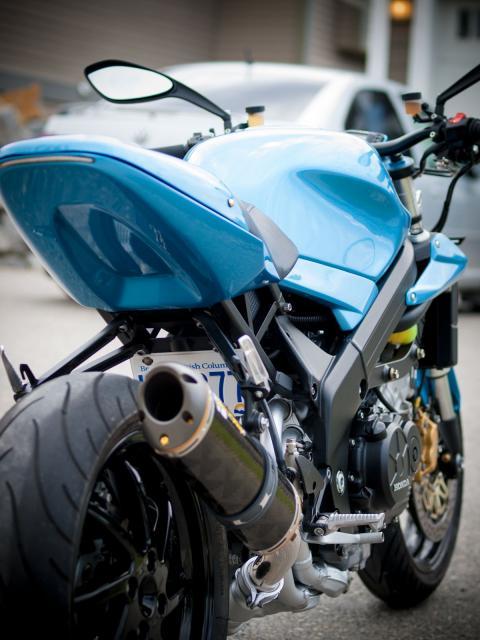
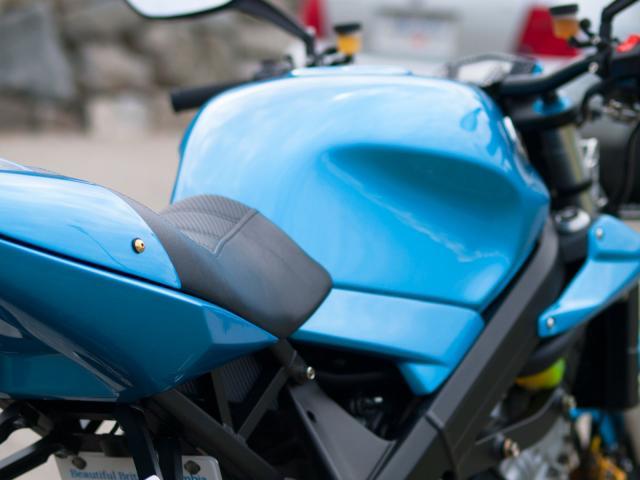
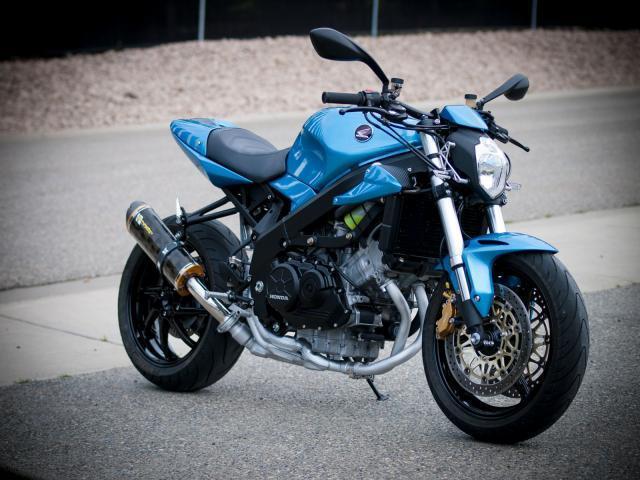
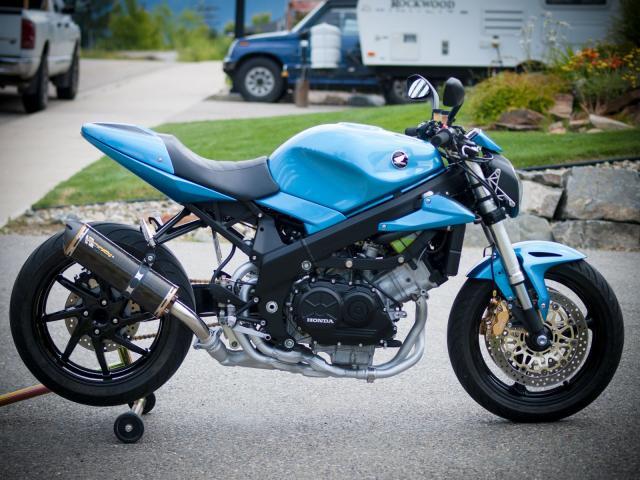
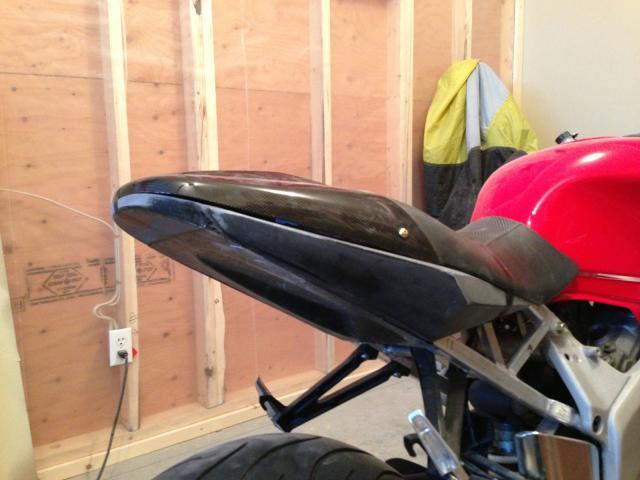
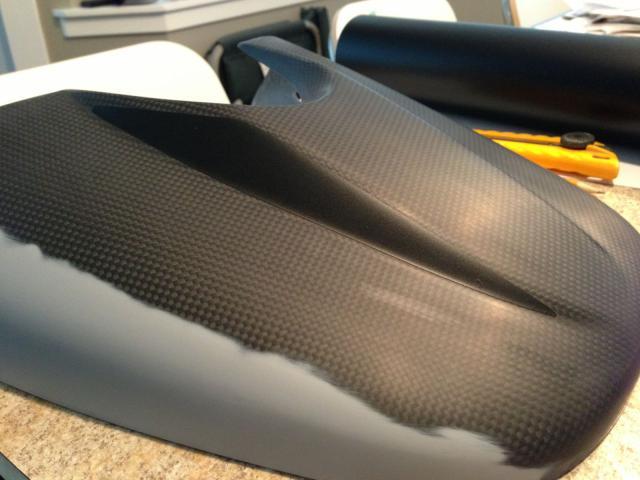
Its called Azzuro Meditterano (or something like that) and it's a ducati monster color. I know not everyone will like it, but I love blue and am very happy with the color! PS the seat cowl is a Carbon Fiber speed triple part I got off ebay. I haven't started making carbon fiber parts yet... maybe someday. I did however modify the sides of the seat cowl with fiberglass to help it blend in with the tail section better.

And now its time to reassemble the bike completely! My dad rode his brand new Multistrada 1200 over from alberta to help out. Final assembly was a lot of work and I would prob still be working on it if it wasn't for my dad coming to help. Anyone who modifies motorcycles knows that every change affects so many other things... needless to say there were many things to figure out, and some that will be a work in progress.

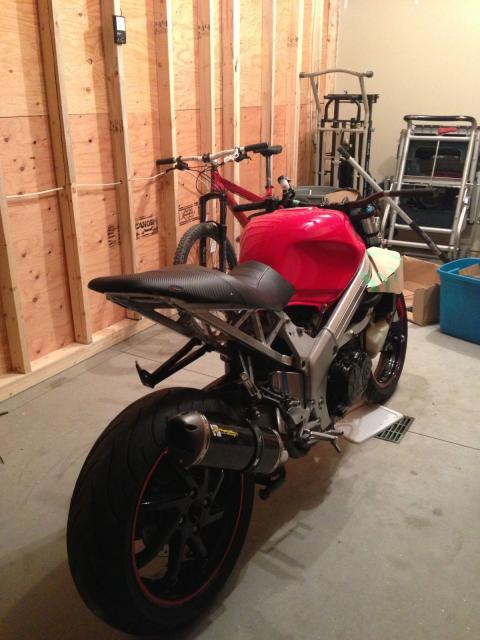
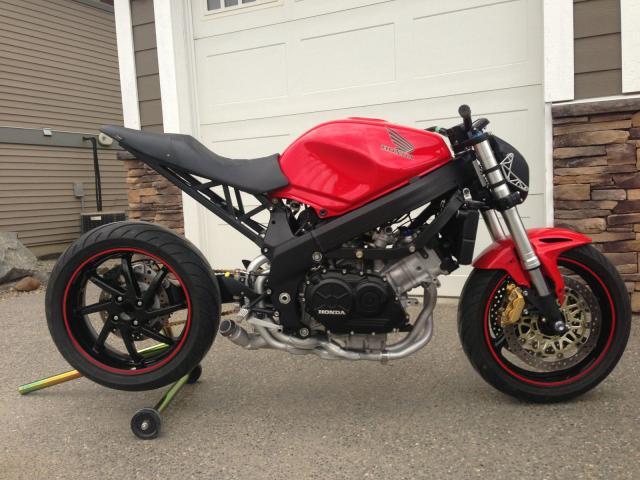
It took me over 9 months, and there are still some things to complete or change, but here is the mostly final product!!!!
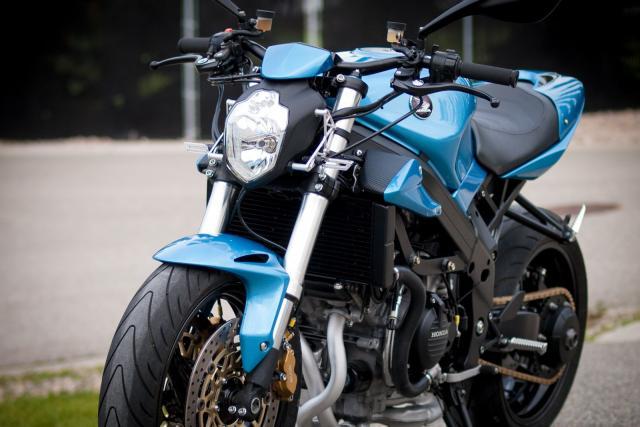
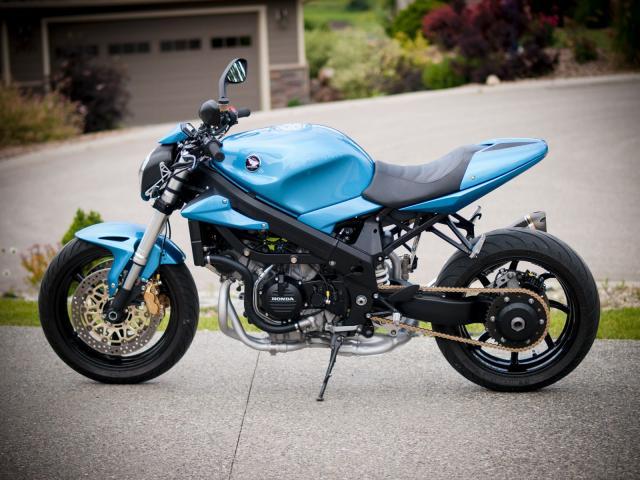
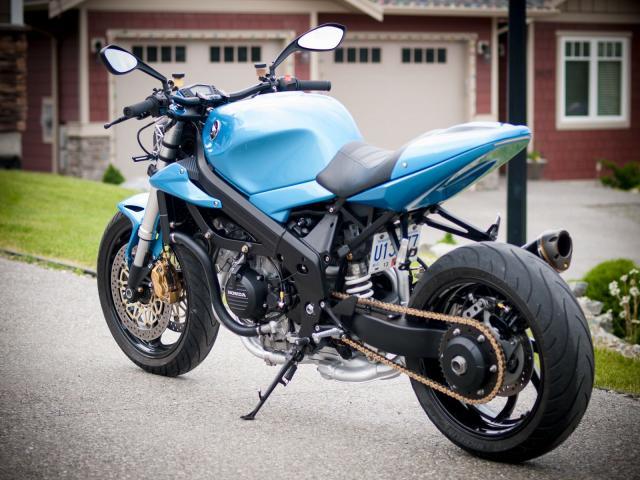
VFR-SF092.jpgVFR-SF093.jpgVFR-SF094.jpgVFR-SF095.jpgVFR-SF096.jpgVFR-SF097.jpgVFR-SF098.jpgVFR-SF099.jpg

So far I have put about 1300km on the bike and am loving it!!! It has turned out to be pretty much everything I wanted it to be. I will give a more detailed ride report later but for now I need to take a break from the computer :) I hope everyone enjoys seeing the process. There are so many details I didn't cover but I will list the mods later and answer any questions people have as best I can. I need to thank this forum a million time for all for all of the things I learned from those who have done these kinds of mods before. You are a great bunch and I appreciate all of the help. Also my Dad deserves a huge high five for all of his help, My Uncle for all of the last minute tech support and above all a gigantic thank you to my wonderful wife for putting up with me as I built my dream bike!
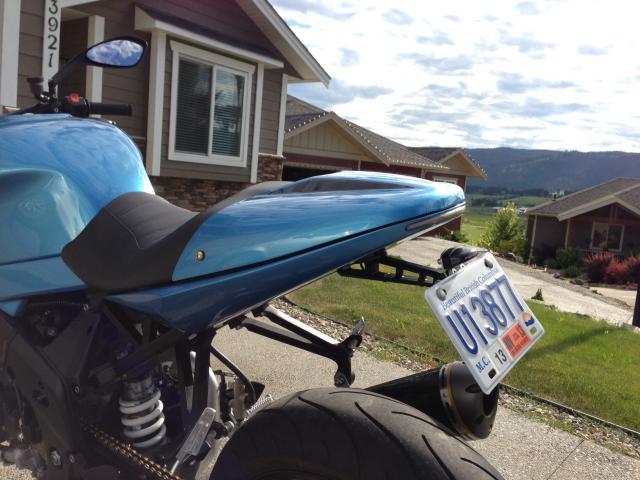
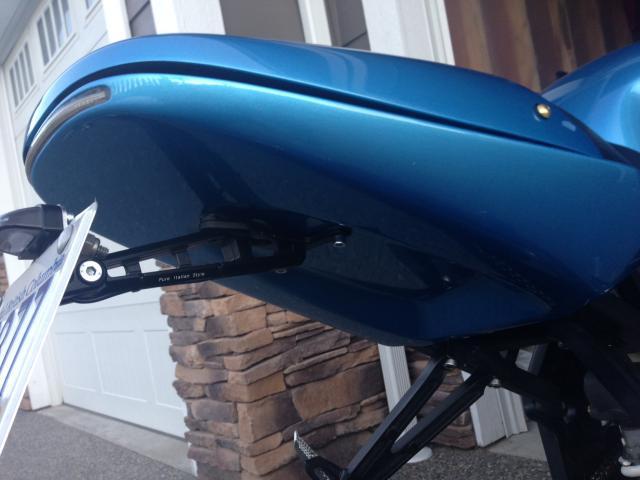
#2

a lot of work ,for sure, but the result is awesome. well done.


#3
Turned out fricken awesome Andy, nice work!
#4

Wow - absolutely spectacular work.   Even better that you can share the project with your father.   Thanks for posting up the pics! 


#5

Beautiful. Got a drawing of that shock mount? Nicest one I've seen yet and i need one.


#7
Wow, just... Wow. Seriously, incredible work!

Sent from my phone.
#8

beautiful work! i bet you are going to get so many people asking you if its the new 2014 honda something or other.


#9

One of the best I've seen, maybe even the very best. It's totally cohesive, as you aimed for. I love the bodywork and the overall design.

Your tank wings are flying backwards :cheerleader:


#10

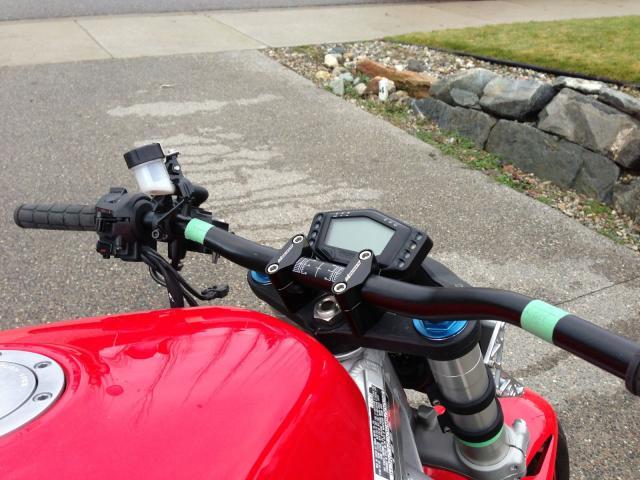
Thanks for all the encouragement guys! One thing I'm also very pleased about it how comfortable it is... I did a 900km trip last weekend (2 days) and it wasn't tiring at all to ride. Im 6'3 so the higher seat height (about 32.75") leaves lots of legroom and the handlebars are still low enough to have a balanced riding position on the highway at 110-120km/h. The seat is also quite good... though maybe a little soft actually. And you all know how smooth the v4 motor is... even without bar end weights. The ducati streetfighter mirrors are actually quite functional and the koso gauge gives me two trip meters, an ambient temp gauge, a volt meter, a fuel gauge, a bunch of fancy performance testing options (that I'll prob never use) and is very readable (the tach not as much... though there are shift lights). My charging system with a 8 cell ballistic LiFe battery, a mosfet regulator (from a kawasaki zx10r), and new eastern beaver connections direct to battery (with a metripack connector to the stator wires) is giving me about 14.2v at idle and 14.5v around 5000rpm.

Also forgot to mention, measured with standard bathroom scales it weighs 450lbs full of fluids. That translates to 415lbs without gas (dry weight as manufacturers do it might even put it under 400lbs dry). Not sure how much I can trust the bathroom scales but that is a weight savings of 71lbs from stock.

It is a blast to ride! With all the geometry changes I was unsure how it would be to ride. The 929 front end with a flat rc51 upper triple (the 929 upper is a gullwing design) lowers the front over an inch I believe but has a shorter offset, the rear ride height is maxed (haven't flipped the eccentric, and i don't think I will) and I ended up with a 24.5 degree steering rake angle. It handles quick (the lighter weight and the wide handlebar helping here) without being twitchy. Sportier tires would make it perfect I think. The rear seems a little soft and underdamped when the engine heats up and the air temp goes up (it was 35 degrees celcius today) but that's expected from a $20 ebay shock that's apprently made for 120lb riders. More things to tinker with down the road :)

#11

I was going to make a list of the things I changed but I think most of you know or can tell what the major changes are. A few that are a little less obvious that people might want to know about:

-ZX14 nissin radial master cylinders for front brakes and clutch. The brake master cylinder is working very well with the 929/954 front brakes (I think they are actually 954 calipers). And the radial clutch master cylinder is working well with the stock vfr clutch and slave cylinder. This one was a bit of a gamble but it is working very smoothly.

-520 sprocket kit with +2 on the rear and DID ERV3... though I can't really do a good comparison to stock 530 chain and gearing because the bike is so different.

-Tried the GSXR COP mod... rode good for 900km but starting acting up after that so I switched back to stock coils and found a place for them. I posted more about it on the COP mod thread. Could have been bad coils.

#12

I love the result. Absolutely stellar.

Whenever I get to BC next, I'm gonna have to stop by and have a look at it.


#14

At last...........   the veil is lifted!

Super job!

And your rotors found a good home :beer:


#15

Whenever I get to BC next, I'm gonna have to stop by and have a look at it.

You bet! I'd love to meet up in the kootenays or show you some local backroads.  


At last...........   the veil is lifted!

Super job!

And your rotors found a good home :beer:

You did a good job keeping the project under wraps duchy. And I'm happy you like the rotors! These 330mm bad boys are crazy powerful! 


#16
one suggestion I have would be to use an RC51 SP2 front wheel which is 6-spoke, as opposed to the CBR 3 spoke wheel you have on there now. I think it would match the rear wheel better, but that's just me.
#17

Turned out fricken awesome Andy, nice work!

Thanks Seb! I always enjoy watching your projects and can't wait to eventually see what you've done on your 4th gen VFR project.

Mine is not too far off. I had also begun a one-off subframe and rear bodywork, but after what happened to the CB900 I decided to pass on the chance of having to re-do hundreds of hours of work, and adapted a production rear end.

I'll shoot you a pm in a bit.


one suggestion I have would be to use an RC51 SP2 front wheel which is 6-spoke, as opposed to the CBR 3 spoke wheel you have on there now. I think it would match the rear wheel better, but that's just me.

SP2 is 5 spoke.

SP1 is 6 spoke.


#18

one suggestion I have would be to use an RC51 SP2 front wheel which is 6-spoke, as opposed to the CBR 3 spoke wheel you have on there now. I think it would match the rear wheel better, but that's just me.

I completely agree... although cost was a huge factor at every step of the way and 929 wheels were going for a lot less on ebay. I think I might try a newer cbr1000rr front wheel eventually :) 

 Mine is not too far off. I had also begun a one-off subframe and rear bodywork, but after what happened to the CB900 I decided to pass on the chance of having to re-do hundreds of hours of work, and adapted a production rear end.

After seeing what happened to you I was able to get my insurance company to cover my bike for essentially double its value which I think is a very good thing... but I know what you mean. I am definitely thinking twice about letting friends ride it this time... the consequences for even a small parking lot tip over are huge :(

But... I can always adapt a production rear end if I had to... I think. Maybe this winter I should make some quality moulds of the bodywork.


#19

 SP2 is 5 spoke.
 
SP1 is 6 spoke.


Oops, I've been up all night at work, brain fade.
#20

 Mine is not too far off. I had also begun a one-off subframe and rear bodywork, but after what happened to the CB900 I decided to pass on the chance of having to re-do hundreds of hours of work, and adapted a production rear end.

After seeing what happened to you I was able to get my insurance company to cover my bike for essentially double its value which I think is a very good thing... but I know what you mean. I am definitely thinking twice about letting friends ride it this time... the consequences for even a small parking lot tip over are huge :(

But... I can always adapt a production rear end if I had to... I think. Maybe this winter I should make some quality moulds of the bodywork.

It was a tough decision and I still feel like I let myself down a little, not going all in but the first time something bad happens, I will remember why.

I have so many other projects. I can spread my custom touches around so I still get to play and try new stuff, without putting all my eggs in one basket.

Moulds are a good idea, on the other hand you may decide to make improvements or change shapes in a few years?


#21

OMG!!!

AMAZING!!!

No words.

RESPECT!


#22

That is just an unbelieveable job. The bike looks factory! I am completely jealous of people like you with that kind of talent. I love the bike.

Rob


#23

Wow! That's some awesome work. Whereabouts in the Kootenays are you? I'm in Kaslo. Would love to see the bike in person sometime.


#24

Fantastic makeover! High quality workmanship everywhere on it! I was going to ask where the evil RR ended up but I guess you at least changed it out to a MOSFET unit that might be less sensitive to location on the bike (less RR cooling needs?). This could be the best naked VFR to be shown in this forum yet! :fing02: :fing02:

Only thing that seems to be always hard to "beautify" is the exhaust header system. They just always kinda hang out there (especially up front) on naked project VFR's. Could it be possible to route the pipes from the front, to curl back over the lower cases of the engine with a bit of creative and fluid pipe bends?? (like how the front pipes go on most HD flat trackers)....and then work them out to connect with the two pipes at the rear with collectors and then to two separate upswept megaphones on both sides of the bike?

Beck

95 VFR


#25

I keep looking at this bike & I am just amazed really. Two things that are purely for functional purposes that you may want to consider is a chainguard and/or hugger. Taht bike is so pretty you don't want chair oil/wax and road grime being flung all over it.

Seriously cool bike and awesome skills!


#26
Very impresive work, I love the fact you made your own bodywork and sub frame.

Tom H
#27
As for the Honda tank decals, you could try with a bit of nylon fishing line. Attach a little pipe either side and "saw" through the adhesive. A bit like a cheese wire, but those are metal. Which will scrape...
#28

Nice   any  idea  on  what  it  weights  now  ?


#29

As for the Honda tank decals, you could try with a bit of nylon fishing line. Attach a little pipe either side and "saw" through the adhesive. A bit like a cheese wire, but those are metal. Which will scrape...


Most have successfully used dental floss to ease off adhesive mounted badges on their cars and bikes...........
#30
And a little help from a hair dryer, held at a respectful distance.
#31

Here are a few iphone shots of the plate bracket and light. I decided I wanted to spend less time making things in the garage and more time riding so I ordered a CNC bracket off ebay made for an MV agusta and modified it slightly to fit.

post-20150-0-34931000-1374902815.jpeg

post-20150-0-42865300-1374902851.jpg

Just over 2000km on the bike since the rebuild and am really enjoying riding it. I feel like I should have more to put into the thread... but the bike is working so well there is little to report. One thing I do want to figure out is how to block some of the heat from making its way under the seat if possible. As soon as the engine temps reach 83*C (181F) the seat starts to get warm.

Riding on the twisty backroads around here I'm having fun practicing smooth downshifting/throttle blipping and hard braking into tight corners. The front brakes are the strongest I've had on a bike which is awesome... but makes it a little harder to prevent the front end from moving up and down a touch during downshifts. Stiffer front springs would probably help, maybe this winter. But this is something I love about riding... there is always room to improve and become a smoother rider :tour:

#32

There is a pretty direct channel from from under the tank into the battery box area on my subframe... I think if I block this off it will help. I've removed quite a few heat /weather shields so that probably doesn't help.

#33

The rear side extractors on the 4th Gen were designed to soppsedly pull out the heated air from around the rear cylinder/ upper manifold area that's buried under the rear of the tank. Although Honda did a good job with the rubber and plastoc air barriers and baffles routing the heated air towards the rear extractors, they did not seal sound the extractor openings and the rear frndet pan and subframe, thus some of that heated air gets trapped in the tail section, heating up the seat and other goodies in there.....

.....like the RR......

I put some foam around the right side extractor openings under my tail fairing to seal it up a bit, and according to the temp sensor I have near the RR, it lowered the temps in there. I suspect that there's still some hot air that leaks over the battery (Especially if the big rubber flap on top of the battery is removed or missing) and under the seat and that's what might still be getting the seat hot on this SF naked bike.....

Beck

95 VFR

#34
Veefer800Canuck

Digging the license plate holder.

And yeah, those 330mm rotors are like tossing a piano out of your pocket, right?

Good description! I'm loving them. I have been practicing "emergency stops" to get my brain used to the amount of braking power available. I don't want to grab too much... which would be easy with these brakes.

Dutchy

How are the badges doing?????

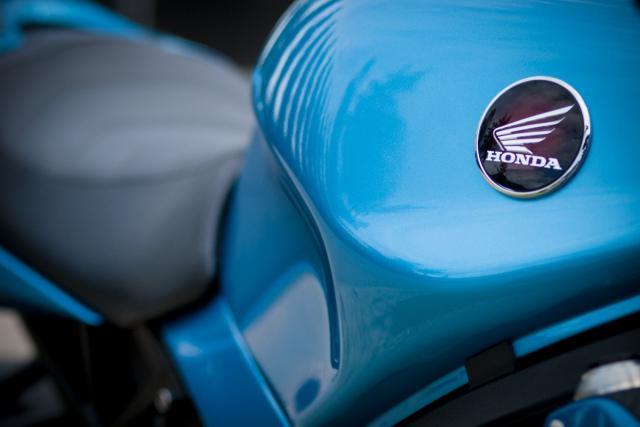
Oh they're just fine... still backwards however. I've been avoiding fixing them out of fear of damaging my new paint and possibly cracking the badges :( Riding is more fun anyway!

#35
apexandy

Thanks zoomzoom :) You are definitely quite close... I like to do the occasional west side road ride to go and check out the bikes at Bently Motorrad. Maybe it would work to meet up sometime.

Hey Apex

I would love to meet up sometime and have the chance to both see your bike and most of all just the chance to shake your hand. You have completed a project that is both stunning and deserving of awards. I'm not sure even the design guys at Ducati could have come up with a bike that looks as good as yours. Absolutely every part of your design flows into the next. Not sure what exactly you do for a living, but perhaps you have missed your calling.

My 6 year old son Liam was looking at the computer with me as I was reading through your write up and he was practically drooling on the kitchen table. To see him that enthralled about something (anything in general) was amazing to see. He asked after we looked at the build and he asked "Daddy, can we go see that bike??" I told him that there are not a large number of people on the site that are from Canada as opposed to the US so the owner who built the bike is probably too far away to drive. It wasn't until I happened to look at where your avatar that I discovered you were so close. I take my son for the odd ride with me, but alas Armstrong is a bit far for him (he would fall asleep for sure on a ride to Armstrong), so if we do get the chance to meet up I will have to bring him with me.

When it comes to the badge issue on your bike, I have seen a badge like the one you have on your bike and as I recall the badge has a type of 3M adhesive rubberized two sided tape much like the stuff they use to install body side mouldings on cars. The difference being that I think your badge has the tape across the entire back side of the emblem. I do PDR for a living and I have had the odd customer ask me about removing badging from their car. I tried to remove the badge off an older BMW once and it had two sided adhesive that covered the whole bottom surface (I checked with the BMW dealer to make sure there were no positioning pins) and it was hard as heck to get off. I had success finally by (I think someone else mentioned this already) using a hair dryer to heat the emblem the whole time I was trying to remove it as it takes a while to get the adhesive warm and pliable in the middle. The other thing I did so as not wreck the emblem was to use fishing line to saw through the adhesive tape while one of the guys that works with me dribbled 98% Isopropyl alcohol (rubbing alcohol) on the fishing line. This helped to release some of the glue and it won't harm the paint, though it will remove any wax. One thing you may find upon removing the emblem is that the adhesive on the emblem may have stained the paint a bit where it is attached, depending on how long it was between when you painted the tank and when the emblem was applied. As long as the paint was well cured before you applied the emblem it should be fine. Once you get the emblem off I have used a product called Goo-Gone to remove any excess tape adhesive, and you can get it at most hardware stores. If you want to get the rubbing alcohol you need to ask for it at the pharmacy counter. Wal Mart carries the stuff and it is about $7 for a 1 litre bottle.

Hope you get the emblem figured out if you haven't already. And again, WOW.

#36

These stupid badges...

Thanks for the tips zoomzoom, do you think I will have any luck removing the remaining adhesive on the badges and using 3m moulding tape to put them back on? That is if I don't crack the badges during removal. And thanks again for all the kind words about the bike.

#37

I finally got around to adjusting the sag on the suspension with the help of my dad who is visiting for a few days :) Completely confirmed my suspicions that the spring rates are quite soft. With front and rear preload maxed out I could only get 40mm sag. I will probably look into suspension upgrade options this winter. I'm thinking revalving and re-springing front forks and maybe an aftermarket shock... but we'll see. Also vacuum bled the front brake again to get rid of a bit of mushiness in the lever... firmed it up quite nicely... now the brakes feel even more powerful :) My dad took it for a ride today... it's cool to see and hear it drive away when I'm not on it. Gave me goosebumps. And to top it off he even washed it for me while I got some other things done... what a dad!

#38

Did a little engine heat blocking under the tank/subframe/battery box area with the rubber heat guards I had from the stock bike. I think I have improved the issue but I'm not sure I can make it any better. Because there is much less in the way of fairings and plastic blocking and redirecting heat behind the engine and above the headers the hot air will get to my seat/legs anyway. Its not uncomfortable really... I guess I've just never had a bike that really does this. On Italian bikes they call things like this "character" :cool:

Other than that... just riding! Oh, and my new tankbag came in: SW Motech Engage. A nice bit of kit! Amazing, sturdy quality, easy to get on and off, and doesn't touch the paint. Not cheap... but my last tank bag lasted 15 years!

[image: post-20150-0-58009000-1376097833.jpeg]

Edited December 21, 2014 by apexandy
#40

Thanks guys :) I wish I had more cool modification to post in here but have just been enjoying riding it! It honestly works so well. It's the most comfortable bike I've owned, (even better than my 6th gen), has completely smooth air on the highway (I've alway preferred smooth air over turbulent air from a windscreen), is refined and smooth but still agile, responsive and full of character. And I can't help turning to look at it a few times as I walk away from parking it... every time.

This weekend looks like some decent fall weather (been pretty cool and wet for enjoyable riding already up here) so I hope to get some good riding in. This winter I have plans to work on some things so I will definitely keep this thread updated.

Again, I appreciate all the comments and if this build has inspired you then I hope you have fun taking on your own project!

#41

[image: post-25028-0-12293800-1381686164.jpg][image: post-25028-0-97494700-1381686193.jpg][image: post-25028-0-55323300-1381686224.jpg]

A few photos of Apex's machine sitting in the driveway at my house a couple weeks back. There has been some photographic trickery employed, but I can not say enhancement, for Apex's bike needs no real enhancement.

PS. Sorry Apex, I just could not help myself. Hope you understand. LOL

Edited October 13, 2013 by zoomzoom
#42

Im so angry you posted pictures of my bike on my build!!!!! :wink:

It looked less clean after the rainstorm on the way home however...

My friends idea to throw our bikes in his truck and head down to California this winter is looking better and better all the time :)

#43

The oil cooler was bypassed. I cut off the stock metal pipes, flared them slightly and looped the rubber hose from the inlet to the outlet (the oil pump needs the cirucuit to be maintained... you can't just block off the ports). A number of people I found online had bypassed the oil cooler with no apparent significant downsides. The stock cooler is quite small and without the fairings the bike gets a lot more cooling air anyway. In 5000km the engine heat hasn't been an issue at all, with temps normally in the 75-85*C range. That being said... it doesn't normally get above 30-35* here in the summer and I don't spend a lot of time in sitting in traffic. Also, I know it's not the best solution to remove the oil cooler as it does more than just try to keep overall engine temps down, and I do have plans to fit either a "filter cooler" from another honda if I can figure out one that fits, or I might find a better fitting cooler to fit in a chin spoiler. But for now, the bike seems to be just fine without it.

Here is a short rundown on parts from other bikes:

-Speed triple seat/solo cowl (modified)

-GSX-R passenger pegs

-ZX14 clutch and front brake radial master cylinders

-complete front end and brakes from CBR929/954

-RC51 upper triple clamp

-CR low bend dirtbike handlebars

-Ducati streetfighter mirrors

-CB1000r master cylinder mirror mount brackets

-CBR929 rear shock

-Yamaha MT-03 headlight

-Tail tidy made for MV agusta F4 (modified)

-Front brake lines for made for CB1000R (not the best fit, but they work)

-Two bros muffler and link pipe from speed triple (cut and welded to a VFR delkevic link pipe)

-ST1100 throttle cables (strangely enough, wrong free length... needed to modify the carb attachment for the cables)

-CBR900 choke cable and lever

-CBR1000 Front fender

-CBR1000 Tank badges (backwards)

-ZX10 Mosfet regulator/rectifier

#44
guitarsoup

Are you running with a fan on the radiator or does opening up the engine do away with need for one? Where did you relocate the coils and fuel pump too? Sorry for all the questions, the more I look at it the more work I see. What part of the build gave you the most grief? Cheers, Brett.

I am running a fan. It only comes on when the temps go above 102... which is very handy sitting at a stoplight on a hot day. I relocated the rear coils to the battery box and the front under the left side rad shroud. The fuel pump is also in the battery box.

What part gave me the most grief? The bodywork...

In other news... I threw together a few video clips of just the beautiful V4 music and a bit of a walk around of the bike. :beer:

[video: https://www.youtube.com/embed/lSoUShafYOY?feature=oembed]
#45

And since it's winter and I can't be out riding... I'm going to post some more VFR-SF related pics :)

[image: post-20150-0-29981300-1387149395.jpg]

My dad bought a cycle hill tire changer used and the guy delivered it to my house, so before sending it off to my dad I changed out my PR2's for dunlop Q3's

[image: post-20150-0-17853400-1387149461.jpg]

This gives an idea of the different profiles of the two tire types. You can't completely trust this pic as the dunlop hasn't even been mounted yet, but the PR2 off the rim here.

[image: post-20150-0-62598500-1387149543.jpg]

And all mounted up. Road a few hundred km on them before putting the bike into hibernation mode. They handle quick yet still nuetral and predictable and have loads of grip! I wasn't really lacking for grip with the PR2's in cornering (although I could tell the rear was starting to slip a touch at the end of it's life) but I will say I find the front tire has a lot more grip under very hard braking. Instead of the front tire chirping a touch (even after nicely warmed up) on the PR2, the Q3 just lifts the rear tire. And they look boss... I know, a great reason to buy a tire.

[image: post-20150-0-64185100-1387149597.jpg]

This is where the whole build was done

[image: post-20150-0-25275500-1387149657.jpg]

My dad lives 650km away, but we got to do a little riding together this summer :)

[image: post-20150-0-18133500-1387149700.jpg]

And here is the photoshop concept I put together of the build before I even had the bike tore down from it's stock form.

#47

The LED light bar acts as the run/brake in red and turn signals in amber.

Though I might add turn signals this year just to make sure they are nice and visible.

#48

Some have been asking about wiring up the Koso gauge. Here is some information I put together that might help.

The only 2 things that don't function properly on my gauge are: fuel reserve light, and Tach is slightly jumpy from about 6500rpm-9000rpm. But I have attached the tach wire directly to the factory wire, not the coils. I might try the coils this winter.

Not sure you have the wires labelled yet your factory loom. But these are what the wires correspond to and where you will run them on your gauge. I left the speedometer wires out of the equation as you are using the magnets, but you could splice into the wires in the factory loom if you were running your koso pickup off the rear wheel. Also, the fuel level wire wasn't labelled on my Koso wiring diagram... it's the wire paired with the tach wire connector (black I think).

Red: Any wires that will go directly to the gauge (Run a dedicated ground)

Pink: Wires that would go to the left side of the indicator panel with one ground wire (switched positive)

Green: Wires that would go to the right side of the indicator panel with one switched power wire (switched negative)

From the Left on the VFR wiring diagram:

Green Connector- (Not in order of wires in actual connector block)

Bl/Br Clock Switched Power

O Left Turn Signal

G/Bl Speedometer 1

R/G Clock Constant power

Bl/Br 12v Switched Power

G Ground (Run a dedicated ground to the actual gauge)

Y/G Tachometer (Unless you decide to wire directly to coils)

Bu/Bl High Beam Light

P Speedometer Signal 2

Y/Bl Side Stand Light

Blue Connector

Bu/R Oil Pressure Light

Lb Right Turn Signal

Gr/Bl Fuel Gauge

Bl/Br Switched Power

Lg/R Neutral Light

Br/Bl Checklight

G/Bl Ground

Br/W Meter Lights Switched Power

Br/Bl Fuel Reserve Light (Needs correct resistance to operate... could try a 150ohm 5W resistor)

G/Bu Coolant Temperature (I ran the koso wire with the attached temperature sensor directly from the thermostat housing to the gauge)

#49
zefarton44

About the fuel reserve light I think that it's not working properly because of the "indicator light check unit" that is on the original tach. I think that it's an hysteresis device to avoid the blinking of the light when the fuel is moving in the tank.

For the RPM i'll check with mine if I have the same problem with the original wire. I'll start the work on the harness tomorrow !

The fuel reserve light is connected to a "thermistor" in the tank. The fuel acts as a coolant, but when the fuel level drops below that of the thermistor sensor, the sensor will heat up and the low fuel indicator will light. The 5 watt bulb in the stock gauge provides the correct resistance in the circuit for the thermistor to function properly. It's possible the "indicator light check unit" has something to do with this as well. With an LED the light will always be on. I saw someone that used a 150ohm 5w resistor fix the issue, but haven't tried it myself. I just use the fuel level gauge as the reserve warning. I find it to be consisted, but not very accurate to the actual percentage marks. a 70% reading is half a tank, and I have my reserve light set to come on at 30% because after that the gauge drops quickly.

As for the tach glitches... this thread might help:

http://www.vfrdiscussion.com/forum/index.php/topic/76055-koso-rx2-gauge-on-4th-gen/

I haven't tried it yet, but intend to.

Hope that helps :)

#50


Paging Mr. Darwin....... ;-)

Dutchy....you are so funny, I'm still laughing.

I'm 52 and been riding for 42 years, can't help myself.

Please don't watch when I'm filtering in traffic, its not for the squeamish :)

Richard Palmer

[image: CopyofIMG_002copy.jpg]


#51

Hi,

Can I stick some pictures of your bike on the RC36 Facebook group?

You are welcome to join if not already a member.

https://www.facebook...00796026651357/

You bet! And let me just say you have an amazing collection of V4's. 

VFRs are jetted rich from factory, Honda's 125 is a big jet... not sure you'll get much gain from going bigger unless you fit a full header system as well. Which you know you should do...

But, it is fun to play :comp13: :beer:

I have seen people post that VFR's are jetted rich or correct from the factory, but I would have to say I have found more information indicating they are still potentially lean from those who have taken the time to tune them with jetting and dyno work. Here is one example http://www.vfrdiscus...0-jetting-rc36/

Has anyone actually seen proof they are rich from the factory??

Considering the 3rd gen has larger carbs with larger jets from the factory (130 mains) as well as Dutchy's list apparently indicating euro models use 130 mains on stock exhaust and air box I do not think my jetting choices are going to be a move in the wrong direction. Like I said earlier… I'm not expecting huge gains here, but how my bike is running and from research I have done I think these jetting changes will be slightly beneficial. I hope to be able to do a dyno run sometime this summer to see how the changes stack up. 

Andy, how did the jetting work out?  Any luck with that 40hp bump?

Jetting is still on the to do list… I'll let you know if I suddenly find myself riding past Panigales on the back wheel at 190mph  :wheel:

I will be posting some of my winter upgrades soon, as I hope to be back on the road in about a month. It is finally starting to warm up here :) 

Been working a lot on re-doing my entire wiring harness, just got my suspension back from Jamie Daugherty, as well as a few other detail changes. Stay tuned


#52

Andy,

I had one FV on the dyno with race pipe and no snorkel. It ran so rich I took out the Dynojet kit, and jetted weaker than std. Gained 8hp at 6000rpm and made 103hp from 9000 to red line.

Richard


#53
Loooooool


Sent from my iPhone using Tapatalk
#54

Andy,

I had one FV on the dyno with race pipe and no snorkel. It ran so rich I took out the Dynojet kit, and jetted weaker than std. Gained 8hp at 6000rpm and made 103hp from 9000 to red line.

Richard

Well shucks… I sure wish my dyno appointment had worked out last fall. Thanks for the info, I read through all the jetting and dyno threads I could find on here and am still confused. I have definitely seen people get gains with jetting (mainly in the midrange), but without specific details it's hard to know what's the best choice. I guess that's why getting a dyno run is so important. What was your AFR targets for tuning if you remember? And what altitude are you at? 

Thanks


#55
Probably just people tuning for different altitudes.


Sent from my iPhone using Tapatalk
#57

Mmmmm, torque plateau.... 


#58

I might've missed it if someone else asked, but what handlebars/conversion setup did you use? 

I recently crashed my 4th gen and am using your bike as a launching pad of sorts for the rebuild, so you might be hearing from me quite often :)


#59
Scottay951

I might've missed it if someone else asked, but what handlebars/conversion setup did you use?

I recently crashed my 4th gen and am using your bike as a launching pad of sorts for the rebuild, so you might be hearing from me quite often :)

I am using driven brand bar risers mounted to an RC51 top triple clamp which I reinforced with aluminum plates and JB weld on the underside of the triple. Then a low bend dirt bike bar.

I'm happy to answer questions and help out! Also don't forget the search function. A lot of what I did was already researched and done by others here and other places on the web. Post up a build thread to get feedback and to show others how you've accomplished different mods. We like looking at pictures :)

Good luck!

#60

Here's a little taste of what occupied most of my winter modding time:

[image: post-20150-0-46970700-1398489865.jpg]

#61

I've some quesitons about the koso tach !

What are your settings for the RPM and for the fuel gauge ?

For the moment I have no indications of both, I'm gonna have to check the wires, but I must admit that I have no idea what settings I have to put into lol

#62

I'm not at home to check but I know fuel gauge should be on 100 ohm. Tach... Hmmm. What are the options again? It think it might be 4 cyl 2 pulse high-act. And I set the scale for 15,000rpm.

If you aren't getting any reading on both I would think it's very possible something is wired incorrectly.

Also, I did the resistor and diode mods to my tach this winter and it's working perfectly now.

#63

I also figured out how to get the low fuel light to work with the Koso LED indicator panel. Here is a little diagram I made if any one is interested:

For those who are curious about this stuff…

The stock gauge uses a 7w Bulb which has the correct "power requirement" to work with the low fuel "thermistor" in the tank (when the fuel drops below the level of the thermistor it heats up and lowers the resistance of the circuit). With the Koso LED indicator panel the low fuel light will always be lit as the LED requires such little power to activate. I tried different resistors but there was alway a tiny bit of power getting through and that was enough to light the LED constantly. The relay allows the LED to be on a separate on/off circuit from the thermistor. I tested it on the last tank and it worked, time will tell if it continues to function properly.

So now I have a fuel gauge and a low fuel light, just like stock :) Going without the low fuel light on the Koso gauge isn't really a problem as the fuel level is consistent (thought not necessarily accurate to percentages of the actual tank level) and the Koso gauge has a user adjustable low fuel warning. However it takes over one of the gauge readouts (for example, if you wanted to have the gauge on engine temperature) and starts flashing when you hit the specified percentage of remaining fuel. A little annoying… now I can postpone the fuel level warning until 10% and rely on the low fuel light.

-End of long winded and probably unnecessary explanation.

#64
VFRonny

I plan to build on a VFR 750 after being inspired by your bike, and was wondering how much work it was to get the new fork to fit?

Thanks!

Ronny Sweden

Not sure how I missed this… Sorry man, and thanks to Zefarton for answering :fing02:

If you run the complete front end (forks, triples, brakes, wheels, discs, axle, spacers…) it is pretty much a direct swap. I drilled and tapped the stock steering stops and installed small allen bolts to limit the forks from hitting the frame. I used an RC51 upper triple clamp so I could drill and mount handlebar risers. Because it isn't a gullwing design my front end is actually a little lower than Zefarton's. With the radiator tucked up close to the frame with custom brackets I have just enough room to keep the wheel from hitting the rad.

Good luck!

#65

What headlight did you end up using because that front is terrific

#66

Headlight is originally a Yamaha MT-03 item. You can find them on ebay for much less than ordering from yamaha but still made by the same supplier. It's a good quality light, but mounts usually need to be fabricated.

#67

This thread used to be 20 or so pages long, did someone clean it out?

#69

What an extraordinary clean build. Nice work! I'm really loving the sound of the 2bro's slipon too! My left side exit exhaust makes finding an exhaust that wont be 100% custom a bit difficult.

#70
SoCal97VFR

My left side exit exhaust makes finding an exhaust that wont be 100% custom a bit difficult.

I mean, if you're not happy with your left exit headers I'd be overjoyed to take them off your hands :wink: :wink: :wink:

#71

So this update has been a long time coming! After moving last summer my wife and I decided to build a house this winter… so that has been keeping me extremely busy lately. But today I am home sick and finally have some time to post up some pics of last years mods:

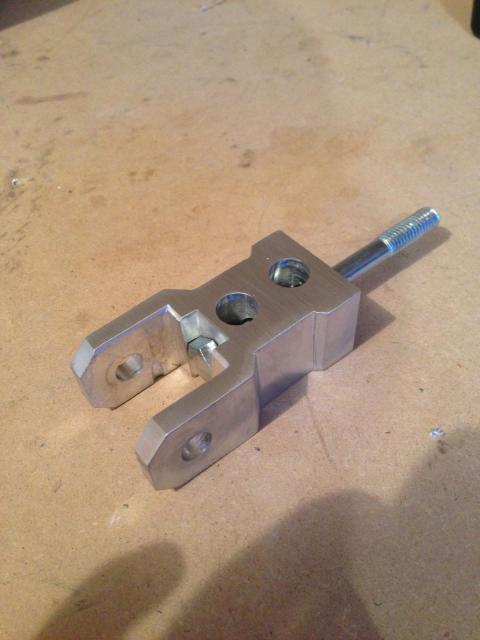
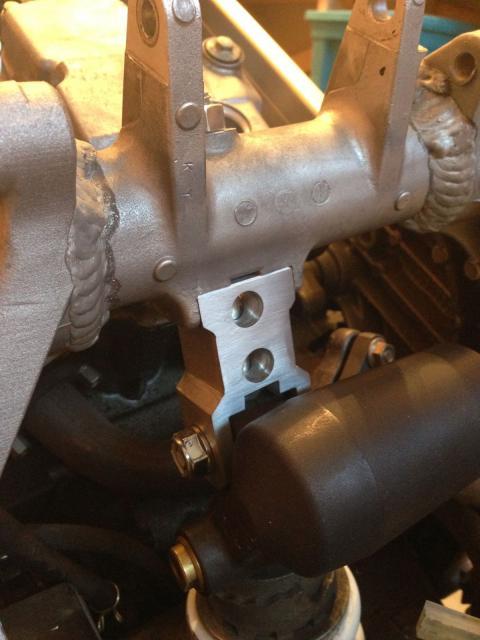
Since I mostly ride solo I decided to remove the passenger pegs and make a new exhaust hanger.

I made an MDF mockup and a friend of mine machined it for me

Decided to send my forks and shock off to Jaimie Daugherty Motorsports to be resprung and revalved

The wiring harness always bugged me, nothing was where it needed to be on the bike, so I decided to start from scratch. This is the stock harness without tape

Needed to make better mounting points for the various components

And then began the long tedious journey of building my own harness

Decided to crimp all connections and seal with heat shrink

Concentric twisting of the layers leaves the harness much more flexible. I eventually wrapped the whole harness in motorsport spec flexible heat shrink and used high quality weather sealed connectors almost everywhere.

Finally made a mount for my hugger fender. Used my own carpenter techniques this time

Upgraded the switchgear and throttle. Used a CBR throttle housing and an R6 throttle tube for a quick turn modification. I would highly recommend this change on the VFR.

Since I use the Koso gauge speed sensor I made a block off plate for the stock sensor location

A few pics from the summer.

Met my dad for a few day ride

My riding buddies

Had a fun night at the local 1/8 mile dragstrip. Even took home a trophy (okay… only a turbo 900cc snowmobile and myself in the bike class that night. But hey, a victory is a victory)

That's my buddies mustang… and no, it's not stock. 800+ hp on drag slicks. We actually ran very close times that night. He runs low 10's in the quarter. It is so strange having a car match your speed under full throttle!

And that's all the pics I have for now. The only other mod I didn't have a close up of was the addition of a dedicated LED brake light on the license plate. I didn't feel comfortable the run/brake LED had enough of a difference between the two to be really noticeable.

I rode another 5000km this season and enjoyed every km of it. The bike is working like a dream. It honestly feels like a brand new machine every time I hop on and ride.

#72

And it still could pass for a brand new bike. If only Honda would build something like it. Well done Andy, you have excellent taste!

#73

Truly amazing how factory it looks next to the other factory fighters. I mean that as a comlliment.

Also, as an aside I love the hugger, amazing how much more room between tire and swingarm there is on the 4th gen than on the 5th.

That hugger would really pop in body color. Anyhow, so good man.

#74

Just when we all thought the best looking custom VFR couldn't be topped... Wow!

#75

Somehow the wife's 4th gen looks just soooooo plain by comparison. Another, and still excellent work Andy. Look forward to perhaps meeting up for a ride this summer. With any luck, maybe even the wife can join in the fun. She starts her motorcycle safety course the end of April, and she is looking forward to getting in a little seat time.

#76

Nice muffled support you made there!

I wish I had the talent an tools to do the same.

My solution on my bike is to just "shave" a right passenger peg bracket I bought off eBay:

[image: DSC02432_zpsc3510924.jpg]

It was the quick, more affordable approach for me and I guess it worked out OK so far....

#77

I like the tank grip Beck


paladinreed

Truly amazing how factory it looks next to the other factory fighters. I mean that as a comlliment.

Thanks man! That was the goal of the build, OEM+

Cool to see you plugging away on your bike again! I can't wait to move into my 2 car garage to have some room for bike work again.

paladinreed

That hugger would really pop in body color.

I've thought about doing the hugger in body color…but I was thinking it might look a little "90's". It does need a new finish of some sort. I just wrapped it in 3M carbon fibre vinyl for now.


zoomzoom

Look forward to perhaps meeting up for a ride this summer. With any luck, maybe even the wife can join in the fun.

I was thinking of maybe organizing a bit of a VFR ride in the okanagan area. A nice sunday ride to the motorcycle museum outside Salmon Arm would be sweet :)

#78

Hey man, what are you using to cut your alu? It seems like you're getting really nice cuts and I always have such a hard time working with it.

#79

A variety of woodworking tools… As I'm a cabinet maker that is what I have access too, I'm sure there are better tools for the job.

For sheet stock I sometimes use the table saw with an old carbide blade to cut it close to size and then usually a good jigsaw with a high quality fine tooth wood blade. It helps to clamp the aluminum to a sacrificial sheet of plywood or mdf and cut through both.

For bar stock pieces I get creative with the table saw and mitre saw… can get sketchy at times though.

Then files and sanding for the rest. Also, I find using a high quality sealer or wax on the parts keeps them corrosion free and easy to clean all season. :fing02:

#80

So you built a house... does it happen to look anything like the house John Britten built?

Loved that last update with the drag strip photos. Not only built, but used :fing02:

#81

John Britten was from another planet! I couldn't last a week working at the pace he managed for years. I modified a motorcycle with a few hand made parts… he build an entire racing motorcycle and took on the world. My house has some hand built cabinets and custom touches… he made everything in his home, including his own sink fixtures! Incredible!

The VFR launches so well at the strip! My best time was a 7.6 in the 1/8 mile. With the track being at 4100 feet it equates to about a 7.2 at sea level I think. Which translates to low 11's I believe in the full 1/4 using online conversions. However I'm not sure how well my bike would do in the 1/4 without a fairing. 1/8 mile suits it well.

My clutch was already a little suspect before the drag races, and I have a sneaking suspicion 2nd gear wheelies are a little hard on it, so I have a new one to install before riding season. I'm going to put in oem discs, but purchased stiffer springs based on positive reviews from others on here. I'm excited to see how it rides with the fresh clutch :wheel:

How's your bike coming along? I thought I read in one of your posts you have been working on it lately?

#82
apexandy

… can get sketchy at times though.

haha if its not sketchy its probably not very creative.

I just felt like your aluminum results are always so nice and I have a hard time working with aluminum stock I wanted some insights. I might play around and get a little sketchy myself.

Good tip on the sealer.

#83

A belt sander clamped to the work bench is very handy as well

#84

Use an old candle or WD40 to lube your cutting tools.

#85

Are you gonna bother with a belly pan? I think it'd finish it off just right.

#86

I've definitely thought about it. I have a desire to change the headers at some point, and potentially enclose an oil cooler in a belly pan, so I don't want to spend too much time on a belly pan that might not fit future plans.

I used to spend a lot of time on the custom fighters forum and I always appreciated the members who "completed" a build and then continued to modify and refine the package as time went on. The itch to do new builds will always be there however…

#87

Hey! My name is Eder and im from Portugal! Let me tell you that im in love with your bike since the first time i saw the vídeo on youtube! At the time i was looking for buy my first bike! And i only buy the VFR 750 because i want to have a bike like yours!! I dont know if you like the idea ! But im trying to copy a vfr Very similar than your bike! Im writting if you can help me with the speedmeeter mold! Im asking everybody Who works on fiberglass But anyone wants to do that job!! If you are available to help me here my email : edy_jsus@hotmail.com .

Im working and dreaming with the bike almost for 2 years! And now im almost at the end of the project!!

EderJesus

Hey! My name is Eder and im from Portugal! Let me tell you that im in love with your bike since the first time i saw the vídeo on youtube! At the time i was looking for buy my first bike! And i only buy the VFR 750 because i want to have a bike like yours!! I dont know if you like the idea ! But im trying to copy a vfr Very similar than your bike! Im writting if you can help me with the speedmeeter mold! Im asking everybody Who works on fiberglass But anyone wants to do that job!! If you are available to help me here my email : edy_jsus@hotmail.com .

Im working and dreaming with the bike almost for 2 years! And now im almost at the end of the project!!

#88

Hey man, welcome here and thank you for the kind words about my bike! I'm not exactly sure what you would like help with. If you started a thread and posted pictures of your project we might have a better idea of what you are referring to.

And we just like looking a project VFR's :)

#89
EderJesus
EderJesus

Very thank you for answer me! Sorry about my inglish!! What i really want is exacly the same mold of speedmeeter as you make for your bike! Is just a magnivicent piece of art! You giv me a price and i pay ! And taxes as well!! So im trying to post a picture here!! Once again Very thanks to answer me!!

Very thank you for answer me! Sorry about my inglish!! What i really want is exacly the same mold of speedmeeter as you make for your bike! Is just a magnivicent piece of art! You giv me a price and i pay ! And taxes as well!! So im trying to post a picture here!! Once again Very thanks to answer me!![image: attachicon.gif]image.jpg
EderJesus

Very thank you for answer me! Sorry about my inglish!! What i really want is exacly the same mold of speedmeeter as you make for your bike! Is just a magnivicent piece of art! You giv me a price and i pay ! And taxes as well!! So im trying to post a picture here!! Once again Very thanks to answer me!!

Very thank you for answer me! Sorry about my inglish!! What i really want is exacly the same mold of speedmeeter as you make for your bike! Is just a magnivicent piece of art! You giv me a price and i pay ! And taxes as well!! So im trying to post a picture here!! Once again Very thanks to answer me!![image: post-30311-0-91588100-1429381158.jpg][image: post-30311-0-00984700-1429381242.jpg] Edited April 18, 2015 by EderJesus
#90

Your bike looks fantastic! You even managed to put the tank badges on the correct direction :) The ducati monster seat is a great choice, it looks really good on there.

As for the gauge mold, unfortunately I am not making or selling any parts right now. But I'm sure you can figure out a solution!

#91

Ok! I supose that! When i finish the project i will post pictures here with beter quality! Thanks alote!!

EderJesus

Ok! I supose that! When i finish the project i will post pictures here with beter quality! Thanks alote!!

Its only a copy of what you do! Its only fantastic because of you !!

#93

Gorgeous work, Andy!
I like the color a lot.
Did you ever consider going with a highmount exhaust?

#95

First, great job! Second, put me on your list of customers when you decide to put together a kit.

#96

Still one of the Sweetest, cleanest and sexiest builds ever!

Amazing!

:fing02:

#97

Thanks again guys :)

Not sure I ever told you how thrilled I am at the front end I bought from you Bailyrock. Looking back and thinking of all the worn out front forks I could have ended up with it is amazing i stumbled onto your sale when I did!

ggathagan

Did you ever consider going with a highmount exhaust?

To be honest I'm not a huge fan of most high mount exhaust systems. It looks more 90's and less balanced overall aesthetically to me. But I have seen a few I like.

In the future I still want to make a new full system and then I would try to tuck the muffler much closer to the right foot peg and expose the wheel more. Maybe even make my own muffler…

So many dreams, so many other priorities.

#98
apexandy

So many dreams, so many other priorities.

Story of my life :wink:

#100
apexandy

Thanks again guys :)

Not sure I ever told you how thrilled I am at the front end I bought from you Bailyrock. Looking back and thinking of all the worn out front forks I could have ended up with it is amazing i stumbled onto your sale when I did!

ggathagan

What the Fork?

Cool, that means I played a very small part in that beauty! :cheerleader:

#101

That is a stunning build out!

#102

I have not read this entire thread but I have to say that I think what you did there is awesome! The bike looks great and you should be very proud of your work.

#103

The best one yet ! AWESOME BIKE !

Roll On ..

#104

Thanks guys :wheel:

#105

It is great to see all these SF builds. I have to say though, if you all are not envious enough, they are Amazing to ride. The engine, the weight, the position, the engine, did I repeat myself, sorry. Absolute blast to ride. If you have the means, I highly recommend building one. Wether it is a beater or a beauty, they are outstanding on the road.

#106

Hey my friend! Can you help me how to configure The speedmeeter koso dB-02 !?? I just finish my bike and everyone loves! And i tell thanks to A guy from Canada Thats inspire me ! Cheers bro

EderJesus

Hey my friend! Can you help me how to configure The speedmeeter koso dB-02 !?? I just finish my bike and everyone loves! And i tell thanks to A guy from Canada Thats inspire me ! Cheers bro

[image: post-30311-0-26802400-1440794955.jpg]

[image: post-30311-0-76222800-1440794980.jpg]

Edited August 28, 2015 by EderJesus
#107

Hi Andy, i stumbled upon your build, had to register just to say that this is incredible. It is beyond awesome what you did on this build. Honestly drooled on my screen while gawking at the clean factory-esque lines you crafted. Congratulations on this great bike. Id love to build one similar to this, i too am a V-fan. By the way, i love the sound of the motor.

Im from the Philippines and how i wish i had some of the resources and supplies you have at my disposal as id like to turn out a beauty like yours. Anyway, keep at it, its gorgeous as it stands but im sure youll keep perfecting it.

#108
EderJesus

Hey my friend! Can you help me how to configure The speedmeeter koso dB-02 !?? I just finish my bike and everyone loves! And i tell thanks to A guy from Canada Thats inspire me ! Cheers bro

Hey man! Not sure how I missed your message, but if you are still having issues post #21-27 in this thread has quite a bit of info that should help :) Bike is looking good!

Jic675Trip

Hi Andy, i stumbled upon your build, had to register just to say that this is incredible. It is beyond awesome what you did on this build. Honestly drooled on my screen while gawking at the clean factory-esque lines you crafted. Congratulations on this great bike. Id love to build one similar to this, i too am a V-fan. By the way, i love the sound of the motor.

Im from the Philippines and how i wish i had some of the resources and supplies you have at my disposal as id like to turn out a beauty like yours. Anyway, keep at it, its gorgeous as it stands but im sure youll keep perfecting it.

Thank you very much man! When it comes to modding a bike every task you research and tackle will be learning experience, and even though it may not work perfectly the first time if you keep at it you will continue to improve in your skills. There is a ton of info on this site and all over the internet on modding and fabricating, we have it good :)

And yes… the VFR creates some beautiful music!

#109

Hi andy, thats was so amazing i can say, yes you insprite everyone that hv own VFR user, can i asking what part clucth you change for subtitution the oem clucth?thank you for that advice.

#110

I Andy! I ready the tópics over and over again! I really cant put the speedmeter rolling!! Its a Shame! Everything works rigth!!!

[image: post-30311-0-59880600-1449707429.jpeg]

Edited December 10, 2015 by EderJesus
#112
wayfastwil

Great bike! Ever better Dad!

Cheers to that!!!

EderJesus

I Andy! I ready the tópics over and over again! I really cant put the speedmeter rolling!! Its a Shame! Everything works rigth!!!

Your bike looks fantastic! What is it specifically your are having trouble with on the Speedometer?

#113
apexandy
wayfastwil

Great bike! Ever better Dad!

Cheers to that!!!

EderJesus

I Andy! I ready the tópics over and over again! I really cant put the speedmeter rolling!! Its a Shame! Everything works rigth!!!

Your bike looks fantastic! What is it specifically your are having trouble with on the Speedometer?

The problem is because the electricist that make the work for me! Put the gauge no the original wire that comes Out from the bike! Anda that thing works with impulse!! I dont know if Its possible to configurate, or the only way to work rigth is to put the íman on the wheel ...

Iman me

EderJesus
apexandy
wayfastwil

Great bike! Ever better Dad!

Cheers to that!!!

EderJesus

I Andy! I ready the tópics over and over again! I really cant put the speedmeter rolling!! Its a Shame! Everything works rigth!!!

Your bike looks fantastic! What is it specifically your are having trouble with on the Speedometer?

The problem is because the electricist that make the work for me! Put the gauge no the original wire that comes Out from the bike! Anda that thing works with impulse!! I dont know if Its possible to configurate, or the only way to work rigth is to put the íman on the wheel ...

. Íman means magnet ! :))
#114
EderJesus
EderJesus
apexandyThe problem is because the electricist that make the work for me! Put the gauge no the original wire that comes Out from the bike! Anda that thing works with impulse!! I dont know if Its possible to configurate, or the only way to work rigth is to put the íman on the wheel ...
. Íman means magnet ! :))

I tried many different methods to get the factory speed sensor to work with the koso gauge, and I think it might be possible with a 5th or 6th generation speed sensor (I can't remember why... this was a few years ago). But I couldn't get it to function. So I used the koso supplied speed sensor and put it on the swing arm with the magnet on the sprocket bolts. Problem solved. I hope that helps.

#115

I don't have the same aftermarket dash that you guys do, but I do have a 4th gen with the factory speed sensor working.

I think your problem might be related to the number of signals sent by each unit.

The magnet will send one signal per wheel revolution, so the speedo just mutiplies whatever you said your tire circumfrance is by the number of revs it's getting and does some math.

I don't remember the exact number, but the stock speed sensor sends something like 7 signals per wheel revolution. So, I had to tell the dash I've got (acewell) that I've got really tiny tires. It still has a cap to how fast it will count though, and the speedometer never exceeds 82mph or so now. If I moved back to the magnet, it'd read fine, but for me, basically I know I'm speeding if it says 82. . .

So, might have to do with how fast the dash can count.

Love both your bikes by the way, they look amazing.

*EDIT*

I almost forgot, my stock speed sending unit was bad when I got the bike, so when I tried to hook it up at first, I got no signals at all. It should send a pulse similar to the magnet, so, if you're not getting anything at all, maybe see if someone you know will let you borrow their speed sending unit for a bit. I think there's just two bolts and one plug that connect it to the bike.

#116

Bike looks fantastic, great job mate.

What kind of right switch gear have you used? Looks really clean and uncluttered.

#117

Looks like not much activity on this thread but I was hoping for:

@apexandy Can you help me out by giving some up close shots of the rear frame you have constructed and the mounting/mating points where it joins on the main frame?

Thanks heaps!!

End of thread · 117 posts recovered Wayback Machine snapshot 18 Sep 2021