No longer a 4Gen Secret Project for quite some time so I needed a new name; hence RCBVFR. Maybe something better will come to mind. Although there are still quite a few minor details to attend to, I think this is the final and running edition!!!!! WOO-HOO!!! I put about 20 miles on her this weekend between rains.
I installed longer VTEC throttle cables for the superbike bar and bolted a CBR900rr choke cable on to the top bridge since the stockers were way too short for this bar bend. [image: Posted Image]
I modded standard 4gen h4 bulbs to fit the 600rr H7 housings but first impressions are not that favorable. Will try H7 bulbs/wiring next. [image: Posted Image]
Mirrors offer a limited sportbike type view but it's liveable. I'll probably work on that some time down the road.
EDIT: I got around to weighing the RCBVFR and my 02 vtec with a bathroom scale (a'la the BLS method). While on the centerstand in the garage, I filled each bike up to the rim of the filler opening. Capacity: RCBVFR 5.5 gal vs VTEC 5.7 gal
Now much to look at when you start with a "clean slate".
Phase one is the front end of the bike. NOTE: Although most everything is bolted down, this is still a mock up version at this point.
First off, I knew I would go with F4i forks since they bolt right on using the same neck bearings and are close in length. Second I wanted to keep using gixxer1000 6piston brake calipers. I had these on my SuperHawk project and they are amazing. They bolt right on to the forks with a little shimming, no drama. Will run the gixxer master cylinder too.
Next, I decided to go with a CBR600RR set of bodywork. Pretty easy to obtain used on ebay except for the very expensive fairing uppers. Those squiddies crash a lot! I removed the honda wings to keep the classic VFR look. Me likey! :wheel:
right side.jpg
left front.jpg
front.jpg
The side fairings were adapted with very little work. Kind of freaky. I rotated the main brackets around on their mounts. The bottom (gray) lowers will need some extensions or drilling but they are VERY close also. I was extremely excited at this point.
right side mount.jpg
left case.jpg
The upper, however, isn't as easy; different stay that bolts on a different way. The VFR stay would not work with the bodywork but it was bent to hell anyway so that was OK. I fab up some aluminum extension tabs as templates for later steel items to connect the steering mount neck to the CBR stay (sorry forgot to get pic). I'm using a cheap bent one as a test mule; however, I'll be getting one now as they are cheap compared to VFR's ($55 @ service honda).
The instrument panel is a bitch too. In some ways it works perfectly and in others it's a pain. It's a very close fit with the forks as they just graze it on full lock but it's not a deal breaker by any means. There is NO clearance between the windscreen and the panel. An aftermarket speedo is the easy solution here. I'll probably do that but I will miss the fuel reserve light which is the only thing I can't determine a way to include on an upper end aftermarket unit.
I wanted to run a superbike bar so I knew that would negate problems with clip on clearance with the panel but would possibly introduce upper fairing clearance issues. Initial tests are good but choke and throttle cable length might be too tight. I have a lower rise bar on the way to help with that.
guages.jpg
top side.jpg
left guages.jpg
More pics:
right rear.jpg
right air duct.jpg
fender front.jpg
Still LOTS to do. For one thing, I need to deal with the air duct cover issue. I'll probably just trim the tabs off for right now. Every time I stare at it or take it apart again (for the 50th time), I find something else to deal with PLUS I still have the rear end, Phase II to tackle.
rear phase II.jpg
Even tho' it seems like I'll never get it done, I'm having fun with it and feel like it will actually run one day. More to come. But first I need a few of these:
Well the back half is coming along quite nicely with no major obstacles (knocking on wood, fingers/toes double crossed).
Here's what I've got done so far: VTEC rear subframe, VTEC LeoVince CF pipes, 3/4 gen TBR SS headers, Wilbers triple-clicker shock, and 5/6 gen wheel. Next I will need to determine bodywork (don't want to go VTEC) and fit the seat (GSXR sargent). TONS of little things to do that it seems like it will never end.
Can't find the gallery posting tool (Miggy working on it?) so here's a link to the gallery instead:
[image: View Post]flyguyeddy, on May 2 2007, 05:37 PM, said:
can you post some more pics of that exhaust? im VERY interested in it!
Do you mean the headers? TBR SS pipes.jpg TBR 4th Gen Stainless Steel headers with Ti muffler. Besides looking WAY better, there is a substantial weight savings too. PLUS: I should be able to keep the centerstand.
I won't be running that single Ti muffler rather the dual carbon firber VTEC Leo system seen in the previous pics.
[image: View Post]sesand, on May 13 2007, 10:27 AM, said:
How close are you to finishing your RR conversion? Final pics? The RR plastics look like they fit a little better than the F4i plastics. Did you figure out the upper fairing stay? Nice work.
I haven't been working on it too much due to work and other commitments but have made some important progress.
First: A slightly modified stock 600rr fairing stay works better than my more highly modified first attempt. Some grinding on the mount end for clearance gets it positioned just about right. It's slightly off center this way but my first attempt which corrected this introduced other more significant issues. I can live with but it might drive anal types kerr-razy. Only 1 of the two holes line up. I haven't decided if I will run it with just one (it's very sturdy) or drill the steering neck mount for the second hole(gulp), or fab a link between the two misaligned second holes. Also, the RR stay is aluminum, much lighter than the steel vfr unit, and much cheaper than I thought ($55 @ servicehonda).
IMG_6049.jpg
IMG_6050.jpg
IMG_6051.jpg
Second: Although it's an additional expense, I've decided aftermarket gauges are a simpler solution than trying to use the stock unit.
IMG_6056.jpg
Third: Even with the stock 600rr stay, fairing panel alignment will bolt up using 3 of the 4 stock vfr mounting points! The left bottom (by the kickstand) is the only one that's way off and will need a hole drilled. The stock side frame mounting brackets simply need to be loosened and rotated forwarded/upward on their axis's. Some bending and/or filing of the locking tabs will need to be done but that's it! Suh-weet!
IMG_6046.jpg
IMG_6047.jpg
IMG_6064.jpg
IMG_6065.jpg
Fourth: the lowers will need to be trimmed at the rear for centerstand clearance. Maybe not if running no stand but rear exhaust collector could also be an issue. I don't know for sure since I'm running a TBR header with slightly different routing.
IMG_6071.jpg
Fifth: Ram air duct panels covers the coils perfectly. Issues are the stock coil/radiator brackets stick up too high and need to be cut off, no problem since they aren't used now, and the panels need to be trimmed at the tank junction for aesthetic reasons.
IMG_6058.jpg
IMG_6062.jpg
IMG_6063.jpg
IMG_6070.jpg
Sixth: The 600RR upper fairing stay uses two cheap ($3) mirror/windscreen reinforcement brackets. Get these. You can bend them forward on their mounts to push the windscreen upwards/forwards for additional steering clearance. Even with my high/wide superbike handlebars, I have no clearance problems. Stock clipons "should" be a breeze but I can't test that (sold stock bits). IMG_6054.jpg
IMG_6055.jpg
IMG_6052.jpg
That's how it stands right now. Waiting on gauges and a few other things to arrive and I'll be done with parts but the list is veeeeeeery long on all the little things I need to tidy up or solve. I don't for see any big issues with the front end now. yipp-eee!
Well it's been three long months waiting for this day, 4GSP lives! :wheel: I got the two brothers header hooked up to the leo vince vtec pipes, installed new battery with new, longer power cables ($9 made locally), hooked up fuel tank, crossed fingers, and pushed the button.
OK, so it sounds like it's running on 3 & 1/2 cylinders but it's still music to my ears. I'm adding "tune up" to the all ready long list of things to do but this thing might actually roll a wheel in anger one of these days. :beer:
Continuing on with the rear subframe, I did a lot of head scratching trying to figure out where to put everything: fuel pump, fuel lines, rear coils, wire harness, main fuse assembly, R/R, and spark unit.
As previous mentioned, I needed longer battery cables since the battery is in different location and further back from original. I also lengthened the fuel lines and relocated the pump to the rear section. I even found places to attach the rubber sleeve thus keeping the pump suspended in the air.
KG9K7798.jpg
KG9K7800.jpg
The fuel filter remains in the stock location for the time being.
[ KG9K7799.jpg
I also put the spark unit back there but on the other side.
KG9K7784.jpg
Moving the spark unit necessitated moving the entire rear wiring harness from the left side over to the right. The coils, main fuse block, and R/R all reside where the rear brake m/c and linked brake/abs guts would be on the vtec. The R/R is mounted upside down on the mail rail (see arrows). I'm getting a gsxr r/r which is MUCH larger and later on will relocated that to the rear passenger section.
KG9K7781.jpg
KG9K7782.jpg
Everything is tidy and ready for the next step; getting some bodywork.
Just got it in today from air-tech in a box so friggin' huge I thought my wife had order furniture or something! This is an RC45 replica tail. The Mike Hale edition specifically. For those who may not know, Mike as a rather big guy for a racer (little Miguel Duhamel was his team mate) and simply could not fit on the race spec 45. Airtech built a special longer seat pan edition just for him and still sells it today. I decided to go with it as I thought it would give me more leeway for trimming at the tank/frame spare juncture and give me more wiggle room on the road.
With fingers crossed I tried an initial fitting but it would not go on. The VTEC undertail and parts of the subframe were too wide by about an inch on each side. So I pulled out the dremel and got busy. Now I can get it nearly all the way on to see where it will need to be trimmed, tucked, and/or cut to flush fit. It's very close as is. A testament to how close the RC45 and 4th gen are in overall size and layout. IMG_6087.jpg
IMG_6086.jpg
IMG_6088.jpg
The two biggest areas of concern are the mufflers (yellow circle) and seat pan. Those will need the most extensive cutting. I placed the gixxer sargent seat on it for the pic. The longer Mike Hale edition will give me enough room for a real "selfislhy wasting bandwidth" pad for more comfort/support. Obviously the seat will not sit up that high as I will need to cut out the seat pan to lower the seat down to the frame rails for support.
cutout.jpg
IMG_6079.jpg
At this point, I don't know how I will bolt down the rear half. The front section will use the standard VFR lower mounts with an bracket to bridge the difference.
I'm pysched that it's as close as it is right out of the box. Did I mention how big the box was? :)
Got busy with the dremel on the RC45 fiberglass. A cutting wheel designated for plastic on medium speed cut thru it like a knife thru butter. Please note that these are all rough cuts in need of sanding/finishing.
First, I measured and trimmed the muffler cut outs. I erred on the side of loose due to heat considerations. Next was the seat.
IMG_1866.jpg
After those was the RC51 brake/tail light.
[image: Posted Image] IMG_1869.jpg
IMG_1873.jpg
I'm very happy with the first fitment results. I will need to make mounting brackets for the front and rear. Both will be quick disconnect. Why? Because I want to. :joystick: Also notice that I got the front turn signals (hanging not mounted in previous pics) and headlights working too. (need to post this in the Phase I thread).
IMG_1878.jpg
Overall, I'm really, really happy with the side profile lines of the bike. Once I get it painted, the tail won't stick out like a sore thumb against all the VFR red-ness! The ill fitting superhawk tank bra I had laying around does an OK job of hiding the mismatch of the RC tail and the VFR tank but a VFR specific bra will be MUCH better. Opps. Just realized I forgot to put the front fender on to complete the look for the pics. I'll make sure to do that next time when I trimmed the silver lowers.
Finally reached a point that it's a roller and got it out of the garage for a little sunshine and some pics. Two Brothers header centerstand stop works with my modded VTEC exhaust system (much relief) and I trimmed the CBR lower for a better fit. I think I'll eventually paint these black as a tribute to the original 4th gen look. I still need to do the left side but here's some pics of the right.
Some more work on the rear end. Got a 520 chain/sprocket set in today from sumofallparts2 who are on ebay. Thumbs down on these guys IMO. Don't stock anything and try to sell you higher priced items when they contact you to notify you they don't have the item you just bought. Took nearly a month to get it and I'm only a tad over 100 miles away from them ($20 shipping). A rivet link was extra costs (?) and they didn't send it.
But the gold chain/vortex sprockets do look great. :thumbsup: 15/45 ratio should keep things interesting. I also bolted on a stock vtec passenger peg for the wilbers remote reservoir.
IMG_1984.jpg
IMG_1987.jpg
IMG_1985.jpg
With the chain installed, I could set about modding a 919 rear hugger I've been playing with. Since it comes from a double sided swingarm, I had to trim the entire right side. The left side mounts are close enough that I only need to make the rear mount bracket. It still needs some more work and a possible reinforcement bracket but I'm happy with the price (ebay $10) :thumbsup:
Time to turn more attention to the front end. I got the headlights working; using stock wiring and H4 bulbs but needed to trim them to fit the H7 housings.
KG9K7821.jpg
No winkie eye for me. Both will be high/low beam.
KG9K7825.jpg
Finally got the new instrument panel in. It's a KOSO RX1N unit. It comes with plenty of supplies including extensions for cables, sensors, and nice hardware. It is a full feature unit with more things than I care to list (or will probably ever use) but besides the obvious it has two trips, water/oil temps, fuel gauge with reserve warning, clock, and all the typical warning lights.
Since I can't determine an easy way to tap into the oil lines/cooler for the sensor (seen just below the gauge), I'm going to mount it to the fairing in the same spot the VTEC uses as an air temperature gauge instead. It all ready has an oil pressure light just like stock.
[image: Posted Image] IMG_1995.jpg
It's much smaller and thus lighter than the stock unit which now appears behemoth in size!
IMG_1996.jpg
Wiring it up was fun. It's not as bad as it looks. http://www.vfrdiscus...tyle_emoticons/default/smile.gif I'm still not 100% there but it's now functional. The water temp sensor threads into the stock location on the thermostat housing.
[image: Posted Image] IMG_2003.jpg
Mounting it on the stay was very easy as there were two stock holes that matched perfectly. Weird. Just need to trim underneath for the bolts to stick out.
IMG_2007.jpg
Overall, it looks very nice and is easily readable from the seat. It uses LED light sources. I haven't check it out in the sun yet.
IMG_2013.jpg
IMG_1998.jpg
It also does a power up self test just like the newer modern gauges. You can see all lights in this shot. That's a over rev light on the top right. Does both yellow and red and are adjustable to ones requirements.
I knew this could be done on my conversion. I even asked the mechanic if there was any way he could make H4 bulbs fit in the H7 holes so he wouldn't need to rewire the thing.
Two questions: Do they aim correctly now that you widdled the H4's down? How much effort did it actually take to get them the right size?
If I were the mechanic and working on somebody else's bike, I'd tell you the same thing.
Here's what I did. I had to trim the top tab off and the area between the two bottom tabs to allow the H4 bulb to sit flush. Took a minute on the grinding wheel but tin snips would probably achieve the same thing.
KG9K7815.jpg
KG9K7814.jpg
Next I had to push the locking tab out a bit and bend the wire clasp some to allow for the larger bulb assembly. It's not an easy factory fit installation so it is MUCH easier to install them with the headlights/fairing off the bike.
KG9K7816.jpg
Plug the harness in and you're done. I haven't checked alignment out yet but the 600rr headlight assembly has both up/down and side to side screw adjusters for each lamp so I should have plenty of latitude.
You gotta tell us where you got it and how much it was! I've seen it, and researched it a little, had it in mind for a project, but I remember it was $$$, that or I found the price in canuckle funds...
Yes, they are expensive. Here's the N.A. KOSO website with US distributors who all show list prices on their websites too:
but they are much cheaper on UK and German ebay which is where I got mine but I got seriously raped on shipping charges by the German vendor. In hindsight, I should have asked a Euro or Brit Viffer to purchase/ship them to me.
Well I spent some time getting the left side up to par with the right side that I've only been showing so far. Opps, I didn't plug in the right side headlight for the photos. I trimmed the gray lower a good bit to clear the centerstand while it's deployed and then drilled it to match the standard mounting point (no bracket required!). I've got a feeling I'll need to trim both of the lowers more to allow adequate heat spacing from the headers. I think I also have some of the Honda heat foil padding to add to the backs to give them more resistance.
The speedo is easy to see in the daylight. I got most of the wiring routing determined but still have one issue with the gauge I need to solve. I think I will lower and center it some more. I'm using some stock cbr holes at present for the bracket.
Not much time this weekend what with the Fathers Day activities (which usually involves me spending money?) but I did get the left side cover made. The seat has wrinkles because I added sargent seat foam and used it on my other VTEC bike. I'm not real good with seat covering but I'll try to redo it and make it longer to better fill the gap between it and the tank. Ultimately, I'll move the VTEC subframe closer (about 1/2 inch or so). I keep forgetting to remove the honda wing decals from the left side of the upper.
I also trimmed and installed the cb919 rear hugger. I think I will move it back about 1/2 inch towards the tire for closer fit and get it further away from the up pipe. Unfortunately, this means not using the stock front mounting hole on the hugger and making another longer rear bracket. Notice that the plate is several years out of date, this 4th gen has been sitting awhile (only 12k miles) after being wrecked.
I got the VTEC rear wheel mounted correctly by cutting away slots for the rear brake rotor bolts/nuts. This allows it to fit flush with against the hub. Rim bought from VFRd is in definite need of some touch up paint or powdercoating. The bike is almost ready to ride!
Any luck getting tech support with your gauge issue?
Doug,
The Koso gauge issue isn't looking good. I'm bummed. Tech support (French Canadians) has been helpful and courteous but couldn't get the tach issue (not accurate at all) solved even after bringing in two company engineers. Official answer: it's made for newer style ignition systems. WTH? All the other functions I have connected work GREAT. I'm going to try a CBR1000RR unit next.
I've also been working on some other things:
1) Got Silverstar H7's installed as the modified H4's threw out a funky beam pattern in the CBR housing. Back to the winky look now but the pattern is normal. 2) Marine grade voltmeter ($8 on ebay!) installed. 3) 06 GSXR 600 R/R with 43 miles on it installed. Bonus: came with OEM mounting bracket/horn that I installed between the fork legs. It's wired in parallel with the stock system which is unplugged. IOW, I have a backup system on board and wired in. I just need to plug/unplug between the two. Kinda' cool I think. 4) Pulled and cleaned carbs, added factory jet kit and carb sync. Motor runs so much better and smoother now. Example: pulling up to an intersection but not coming to a complete stop, I can leave it in 2nd and smoothly pull away (it's geared also). 5) Mirror spacer mounts so I can see better with the wider superbike bars. 6) Flush mount front turnsignals (as requested by posters) 7) Correct size front tire (came with a 60 series) 8) Nicer condition oil lines (originals were heavily corroded) 9) Painted and/or polished engine covers (originals corroded) 10) Oil and coolant change/flush (coolant probably still original; catch tank had heavy deposits) 11) Didn't take pictures as I was too damn busy doing the first 10 things! Sorry, will post some later.
Well it's just about done but I doubt it ever will be finished. :joystick:
Internal: converted to H7's, new oil lines, oil/coolant change, and factory jet kit installed. Next I added an "extra" gsxr r/r upfront between the forks. The upgraded honda unit is stilled wired in also but unplugged. I also added a voltmeter so I will know if I need to switch to the backup. [image: Posted Image] [image: Posted Image]
Did you get your instruments working correctly? Do you have good written instructions on the wiring? I may want to steal your hard work. I have a set of VF1000R gauges I WAS going to put on my RC211V replica, but that looks so much more fitting!
i really dont think that the 1000rr unit will work. i have a wiring diagram for it and it talks to the ecu on several lines. i cant recall correctly, but i dont think the coolant sensor even goes to the gauge cluster. it might, ill look at it when i can dig up the diagram.
The upside: TACH WORKS NOW!!!!. Coolant works. Neutral, high beam, turn signals, oil pressure, and reserve fuel level (comes on at 5.1 gal) lights all work and function properly. The over rev light also works but on the 4gen that's not such a big deal as the limiter kicks in about the same time. Redline is the same as the 4gen (OK 100rpm higher for the anal types). Fits my 600rr upper stay and fairing perfectly. Very light. No damage; $150 shipped from epay. Two trips. Looks factory; well...... because it is, sort of. :blink:
Downside: now have a $300+ koso rx1n paper weight. Coolant gauge requires a different two lead sensor. 4gen is single lead and pegs the gauge at 270f when plugged in. I was able to use the sensor from my Koso so the paper weight isn't quite so heavy. http://www.vfrdiscus...tyle_emoticons/default/+1.gif Will get the 1000r unit later and sell koso. Just as mustang66 experienced with his 6000f4i gauge, the speedo is way off (by the power of 10 or thereabouts) and will need a speedohealer box to function correctly. Temp fix is putting my sigma 800 back on. Needs cbr headlight harness to mate to vfr harness (cut/splice a bunch of wires). No air temp or incremental fuel level only reserve notification.
BTW, could the fairing set back anoth inch or two so the semicircualr cutout meets the case better?
Basically you need the wiring schematics for both bikes and then it's pretty straightforward. I DL'ed the 1000 manual from somewhere on the net; sorry I forget from where exactly. I can burn you a copy of mine if need be. You'll need the RR headlight harness to plug into the back of the gauge. Cut connectors off both harnesses (yikes!), unwrap and start tracing wires. Not all that many are needed and some colors match up. Two power leads with one constant for clock and the other to the fuse box for a keyed source.
Like I said, the coolant unit is the biggest obstacle and a speedo healer is needed for correction factor.
An absolute masterpiece. (insert slow measured clap here). I is the MV Agusta of VFR's. Could you build a better shock res. mount though. That is the only thing that looks less than integrated on the whole project. And that's saying a lot after all the mods are seamless. :thumbsup: :beer: :goofy:
VFR Capt.BobAn absolute masterpiece. (insert slow measured clap here). I is the MV Agusta of VFR's. Could you build a better shock res. mount though. That is the only thing that looks less than integrated on the whole project. And that's saying a lot after all the mods are seamless. :thumbsup: :idea3: :beer:
WOW, thanks Cap'n! And thanks to those for the featured thread front page move. :thumbsup:
mmmm, MV Agusta's sure look sweet and I'm seriously considering an MV black/CF paint scheme since I think they look so suh-weeeeeeet.
Yup, the shock reservoir mount MUST be improved. Either I'll fab up something or as Dutchy suggested I'll hack off the peg part of the mount.
as I'm loading it up for a 1600+ mile extended weekend trip out to Big Bend National Park; a tank bag and rear seat bag are more than enough. This will be my fourth trip in two years. Yes, I now love that place. Weather forecasts are perfect. I'll post a trip and bike report when I get back. :wheel:
I had to get my butt in gear to make this and the Texas VFRd rides. I had a long list of things to fix/improve/make or basically git-ur-dun:
at least a month or so before. Nothing like a little stress to add to ride. :offtopic: Well I got most of the list done plus a cheap cosmetic rear wheel axle cover! :thumbsup:
You've made up my mind on several items, from the CBR1000RR gauges (made an Ebay coup) as well as the specing of the CBR600RR fairing as my choice for the RC211V replica body. And it just happens to be the same body as Rossi rode, even if I paint it Repsol from the Nicky era.
Now, just getting the dough saved for the Oppracing fiberglass fairing.
Again, way to go. Need to drive up to Dallas for anything?
veefer800canuckI wanna know: what to the CBR guys say to you at bike night?
Haven't taken it to a bike night yet. Maybe this spring I'll "spring it" on 'em. LOL
Finally got around to a minor mod for the rear shock reservoir mount. A crash damaged cbr1000rr passenger peg hanger became the unknowing donor part for a much slimmer mount after hacking about 2/3rds of it off as suggested by Dutchy. You can't really tell from these pics but it's tuck in more for better protection against crash damage; not that it will ever need it. (fingers crossed knocking on wood) I'll either paint or powdercoat it black to blend in better.
Well, my buddy and I are going to attempt, and I say attempt, the same thing. I have a '97 VFR and just got a brand new '08 CBR600RR complete front end.....USD forks, triple trees, brakes, lines, cables, controls, switches, the whole shebang; a front wheel from an '07 CBR600RR; EBC Pro-Lite rotors; fairing stay from an '04 CBR600RR; gauges from an '05 CBR600RR.....we are ready to begin major surgery this week, gulp! As I have a new titanium TBR can, I am going to leave the exhaust system as is and keep the rear wheel as well (just put a new Michelin Pilot Power on it this week); will be getting an Aprilia RSV clutch unit this week hopefully; going to be getting '03-'04 CBR600RR bodywork front and rear I hope in the next two weeks....although I wonder if the '05-'06 bodywork would work...last model with the twin air intakes before they went to the central intake. We found a shop manual for the CBR600RR on line so we can compare it to the shop manual for the VFR regarding the electrical system. As the VFR is longer than the CBR, it will be interesting to see how the subframe and tail from the CBR work on the VFR.
Just a couple of questions now.....I will try to keep the questions to a minimum and not be a bother as we go along.
How do you deal with the choke when you do the conversion?
Are there any ECU issues that need to be addressed? I figure that the '97 bike (which is really a '94 model) might be more analog and the new CBR more digital.
roadkillWell, my buddy and I are going to attempt, and I say attempt, the same thing. I have a '97 VFR and just got a brand new '08 CBR600RR complete front end.....USD forks, triple trees, brakes, lines, cables, controls, switches, the whole shebang; a front wheel from an '07 CBR600RR; EBC Pro-Lite rotors; fairing stay from an '04 CBR600RR; gauges from an '05 CBR600RR.....we are ready to begin major surgery this week, gulp! As I have a new titanium TBR can, I am going to leave the exhaust system as is and keep the rear wheel as well (just put a new Michelin Pilot Power on it this week); will be getting an Aprilia RSV clutch unit this week hopefully; going to be getting '03-'04 CBR600RR bodywork front and rear I hope in the next two weeks....although I wonder if the '05-'06 bodywork would work...last model with the twin air intakes before they went to the central intake. We found a shop manual for the CBR600RR on line so we can compare it to the shop manual for the VFR regarding the electrical system. As the VFR is longer than the CBR, it will be interesting to see how the subframe and tail from the CBR work on the VFR.
Just a couple of questions now.....I will try to keep the questions to a minimum and not be a bother as we go along.
How do you deal with the choke when you do the conversion?
Are there any ECU issues that need to be addressed? I figure that the '97 bike (which is really a '94 model) might be more analog and the new CBR more digital.
We are so pumped about this project!
Oh man I'm sorry I didn't see your post any sooner. :fing02: Shoot, you're probably finished by now! Sounds like an awesome project. :wheel:
I do have a concern on the 600RR front end. Most of these newer USD units are pretty short. How's that going?
No major issues with the electronics other than two minor things:
I solved the choke cable issue by using a CBR900RR triple clamp mount (cheap). In your case with the low 600rr clipons, you maybe able to run the choke cable in the stock 4gen position with no length issues. Remember I have more upright handlebar setup. If I had a better local dealer, I would have just taken my cable and compared lengths of their in-stock supply but a request like that would just blown their minds.
Doug....ever so glad you came back.....we started on it yesterday....the '08 CBR600RR entire front end went on flawlessly....Honda really doesn't change something unless it needs changed.....we put an RC51 hydraulic clutch unit on it and it was a total bitch.....took hours to get it to work, no idea why, just took hours to make it work. The USD unit turns out to be like 4" shorter than the VFR unit, so I really need heli-bars now.
I got a stock CBR fairing stay and chopped off the end and made redneck engineered aluminum plates on both sides with spacers as the CBR fairing stay is much wider than the VFR to mate the fairing stay to the VFR headstock....worked out quite well. And the VFR ignition just bolted right up to the CBR triple tree...no problem.
Now.....mating the VFR electrics to the CBR....I have a gauge unit from an '05 CBR600 and bought on ebay the complete wiring harness for that bike as well....Honda is pretty anal about their stuff over time and keep everything the same more often than not....but we are now looking at the old wiring and the new wiring and would very much like your help. Would you be willing to help us with this phase of the work? We would be eternally grateful.
I used a cbr1000rr gauge because the redline is the same so the wire colors could probably be different. Now is the point where I wished I would have written things down more often but basically I just traced the cbr wiring schematic from the sensors back up to the gauge to determine what color wire went where. The cbr gauges will have extra wires for digital functions (FI light, etc) so don't panic.
4 inches shorter huh? WOW, that's a lot. You are probably going to run into radiator clearance during fork compression. I loved the plates. I did the same thing during mock up stage but mine were more flimsy.
FotoMotoI used a cbr1000rr gauge because the redline is the same so the wire colors could probably be different. Now is the point where I wished I would have written things down more often but basically I just traced the cbr wiring schematic from the sensors back up to the gauge to determine what color wire went where. The cbr gauges will have extra wires for digital functions (FI light, etc) so don't panic.
4 inches shorter huh? WOW, that's a lot. You are probably going to run into radiator clearance during fork compression. I loved the plates. I did the same thing during mock up stage but mine were more flimsy.
Doug....the picture of the "final" is misleading as the oil radiator in the pic is just hanging down unattached.....it will mount high enough to account for fork compression. Also, these mounting plates and oil radiator bracket are just mockups....I am going to have a machine shop make me "real purty" ones that will be powder coated to replace these "proof of concept" ones. The VFR headstock bracket is quite narrow and the CBR is quite wide, so we needed scrap aluminum spacer plates and washers to make up the difference in widths....this will be addressed with quite dressy pieces shortly....gonna look perfesshunal when it is all done.
Just one more question concerning electrical mating.....the VFR has a "dark green" ground wire at every end point....the CBR does not. Was this a problem for you?
I am not overly concerned about redlines at this point as I don't tend to be gauge oriented when I ride....my ears are my "gauge"....but I am sure that I will have some questions as I go along.....if you will indulge me.
Why did you decide to switch from clipons? Handlebar height? I want to stay with clipons but don't want to ride like every ride is a track day.....this bike is for a relaxing street ride......my '05 maxxed out Yamaha R6 is my track beast and ready for more action now that I am healed up from a quite nasty highside last year.
No, I'm referring to the coolant rad, even hanging down your oil rad won't be a problem (BTDT). I think the fender will be hitting either the coolant rad or cylinder head on full compression.
The dark green (DG) are grounds. I recently upgraded my computer and don't have the cbr manual I downloaded on it so I can't check to see nor recall what the common ground wire color is on that bike.
Yeah I know what you mean about listening for the redline but I wanted a set of clocks that were close. Just an attention to detail kind of thing.
I'm, ahemmm, nearly as old as Baileyroc :fing02: and a more comfy riding position is a priority item so I try to add superbike bars to my bikes if at all possible.
FotoMotoNo, I'm referring to the coolant rad, even hanging down your oil rad won't be a problem (BTDT). I think the fender will be hitting either the coolant rad or cylinder head on full compression.
The dark green (DG) are grounds. I recently upgraded my computer and don't have the cbr manual I downloaded on it so I can't check to see nor recall what the common ground wire color is on that bike.
Yeah I know what you mean about listening for the redline but I wanted a set of clocks that were close. Just an attention to detail kind of thing.
I'm, ahemmm, nearly as old as Baileyroc :biggrin: and a more comfy riding position is a priority item so I try to add superbike bars to my bikes if at all possible.
Keep at it. :fing02:
Doug.....
Well, we are making steady progress....the beast is running and I have put hundreds of miles on it already....rode for like five hours on Monday.....no gauges but what the heck....although it would have been a real help to have actually had mirrors.
The '08 CBR front is a whopping 4" lower so the riding position is very CBR like but the steering and braking are light years ahead of this old VFR....just a real hoot to carve up winding roads like being on a crotch rocket.....hey, ya gotta do something fun when you are 61 going on 29.
Now to the real challenge....the gauges....am trying to mate the old analog VFR wiring to the new CBR wiring.....I see lots of differences already (we had to ditch the CBR left side pod because the default position is exactly opposite the VFR....will revisit this later as I like the CBR look and feel of the pod).....what I see so far....
the VFR has a side stand light, not so the CBR...don't care.
the VFR and CBR speedo leads are quite different....gonna take some experimenting around to figure out why they are so different and what works. Any thoughts?
the CBR has some FI stuff that I don't need so it will be unconnected pin outs.
the CBR has a grey wire labeled "W/N OUT".....have no idea what that is or means.
the CBR has two bank angle sensors....one on the left and one on the right....can't see as to how I need them as they have no VFR counterpart.
the CBR has has a white and green wire labeled "WIN - IN".......ain't gotta clue what it is or means. Hope it ain't critical as it has no VFR counterpart.
Any thoughts or suggestions will be most gratefully accepted.
Gonna spend the whole day tomorrow on the thing....made adapter plates and put some el cheapo EMGO GSXR mirrors from the local Cycle Gear store so I can see around me......ain't got no fuel gauge so I have to stop fairly often just to make sure....too old to walk to a gas station.
Dang....I love this frankenbike.....what a hoot to ride around on.
HI VFR PARTNER!!! I READ YOUR POST FROM SPAIN AND I THIN IS A VERY PROFESSIONAL WORK. I´M FINISHING NOW MY VFR 90-93 STREETFIGHTER PROJECT, YOU CAN FIND IT HERE:
I PURCHASED A KOSO RX2 BUT I CANNOT MAKE IT WORK CORRECTLY AND NOW I´M SELLING IT.
ONE DAY READING YOUR POST I SEE THE 1000RR GAUGES AND PURCHASED ONE FROM EBAY TO FIT MY 90-93 VFR 750 F. I HAVE DOWNLOADED THE SERVICE MANUAL OF BOTH BIKES TO SEE HOW CAN I CONNECT IT. THE VFR ELECTRIC DIAGRAM IS VERY CLEAR BUT THE 1000 RR ONE APPEARS WITH SOME KIND OF FOG. CAN YOU TELL ME THE COLOUR OF THE CABLES YOU USED TO CONNECT THE GAUGES OF THE 1000 RR I COULD FIND THE FOLLOWING:
GR/R - TEMPERATURE SENSOR
Y/G - TACHOMETER (RPM)
BU/R - OIL
BR/BL - RESERVE FUEL
LG/BL - NEUTRAL
LB - RIGHT TURN
BL/BU - HIGH BEAM
O - LEFT TURN
G/BL - SPEED SENSOR
ARE THEY CORRECT?
I SEND YOU A PIC OF MY CONNECTION DIAGRAM. I´LL BE VERY PLEASED IF YOU CAN CORRECT IT AND SEND ME AGAIN THE CORRECTED ONE. ARE THERE ANYTHING I MUST KNOW BEFORE STARTING THE INSTALLATION.
Great, now I have a waiting line of folks wanting me to take my harness apart since, being the lazy ass person that I am, I didn't write down the wire color codes!!!!! :warranty:
Roadkill, Todd, and Gazman: I must have downloaded the same cbr pdf file as it's also very low quality and I can not make out many of the words at the meter connection. So, here's what I did. Just as in the above image, I could make out the cbr wire color codes but not the words at the gauge connection (grrrrrr). So, I looked all over the cbr schematic till I found the sensor or switch I needed (neutral, oil, high beam, etc) and then followed it back up to the harness connection. Just a process of elimination really and didn't worry about the extra cbr wires used for FI and other uses. Many (most) of the wires run to the ECM first so don't get lost.
I cut off the 4gen green and blue connectors and connected the vfr wires to the cbr gauge harness to plug into the cbr gauge. That way the instrument is removable and not hardwired to the bike. Hope this makes sense. I'm truly sorry I can't take my bike apart and unwrap the harness to give you definite answers to color codes but I'm in the middle of a house restoration, bike is in storage, and I've only ridden once in the past 3 months or so. I'm beginning to understand what PMS is now. :fing02:
Gazman, your 3gen streetfighter is MAGNIFICO! :goofy: Did the RX2 tachometer function not work properly? That was the only thing the RX1 didn't solved or I would have kept it. My 4gen coolant sensor didn't work correctly with the cbr gauge but the KOSO sensor did so I'm using that one. A cbr temperature sensor might bolt onto the vfr thermostat but I don't know that for a fact and am just guessing. You will also need a speedohealer version 4 (latest) to calibrate the speedometer correctly.
Roadkill,
Remember you are adding a digital gauge on an "analog" bike so yes there are going to be many unused functions (wires) on the cbr's end like the electronic steering damper. Don't worry about them. You'll also need the ver4 speedohealer. Post some pics of that front end, please.
I COULDN´T FIX THE TACHOMETER FROM ANY OF THE COILS WIRE, PICK UP OR DIRECTLY FROM COIL. ELSEWHERE SPEED ISN´T ACCURATE, BUT I THINK IT´S CAUSED FOR ONE MAGNET INSTALLATION ONLY, I SHOULD INSTALL AT LEAST 3 MAGNETS TO IMPROVE METER SIGNAL. I THINK TACHOMETER IS THE MOST IMPORTANT FUNCTION FOR ME, BECAUSE SPEED, TEMPERATURE AND ANYTHING ELSE CAN BE SOLVED EASILY WITH ANOTHER GAUGE OR ACCESORY, BUT RPM SHOULD BE THE MOST ACCURATE POSSIBLE. I WILL POST MY LAST PROGRESSES SOON, IT WILL INCLUDE A GSXR K7 COMPLETE FRONT END FOR THE OLD VIFFER smile.gif . AND A GSXR K6 HEADLIGHT smile.gif
Remember you are adding a digital gauge on an "analog" bike so yes there are going to be many unused functions (wires) on the cbr's end like the electronic steering damper. Don't worry about them. You'll also need the ver4 speedohealer. Post some pics of that front end, please.
Doug....I already did....see post #32 for the link.
Also....I have been using a Clymer's Honda manual and now see by comparing their wiring diagram to my bike that the manual has some problems....what is in the manual does NOT match up with my bike's actual pin layout. However, that should not be too much of a problem as it is the color of the wiring that is important, not its location in the connector harness. I mean if the wire is shown on the layout as Pin 4 but in reality is Pin 3, then Pin 3, it is.
Did you have any problems that you remember with the fuel gauge and low fuel warning light hookup?
BTW, I had a blast riding it yesterday for like six hours.....just had to be careful as I do not have a fuel gauge, so I had to just guess....one time it took 1.7 gallons and the last time 3.5, so I really have no idea of how far I have ridden with no odometer or fuel gauge. I fixed the mirror problem by going to Cycle Gear and getting two GSXR mini mirrors (Emgo) and making some crude but effective adapter plates.
JACKPOT! Guys I did write it down. :wheel: Seeing gazman's schematic finally trigger one of my last functioning brain cells :beer: which let me recall that I enlarged the schematic and printed it in the hopes of reading it better. Anyway, I found that print out and I did label things. Starting from left to right on the above connector of the cbr1000rr gauge harness:
CBR wire colors=function
P= Speedometer (1)
Br/W = Instrument lighting (switched)
R/G= Instrument power (non-switched for clock, etc)
Gr/Y= Not used (cbr steering damper)
G= Ground
Gr/R= Water temp
Y/G= Tachometer
Bu/R= Oil
W/Bu= Not used (FI light)
Br/W= Speedometer (2)
Br/Bl= Fuel Reserve
Lg/Bl= Neutral
Lb= Right Turn
Bl/Bu= High Beam
O= Left Turn
G/Bl= Speedometer (3)
For the three speedometer sensor connections:
CBR=VFR color wire
Speedo (1)= Pink
Speedo (2)= B/Br
Speedo (3)= G/B
Pink is the actual signal wire and the other two are power & ground.
HTH and, oh yeah, disconnect battery before surgery! :wheel: Good luck :beer:
Well......today was the day we put all the hours and hours and hours of comparative charts, diagrams, lines, boxes and assorted squiggles all together.....
As a preliminary, I chopped off the "ears" on the bodywork bracket and relocated the choke cable to the bored out threaded hole for the bodywork attachment....
speedo.....off by a factor of almost 10....registers like 7 doing 55
odometer....same story
I wonder if the Speedohealer has THAT much of a correction factor available.
What doesn't work:
Coolant temperature reading....the VFR, as noted, has a single wire, the CBR a two wire system. I am getting a CBR sensor to possibly correct this problem....also the VFR sensor mounts to the radiator and the CBR as part of the neck of the engine attachment bracket tied into the thermostat....hope they are the same gauge and threading. I will soon find out.
Fuel gauge and low fuel warning light.....very obvious why....the VFR has a carburated system and the tank float is just a mechanical piece whereas the CBR has the actual FI fuel pump as a consolidated unit in the tank......non-FI versus full-FI......however, both the analog VFR gauge and the digital CBR gauge both work off resistance changes.....same thing but different languages.....there must be some way to convert "English into Spanish" as an example.....it can be done....just gotta figure out how.
GAZMANgreat job mate!!!! did you buy the connection harness of the cbr or you just welded vfr wiring into cbr gauges?
I think I´ll need CBR wiring or at least the little connection of the gauges to do the less mess possible. smile.gif
Keep on the good JOB:)
When I bought the gauges on ebay, they came with the wiring that plugs into the back of the gauge and then I bought a main wiring harness off ebay for $91 I think it was so we had plenty of wire and connectors to put it mildly.
It did not turn out to the the monster nightmare that we imagined......many things were just simply matching the orange wire to the orange wire kinds of things...very straightforward.
roadkillWell......today was the day we put all the hours and hours and hours of comparative charts, diagrams, lines, boxes and assorted squiggles all together.....
As a preliminary, I chopped off the "ears" on the bodywork bracket and relocated the choke cable to the bored out threaded hole for the bodywork attachment....
What works:
tach
clock
neutral indicator light
left/right turn signal indicator lights
high beam indicator light
What needs work:
speedo.....off by a factor of almost 10....registers like 7 doing 55
odometer....same story
I wonder if the Speedohealer has THAT much of a correction factor available.
What doesn't work:
Coolant temperature reading....the VFR, as noted, has a single wire, the CBR a two wire system. I am getting a CBR sensor to possibly correct this problem....also the VFR sensor mounts to the radiator and the CBR as part of the neck of the engine attachment bracket tied into the thermostat....hope they are the same gauge and threading. I will soon find out.
Fuel gauge and low fuel warning light.....very obvious why....the VFR has a carburated system and the tank float is just a mechanical piece whereas the CBR has the actual FI fuel pump as a consolidated unit in the tank......non-FI versus full-FI......however, both the analog VFR gauge and the digital CBR gauge both work off resistance changes.....same thing but different languages.....there must be some way to convert "English into Spanish" as an example.....it can be done....just gotta figure out how.
Todd here, the buddy helping Roadkill with this project.
My biggest concern on the gauges (and this was bugging me all last night after we finished up), is the Speedo inaccuracy.
Doug, when you got your gauges working, was your speedo off THAT much? I mean as much as what we're experiencing? Like Roakill said, at about 50-55 mph, the speedo is only reading 6-7 mph. I just cant see it making THAT much difference in the signal being sent.
This has def. been a learning experience. Most of my moto mechanical stuff has been working on racebikes, not transforming one type of bike to another :unsure:
[image: View Post]WERA39, on Jun 1 2008, 09:00 AM, said:
Doug, when you got your gauges working, was your speedo off THAT much? I mean as much as what we're experiencing? Like Roakill said, at about 50-55 mph, the speedo is only reading 6-7 mph. I just cant see it making THAT much difference in the signal being sent.
Todd,
Yes, it is off THAT much. As I said, you will need Verison 4.0 of the speedohealer which is the only one with enough range to handle this. I tried three others: "regular" speedohealer, a yellow box, and a daktronics box before speedohealer's tech support :fing02: helped me figure it out. Ver.4.0 has only been out since march so make sure you're not getting old stock when ordering. I got mine here:
I originally solved my limited mirror view buy adding spacers as seen in some of the pics but I just didn't like the looks nor the "dirty" air coming off the fairing. So, I'm now using bar end mirrors which greatly cleaned up the lines of the bike and greatly reduced turbulence. Pics to come soon.
Gazman,
Yes splicing into the cbr gauge/headlight harness (cheap on ebay) is the only way to go. Also, I saw your youtube video and the KOSO tach looked to be working fine.
YES, IT SEEMED TO WORK FINE CONNECTED DIRECTLY TO THE COIL OF THE SECOND CILYNDER BUT WHEN I PASS 6000 RPMS IT GOES CRAZY. ELSEWHERE I HAVE TO TRY REINSTALLING KOSO BEFORE CONNECTING CBR 1000 RR ONE. IN CASE KOSO WORKS FINE FINALLY I CAN SELL THE CBR RR ONE :)
[image: View Post]FotoMoto, on Jun 1 2008, 09:25 AM, said:
Todd,
Yes, it is off THAT much. As I said, you will need Verison 4.0 of the speedohealer which is the only one with enough range to handle this. I tried three others: "regular" speedohealer, a yellow box, and a daktronics box before speedohealer's tech support :fing02: helped me figure it out. Ver.4.0 has only been out since march so make sure you're not getting old stock when ordering. I got mine here:
I originally solved my limited mirror view buy adding spacers as seen in some of the pics but I just didn't like the looks nor the "dirty" air coming off the fairing. So, I'm now using bar end mirrors which greatly cleaned up the lines of the bike and greatly reduced turbulence. Pics to come soon.
Gazman,
Yes splicing into the cbr gauge/headlight harness (cheap on ebay) is the only way to go. Also, I saw your youtube video and the KOSO tach looked to be working fine.ahhhhhhh, well glad to see that i didnt screw up. I had some things to do after Roadkill left my house yesterday, but last night, i spent a few hours going over and over the schematics trying to figure out where i messed up and IF i had messed up. I guess the reason its off so much is because the speed sensor of the CBR actually goes thru the ECU and other sensors BEFORE it gets to the electronic gauges, which in turn causes the signal from the VFR which doesnt go thru all the electronics to be THAT much off. Im sure Roadkill will read your post, and hopefully will get the correct SPEEDOHEALER that will be able to make that much adjustment. I didnt think the standard one would make an almost 90% adjustments as i just installed one on another friends bike who only needed an 8% adjustment to bring his speedo to within 1mph of being dead on accurate according to his GPS on the bike.
the reason that the speedo is off so much is because instead of picking it up at the countershaft sprocket and sending 4 pulses per revolution like our bikes do the RR is actually picking it up off of a gear in the transmission which has far more teeth than just 4 so its only getting a fraction of the necessary pulses.
[image: View Post]flyguyeddy, on Jun 1 2008, 07:36 PM, said:
the reason that the speedo is off so much is because instead of picking it up at the countershaft sprocket and sending 4 pulses per revolution like our bikes do the RR is actually picking it up off of a gear in the transmission which has far more teeth than just 4 so its only getting a fraction of the necessary pulses.
Thanks for the info. I have a Speedohealer on order to address this issue.
Now for one more question......mating the VFR fuel sensor to the CBR LCD fuel gauge.....I am deathly afraid of just making a straight connection as the VFR signal may be too much for the CBR and might fry the cluster.....
So I want to look at the resistance of the fuel level sensor in each bike and compare the two.....I have the page from the factory manual for the CBR showing that the resistance at top (full) is 11-13 ohms and at bottom (empty) is 130-135 ohms. Does any one have a chart for the VFR? Much thanks.
[image: View Post]roadkill, on Jun 9 2008, 04:27 PM, said:
[image: View Post]flyguyeddy, on Jun 1 2008, 07:36 PM, said:
the reason that the speedo is off so much is because instead of picking it up at the countershaft sprocket and sending 4 pulses per revolution like our bikes do the RR is actually picking it up off of a gear in the transmission which has far more teeth than just 4 so its only getting a fraction of the necessary pulses.
Thanks for the info. I have a Speedohealer on order to address this issue.
Now for one more question......mating the VFR fuel sensor to the CBR LCD fuel gauge.....I am deathly afraid of just making a straight connection as the VFR signal may be too much for the CBR and might fry the cluster.....
So I want to look at the resistance of the fuel level sensor in each bike and compare the two.....I have the page from the factory manual for the CBR showing that the resistance at top (full) is 11-13 ohms and at bottom (empty) is 130-135 ohms. Does any one have a chart for the VFR? Much thanks.
the vfr one gives from 4 to 10 ohm at high position and from 90 to 100 ohm on low position so there is no risk on frying anything :)
I'm going to try the RC51 front end on my ol' RCBVFR. I found out that pre-2008 CBR1000R triples are identical to the 929/954 setups so popular with modders which use the stock VFR bearings and races but are becoming somewhat rare and thus high dollar on ebay. I picked up an entire 1000r setup for $90. The offset and stem length are the same on all of them (1000, 954, 929). This pic shows the difference in build substance vs my vtec triples and the difference in overall length due to the gullwing drop of the upper triple.
The only negative is the 1000r upper triple is "ugly" (not pictured) as it has mount holes for the electronic steering damper that is (obviously) not used in our applications. Fortunately, I had all ready purchased a 954 upper and used it instead as seen in this pic. It's mounted on the cbr1000rr bottom triple vs my previous setup on right: 2002 vfr triples (with f4i forks)
[image: View Post]SEBSPEED, on Feb 28 2009, 08:56 AM, said:
Nice job Doug!
Dibs on the F4i forks, if they are available and the price is right! :blush: I mean, you're not putting them on the RC, are you? :huh:
Thanks Seb. Yeah, they would look at little funny on the RC, huh? LOL Well, they aren't for sale yet because......
I really luv the look the look and bling factor of the USD forks on my RCBVFR. Not to mention the new found braking power of the larger 310mm rotors and that my gixxer 6p calipers bolt right up too is just icing on the cake. But..... with different offsets the steering is a little, well......, different feeling; however, after an hour + test ride today I am getting use to it. I didn't get a true test of the front end as we had 30-40+mph winds that were totally messing with my lines. :blink: Hell, I was leaned over in the straights! :biggrin:
But the biggest obstacle with these on my 4gen custom is steering lock; as in, there isn't any with the cbr1000r lowers. I almost dropped it on a very slow u-turn while caught off guard watching traffic. I spent most of the evening grinding down the stops with a dremel to gain more clearance with the forks still mounted on the bike. I gained a lot more but realized I'll have to remove them for more working room to get the proper clearance. With the now new additional turning lock, I see I might have clearance issues with the radiator if I try to go for more. Hmmm.
The very tall ducati 900 SS clipons are just about perfect as I have them set all the way up and that is about all my brake line length and fairing upper clearance can take. I used these on my RC51 and got the tinglies on very long rides that I think are due to no bar end weights; gonna have to fix that.
Forgot to mention, I'm also using a Carrrozzeria forged aluminum front wheel pirated from my RC51. You know, for that even greater bling factor! :) Seriously, these lighter wheels are really the tits; no kidding.
[image: View Post]FotoMoto, on Mar 1 2009, 04:30 PM, said:
Forgot to mention, I'm also using a Carrrozzeria forged aluminum front wheel pirated from my RC51. You know, for that even greater bling factor! :) Seriously, these lighter wheels are really the tits; no kidding.
Doug, it looks REALLY AWESOME!!!
I'd nominate you to design the new gen of VFR's any day!
I TOTALLY want to find a way to get some type of OHLINS Forks to work with my 6th gen. Not just the insert/springs, but the whole thing.
Man I REALLY REALLY want to do that.
Any possible way whatsoever?
Oh, since you seem to be the expert on VFR Mods, wondering if there is any way to get Fork Sliders for the VFR 6th gen?
[image: View Post]SOTY, on Mar 3 2009, 08:44 AM, said:
I TOTALLY want to find a way to get some type of OHLINS Forks to work with my 6th gen. Not just the insert/springs, but the whole thing.
Man I REALLY REALLY want to do that.
Any possible way whatsoever?
Oh, since you seem to be the expert on VFR Mods, wondering if there is any way to get Fork Sliders for the VFR 6th gen?
Ohlins huh? (insert whistle sound here) Suh-weet. Got an extra $2800 laying around for a set of RC51 Road and Track units? Add a set of gull wing type triples and you're set! :cool: Of course, you'll lose the LBS and need to attend to that. You can find used sets on the more racer type forums for under $2k but they get snatched up pretty quick; gotta be ready to pull the trigger.
By sliders are you meaning the plastic protectors? If so, than the F4i items should fit as they are also 43mm. About $7 a piece.
Thanks for the kudo's guys. It's nice to know others like the RCBVFR too. I sure do. :blush:
[image: View Post]FotoMoto, on Mar 4 2009, 02:01 AM, said:
[image: View Post]SOTY, on Mar 3 2009, 08:44 AM, said:
I TOTALLY want to find a way to get some type of OHLINS Forks to work with my 6th gen. Not just the insert/springs, but the whole thing.
Man I REALLY REALLY want to do that.
Any possible way whatsoever?
Oh, since you seem to be the expert on VFR Mods, wondering if there is any way to get Fork Sliders for the VFR 6th gen?
Ohlins huh? (insert whistle sound here) Suh-weet. Got an extra $2800 laying around for a set of RC51 Road and Track units? Add a set of gull wing type triples and you're set! :cool: Of course, you'll lose the LBS and need to attend to that. You can find used sets on the more racer type forums for under $2k but they get snatched up pretty quick; gotta be ready to pull the trigger.
By sliders are you meaning the plastic protectors? If so, than the F4i items should fit as they are also 43mm. About $7 a piece.
Thanks for the kudo's guys. It's nice to know others like the RCBVFR too. I sure do. :blush:
Ok, something happened to my last post...
Ohlins:
So you mean that because the RC51's are of a different size and mounting, I'd have to replace my front brake calipers due to the different mounting system and I'd lose my ABS?
Any other Forks out there perhaps suitable?
Fork Sliders:
I mean those plastic slider thingies that go on the ends of the axel on the front wheel. I thought not possible because no mounting location?
Perhaps there is some type of replacement axel that makes it possible? [image: Posted Image]
[image: View Post]SOTY, on Mar 4 2009, 04:52 AM, said:
Ohlins:
So you mean that because the RC51's are of a different size and mounting, I'd have to replace my front brake calipers due to the different mounting system and I'd lose my ABS?
Any other Forks out there perhaps suitable?
Fork Sliders:
I mean those plastic slider thingies that go on the ends of the axel on the front wheel.
Yes, a fork mod (change) will require removing the LBS as it uses the stock left fork as part of the system and USD (upside down) forks can't do that.
I haven't seen axle sliders for the vfr but that doesn't mean they aren't out there or ones can be made to fit. USD forks typically have a larger axle diameter and bolt sizing.
Sorry, nothing up my sleeve. I will put these back on the RC and bolt up another set with Dan Kyle internals coming from the seller in California but with a quick stop back at Dan's shop to have them freshened up and resprung for my weight as there was a significant difference between us.
Basically I realized I had everything on hand except the triples to try this mod. Then if I didn't like it, I wouldn't be out much dough (easily sell the triples) but I did so now it costing me! :warranty: :biggrin:
[image: View Post]supertex, on Mar 28 2009, 02:37 PM, said:
Hey Foto what type of screen did you use for your side pieces you made.
Sorry for the late reply, my email notification for this thread isn't working; need to reset it I guess.
I used cardboard to form the basic templates and then made the second set out of black plastic from a rubbermaid trashcan. ;) The current edition is a copy of the 2nd but cut from thin carbon fiber sheets forming three layers with the screen sandwiched as the second in between.
I just want to help out. I found this....04-05 CBR1000RR wire diagram Hope this can help someone out. It has helped me.
Thank you Doug (FotoMoto) for starting this post. I am hooked!
:lurk:
Good stuff here
So am i right, a cbr/rr clock will slip right in place of my 4th gen clock?
Or do i simply need a speedo healer to make good?(never used or seen one of them before)
A how do sheet with out all the fluff would be awsome.
[image: View Post]B4D80Y, on May 18 2009, 12:52 PM, said:
:lurk:
Good stuff here
So am i right, a cbr/rr clock will slip right in place of my 4th gen clock?
Or do i simply need a speedo healer to make good?(never used or seen one of them before)
A how do sheet with out all the fluff would be awsome.
Yes you will need a Speed O Healer. I have not got one yet and you will also need a different ECT sensor (2 wire set up). Good luck and get some pictures up when done.
I am looking forward to getting this done and riding again. I want to say thanks FotoMoto again for all your help!
[image: View Post]B4D80Y, on May 18 2009, 11:52 AM, said:
:lurk:
Good stuff here
So am i right, a cbr/rr clock will slip right in place of my 4th gen clock?
Or do i simply need a speedo healer to make good?(never used or seen one of them before)
A how do sheet with out all the fluff would be awsome.
No, the cbr1000rr clock doesn't bolt to the stock fairing bracket (stay) so you'd need some kind of adapter plate or brackets. Plus it's a LOT smaller so you'd have some unsightly gaps with the stock 4gen plastics.
You need version 4 of the speedohealer. The older versions don't have the wide range of adjustments needed. BTDT
You would also need the cbr headlight/instrument panel harness that plugs into the back of the gauge. All this involves cutting off and splicing into the main harness; not for the timid to say the least.
[image: View Post]FotoMoto, on May 18 2009, 07:28 PM, said:
No, the cbr1000rr clock doesn't bolt to the stock fairing bracket (stay) so you'd need some kind of adapter plate or brackets. Plus it's a LOT smaller so you'd have some unsightly gaps with the stock 4gen plastics.
You need version 4 of the speedohealer. The older versions don't have the wide range of adjustments needed. BTDT
You would also need the cbr headlight/instrument panel harness that plugs into the back of the gauge. All this involves cutting off and splicing into the main harness; not for the timid to say the least.
gettin a bit over techy 4 me now..... less is more in my eye,,,,, the unit will sit on a Ducati cast front subframe so will be mounted to sit right. will look fine am sure.
no speedo healer here in uk i know of.....
wiring is no probs for me.....
considering an after market unit, but havent found one am happy with as yet.... :lurk:
A few more mods: CBR1000RR radial front brakes via custom mounts, RC51 clip ons, and RC51 footpeg assemblies. Just got it back together tonight so I haven't ridden it yet but did butt test it in the garage. :biggrin: The pegs are about in the same location but IMO look better/more modern and replace damaged/rusted stockers. I could have re-installed my buell footpegs but after owning an RC51 for the past year, they now feel too low. The altered clipons are closer to me and have a better angle. The brakes stopped it when I pushed it outside. :goofy:
CBR radial master cylinder mounted on the RC51 clipons. With the fork tubes raised, I had enough room to mount these ABOVE the triple. I reversed them (left is now the right) and bent the angle to my liking with a cheater pipe. :warranty:
The footpeg hangers are about 1 to 1.5mm off in bolt spacing but slightly enlarging the holes of the RC units with the next size drill bit did the trick. The rubber footpegs are aftermarket as the stock RC pegs are bare metal. Gear change assembly went on easily; I only had to space the entire mount out about 20mm for the shift rod to clear the frame spar. NOTE: with a shorter rod you could easily go to GP shift if you prefer.
The rear brake side also bolted on after enlarging the holes but the heat shield needs adjusting. There is a gap at the front letting out more heat so I'll need to address that; probably with a CF solution. I still need to cut off the large holes on both sides. These were the mid-pipe exhaust mounts on the RC and aren't needed here.
Nice work. :beer:
Might have to look at using VTR rearsets myself if your findings are true.
My rearset guy has not come up with the goods this time, so a bit of lateral thinking, fleabay and hope to have replacement controls very soon....
[image: View Post]FotoMoto, on 29 May 2008 - 02:59 PM, said:
Gazman, your 3gen streetfighter is MAGNIFICO! :beer: Did the RX2 tachometer function not work properly? That was the only thing the RX1 didn't solved or I would have kept it. My 4gen coolant sensor didn't work correctly with the cbr gauge but the KOSO sensor did so I'm using that one. A cbr temperature sensor might bolt onto the vfr thermostat but I don't know that for a fact and am just guessing. You will also need a speedohealer version 4 (latest) to calibrate the speedometer correctly.
Ok, so I finally got the KOSO Sensor in the mail yesterday, opened up the package, and was quite surprised to see how small it was. Wasn't exactly what I was thinking it was going to be. I thought it would replace the sensor on the aft, left side of the radiator. I'm not sure where this thing goes, can you guys help me out, and point me in the right direction, as I really don't see where this smaller sensor goes. Thanks!!!
Doug(in TX), those footpegs look exactly like my oem F4i footpegs - with the threaded boss for the feeler and all!
Doug(in Germany) - I think KOSO wants that sensor mounted in one of your coolant pipes, but I don't know the specifics. Have you tried doing a google search to see how others have done it?
[image: View Post]SEBSPEED, on 20 February 2010 - 12:46 PM, said:
Doug(in TX), those footpegs look exactly like my oem F4i footpegs - with the threaded boss for the feeler and all!
Doug(in Germany) - I think KOSO wants that sensor mounted in one of your coolant pipes, but I don't know the specifics. Have you tried doing a google search to see how others have done it?
A google search...DUH!!! I don't know why I didn't think of that. I'll do that, google is my friend, and I use it alot, not sure why I didn't think of it for this application. I think I was shocked at the tiny little sensor that I got in the mail, that it short circuited my logic circuits. Thanks for bringing me back to the real world, and I'll be hitting up google shortly!!!
Doug: The koso sensor threads into the thermostat housing. It replaces the stock unit. Hope you have small hands! :biggrin: The sensor on the rad is the fan switch. Best to leave that alone if you want a fully functioning cooling system! :warranty:
Seb: Yes, those are aftermarket F4i footpegs (HK knockoffs). They bolt right onto the RC hangers. Years ago, I tried them on my first 4gen as the original metal pegs were slippery plus I wanted to try reducing vibrations with a rubber peg. To get them to fit I needed to grind down the peg's mounting width a slight tad (technical term) to fit the narrower vfr hanger assemblies; no changes needed to pins or springs, etc.
[image: View Post]FotoMoto, on 20 February 2010 - 04:53 PM, said:
Seb: Yes, those are aftermarket F4i footpegs (HK knockoffs). They bolt right onto the RC hangers. Years ago, I tried them on my first 4gen as the original metal pegs were slippery plus I wanted to try reducing vibrations with a rubber peg. To get them to fit I needed to grind down the peg's mounting width a slight tad (technical term) to fit the narrower vfr hanger assemblies; no changes needed to pins or springs, etc.
Nice, I knew I recognized them. :biggrin: I still have mine(put anodized pegs on the CBR), and was thinking of using them on a 96. Good to know they can fit with a little persuasion! :fing02:
[image: View Post]FotoMoto, on 20 February 2010 - 04:53 PM, said:
Doug: The koso sensor threads into the thermostat housing. It replaces the stock unit. Hope you have small hands! :biggrin: The sensor on the rad is the fan switch. Best to leave that alone if you want a fully functioning cooling system! :warranty:
Seb: Yes, those are aftermarket F4i footpegs (HK knockoffs). They bolt right onto the RC hangers. Years ago, I tried them on my first 4gen as the original metal pegs were slippery plus I wanted to try reducing vibrations with a rubber peg. To get them to fit I needed to grind down the peg's mounting width a slight tad (technical term) to fit the narrower vfr hanger assemblies; no changes needed to pins or springs, etc.
Thanks for the location of the sensor! I really didn't know where to put it looking at what I thought was the temp sending unit. Glad I asked before I ordered a different part, and started taking stuff completely part.
As far as rear sets go, I'm currently experimenting with some R-1 rear sets. The bolt pattern is the same, although they are a little long, and will impact the swing arm with out any spacers installed. There are a few different work-arounds that I'm toying with right now, just gotta decide which direction that I want to go in. I might also look at F4i rear sets, as I didn't know those would fit...
[image: View Post]douglasthecook, on 20 February 2010 - 05:20 PM, said:
I might also look at F4i rear sets, as I didn't know those would fit...
Doug, FM and I were talking about the footpegs only, not the entire footrest/bracket. That does give me an idea though, I can measure my F4i bracket for you and see if it will work on the 4th gen. I'll let you know later tonight(if I forget, PM me!)
[image: View Post]SEBSPEED, on 20 February 2010 - 06:37 PM, said:
Doug, FM and I were talking about the footpegs only, not the entire footrest/bracket. That does give me an idea though, I can measure my F4i bracket for you and see if it will work on the 4th gen. I'll let you know later tonight(if I forget, PM me!)
I checked once with an ebay vendor if F4i rearsets would work with the 6gen and they said no (off by several mm). Don't know if they would fit the 4gen.
[image: View Post]FotoMoto, on 20 February 2010 - 07:30 PM, said:
[image: View Post]SEBSPEED, on 20 February 2010 - 06:37 PM, said:
Doug, FM and I were talking about the footpegs only, not the entire footrest/bracket. That does give me an idea though, I can measure my F4i bracket for you and see if it will work on the 4th gen. I'll let you know later tonight(if I forget, PM me!)
I checked once with an ebay vendor if F4i rearsets would work with the 6gen and they said no (off by several mm). Don't know if they would fit the 4gen.
I do know that R-1 rear sets will fit, although they're a little long on the left side, as they rub against the swing arm. I'm working with a vendor to see of he has shorted mid-plates to install instead. If not, I have 3 possible solutions. Being that my VFR is becoming more and more of a track monster, adjustable rear sets are really something that I could use. FWIW the spacing on the 4th Gen mount bolts is 79mm, so any that have a 79mm spacing will be a start in the right direction. I really wanted to fit RC-51 rear sets, but they're spacing was too narrow if I remember right.
Well, I checked last night by holding a 4th gen right side bracket against my F4i's bracket - the F4i has a smaller spacing. I didn't measure the exact difference, but it's enough that simply drilling out the holes wouldn't do the trick(I wouldn't want to, that is). They're off by at least 10mm - if the 4th gen spacing is 79mm, then the F4i is closer to 69.
[image: View Post]SEBSPEED, on 21 February 2010 - 08:38 AM, said:
Well, I checked last night by holding a 4th gen right side bracket against my F4i's bracket - the F4i has a smaller spacing. I didn't measure the exact difference, but it's enough that simply drilling out the holes wouldn't do the trick(I wouldn't want to, that is). They're off by at least 10mm - if the 4th gen spacing is 79mm, then the F4i is closer to 69.
Cool, thanks for checking!!! I won't be able to use them, but someone else may need that data!
[image: View Post]FotoMoto, on 17 July 2009 - 09:58 PM, said:
A few more mods: CBR1000RR radial front brakes via custom mounts, RC51 clip ons, and RC51 footpeg assemblies. Just got it back together tonight so I haven't ridden it yet but did butt test it in the garage. :biggrin: The pegs are about in the same location but IMO look better/more modern and replace damaged/rusted stockers. I could have re-installed my buell footpegs but after owning an RC51 for the past year, they now feel too low. The altered clipons are closer to me and have a better angle. The brakes stopped it when I pushed it outside. :goofy:
The footpeg hangers are about 1 to 1.5mm off in bolt spacing but slightly enlarging the holes of the RC units with the next size drill bit did the trick. The rubber footpegs are aftermarket as the stock RC pegs are bare metal. Gear change assembly went on easily; I only had to space the entire mount out about 20mm for the shift rod to clear the frame spar. NOTE: with a shorter rod you could easily go to GP shift if you prefer.
What year and model did your shifter arm come from? I ordered one for/from a CBR900RR, and it doesn't give me a big enough offset to clear the water pump. This is my biggest issue right now for my rear sets. On another note, I was able to get the wiring harness from the CBR1000RR Gauges spliced in, now I just need to get the gauges back in the mail, and get a battery and that should be that for the gauges.
I JUST PUT MY WHOLE BIKE TOGETHER, I'LL PROBABLY TAKE OFF THE STAND FOR NOW, AND MY RADIATOR NEEDS TO BE INCHED OVER TO THE LEFT, I USED THE CBR LIGHTS WITH THE VFR WIRING SO I ONLY HAVE HIGH BEAMS AND WHEN I SWITCH TO LOWS IT JUST TURNS THEM OFF BUT NO WINKING EYE PROBLEM, SAVED ME WIRING TIME LOL...THE ONLY THING MY BIKES MISSING IS THE DASH PLASTICS AND THE GAUGES WHICH I SHOULD HAVE ALL THAT IN A WEEK OR TWO, THIS WEEKEND I GOT A BRAND NEW REAR TIRE, AND A USED TIRE ON THE FRONT, AND MIGHT BE GETTING NEW CHAIN AND SPROCKET(TRYING A 15/45 AS WELL), PICS WILL BE UP THIS WEEKEND, STAY TUNED! :wheel:
OK ladies and gents I think I'm through with it. Of late I've added a new upper from the 2005 cbr600rr which has a much neater air intake over the 03/04 cheese grater design I used previously. The black plastic intake needed some minor trimming to clear the oil cooler seen in the background.
[image: Posted Image]
But what I'm really liking are the new side covers. These were also pirated from the 600rr but greatly cut down to fit. I had to make some minor brackets for the bottom bolt and the upper tank screw utilizes a slightly new design. I now realize I don't have the closeup pics of those on this computer so I'll add them later. Anyway this is the finished look as of today approx. 3 years later. I can't believe it's been that long.
[image: Posted Image]
Poke it with a fork, I think it's FINALLY DONE! :cheerleader:
Need a nice clear pic of the front fairing to tank region where the CBR600RR has that air intake fairing. Need to see how it fits for my RC211V project.
I don't know whether I just now noticed it or I forgot: The bike's got handlebars?!
Out of curiosity, have you ever tried to put another bike's bodywork on a 6th gen. VFR? I would think an RC51 would be a good place to start (and since you once owned both bikes, maybe you tried it.)
[image: View Post]EmeraldVFR, on 10 April 2010 - 09:32 PM, said:
For starters, good job (as usual.)
I don't know whether I just now noticed it or I forgot: The bike's got handlebars?!
Out of curiosity, have you ever tried to put another bike's bodywork on a 6th gen. VFR? I would think an RC51 would be a good place to start (and since you once owned both bikes, maybe you tried it.)
Ha, I came here to ask whether something like this could be done to a 5th gen... I'd like a more modern look, but I really want a v4.
[image: View Post]tarun, on 27 April 2010 - 11:39 PM, said:
Ha, I came here to ask whether something like this could be done to a 5th gen... I'd like a more modern look, but I really want a v4.
I would think you might have issues with the side radiator airflow and cbr fairings. RC51's have side rads but one member (Kevin Perham) said they don't fit. Dunno' myself.
i cant get this wiring down, i got all the colors matched up except off the vfr i got grey/black, blue/black, yellow/black, and then off the cbr i got white/green, grey, white, and white/blue? can someone HELP!
nevermind i got it all to work, all i need now is to hook up the v4 speedohealer, and install the 3 lead temp sensor, then after that try to figure out how the hell to get the gas gauge to work right...hmmm any ideas? and what year and model is this 3 lead temp sensor i need so i can get that already?
The 4gen has both a fuel level gauge and "reserve" light. The cbr1000 gauge only has a low fuel light. So, on the schematic you will need to trace the three vfr wires coming from the tank sending unit and see which one goes to the reserve bulb. That's the wire you'll connect to the the cbr unit. You don't need to buy or adapt anything. The other two vfr wires won't be used. The cbr low fuel light should come on with about 1 gal left.
Looks great Doug. I also like the 05 06 front, (the black directs the air right at the oil cooler and looks almost OEM) looks a little cleaner and flows better with the lines. Plus I love the new side covers, I still have not messed with my side panels yet. I wish we could get both our bikes together sometime for some pictures.
The footpeg hangers are about 1 to 1.5mm off in bolt spacing but slightly enlarging the holes of the RC units with the next size drill bit did the trick. The rubber footpegs are aftermarket as the stock RC pegs are bare metal. Gear change assembly went on easily; I only had to space the entire mount out about 20mm for the shift rod to clear the frame spar. NOTE: with a shorter rod you could easily go to GP shift if you prefer.
The rear brake side also bolted on after enlarging the holes but the heat shield needs adjusting. There is a gap at the front letting out more heat so I'll need to address that; probably with a CF solution. I still need to cut off the large holes on both sides. These were the mid-pipe exhaust mounts on the RC and aren't needed here.
I just got a set of RC51 rearsets to try out - I found that I would have had to open the holes up more than I would like in order to get them to fit. They are more than a mm or two off. I'll measure tonight and post numbers in a new thread for reference.
The kicker is that installing these lowers the pegs from the stock position. If anyone is looking to raise the pegs, these are not your option.
So far, the CBR900RR rearsets are the only direct bolt on replacement for the 4th gen that I know of.
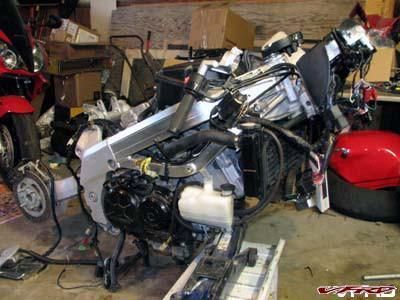
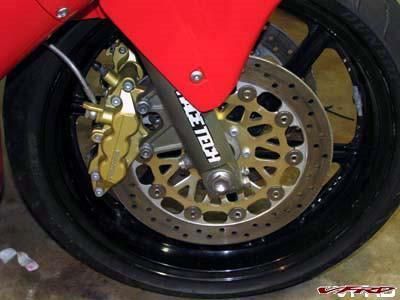
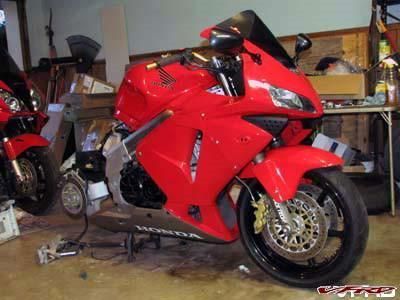
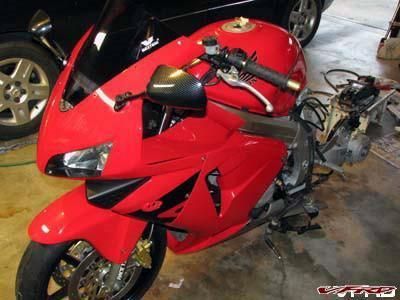
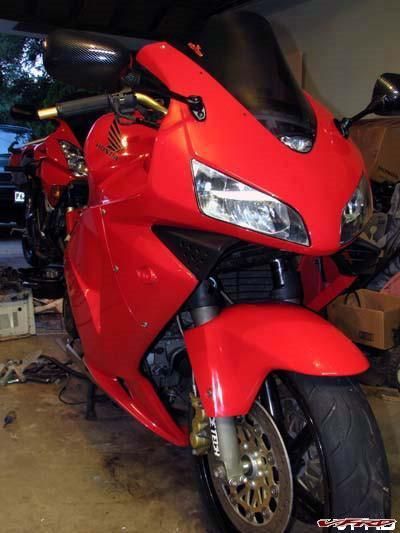
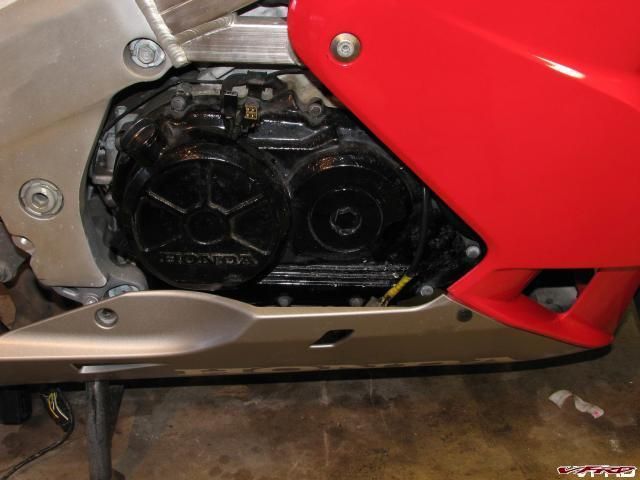
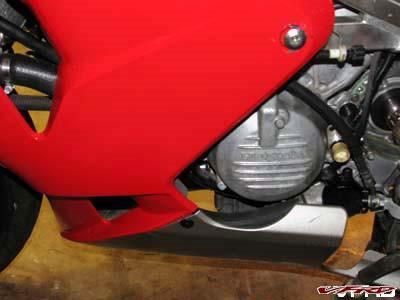
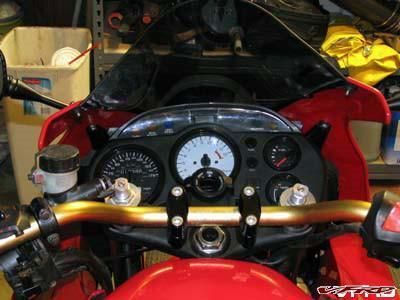
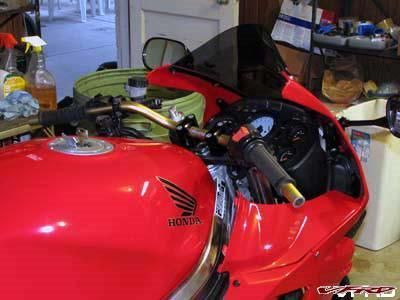
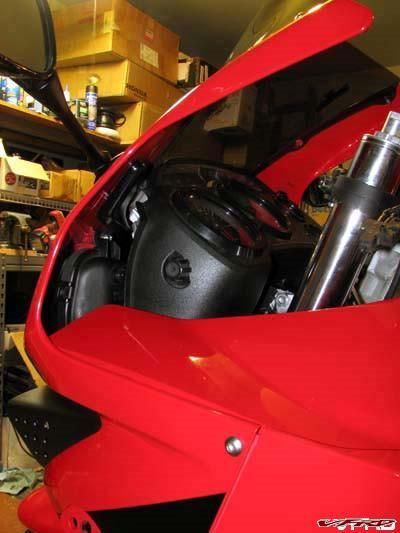
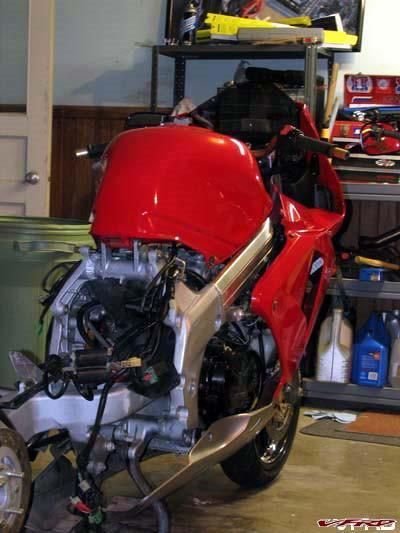
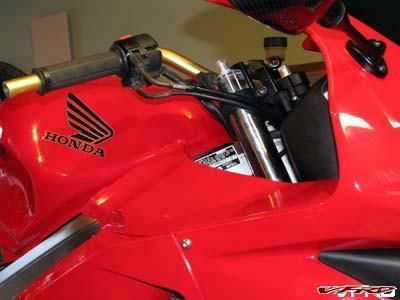
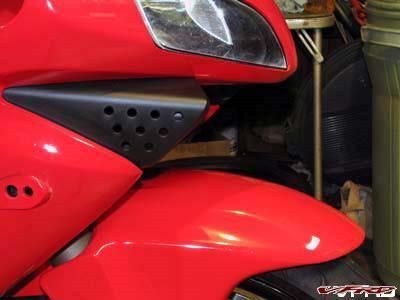
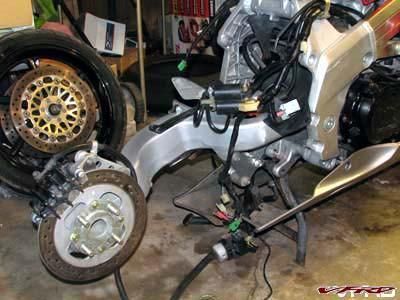
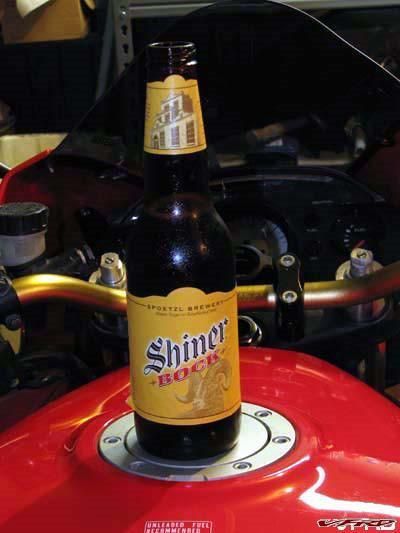
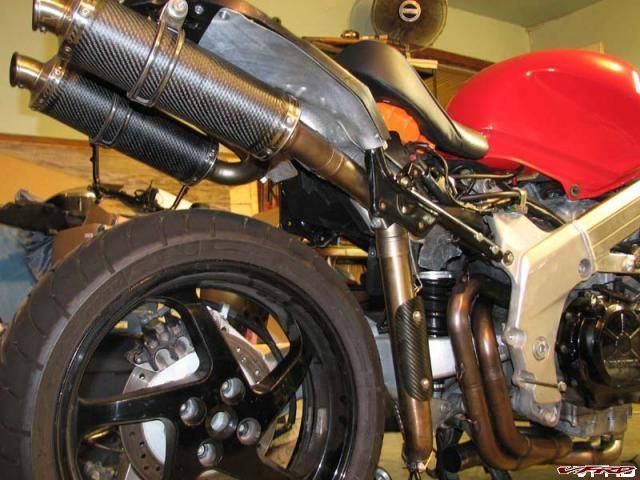
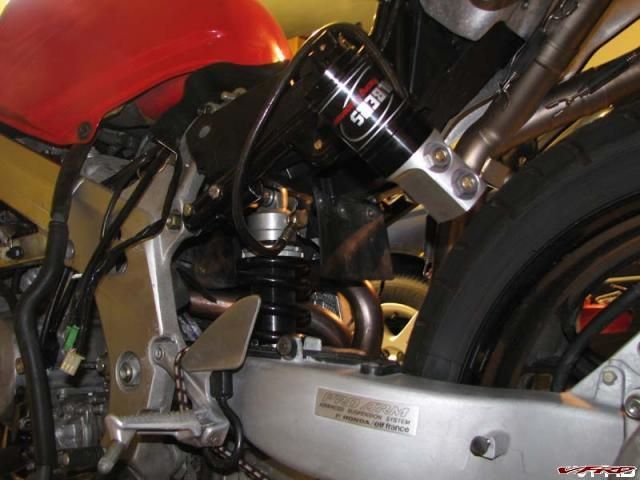
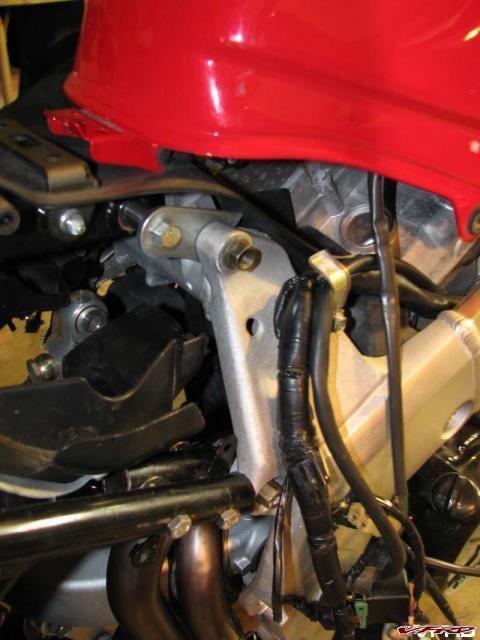
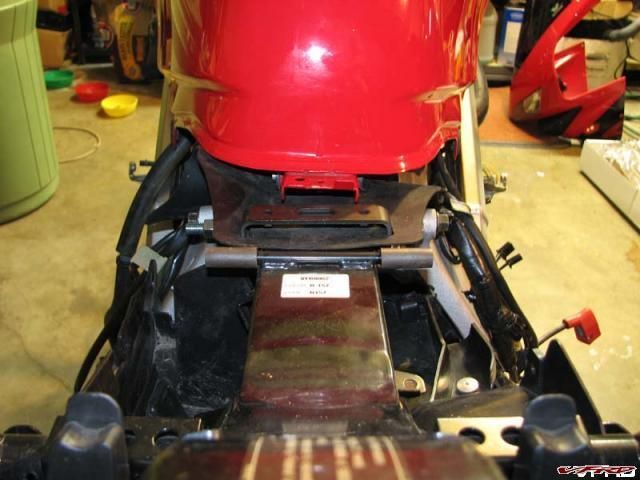
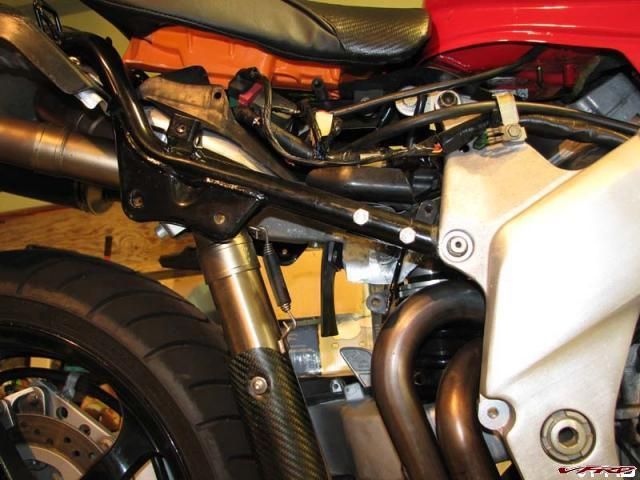
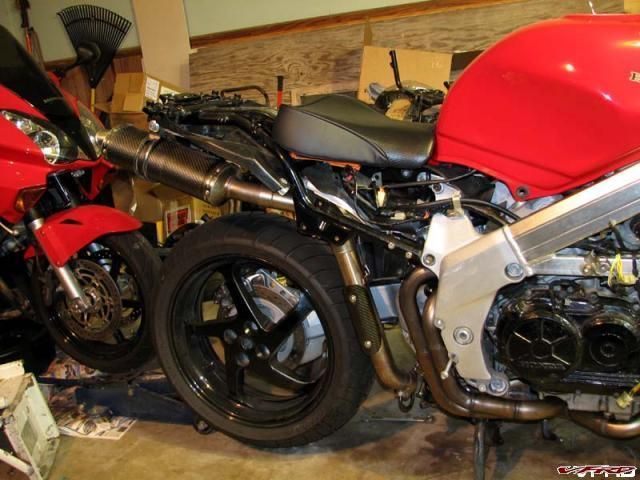
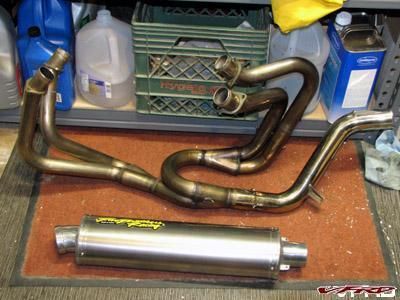
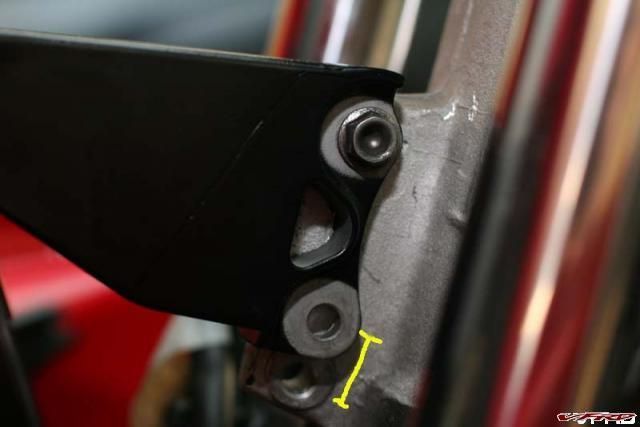
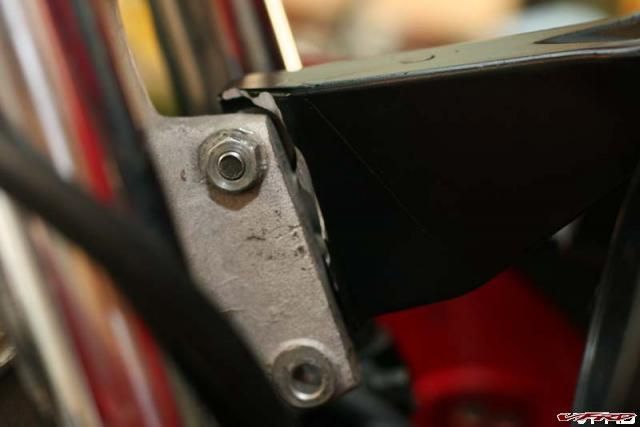
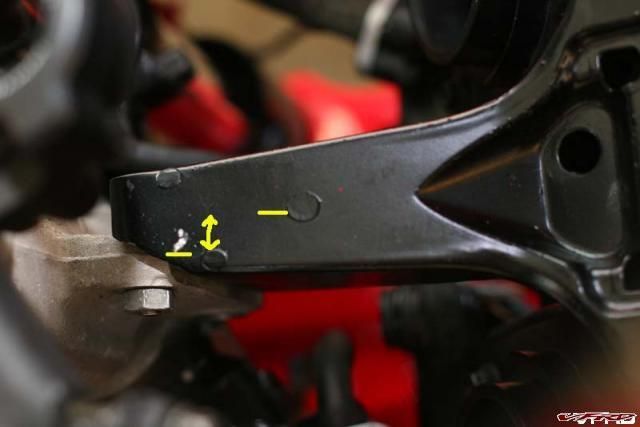
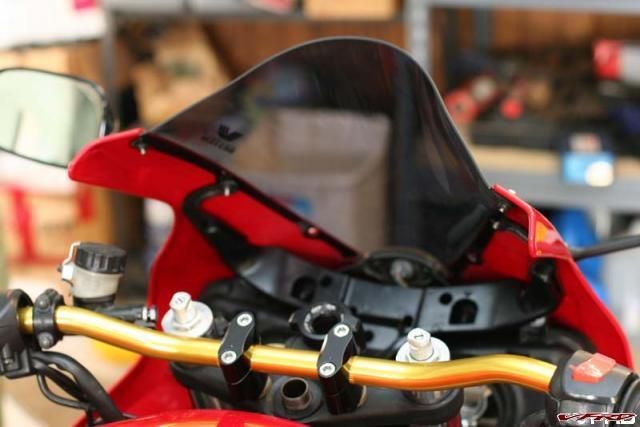
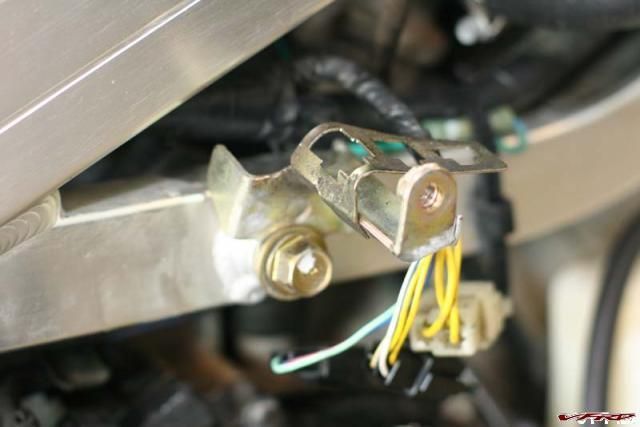
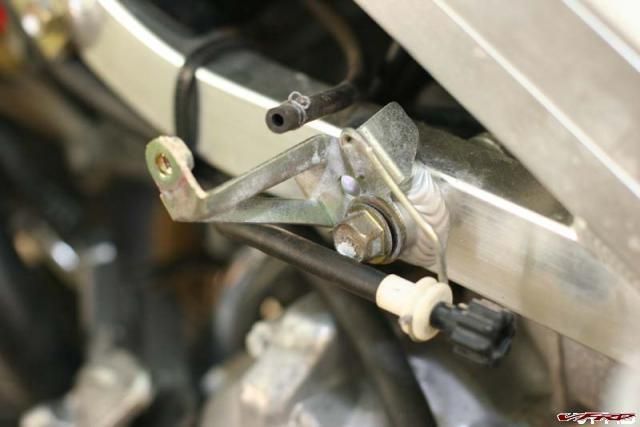
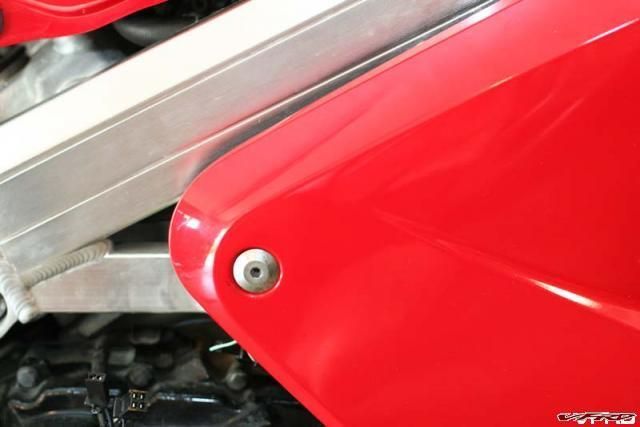
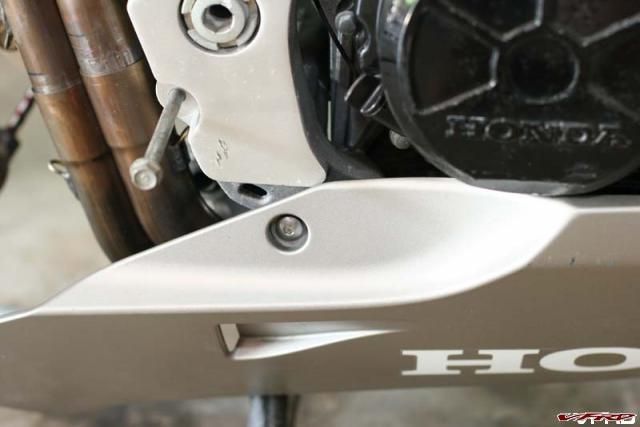
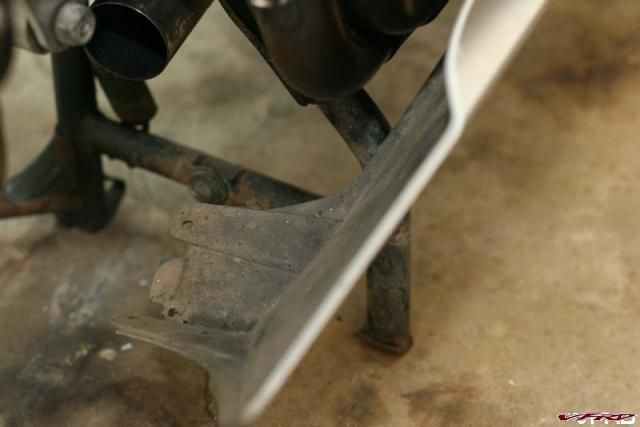
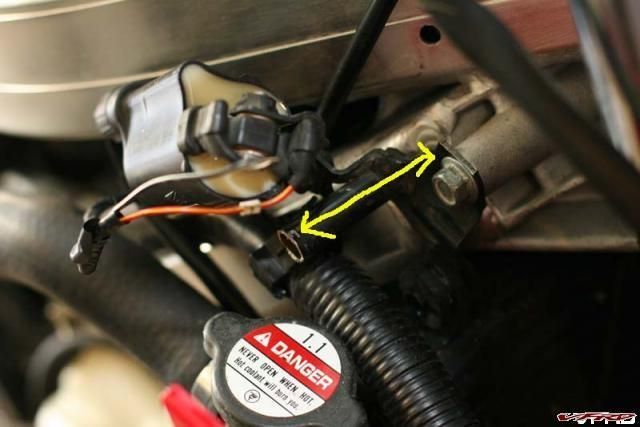
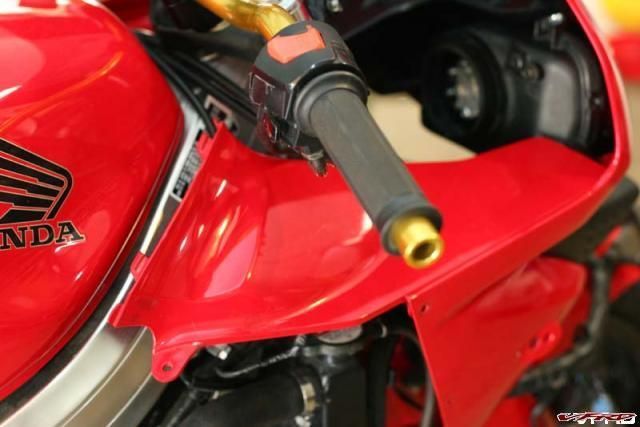
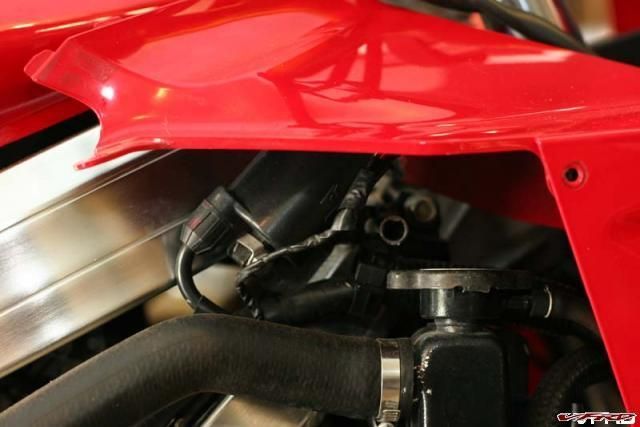
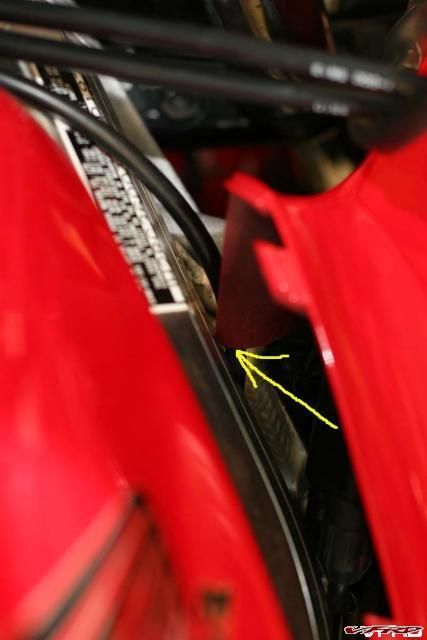
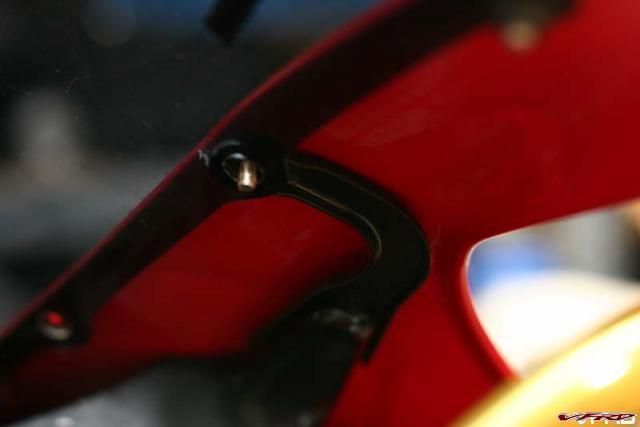
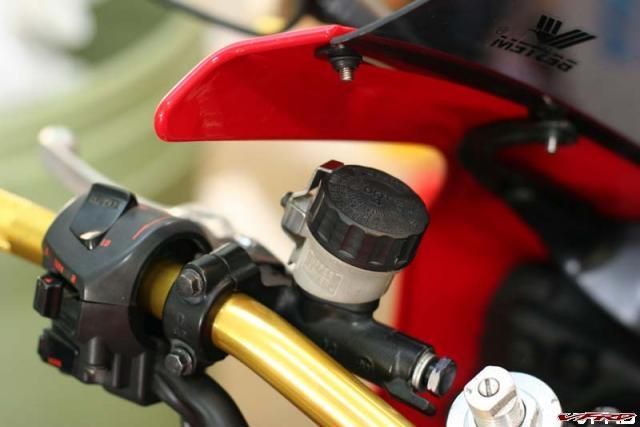
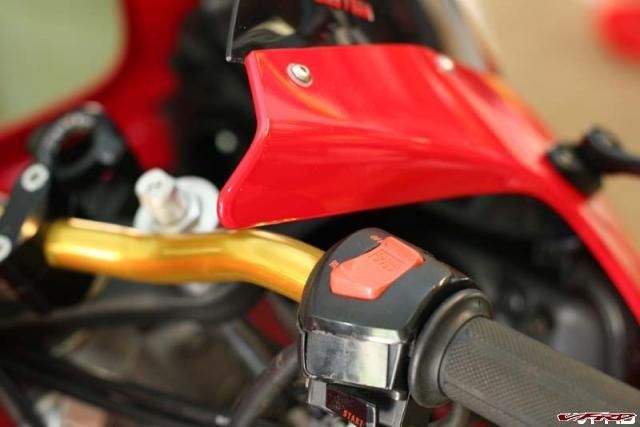
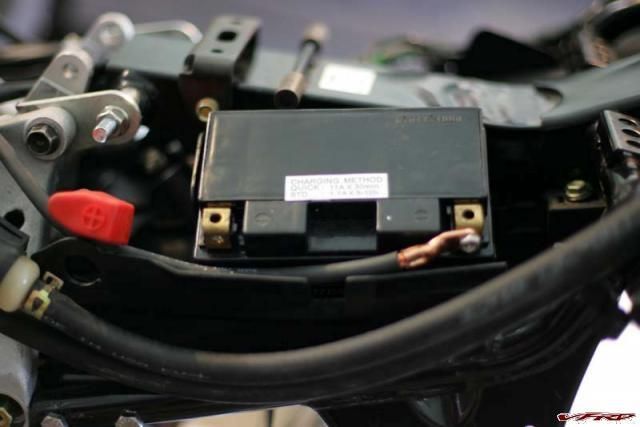
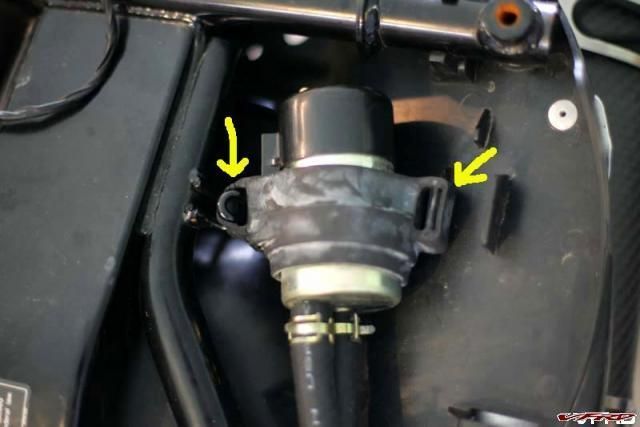
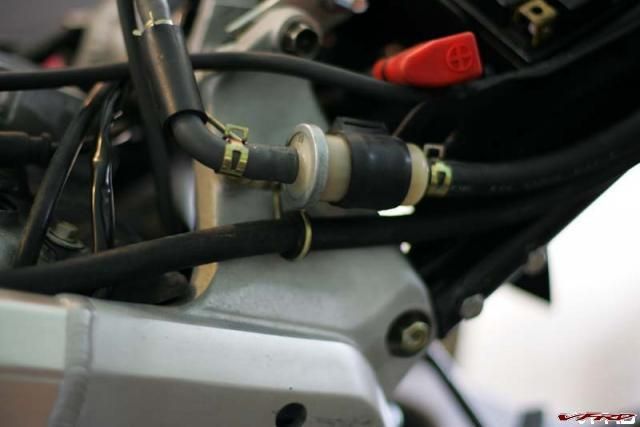
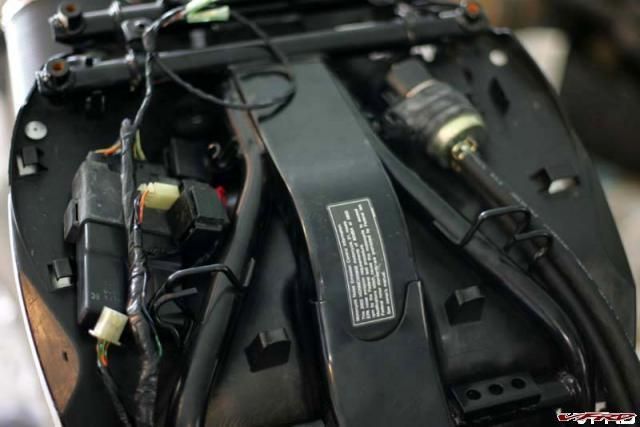
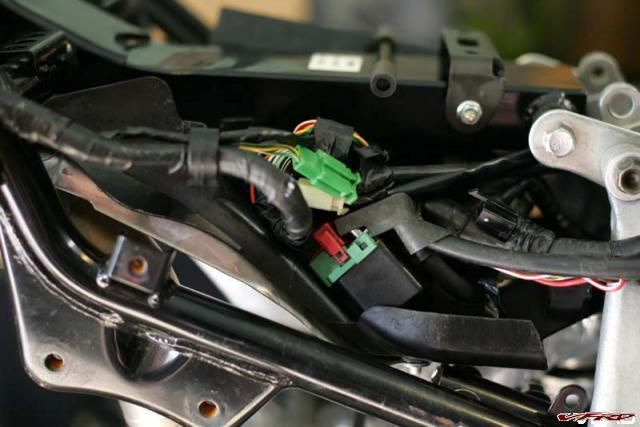
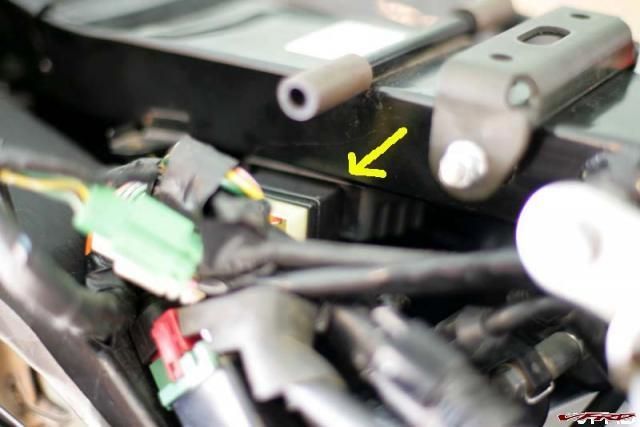
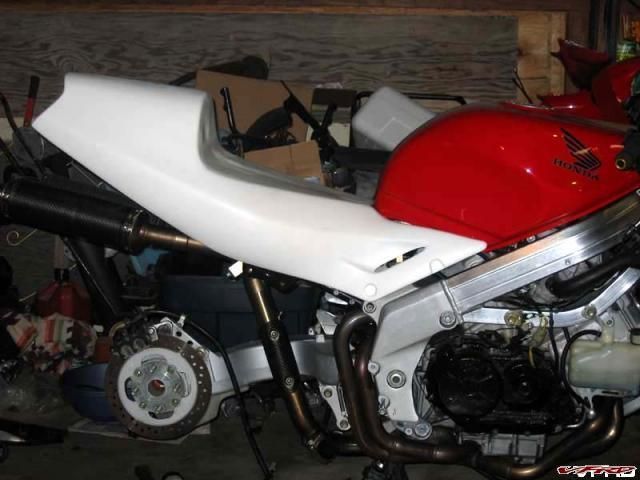
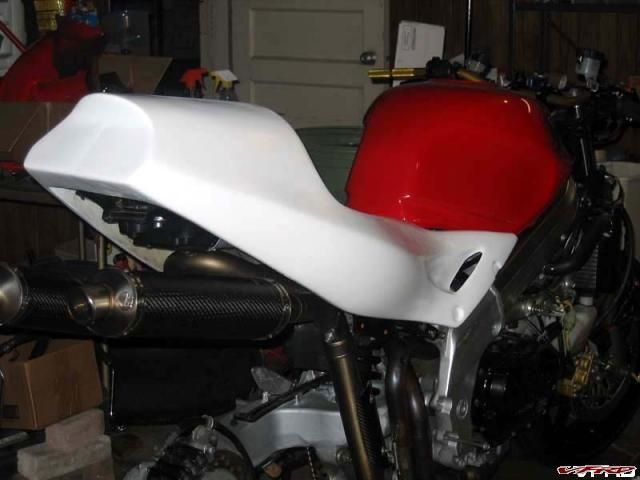
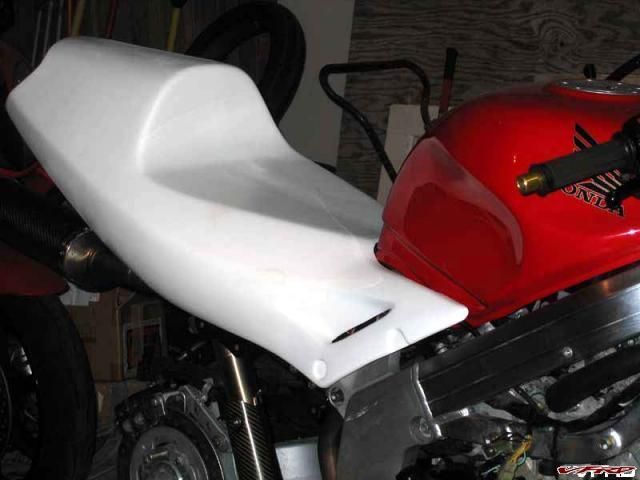
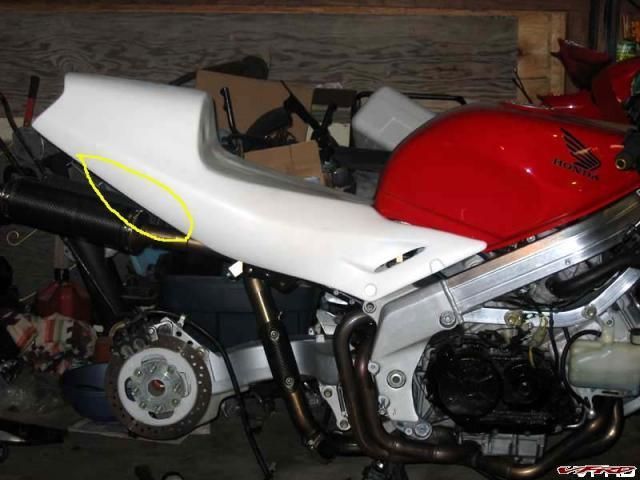
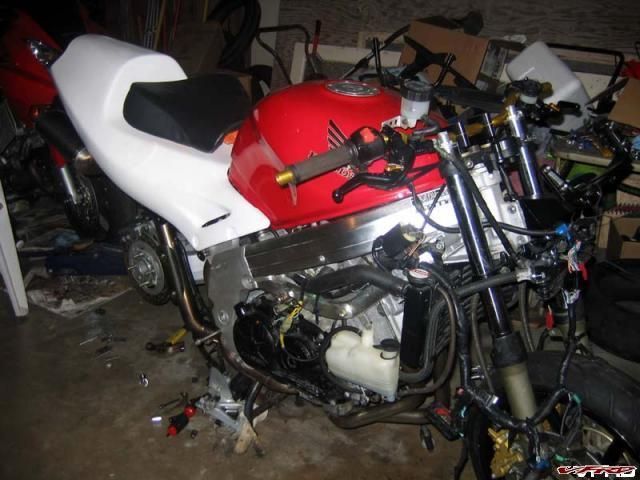
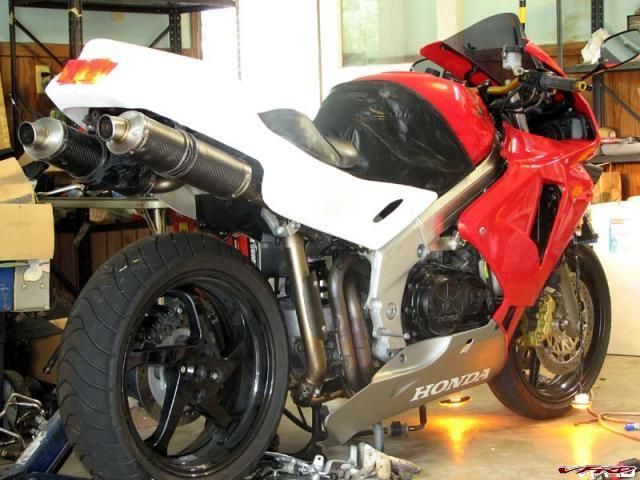
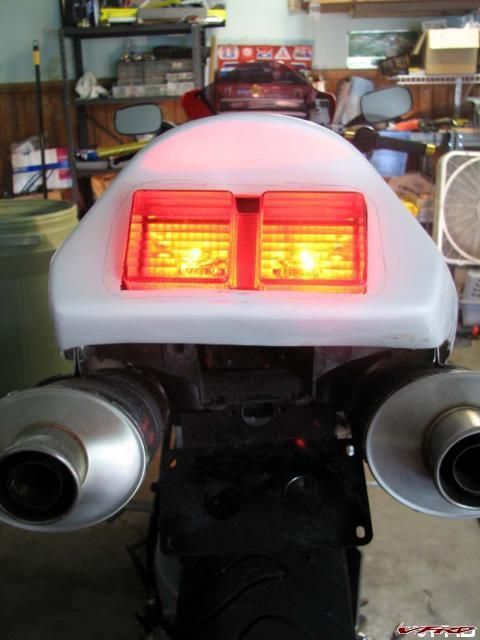
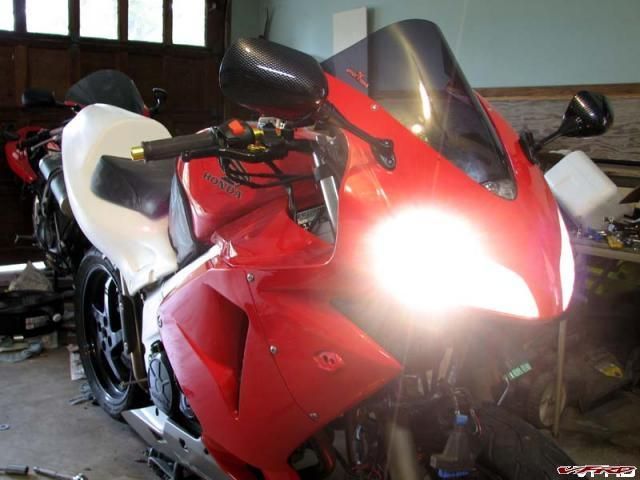
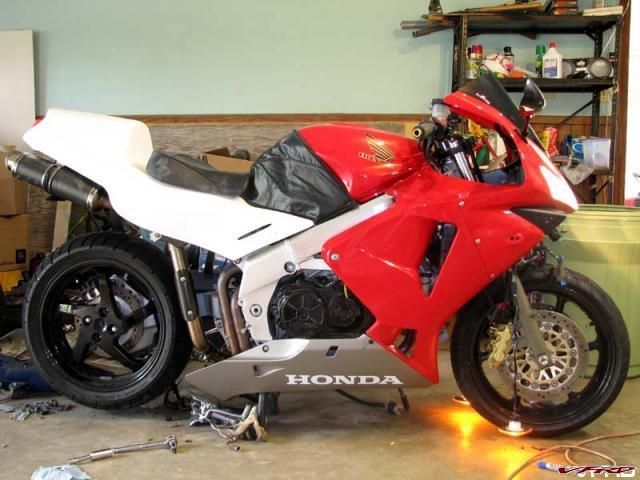
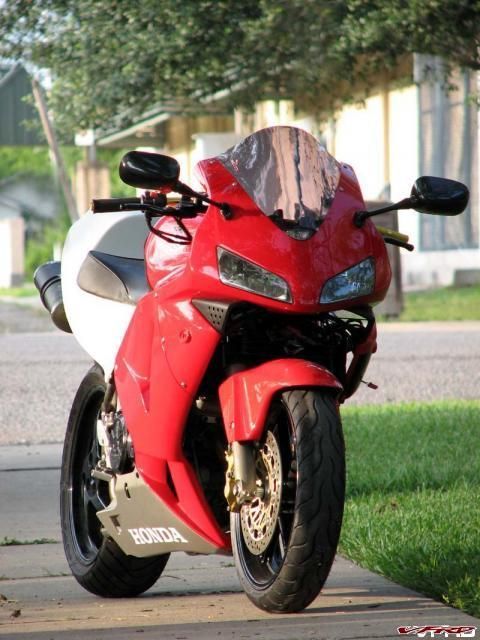
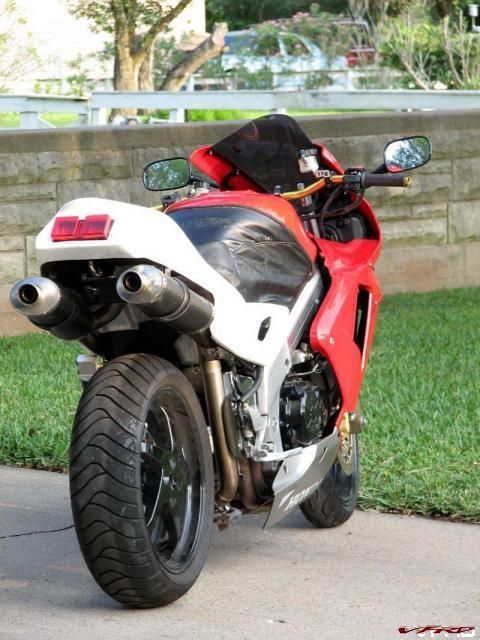
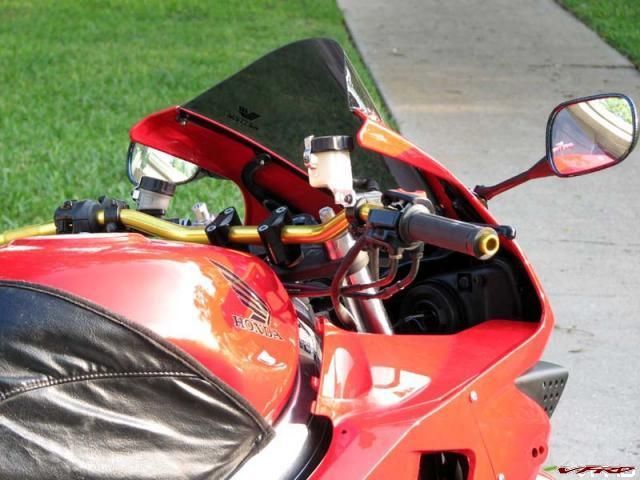
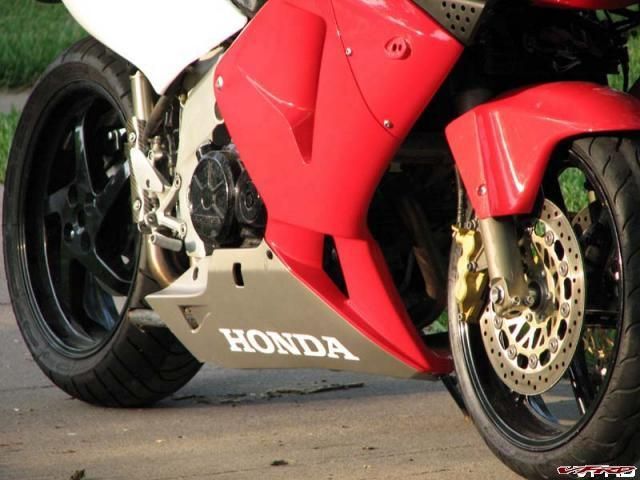
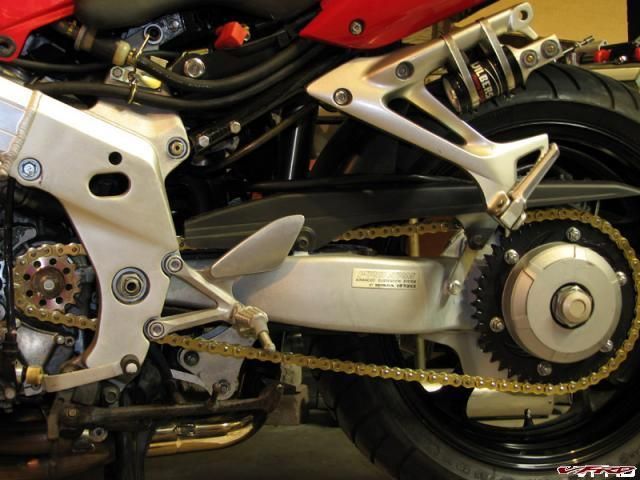
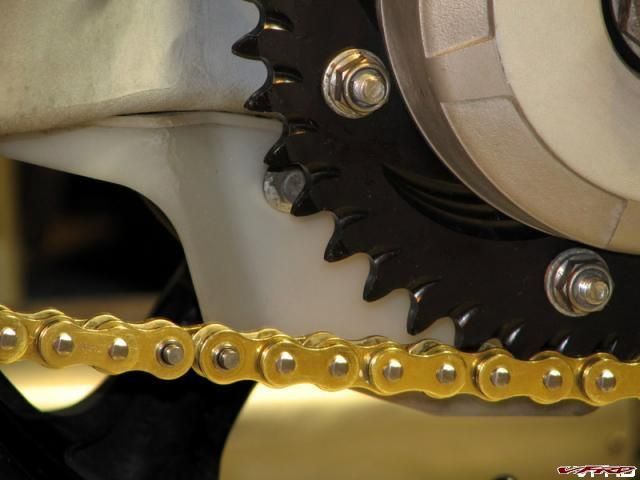
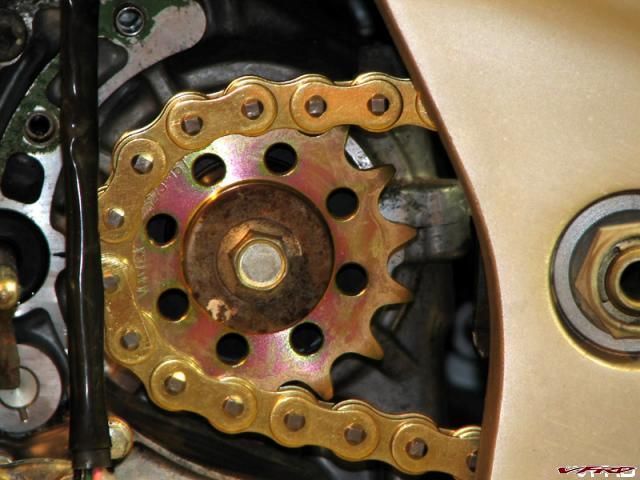
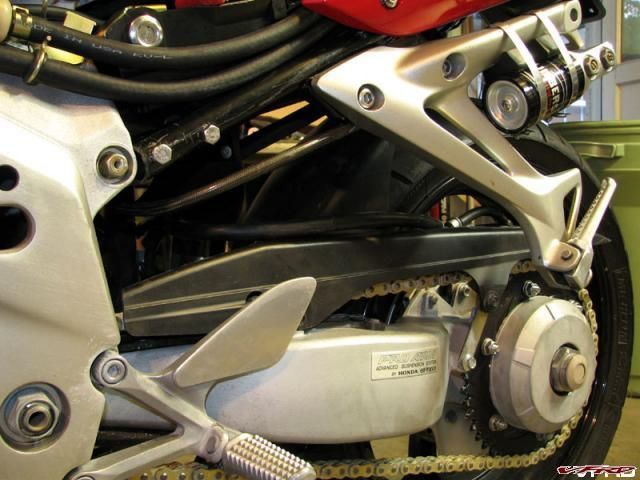
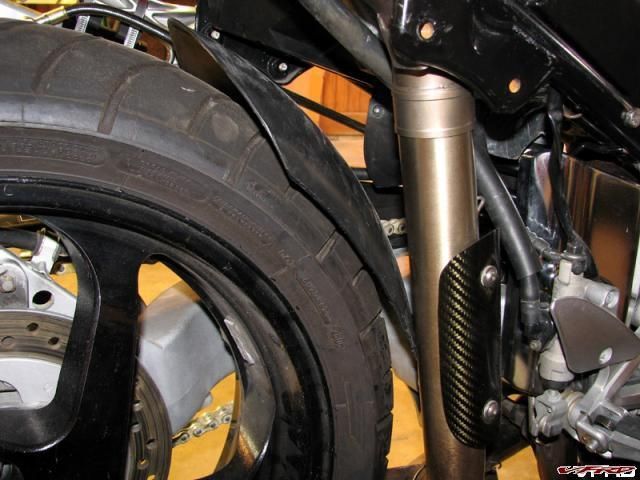
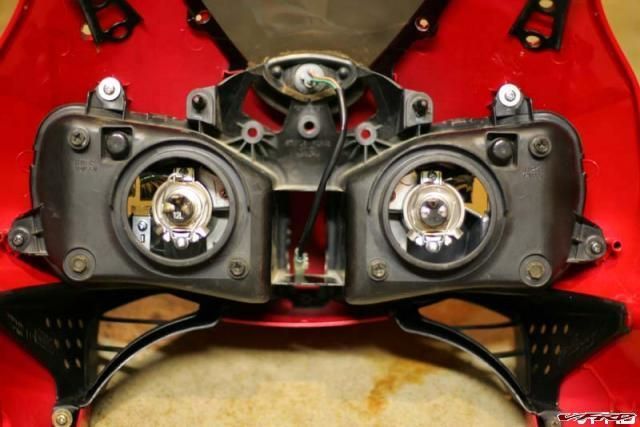
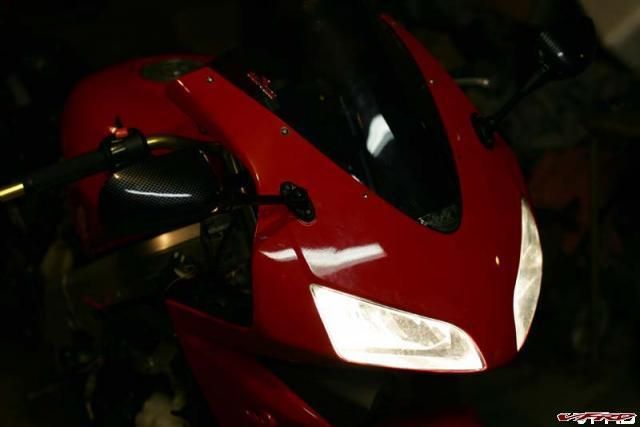
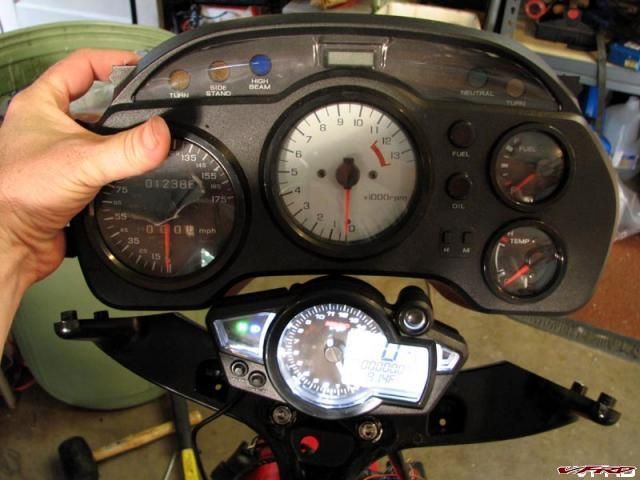
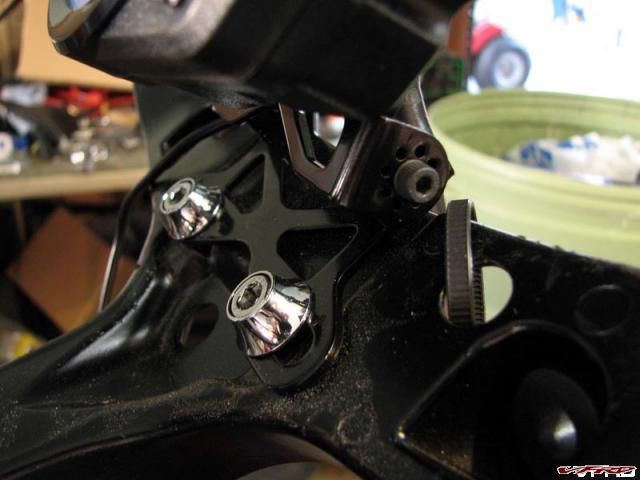
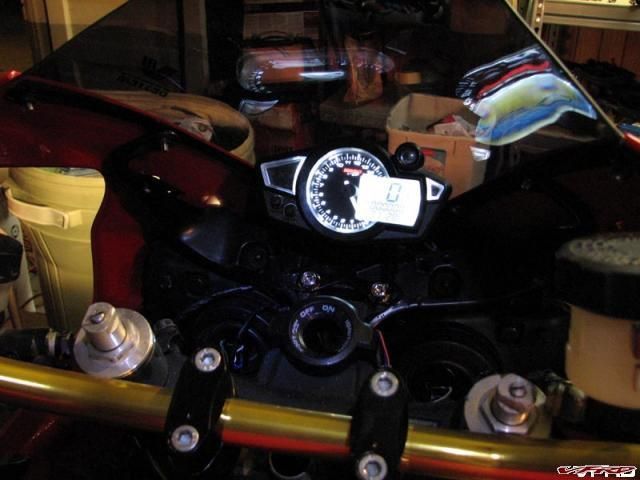
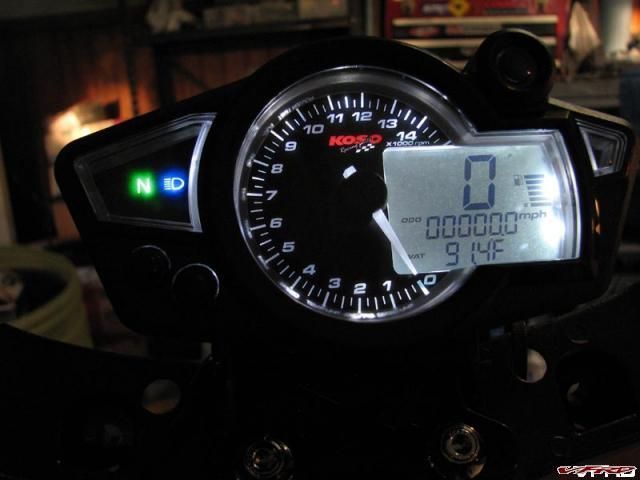
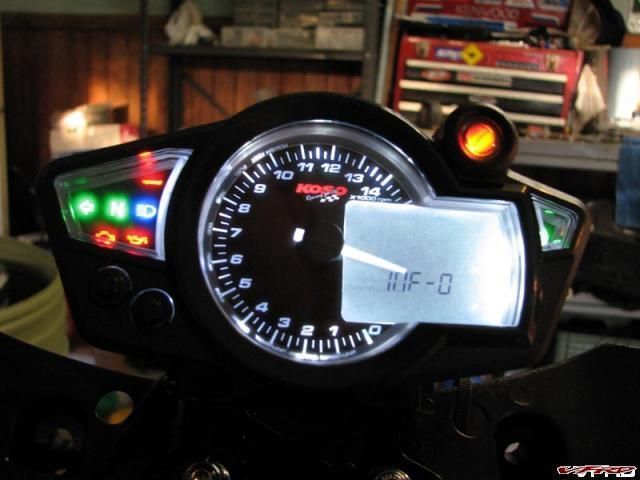
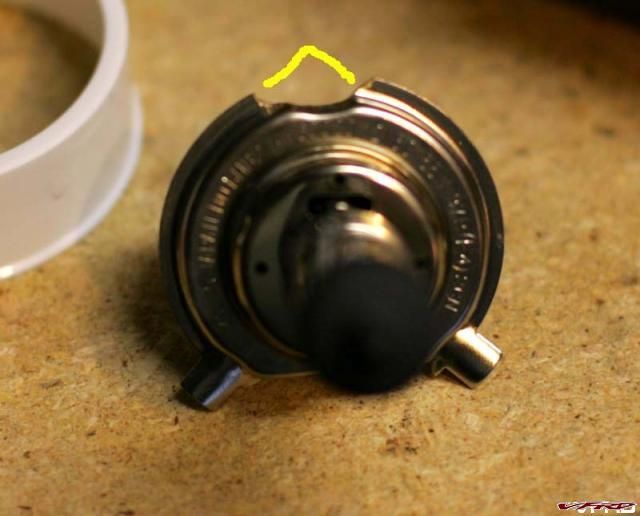
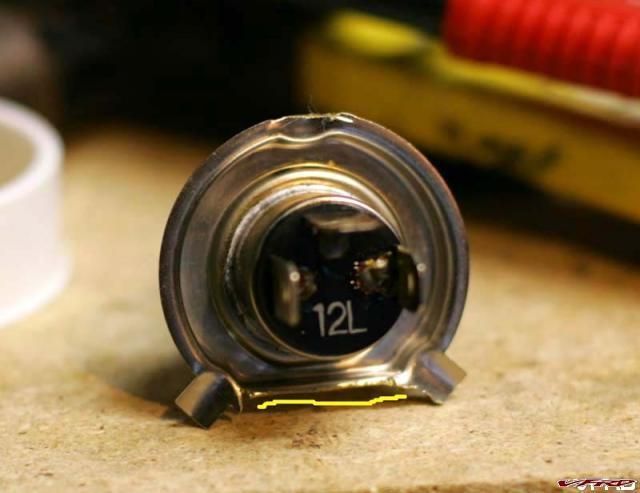
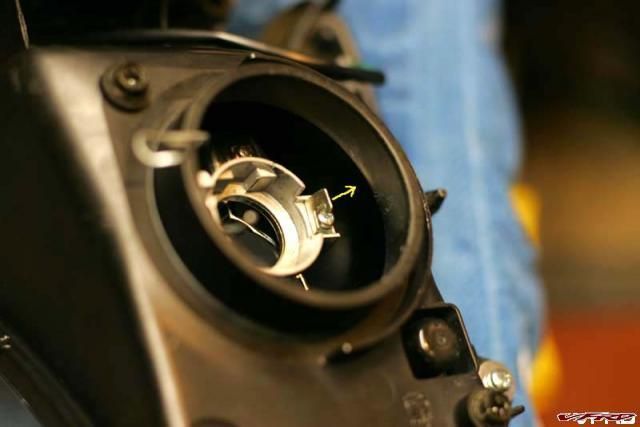
![[image: Posted Image]](http://i211.photobucket.com/albums/bb70/fotomotovfr/IMG_6330.jpg)
![[image: Posted Image]](http://i211.photobucket.com/albums/bb70/fotomotovfr/IMG_6329.jpg)
![[image: Posted Image]](http://i211.photobucket.com/albums/bb70/fotomotovfr/IMG_6301.jpg)
![[image: Posted Image]](http://i211.photobucket.com/albums/bb70/fotomotovfr/IMG_6256.jpg)
![[image: Posted Image]](http://i211.photobucket.com/albums/bb70/fotomotovfr/IMG_6277.jpg)
![[image: Posted Image]](http://i211.photobucket.com/albums/bb70/fotomotovfr/IMG_6257.jpg)
![[image: Posted Image]](http://i211.photobucket.com/albums/bb70/fotomotovfr/IMG_6255.jpg)
![[image: Posted Image]](http://burnsstainless.com/MergeCollectors/2into1base/a_base_2-1.gif)
![[image: Posted Image]](http://i211.photobucket.com/albums/bb70/fotomotovfr/IMG_6154.jpg)
![[image: Posted Image]](http://i211.photobucket.com/albums/bb70/fotomotovfr/IMG_6152.jpg)
![[image: Posted Image]](http://i211.photobucket.com/albums/bb70/fotomotovfr/IMG_6147.jpg)
![[image: Posted Image]](http://i211.photobucket.com/albums/bb70/fotomotovfr/IMG_6150.jpg)
![[image: Posted Image]](http://i211.photobucket.com/albums/bb70/fotomotovfr/IMG_6226.jpg)
![[image: Posted Image]](http://i211.photobucket.com/albums/bb70/fotomotovfr/IMG_6232.jpg)
![[image: Posted Image]](http://i211.photobucket.com/albums/bb70/fotomotovfr/IMG_6218.jpg)
![[image: Posted Image]](http://i211.photobucket.com/albums/bb70/fotomotovfr/IMG_6238.jpg)
![[image: Posted Image]](http://i211.photobucket.com/albums/bb70/fotomotovfr/KG9K0263.jpg)
![[image: Posted Image]](http://i211.photobucket.com/albums/bb70/fotomotovfr/KG9K0219.jpg)
![[image: Posted Image]](http://i211.photobucket.com/albums/bb70/fotomotovfr/KG9K0149.jpg)
![[image: Posted Image]](http://i211.photobucket.com/albums/bb70/fotomotovfr/KG9K0200.jpg)
![[image: Posted Image]](http://i211.photobucket.com/albums/bb70/fotomotovfr/KG9K0142.jpg)
![[image: Posted Image]](http://i211.photobucket.com/albums/bb70/fotomotovfr/KG9K0156.jpg)
![[image: Posted Image]](http://i211.photobucket.com/albums/bb70/fotomotovfr/KG9K0252.jpg)
![[image: Posted Image]](http://i211.photobucket.com/albums/bb70/fotomotovfr/1000rrgauges.jpg)
![[image: loadedup.jpg]](http://i211.photobucket.com/albums/bb70/fotomotovfr/loadedup.jpg)
![[image: list.jpg]](http://i211.photobucket.com/albums/bb70/fotomotovfr/list.jpg)
![[image: rearmount.jpg]](http://i211.photobucket.com/albums/bb70/fotomotovfr/rearmount.jpg)
![[image: 1000rrgv7.jpg]](http://img87.imageshack.us/img87/9229/1000rrgv7.jpg)
![[image: 750bf0.jpg]](http://img49.imageshack.us/img49/3371/750bf0.jpg)
![[image: leftassembly1.jpg]](http://i240.photobucket.com/albums/ff158/premoto/frankenbike%202/leftassembly1.jpg)
![[image: leftassembly3.jpg]](http://i240.photobucket.com/albums/ff158/premoto/frankenbike%202/leftassembly3.jpg)
![[image: wiringmess1.jpg]](http://i240.photobucket.com/albums/ff158/premoto/frankenbike%202/wiringmess1.jpg)
![[image: gaugesdone1.jpg]](http://i240.photobucket.com/albums/ff158/premoto/frankenbike%202/gaugesdone1.jpg)
![[image: Posted Image]](http://i211.photobucket.com/albums/bb70/fotomotovfr/IMG_0642.jpg)
![[image: Posted Image]](http://i211.photobucket.com/albums/bb70/fotomotovfr/IMG_0644.jpg)
![[image: Posted Image]](http://i211.photobucket.com/albums/bb70/fotomotovfr/forks-1.jpg)
![[image: Posted Image]](http://i211.photobucket.com/albums/bb70/fotomotovfr/rc51frontend.jpg)
![[image: Posted Image]](http://i211.photobucket.com/albums/bb70/fotomotovfr/KG9K6446.jpg)
![[image: Posted Image]](http://i211.photobucket.com/albums/bb70/fotomotovfr/KG9K6452.jpg)
![[image: Posted Image]](http://i211.photobucket.com/albums/bb70/fotomotovfr/KG9K6453.jpg)
![[image: Posted Image]](http://i211.photobucket.com/albums/bb70/fotomotovfr/rcfrontendweb.jpg)
![[image: Posted Image]](http://www.british-customs.com/images/T/gsg-fork-sliders-s3-1050-d.jpg)

![[image: Posted Image]](http://i211.photobucket.com/albums/bb70/fotomotovfr/vfr002-Copy.jpg)
![[image: Posted Image]](http://i211.photobucket.com/albums/bb70/fotomotovfr/vfr008.jpg)
![[image: Posted Image]](http://i211.photobucket.com/albums/bb70/fotomotovfr/vfr005-Copy.jpg)
![[image: Posted Image]](http://i211.photobucket.com/albums/bb70/fotomotovfr/vfr004-Copy.jpg)
![[image: Posted Image]](http://i211.photobucket.com/albums/bb70/fotomotovfr/vfr021.jpg)